If you are going to be a podcaster, then you have to use iTunes to distribute your podcast. There really is no way around it. Apple’s service not only originated the terminology and technology of podcasting (broadcasting for an iPod), but it has since remained the defacto podcast hub.
Around two-thirds of all podcast listeners go through iTunes to get their audio fix (or via the Apple Podcasts app–which is the same thing for our purposes here), and honestly, most of the podcasting services out there still pull from the iTunes directory to aggregate content.
Long story, short: you need to know how to submit a podcast to iTunes if you want anyone to listen to you. Luckily, it’s pretty easy, and it doesn’t matter if you use Blubrry Powerpress, Libsyn, Soundcloud, or another podcast hosting solution.
Step 1: Have a Podcast
When you’re ready to submit a podcast to iTunes, you need to have your podcast totally set up and ready for listeners. iTunes submission is really the last step in the overall process (think about it like publishing a book and shipping it to bookstores).
Quick and Easy “How to Submit a Podcast to iTunes” Checklist
- At least 1 episode should be recorded and published (preferably more)
- Podcast artwork should be uploaded with a resolution between 1400×1400 and 3000×3000 in JPG or PNG format (note that it must be square for iTunes inclusion)
- Your title, description, summary, categories, and contact info should be filled out completely (done through your host’s admin panel)
Step 2: Find your RSS Feed
Podcasts are distributed by RSS feed. Rather than hosting your content itself, iTunes will give your listeners’ software this feed address, and they will download it from your host directly. You won’t set up this feed manually–your host will provide the address that you will submit to iTunes.
Blubrry PowerPress
Finding your feed with PowerPress is easy. Head to PowerPress -> Settings and click on Step 3:

The next page will have your feed address at the very top.

Libsyn
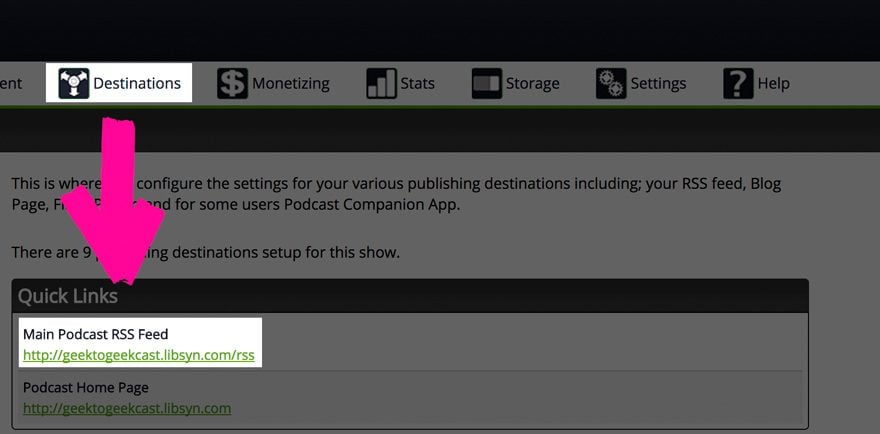
Upon logging into your Libsyn dashboard, you will see Destinations in the menu. Click it or Edit or View Existing from the dropdown menu, and you will see your RSS feed address.
Soundcloud
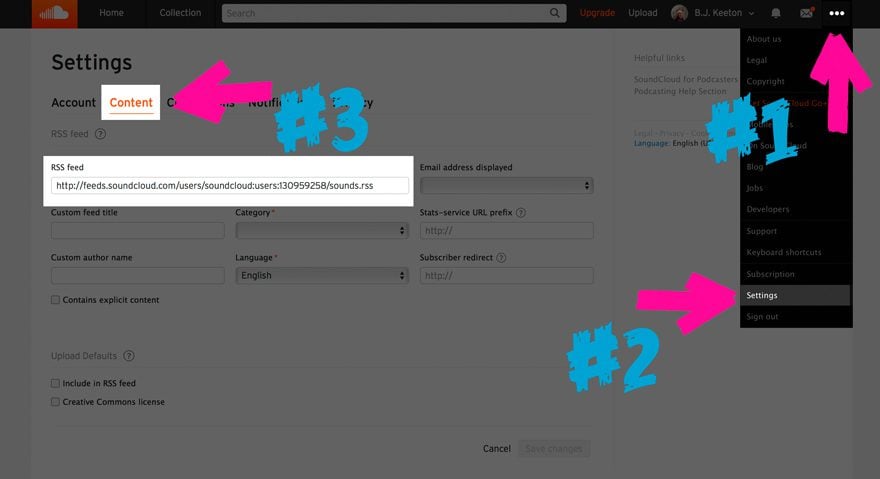
Soundcloud is a little more hidden (and the feed looks a little different), but it will work the exact same way. You will click the three dots in the upper right of the toolbar to expand the menu, navigate to settings, and into the content tab. Your RSS feed will be at the top.
Step 3: iTunes Podcasts Connect
Apple has a very specific way (go figure) that you submit your show to them. Head over to Podcasts Connect, Apple’s dedicated podcast portal for creators.
Note: you must have an Apple ID for this. If you don’t have one, create one (you have to download iTunes to do this. Sorry! I know it’s a pain.), and if you do have one, sign in with it.

Your Podcasts Connect Dashboard
The dashboard in Podcasts Connect is really straightforward. There’s a + to the left where you can add a new show to the directory, and you will see the artwork for all of your shows displayed here.
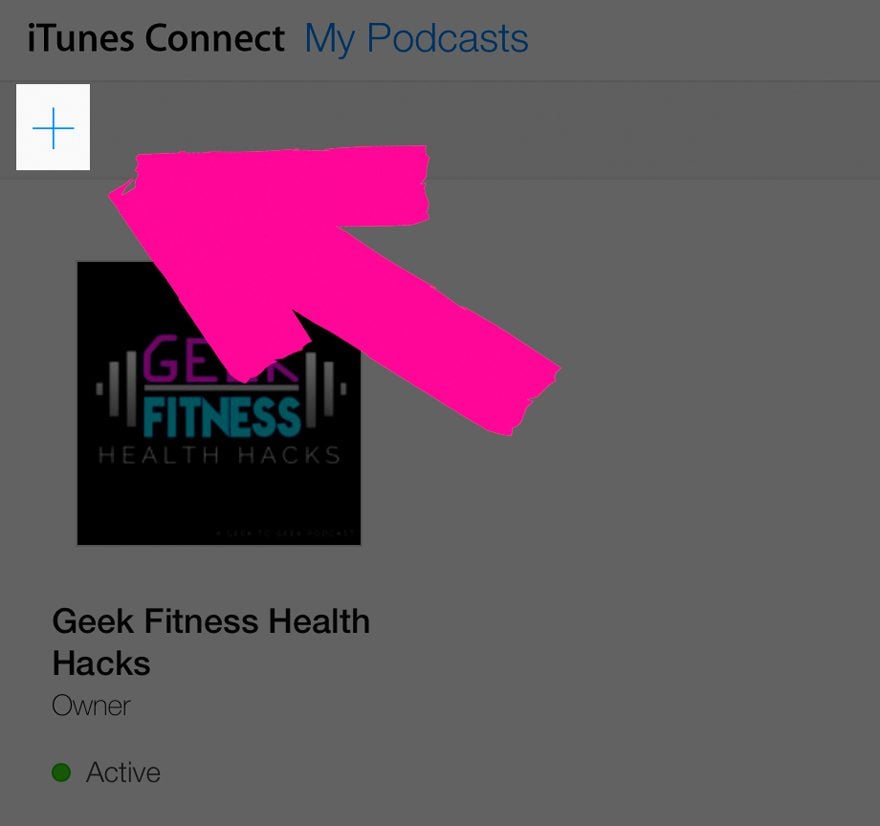
When you hit the +, you’re taken to a simple page where you are asked to enter and validate your RSS feed address.

There are lots of reasons for your feed to come back invalid, but the main ones are:
- your artwork doesn’t meet the minimum specifications (at least 1400×1400 resolution and JPG or PNG format)
- one of the required fields such as category, email, title is missing
- that you haven’t published an episode yet and the feed is empty
Once your feed validates, you’ll see a screen like this.
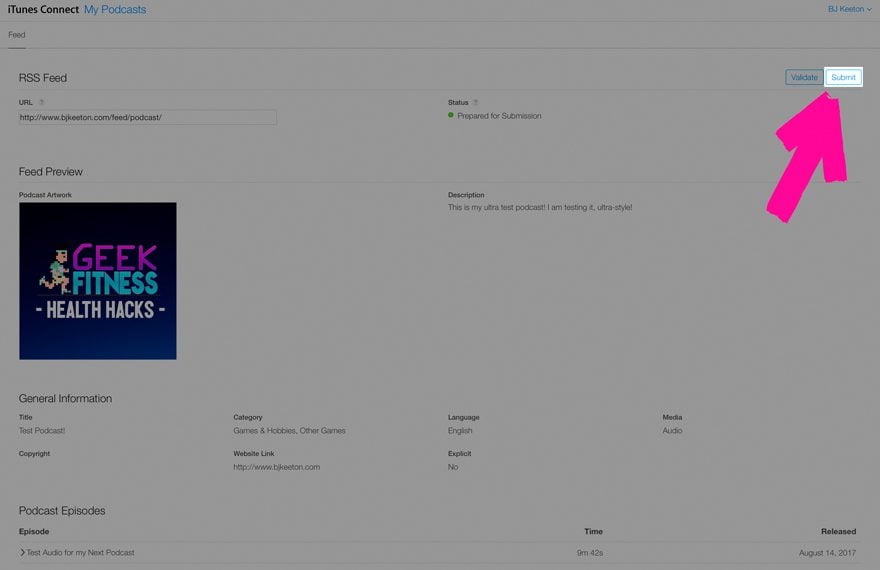
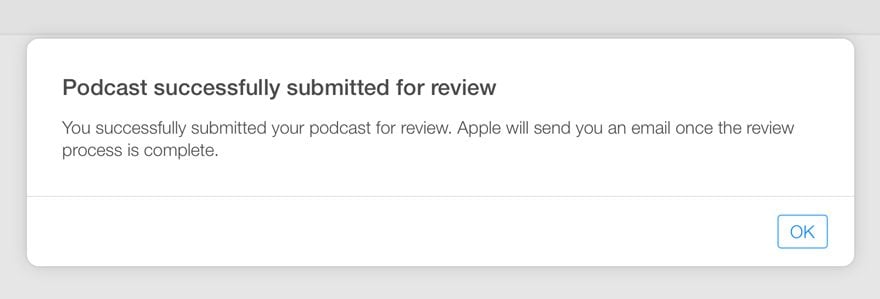
Check your show’s details to make sure that everything is exactly like you want it to be, and you are ready hit that Submit button.
Playing the Waiting Game
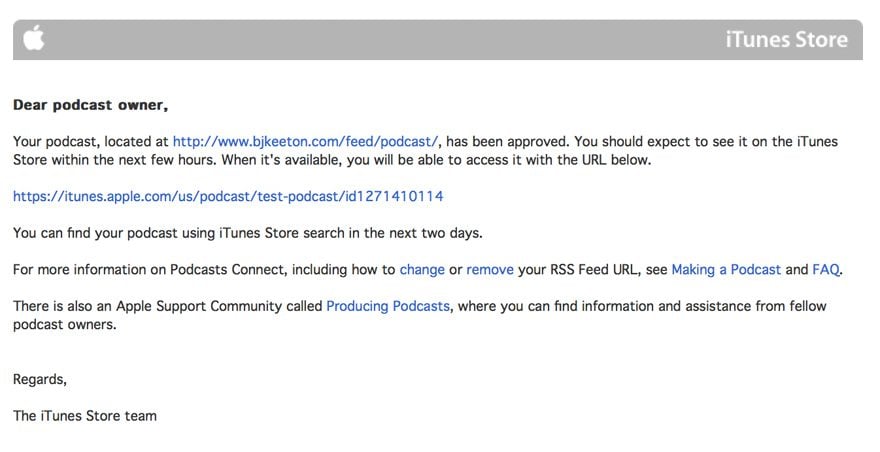
While you’re podcast is being reviewed, you’re going to be locked out of it and can’t make any additional edits. Just make sure that your information is how you want it shown in the iTune store. The process doesn’t usually take a long time–even my dummy cast was (surprisingly) approved within an hour or two.
When things are good to go, you will get an email like this one.
You can go back into Podcasts Connect after that and see that your show is listed in your dashboard now.
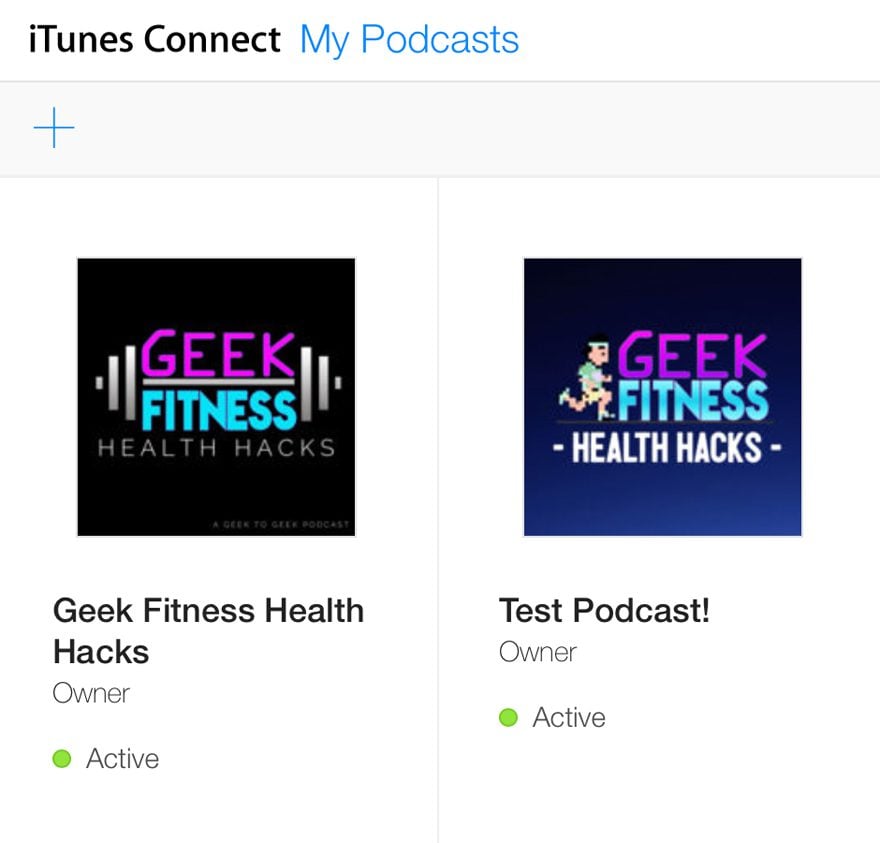
Clicking into the new show will give you the few options Apple allows you. Within a day, the podcast feed will proliferate through the system, and the link to the iTunes Store will go live.

That’s All, Folks!
You’re live. That’s it. Your new podcast will soon be listed in iTunes, and you will soon be distributed far and wide. If you want even further distribution, you can submit your show’s RSS feed to TuneIn, Stitcher, and Google Play, all of which use their own feed distribution services instead of pulling from iTunes.
Go tell the world about it, and get yourself some listeners!
FYI: iOS 11 Changes to iTunes Podcasts
You should know one more thing you submit to iTunes: iOS 11 changes the way the iTunes podcast directory lists and pulls your information. Apple has introduced various tags for podcasts, which means you have more control over how your content shows up than ever before. Yay!
- itunes:type – choose which order your episodes appear, first-to-last (serial) or last-to-first (episodic)
- itunes:episodeType – tell your listeners if the episode is full-length, bonus, or a trailer for an upcoming episode or other show
- itunes:title – just the title itself with no seasons or episode numbers
- itunes:episode – just an episode number (either by season or by show lifetime)
- itunes:season – if you use seasons for your podcast, list it here
- itunes:summary – a short summary of the episode content that will show up first, before other notes
- content:encoded – any long-form content you include with your episode, including full show notes
Using Apple Podcast Tags
Lucky for you, podcast hosts are on top of Apple’s changes in iOS 11. If you use Blubrry PowerPress, we’ve got a write-up on setting up the software to podcast and how the tags are integrated into it.
If you use Libsyn, it’s simple to get the most out of your newly listed show. First, head to your dashboard and pick either Add New Content or edit a Previously Published episode and head over to the 2. Details tab.
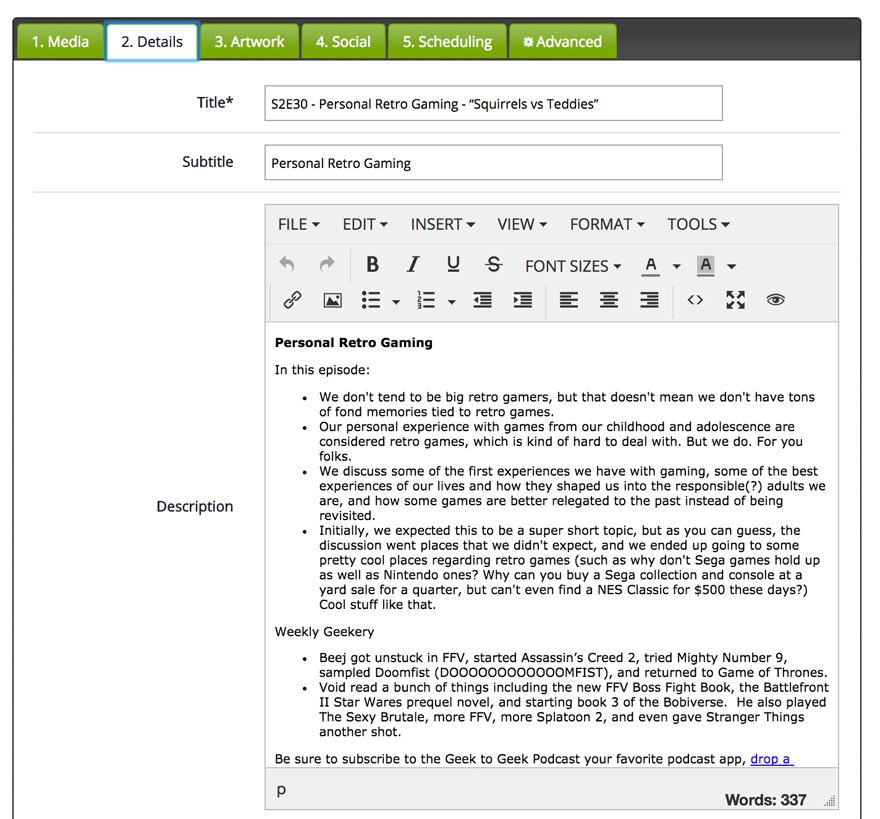
Many shows write their titles and headlines like the screenshot above, and that’s how they are listed in apps and feeds. With season and episode numbers first, long-form show notes, and a spare (if any) subtitle.
The new iTunes tags clean this up a lot.
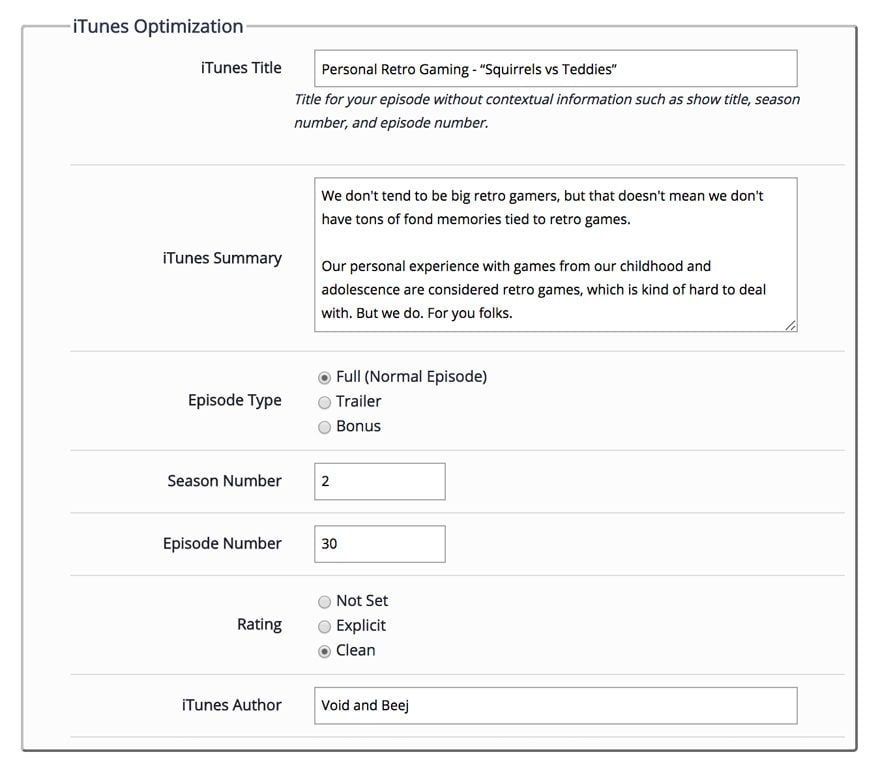
What a difference! I suggest filling your episode information out in both the old and new ways because all podcasting software has not adopted the new iTunes tags, and you don’t want to ruin anything you’ve got going for the 1/3 of your listeners who aren’t using iTunes.
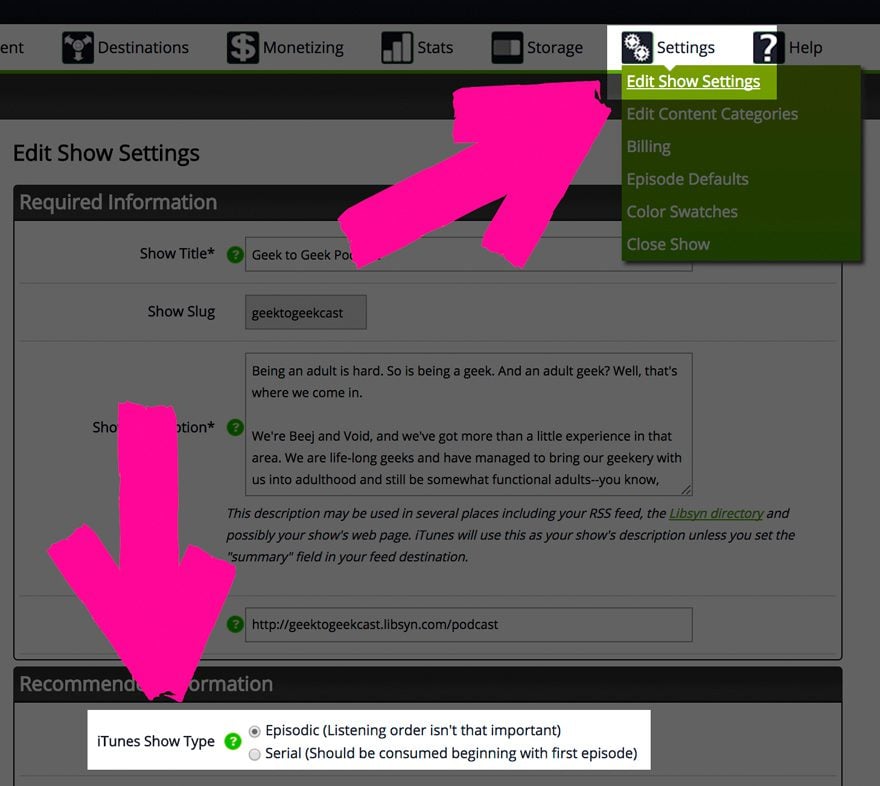
Additionally, you can go into your Libsyn settings and change your show to either be Episodic or Serial, which indicates how your episodes appear in users’ feeds. Episodic is last-to-first because listening order doesn’t build, while Serial starts at the beginning because you’re laying the foundation for upcoming episodes.
Podcasts Connect Analytics
As you can see above, Podcasts Connect has very little utility except for submitting/deleting podcasts to/from iTunes. In iOS 11, you will get–finally! Hallelujah! Woohoo!–official podcast statistics and analytics in that dashboard. You won’t get a complete picture of every listener’s habits, but that’s okay. You’ll get enough data so that you can make educated guesses about the others.
And that’s it! Now you know how to submit a podcast to iTunes, and take advantage of the iOS 11 changes. Not to mention, you’ll soon find your awesome and official podcast stats. You, my friend, are officially a podcaster now, so get to yakking!
Article thumbnail image by ADE2013 / shutterstock.com
The post How to Submit a Podcast to iTunes appeared first on Elegant Themes Blog.
