If you’re creating a coffee shop website, one of the things you might be looking for is a way to allow in-store pickups for online orders. It just makes it easier to attract a new audience that doesn’t have the time to stand hours in a line waiting to order a coffee. It also helps you, as a coffee shop owner, to be more organized.
To help you with the process of creating such a system, we’ve created this tutorial. We’ll show you, step by step, how to achieve a fully-functioning coffee shop website that allows in-store pickups for online orders using the free Coffee Shop Layout Pack, the WooCommerce plugin and the WooCommerce Local Pickup Time Select plugin.
Setting up Your Website Using The Coffee Shop Layout Pack
The first thing you will need to do, before setting up the in-store pickups for online orders, is creating a fully-functioning website with the free Coffee Shop Layout Pack. We’ve created a tutorial that shows you all the steps you need to go through, or if you prefer, you can just watch follow the video below.
Allow In-Store Pickups for Online Orders with Divi’s Free Coffee Shop Layout Pack
Subscribe To Our Youtube Channel
Install The WooCommerce Plugin
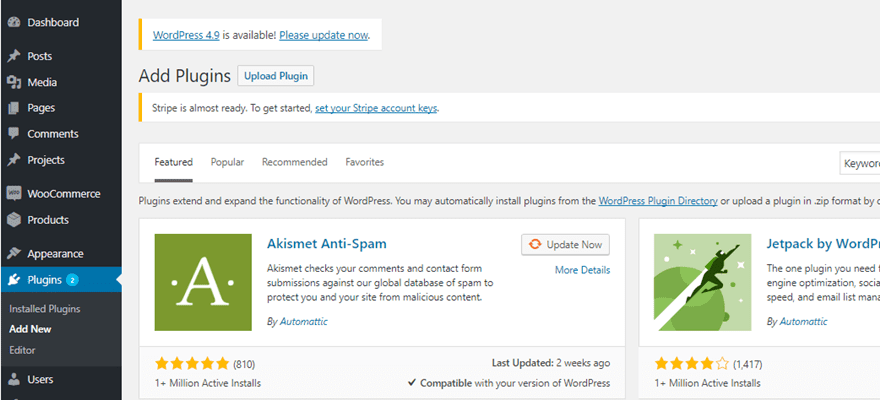
So once you’ve gone through the process of settings up the Coffee Shop Layout Pack, it’s time to get started. For this tutorial, we’ll be using two additional plugins. The first one that you will need to download, by using the following link, is WooCommerce. Once you’ve downloaded the WooCommerce plugin, go to your WordPress website > Plugins > Add New > And upload the zipped file.
Install The WooCommerce Local Pickup Time Select Plugin
The second plugin we’ll be needing for this tutorial is WooCommerce Local Pickup Time Select, which you can download if you click on the following link. This free plugin is the easiest and cheapest way to add a pickup time to your checkout page. Again, upload this plugin to the WordPress website you are working on in the same way as you did for the WooCommerce plugin.
Change Settings of WooCommerce Plugin
The WooCommerce Local Pickup Time Select plugin adds some additional settings to your WooCommerce plugin. So if you want to change the settings, you’ll have to go to the settings of the WooCommerce plugin.
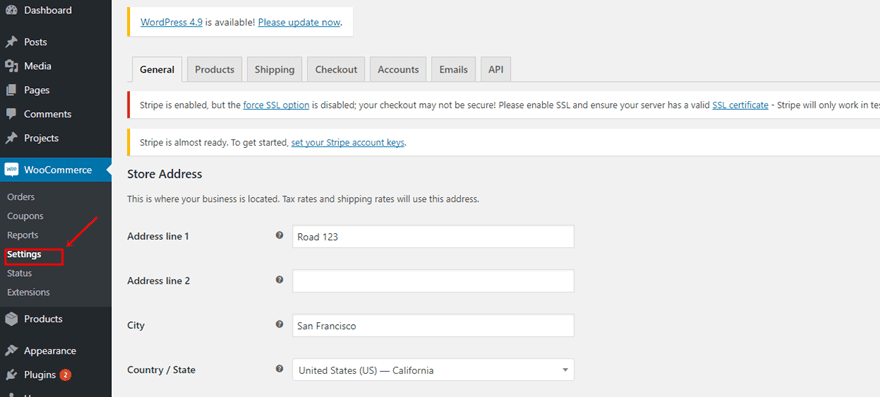
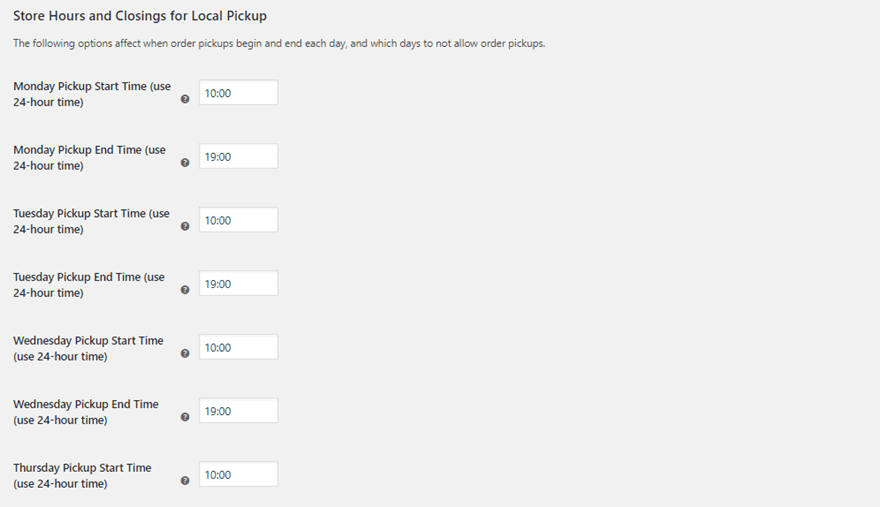
Then scroll down the General tab until you come across ‘Store Hours and Closings for Local Pickup’. Starting from there, you can choose when people can pick up their orders by adding, among other things, the opening and closing hours.
Create Products
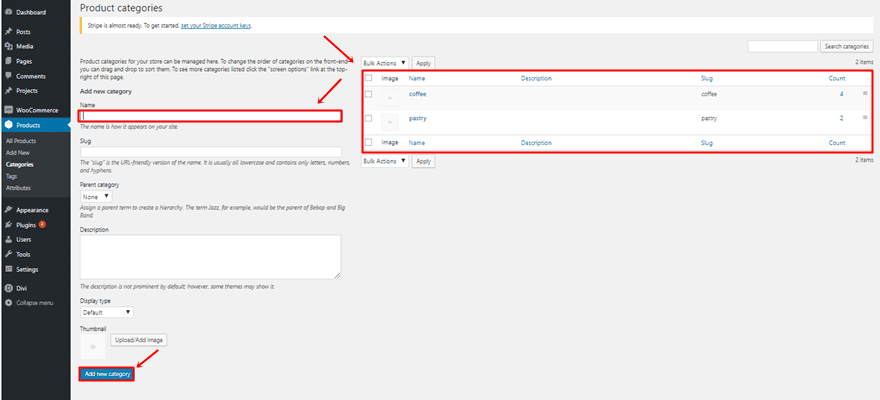
Creating products within your WooCommerce plugin is a two-steps process; adding the product categories and adding the products that belong to each one of the categories. For this example, we’re creating two categories; coffee and pastry.
Add Product Categories
Depending on your assortment, you will probably have multiple categories that’ll make it easier to display your products within the different pages. To add a category, go to Products > Categories > Add new category.
Add Products
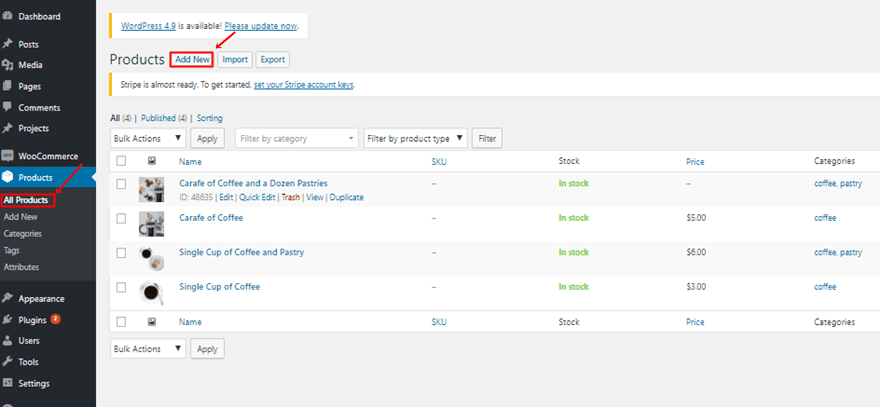
Once you’ve created the product categories, it’s time to add the different products. You can add these products by going to Products > Add new. Once you’re adding a new product, you will need to give your product a title, description, price, category and product image. For this tutorial, we’ve created four different products.
Add Products to Shop Module
Once you’ve activated the plugins and added the products, you can start changing your website visually. One of the first things you will need to do is the Shop Module you can find on the Shop page.
Open Shop Page with Visual Builder
To get started, open the shop page with the Visual Builder.

Change Column Structure of Shop Module
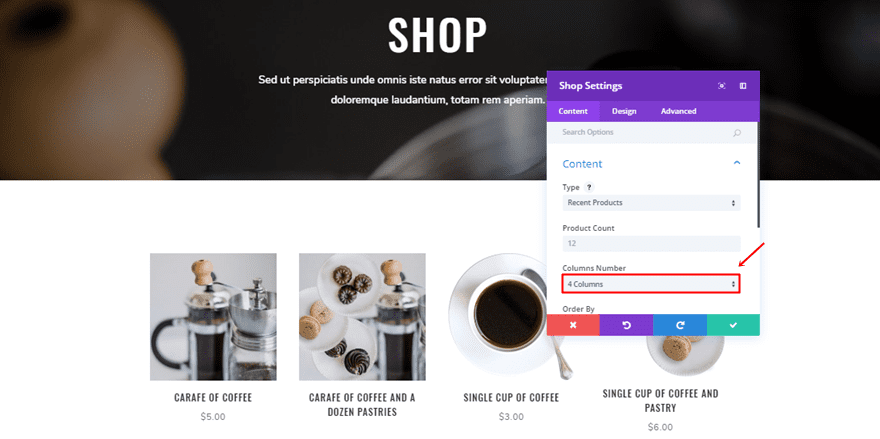
Next, open the Shop Module settings and change the Column Number to ‘4 Columns’. Once you do that, you’ll watch your four products appear in one line.
Change Shopping Cart Page
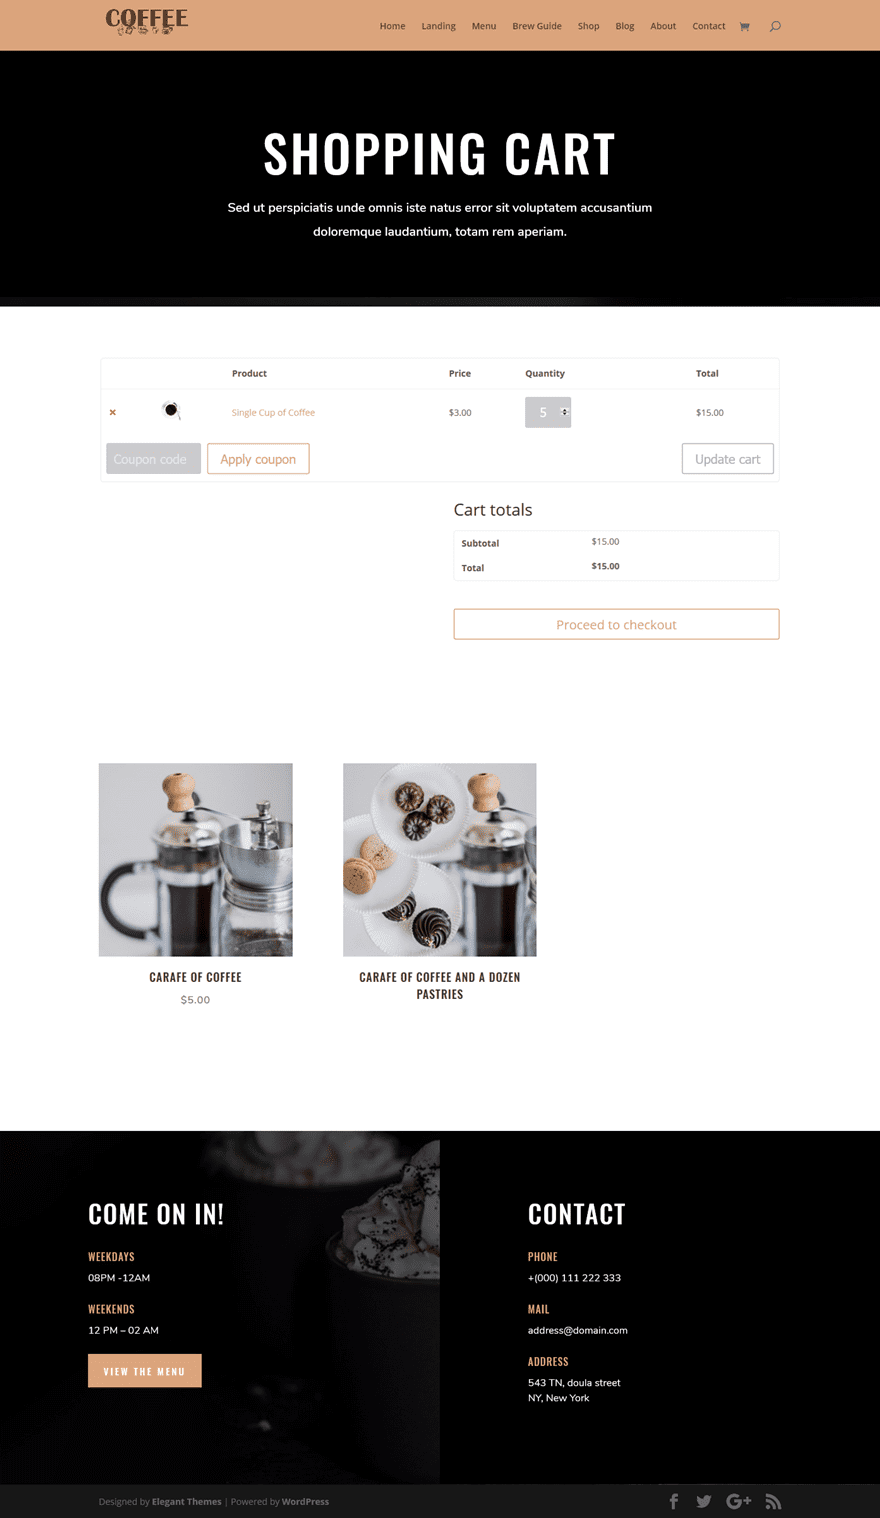
The product pages are, unfortunately, pages you can’t modify with Divi. However, we can luckily change some other pages that contain WooCommerce shortcodes. One of those pages is the shopping cart page. By adding some sections and making some modifications, we’re going to make our shopping cart page look like this:
Enable Visual Builder on Shopping Cart Page
Start by going to your shopping cart page and enabling the Visual Builder.
Change Row Width of Shopping Cart Shortcode
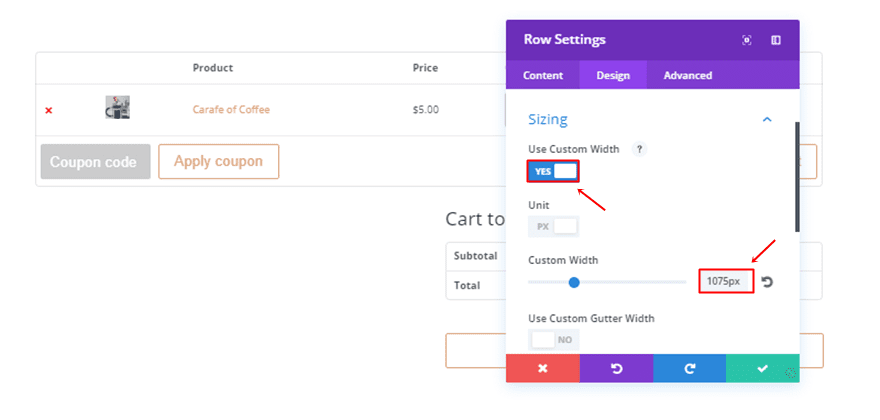
Then, open the settings of the row containing the shopping card shortcode and change the width into ‘1075px’.
Save Shop Page Hero Section, Footer Section & Shop Section to Library
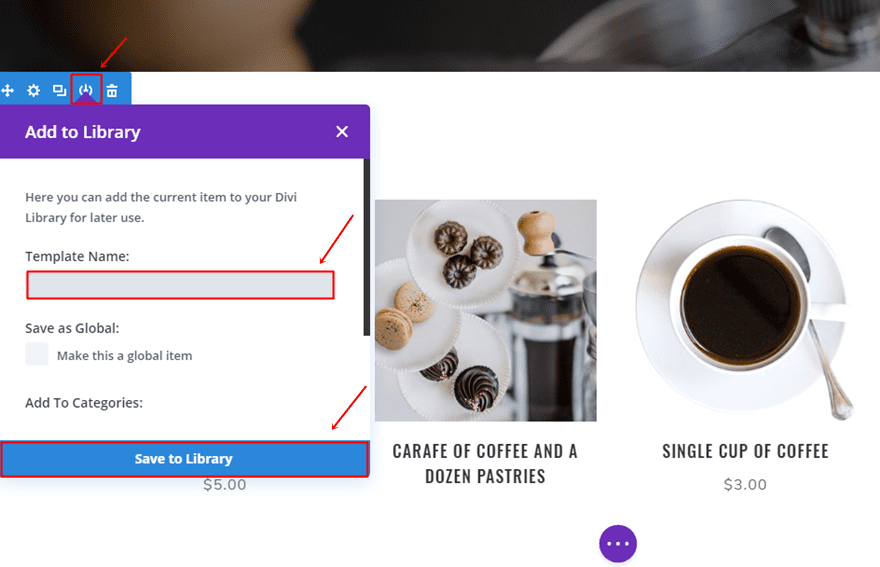
Next, open the shop page in another tab and enable the Visual Builder. We’ll be reusing the hero section, the shop section and the footer section of this page on our shopping cart page. Click on the following option of each section to add them to the library:
Add Sections to Shopping Cart Page
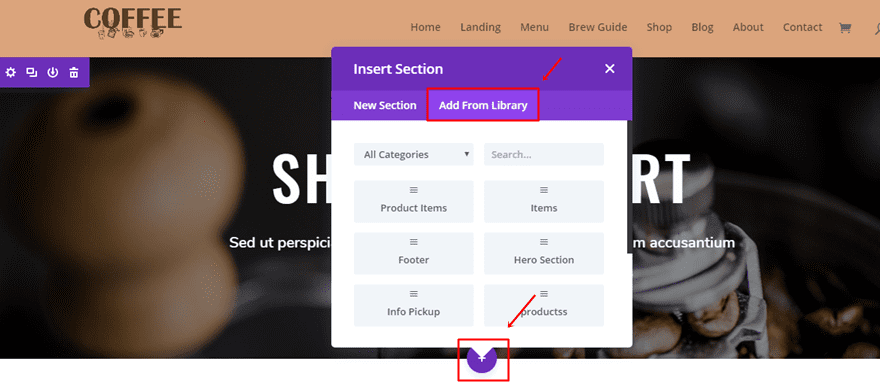
Once you’ve added them to your library, you can go ahead and add them to your Shopping Cart page by just clicking on the following icon:
Save Page & Exit Visual Builder
Once everything’s in place, you can save the page and exit the Visual Builder.
Change Checkout Page
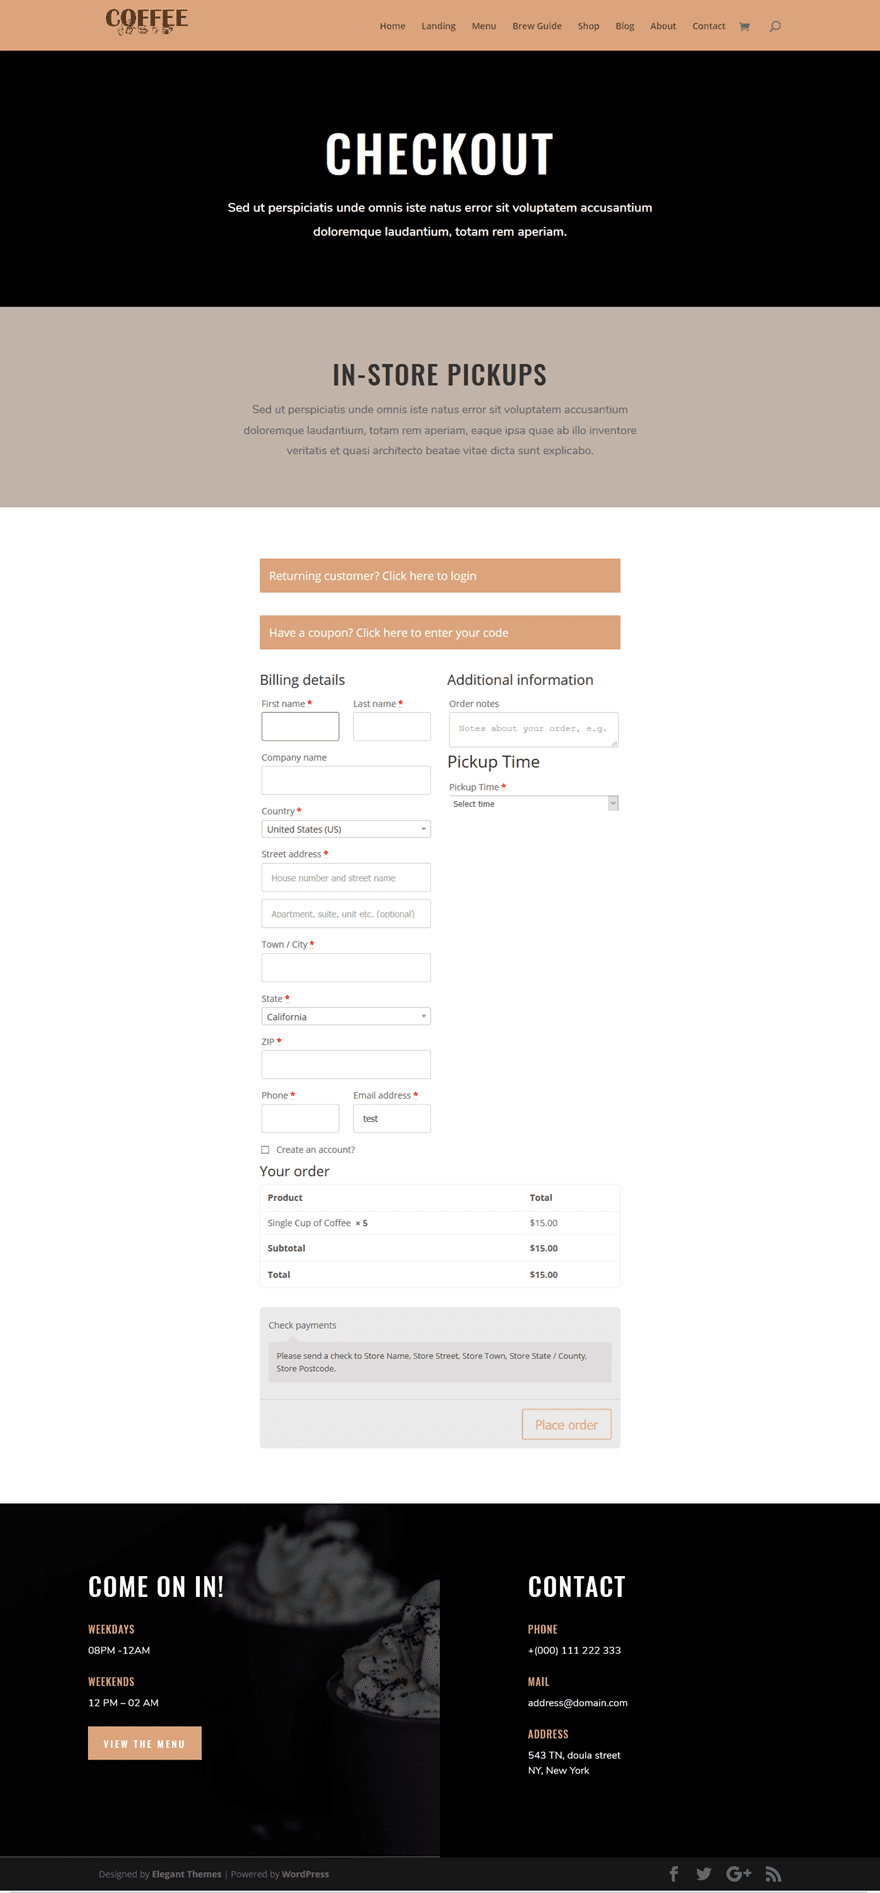
Then, there’s also the checkout page, which you can luckily edit with the Divi Builder as well. The pickup time option will appear on this page. Our end result will look like this:
Enable Visual Builder on Checkout Page
Start by going to your shopping cart page and enabling the Visual Builder.
Change the Row Width
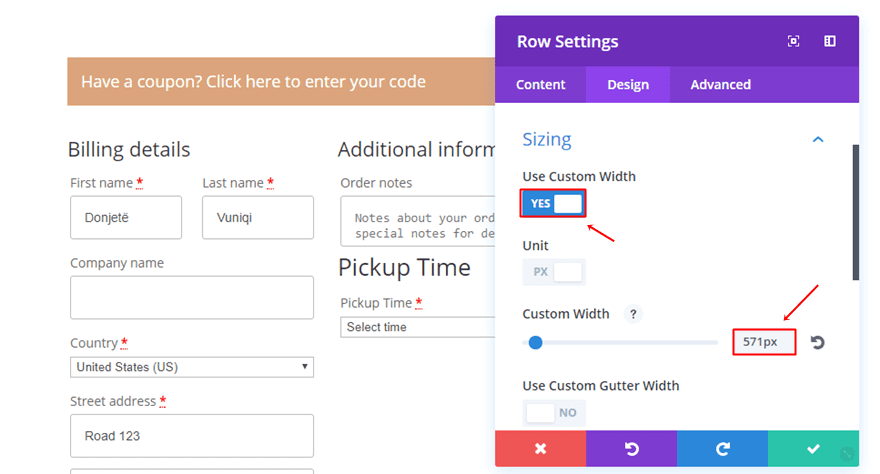
Then, open the row that contains the WooCommerce shortcode and change the width to ‘571px’ within the Sizing subcategory.
Add Hero Section & Footer Section
You can reuse the hero section and footer section within your library on the checkout page as well. Just make sure you change the title of the hero section. We won’t, however, add the shop section to this page since we’re already further down the lane.
Add Pickup Information
Another recommendable thing to add to your checkout page is a separate section that contains information about the order pickup. That can end up looking like something like this:

Save Page & Exit Visual Builder
Once everything’s in place, you can save the page and exit the Visual Builder.
View Orders & Pickup Time
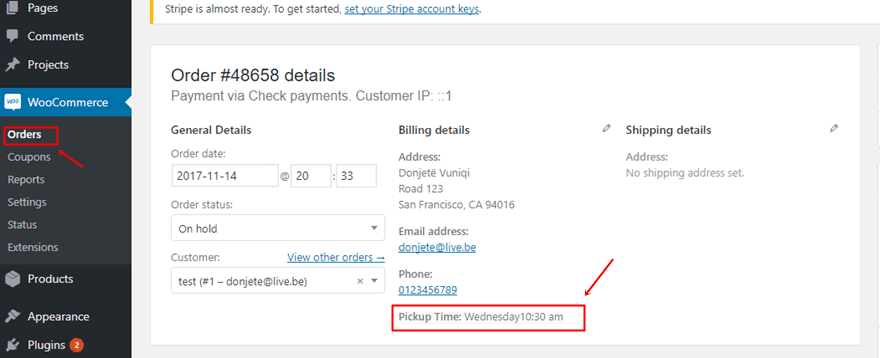
The orders people place on your website show up in the same way as usual, the only difference is that the pickup time will be added. If you go to your WordPress website > Orders > Open an order, you’ll see that the pickup time is mentioned in the order details.
Plugin Alternative: WooCommerce Pickup Locations
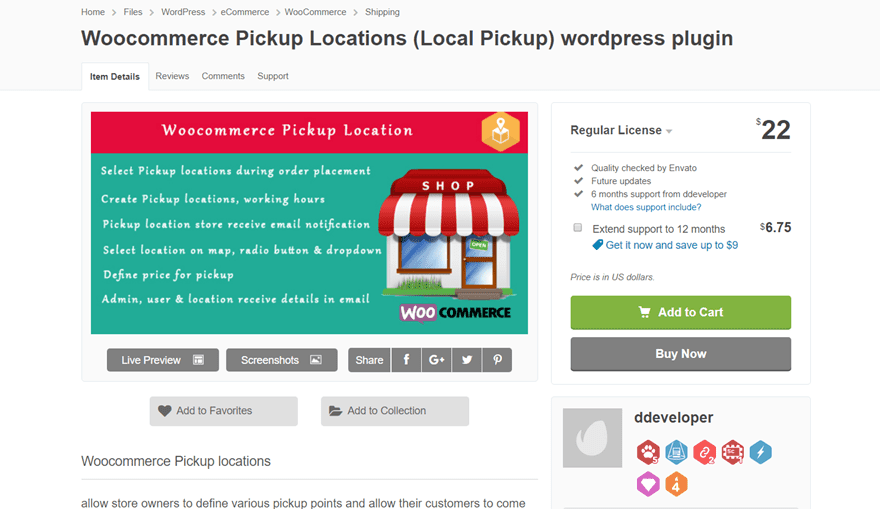
The plugin we’ve created this use case with is the easiest and cheapest solution out there. However, it does limit you in some ways. You can’t make use of it if you have different stores and people can’t order things more than ten days ahead. An alternative for the WooCommerce Local Pickup Time Select Plugin is the Woocommerce Pickup Locations plugin. Although this is a paid plugin, $22 for a regular license, it’s a very nice alternative because of the different options it provides you with. People can select the pickup location, the timing and the date while ordering. You can also choose to display a map with your stores marked on it.
Final Thoughts
In this tutorial, we’ve shown you how to easily allow your coffee shop website to have in-store pickups for online orders. This tutorial is a part of our weekly Divi design initiative where we share a use case for the free layout pack that comes out every week. If you have any questions or suggestions; make sure you leave a comment in the comment section below!
Be sure to subscribe to our email newsletter and YouTube channel so that you never miss a big announcement, useful tip, or Divi freebie!
Featured Image by jabkitticha / shutterstock.com
The post How to Set up In-Store Pickups for Online Orders with Divi’s Free Coffee Shop Layout Pack & WooCommerce appeared first on Elegant Themes Blog.
