Creating a Divi child theme is a great way to add advanced customization to your theme without having to worry about erasing those changes each time you update the Divi theme. In fact, a Divi Child theme has many benefits. It allow you to better organize all of your custom CSS/Code in one place, making it easier to collaborate with others. This will also help protect your code from clients who have access to custom code within the theme customizer and settings.
In this post, I’m going to show you how to create a Divi Child Theme. My hope is that this process will be helpful for those just starting out with Divi and also for developers seeking to publish complete Divi Child Themes for their clients.
Let’s get started.
Why You Need a Divi Child Theme
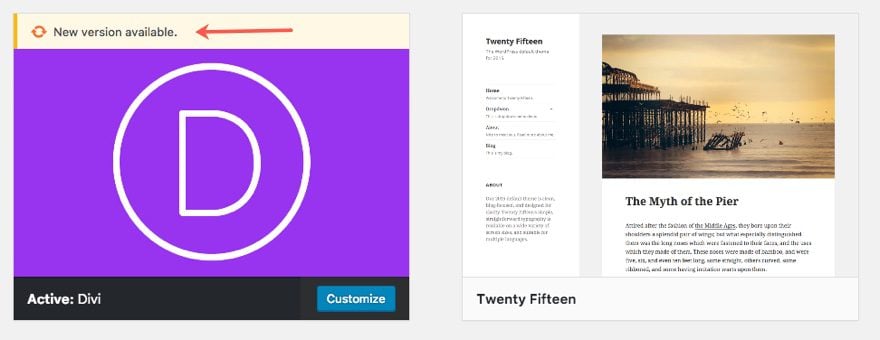
Divi is a WordPress theme. Whenever you need to make modifications to any WordPress theme, it is best practice to create a child theme that inherits the design and functionality of that parent theme. One important reason to create a child theme is to preserve the modifications you make when updating the parent theme. Whenever you update Divi, all of the theme files are updated so if you have made any changes to these files, those changes will be erased. So, instead of modifying Divi’s theme files directly, you can create additional theme files within a child theme so that when Divi is updated, those child theme files remain unchanged. Therefore, if you plan on making advanced customizations to your theme like modifying page templates and/or adding large amounts of CSS/JavaScript, and/or adding new functions, it is best to make these changes to your child theme without ever having to touch the parent theme files.
Is it possible to use Divi without a Child Theme?
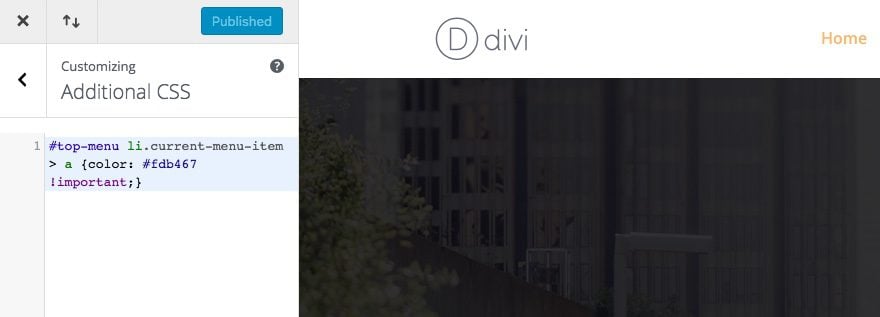
It is possible to use Divi without creating a Divi Child Theme, as long as you understand why.
Divi does allow you to add custom CSS and Code in places like the Divi Builder, Theme Customizer, and Theme Settings. If fact Divi even has improved code editing for this purpose. And this code is preserved when updating the Divi theme. So, there is an argument to be made that a child theme is unnecessary if a user is only going to be making minor modifications. Plus, Divi automatically minifies and caches a static CSS file so there will be no issues with page load speed.
To simplify things for you, let me break down the circumstances in which you probably should and should not use a Divi Child theme.
You probably SHOULD use a Divi Child Theme if…
- You plan on making changes to the code of specific theme files (this includes things like page templates and functions.php)
- You plan on adding hundreds of lines of code (CSS, JavaScript, etc.). Even though it is possible to add this to places like your theme settings, it becomes more difficult to manage with a lot of CSS.
- You want to collaborate with others and speed up development time by keeping everything in one organized space.
- You don’t want clients tinkering around in the Theme Customizer/Settings and breaking your code. Tucking it away in a child theme will definitely keep it safe from others.
You probably SHOULD NOT use a Divi Child Theme if…
- You plan on making minor theme modifications. Adding a small amount of CSS (like less than 100 lines for example) or a few scripts in the Theme Settings/Customizer will not justify the need to create a Child theme if that is ALL you plan on making.
- You don’t plan on collaborating with a team. Let’s say you hire a developer to work on your site, that person may or may not be familiar with Divi and will undoubtedly resort to creating a child theme to make modifications anyway.
- You don’t mind clients seeing your code modifications in theme settings/customizer.
What you will Need to Create a Divi Child Theme
To create your Divi Child theme, you will need the following:
- Divi Theme Installed and Activated
- Text Editor for editing theme files. You can use the text editor that comes with Windows or Mac but if you plan on making a habit of editing these files, I suggest getting a more powerful text editor like Atom, Sublime, Notepad++, etc.
- FTP Client – This isn’t necessary if you plan on uploading your child theme to WordPress as a zip file. But if you are trying to access the theme files for a live site you will need an FTP client like FileZilla in order to be able to access, edit, add, or delete theme files. If you are working on a local install, you should be able to access the theme files directly on your hard drive.
- Cup of Coffee or Tea (optional)
The Building Blocks of a Child Theme
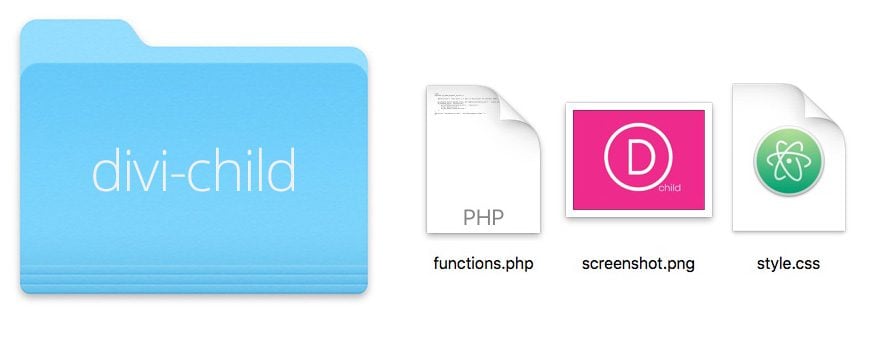
On the most basic level, a child theme must consist of three things:
- A child theme directory (or folder). Like all themes, your child theme folder will exist inside your WordPress Themes folder that holds your child theme files.
- A style.css file (which will be used to store your child theme CSS)
- A functions.php file – At the basic level this file will hold the wp_enqueue_scripts action that will enqueue the parent theme stylesheet (more on this later)
Create Your Child Theme Directory (Folder)

There are two ways to add your child theme files to WordPress. You can add the child theme folder to the WordPress theme files directly (via FTP, or locally). Or you can create a folder outside of WordPress to be later zipped and uploaded into WordPress as a new theme.
To create a new folder for your child theme directly into WordPress, you will need to access your theme files located in the wordpress Themes folder (wp-content/themes/). Then create a new folder inside the themes folder and give it the name “divi-child”. So the new child theme directory will be wp-content/themes/divi-child.
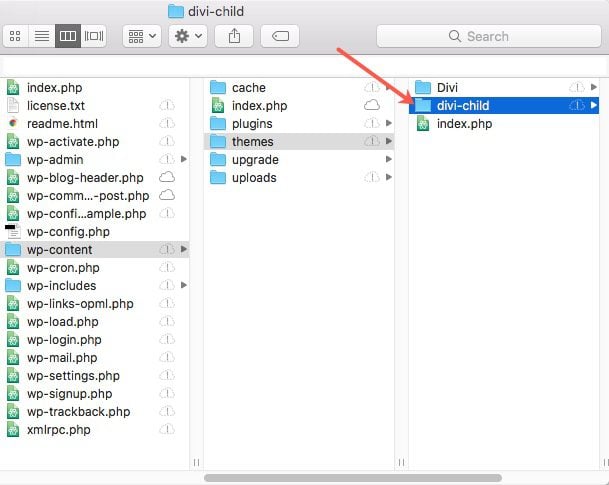
But if you are creating child theme folder to be compressed and uploaded into WordPress later, you can simply create a new folder on your computer and give it the name “divi-child”.
Create Your Child Theme Style.css File to Add Custom CSS
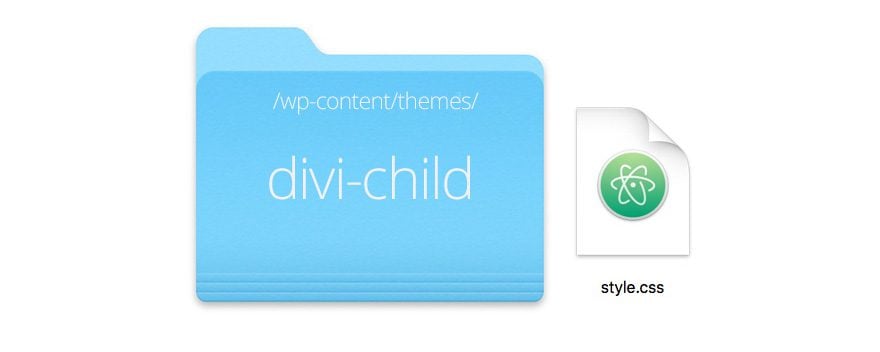
Within your new theme folder, use a text editor to create a file called style.css (the name must be exactly this or WordPress won’t recognize it) and fill in the information as outlined below.
/*
 Theme Name:     Divi Child
 Theme URI:      https://www.elegantthemes.com/gallery/divi/
 Description:    Divi Child Theme
 Author:         Elegant Themes
 Author URI:     https://www.elegantthemes.com
 Template:       Divi
 Version:        1.0.0
*/


/* =Theme customization starts here
------------------------------------------------------- */
If you don’t plan on publishing your child theme, you really only have to have the Theme Name and a Template entered. So if you are struggling to know how to fill in all that info, don’t worry about it.
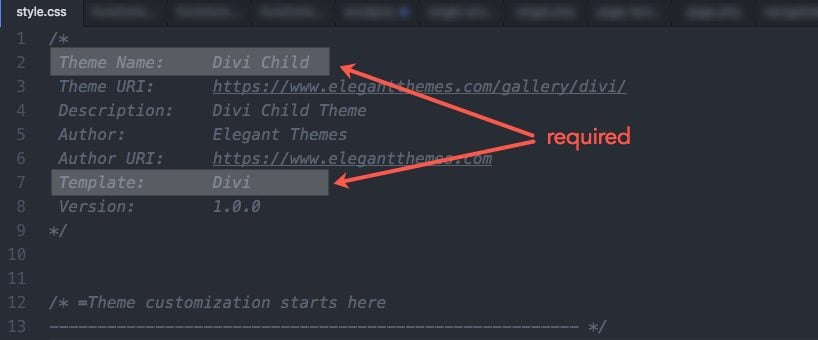
You must make sure that the “Template:” parameter correctly identifies the directory name of your parent theme which is “Divi”. The theme Name, URI, Description and Author are totally up to you. You can customize this header info to accommodate for your client needs. For example you may want to add the name of your client’s company for your theme name since this is the name that shows up when visiting your theme in the WordPress Dashboard.
Create Your Functions.php to Enqueue Your Parent Theme Stylesheet
Now that we have our style.css file for our child theme in place, we need to make sure we don’t completely leave out the styling already in place inside of Divi (the parent theme). That means we will need to make sure we use Divi’s Parent stylesheet first and then introduce our new stylesheet after. This order is important because if you are familiar with CSS, the code you enter at the bottom will always take precedence over the code at the top. So, in our case, we want the parent stylesheet code to load first and then our child stylesheet code last.
To do this, we need to enqueue the parent theme’s (Divi’s) stylesheet. Enqueue is a fancy word that literally means “add to a queue” so in this case we are adding the parent stylesheet to be queued first before the child theme stylesheet. In other words, anything we add to our child theme stylesheet will add to and supercede the parent theme.
Since Divi was first launched, it was set up to adhere to the original WordPress recommended way of setting up a child theme. This original method of creating child themes involved doing a CSS @import of the parent theme’s stylesheet from within the child theme style.css file. Many themes are still set up in this way, leaving the child theme the simple task of defining its own style.css and @import -ing Divi’s style.css and Divi will load that file automatically. This works by Divi using the get_stylesheet_directory_uri() function when it enqueue’s the main stylesheet. What this means is Divi is set up to call upon either it’s own stylesheet or the child theme’s stylesheet (whichever one is active). Basically, with the get_stylesheet_directory_uri(), if you have activated a Child Theme, WordPress will return the uri to the child theme directory rather than the parent theme directory.
Now that WordPress has updated its recommended way of approaching this, you can still easily set up the styles for your Divi child theme. All you need to do is explicitly enqueue Divi’s main style.css, since Divi is already set up to enqueue the child theme’s style.css.
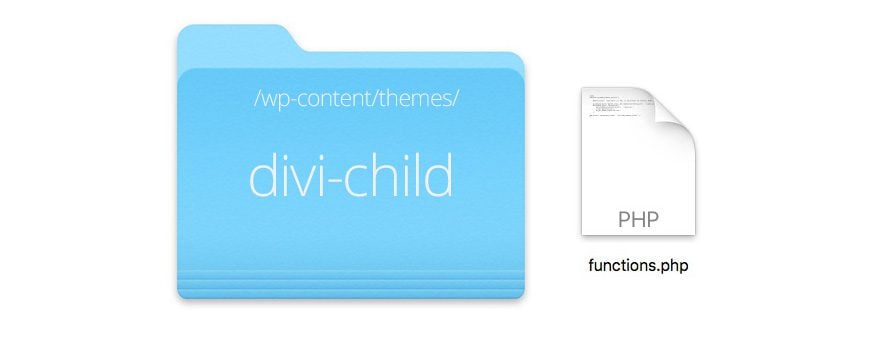
In order to do this, we will need to use our text editor to create another file within the child theme folder. Save the file with the Name functions.php (the name must be exactly this) and then add the following code into the file:
<?php
function my_theme_enqueue_styles() {
    wp_enqueue_style( 'parent-style', get_template_directory_uri() . '/style.css' );
}
add_action( 'wp_enqueue_scripts', 'my_theme_enqueue_styles' );
Then save the file.
This code is specific to Divi and is a modified version of the method proposed by the WordPress Codex.
Tip: You don’t need the PHP closing tag. PHP documents like this one should always begin with an open php tag (the code won’t work without it). However, it is best practice NOT to include the php closing tag. This will make sure that none of your php code gets cut off by a misplaced closing tag or create funky unwanted spaces that may break your code when trying to include it.
By the way, you don’t need to understand the inner workings of this php code for this to work (obviously). So if you are completely confused, don’t worry. You can simply copy and paste the code above into your child theme’s functions.php file and be done with it.
Create a Thumbnail For Your Divi Child Theme (optional)
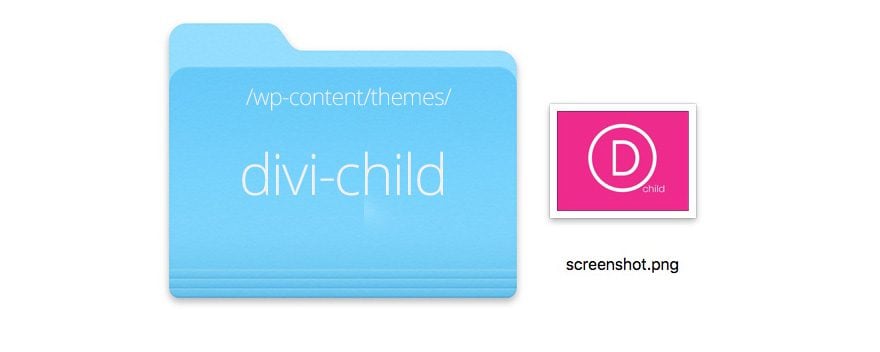
WordPress allows you to provide a thumbnail to serve as a theme screenshot or branding image for your theme when viewing it in the WordPress Dashboard.
To create a thumbnail for your child theme, first create an image (WP recommends a size of 1200px wide by 900px tall) and save it with the filename screenshot.png (the filename must be exactly this so WP recognizes it). Then add it to the child theme folder next to the two files already there.
Here is a Divi Child thumbnail I created:

Here are the three files your child theme folder should have:
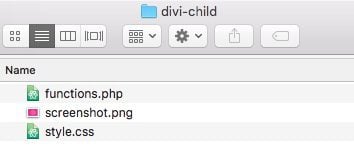
Upload and Activate Your Child Theme
After you have created your child theme folder, style.css file, and functions.php file, your child theme is ready for uploading and activation.
At this point, make sure that your Divi theme has been uploaded so that your Child Theme will function after activation.
If you added the child theme folder and files directly to the WordPress Themes directory, there is no need to upload the theme to WordPress. It is already there. All you need to do is go to the WordPress dashboard and navigate to Appearance > Theme, hover over your child theme, and click the Activate button.
If you have simply created the child theme folder and files on your computer, you will first need to compress (ZIP) it in order for it to be in the proper format for uploading to WordPress. Mac and Windows both have native ZIP functionality. Once it is zipped, uploading and activating a child theme is no different than a normal theme, simply upload it via the Appearances > Themes page in your WordPress Dashboard and activate it.
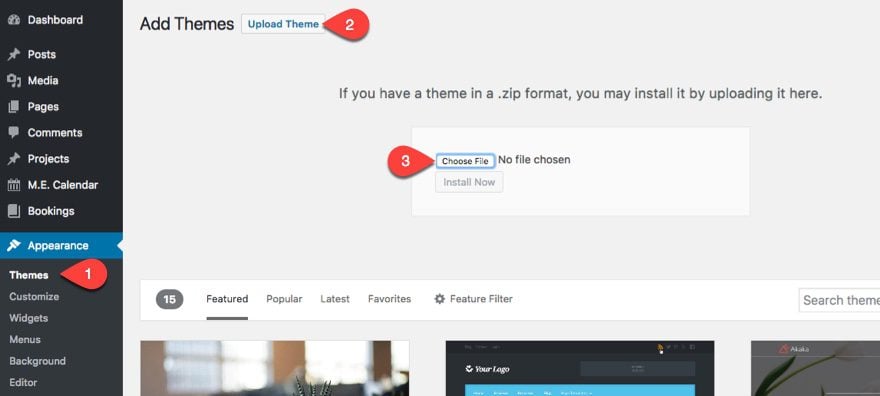
And then activate the theme like normal.
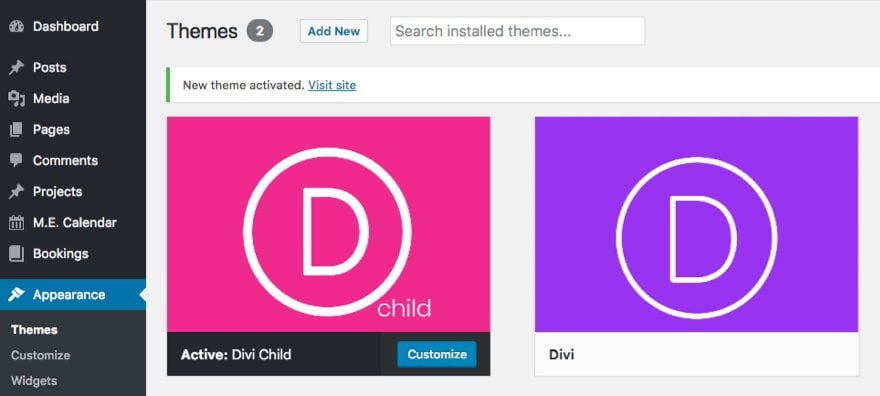
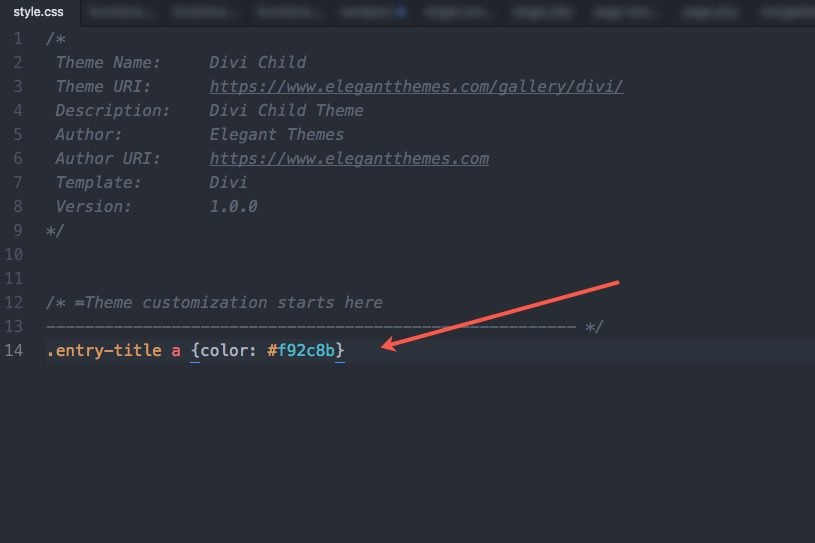
In order to test if your child theme is working correctly, add some CSS in your child theme style.css file and save your changes. You should see those changes on the live site. You may have to open your page in a private browser in case it is cached.
Editing Divi’s Functions.php File
The Functions.php file is where Divi’s main functions are stored. In order to add custom functions for our child theme, we created a functions.php file in our child theme folder. However, this file will not completely override the parent theme’s functions. It will add new functions to it much like the style.css file does for the parent stylesheet.
Since this is a php file, it is important that all your php code be wrapped in the appropriate php tags. But since you will have already added and edited the functions.php file when creating the child theme, you can add any new functions directly after the code already there.
<?php
function my_theme_enqueue_styles() {
    wp_enqueue_style( 'parent-style', get_template_directory_uri() . '/style.css' );
}
add_action( 'wp_enqueue_scripts', 'my_theme_enqueue_styles' );


//add new code here
Editing Divi’s Template Files
You are not limited to editing only the style.css and functions.php files. You can add and edit any of your parent theme’s files, including template files or PHP files. This is where you can completely restructure and adjust any part of your theme (do this with great care). Unlike editing the functions.php, template files must be replaced entirely with a new one. This is because the parent theme’s (Divi’s) original file is ignored and the new one is used instead. To edit a template file, you must first replicate the old file before we start to modify it. To do this, simply copy (not cut!) and paste the theme’s original file into your child theme folder ensuring that the filename and location is exactly the same. For example, if we want to modify the Divi/includes/navigation.php, then we would copy and paste this file to divi-child/includes/navigation.php.
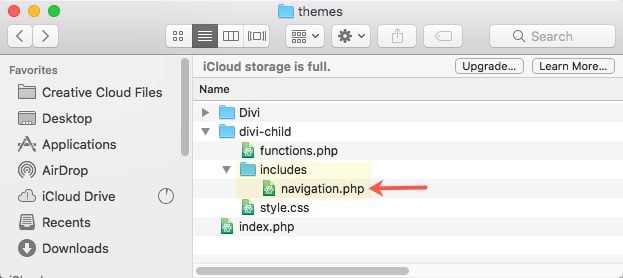
As long as the name and location are exactly the same as in the parent theme, WordPress will use the Child theme file in place of the old one.
Migrating Current Custom CSS / Code to Your New Child Theme
After you create your Divi Child theme, you will want to make sure everything is in one place. So, if you already have custom CSS or code added to Divi, you will migrate that over to your child theme. For example, if you have custom CSS under Divi > Theme Customizer > Additional CSS, all you will need to do is move (cut and paste) the CSS to your child theme’s style.css file.
Updating Your Child Theme
Divi and WordPress are continually improving and adapting. So, there may come a time (after many Divi updates) that some of Divi’s theme files will change. And, if you have a child theme overriding the file that has been changed, your child theme may break in some way. This is because you are using outdated code within your child theme and it needs to be updated to match the new code being used by Divi. So if you have been using a child theme for a while, and things are starting to break, you may need to update your code.
Final Thoughts
I’m sure there are multiple successful ways to create a child theme. But since many WordPress themes are setup differently, I thought it would be most helpful to concentrate on creating a child theme specifically for the Divi Theme. For developers, it may be helpful to know best practices for enqueueing the parent and child stylesheets for better performance. For newbies, you don’t necessarily have to understand how everything works to create a child theme with this tutorial or with a plugin, and that’s okay too. And, you may come to realize that a child theme isn’t necessary because Divi’s built-in style settings are all you need Regardless, I hope this post will serve you well.
I look forward to hearing from you in the comments.
Cheers!
The post Ultimate Guide to Creating a Divi Child Theme appeared first on Elegant Themes Blog.
