Websites exist to make engagement between companies or individuals and their website visitors happen more easily and effectively. The most effective way for a website to indicate which action they’d like visitors to take is what’s called a Call to Action (CTA). When you combine CTAs with a nice design, you can get an even better response from your visitors.
In this Divi tutorial, we’ll be showing you how to create a vibrant CTA section using Divi and Photoshop. You can use this design on any website by changing the images and colors that are being used.
Result
Before we dive into the tutorial, let’s take a quick look at the final result.
On Desktop
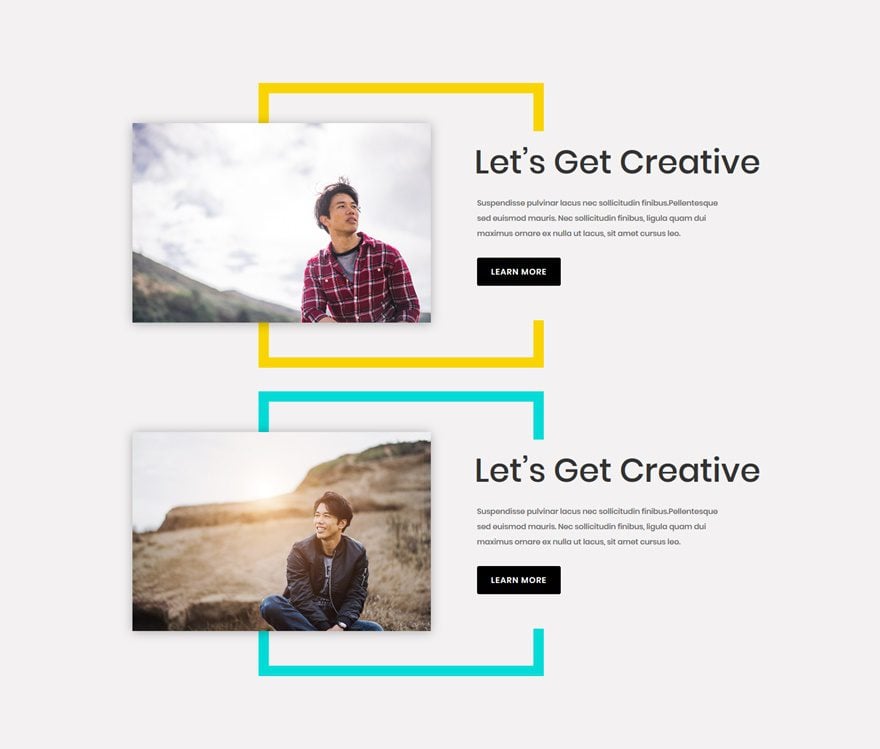
On Tablet
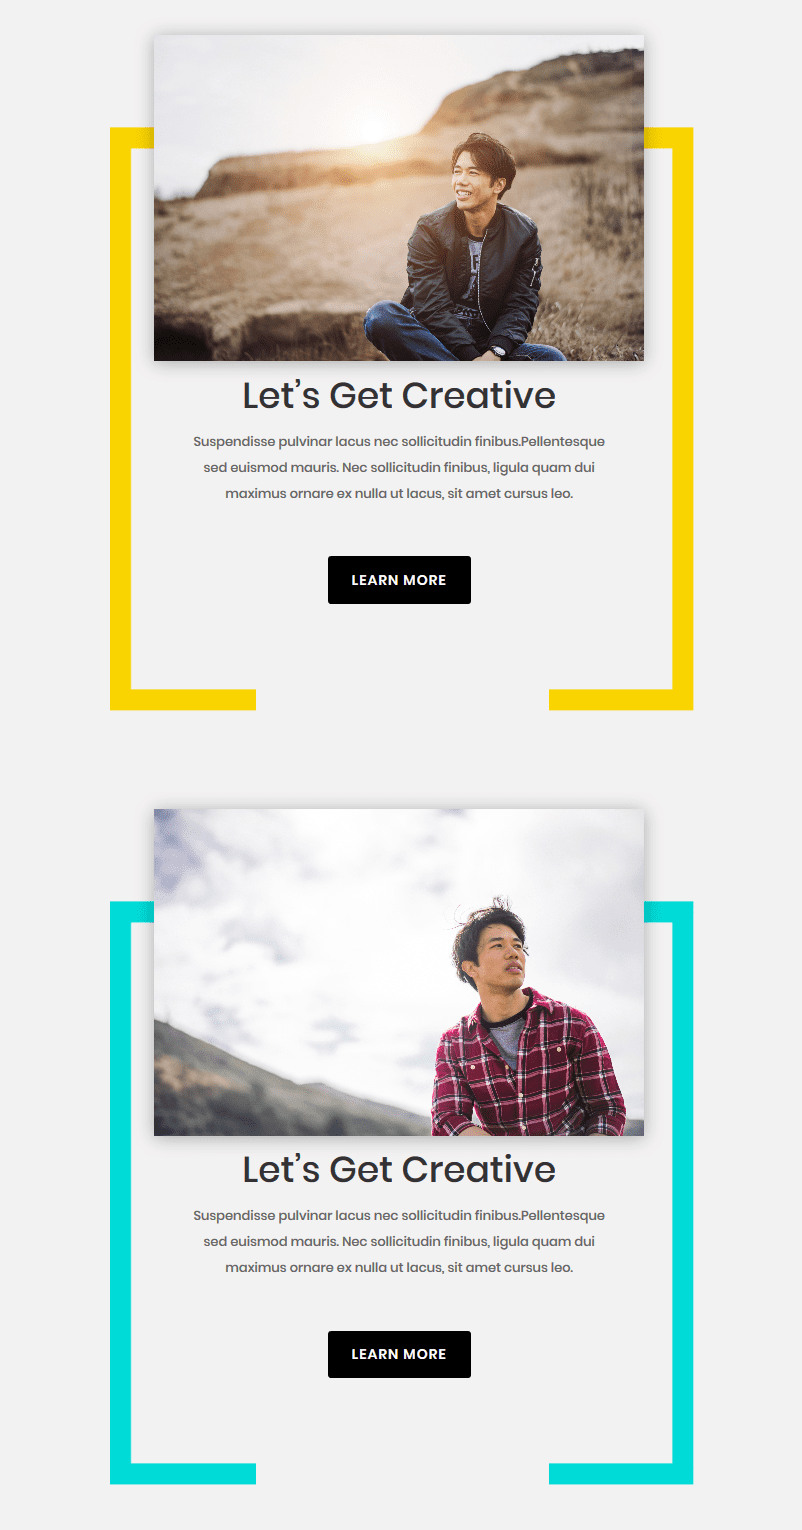
On Phone
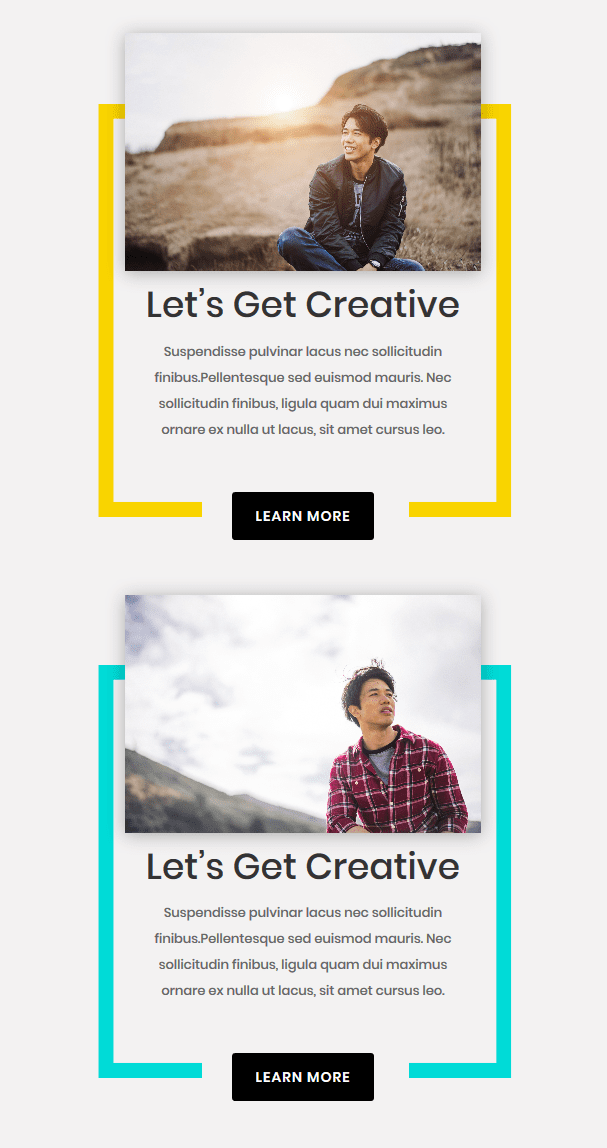
How to Create a Vibrant CTA Section for Your Next Project with Divi
Subscribe To Our Youtube Channel
Create Border Images with Photoshop
Create New Photoshop File
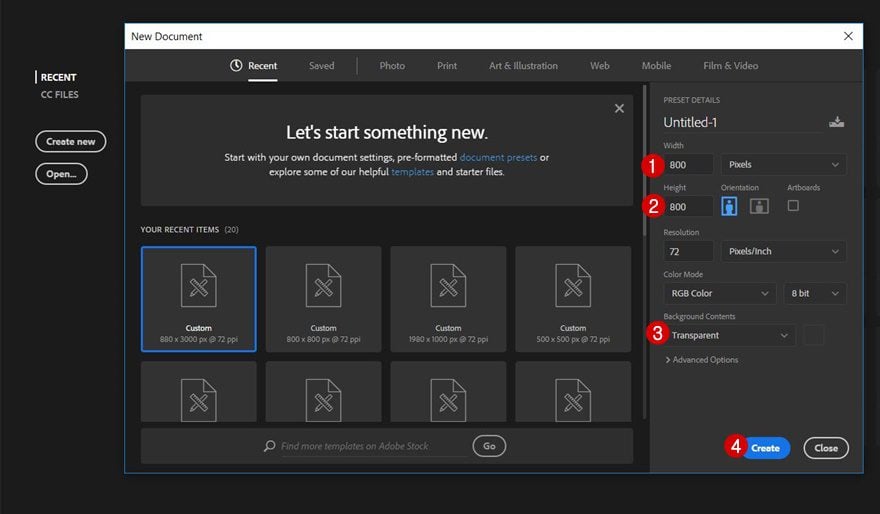
In the first part of this tutorial, we’ll create two images that we’ll use throughout the Divi tutorial. Start off by creating a new Photoshop file and use 800 for the width and height. Then, choose ‘Transparent’ for the Background Contents and click on the create button.
Add Background Color to Layer
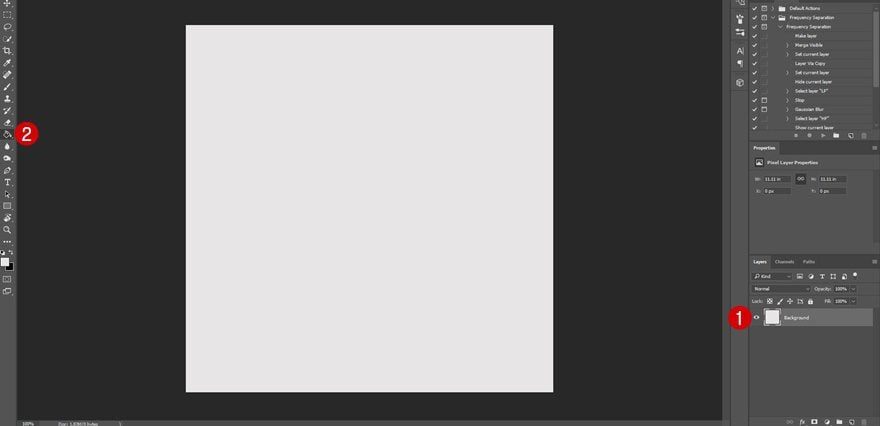
Next, give the layer you’re on ‘#F3F2F2’ as its background color using the paint bucket tool. If you’re planning on using another background color for your section within Divi, use that color instead.
Add Layer Mask
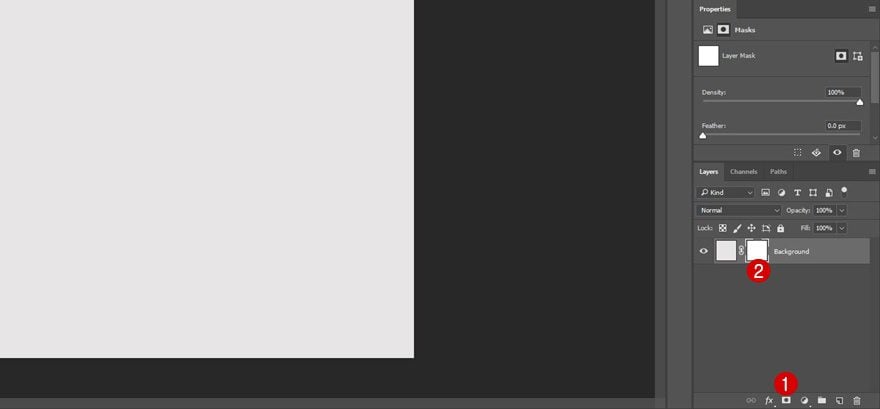
Continue by adding a layer mask to the layer you’ve just given a color.
Create a Rectangle Shape with Stroke
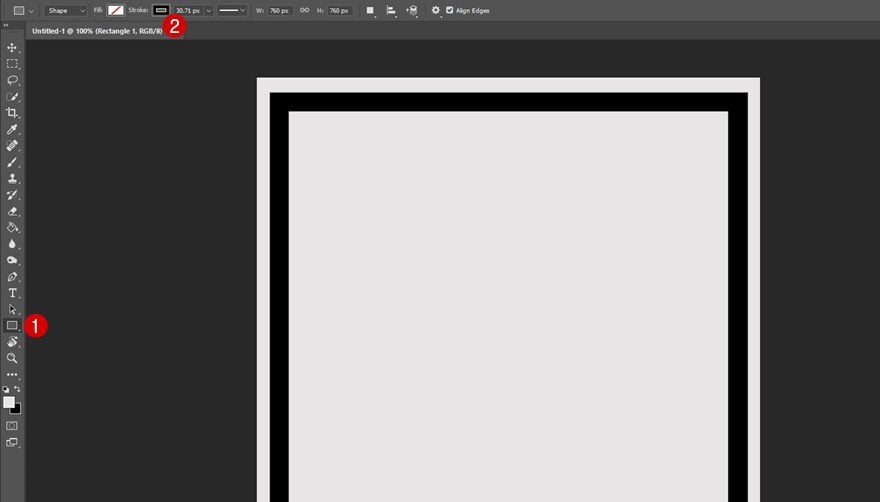
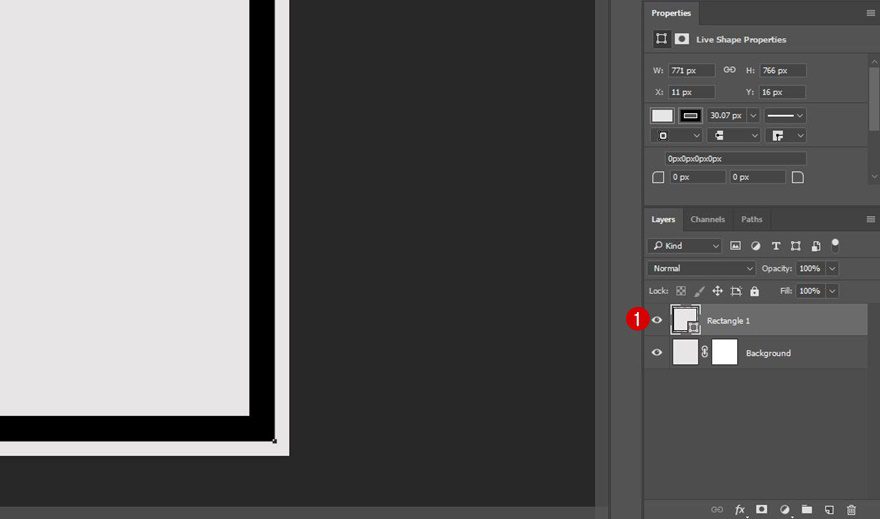
Then, add a square shape using the Rectangle Tool while keeping shift pressed. This rectangle will need no fill and a black stroke of ’30px’.
Rasterize Layer
The rectangle you’ve just added will need to become transparent. That way, once you add the image to the Divi Builder, you can choose which color appears in the transparent part. To start this process, rasterize the layer containing the rectangle.
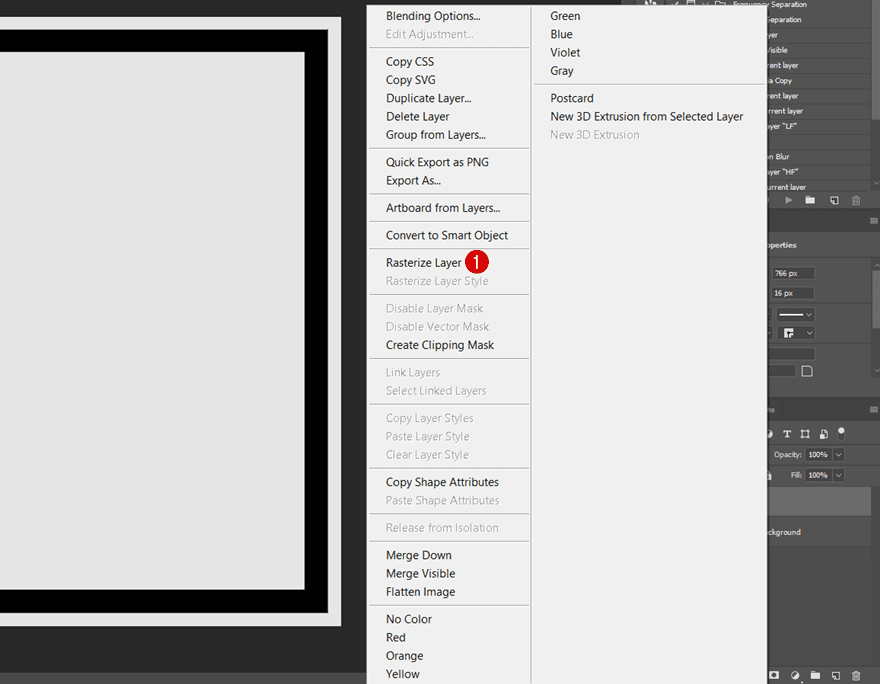
Select Rasterized Layer + Click on Mask
Then, press control/command + click on the rasterized layer and select the layer mask of the background layer.
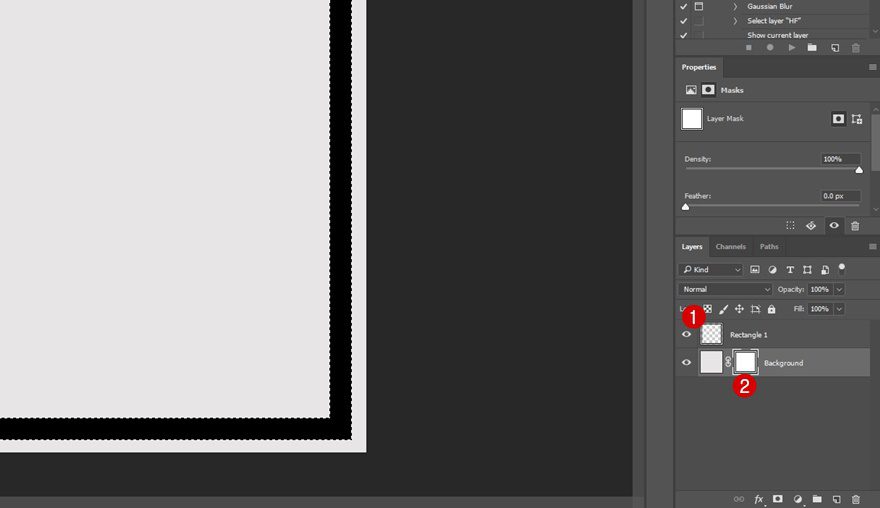
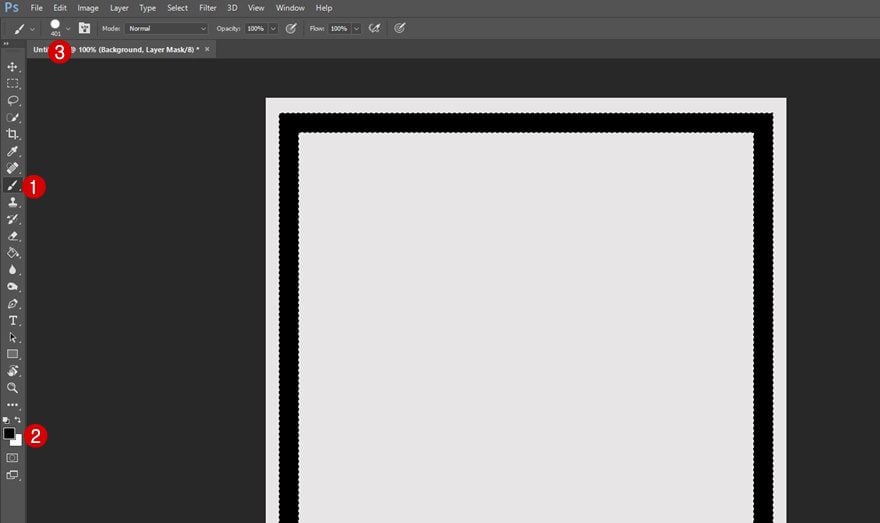
Use Black Brush Tool on Shape
While having the layer mask selected, use a black brush to go over the rectangle shape you’ve created. This will remove the shape from the layer mask.
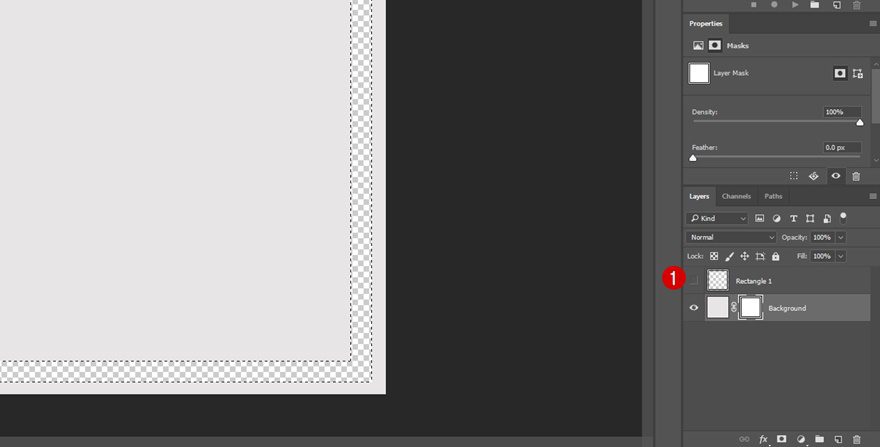
Hide Rasterized Layer
Now that you’ve gone over the rectangle with a black brush, that part of your layer mask will become transparent. But of course, you’ll need to hide the rasterized layer to see the result.
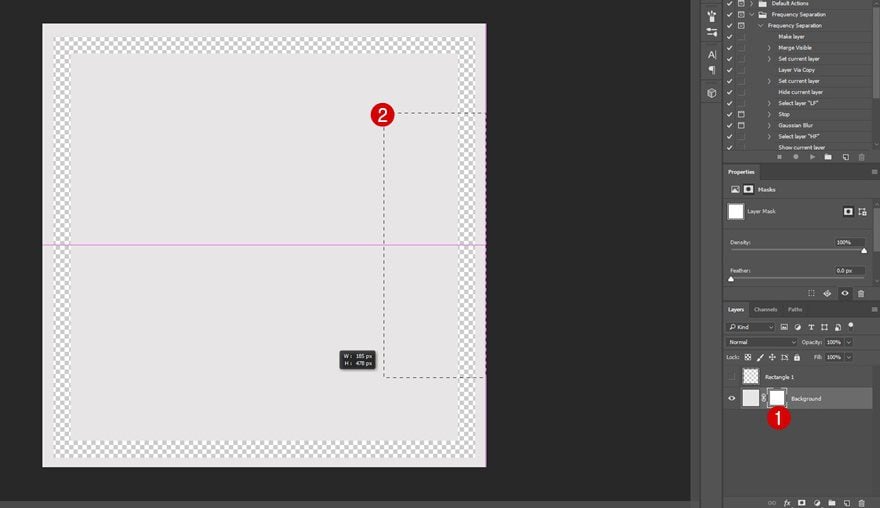
Select Mask & Remove Piece of Right Border
The next step you’ll need to take is to remove a part of the transparency of the right side of your rectangle. To do that, select the layer mask, use the selection tool on the part you want to remove and simply press delete on your keyboard.
Save Desktop Image for Web
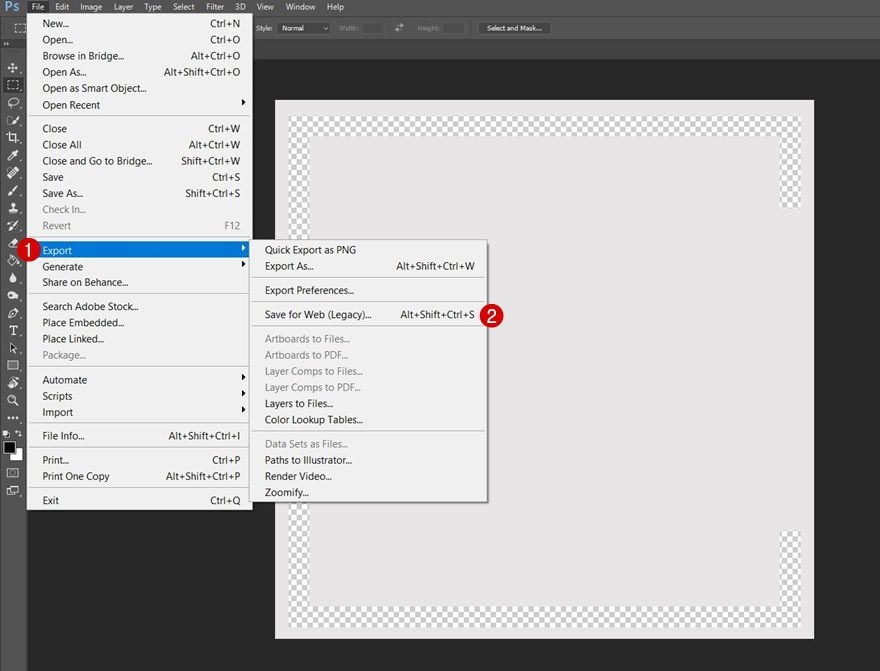
Your desktop version is now done. The only thing left to do is saving it by going to File > Export > Save for Web and making sure the file you’re exporting is PNG.
Drag Saved Image to Photoshop
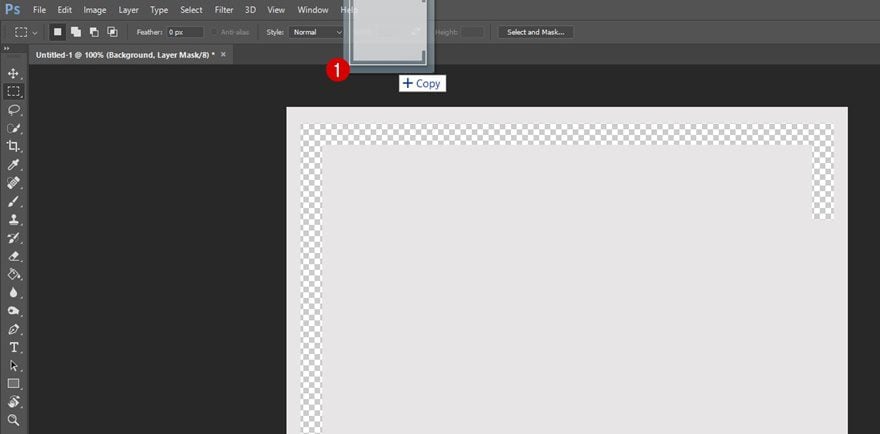
We’re going to save ourselves some time and make some modifications to the image we’ve just saved so we can use it for tablet and phone as well. Start by dragging the image you’ve saved to Photoshop.
Rotate Image
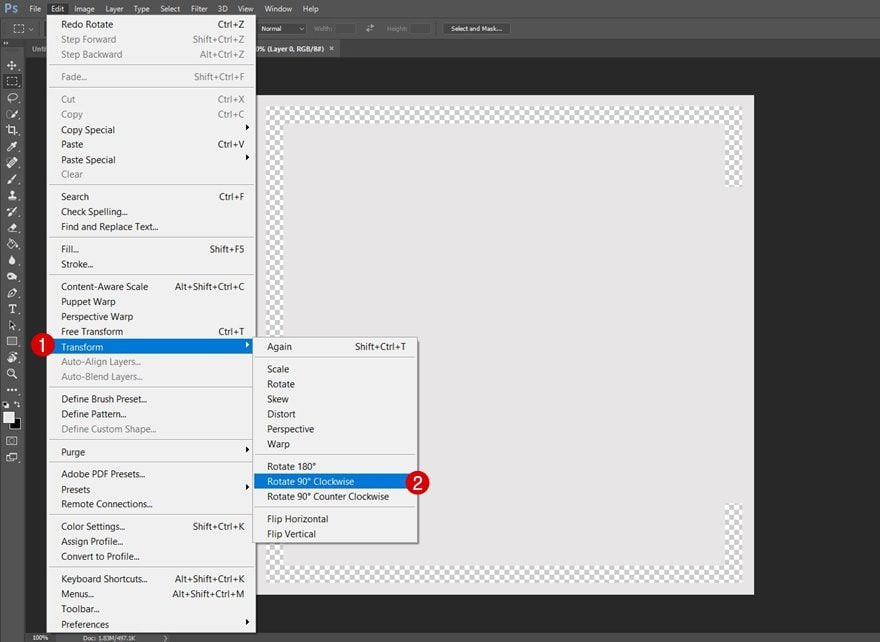
Then, rotate the image by going to Edit > Transform > Rotate 90° Clockwise.
Increase Crop
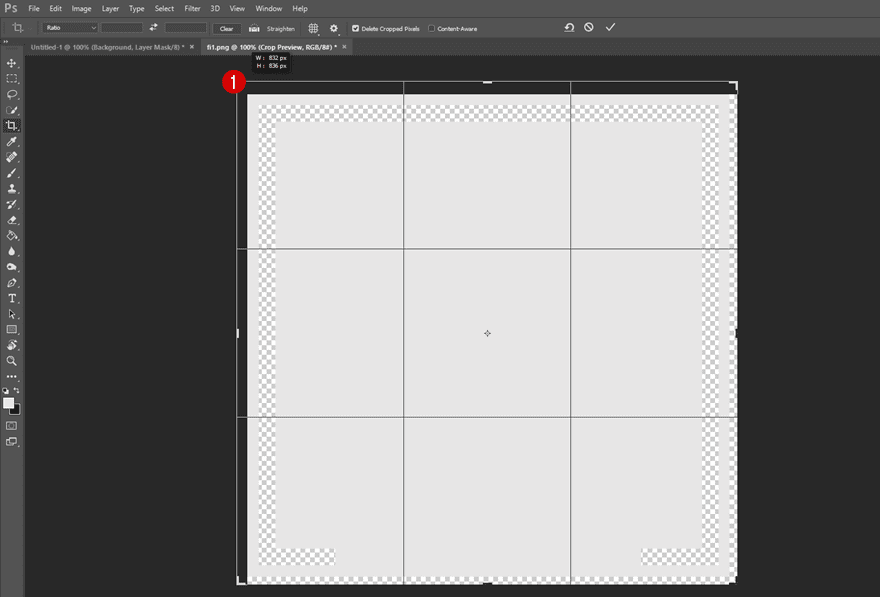
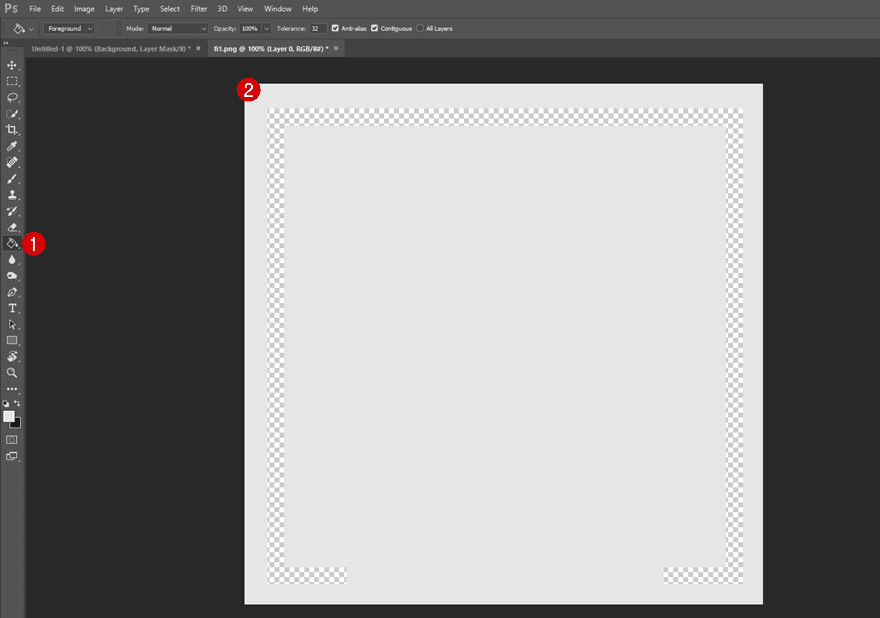
Increase the crop of your image a little bit as well. This will just help you make sure the image doesn’t get cut off by the screen size once you use it for your website.
Save Tablet & Phone Image for Web
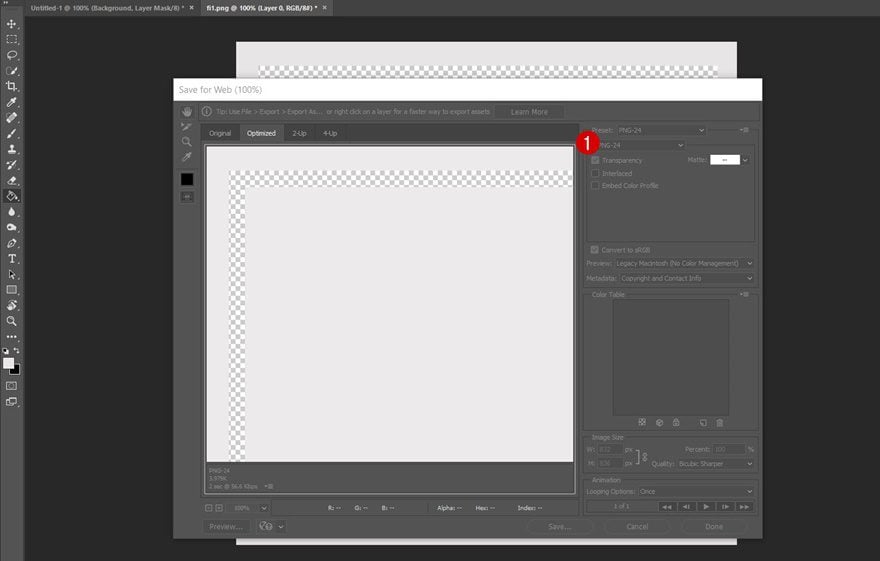
And save this new image as a PNG as well.
Recreate Desktop Version
Create New Section
Background Color
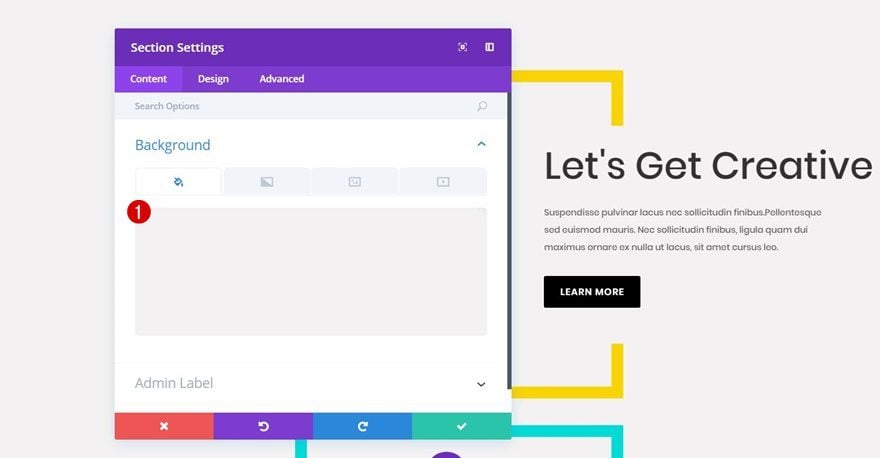
Now that we have the two images we need to make the Divi design work, we can start building the CTA section. To do that, create a new standard section on a new or existing page using ‘#f3f2f2’ as the background color for it.
Add New Row
Column Structure
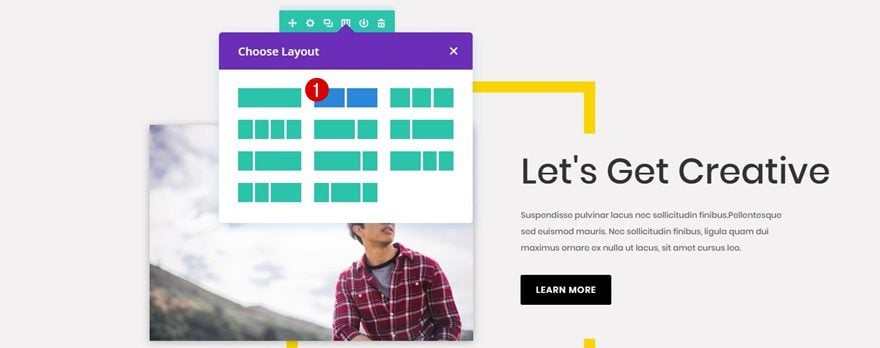
Continue by adding a two column row to the section you’ve just created.
Alignment
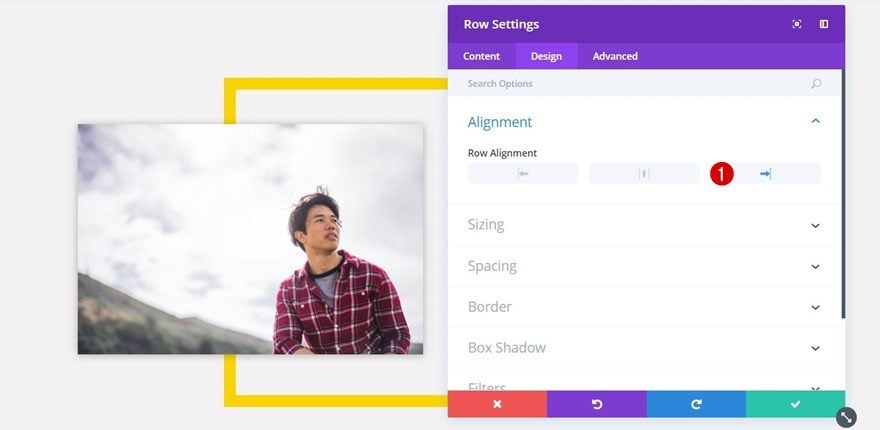
For this row, we’re going to use right alignment within the Alignment subcategory of the Design tab.
Visibility
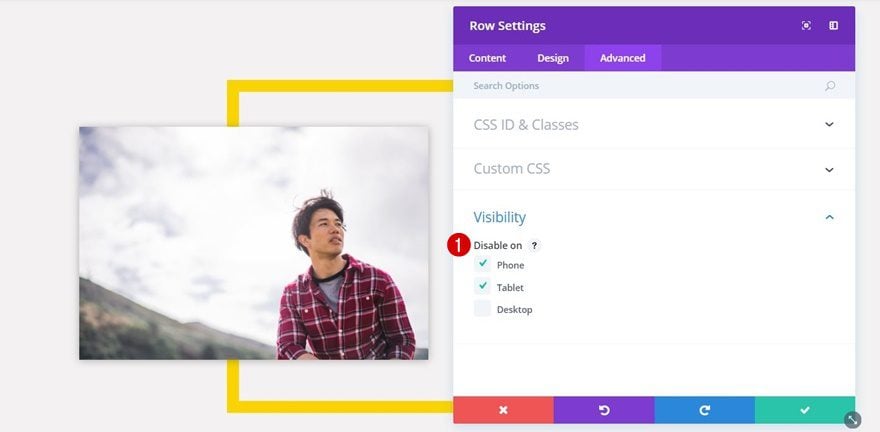
Lastly, we’ll need to disable the row for phone and tablet. Later in this tutorial, we’ll create a new version that will match the screen size of tablets and phones instead.
Add Border Image Module
Upload Image
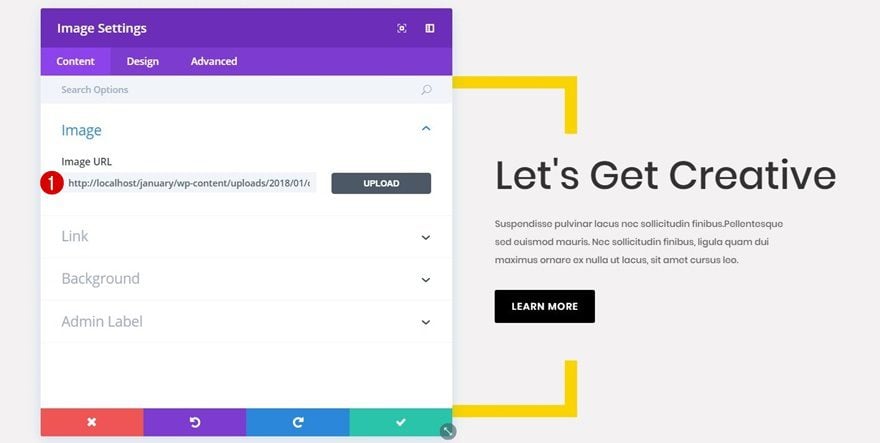
Once you’re done with your row settings, add an Image Module to the first column of your row. Upload the desktop image file you’ve created in the Photoshop part of this post.
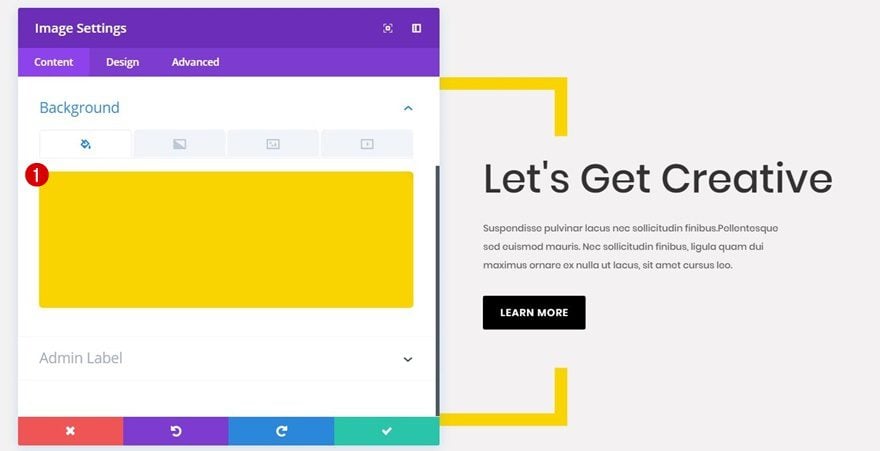
Background Color
Because of the transparency within the image file, you can now choose a color for your rectangle without having to make the change within Photoshop. You can reuse the same image and just assign a different background color to it. In this case, we’re using ‘#f9d400’.
Add Image Module
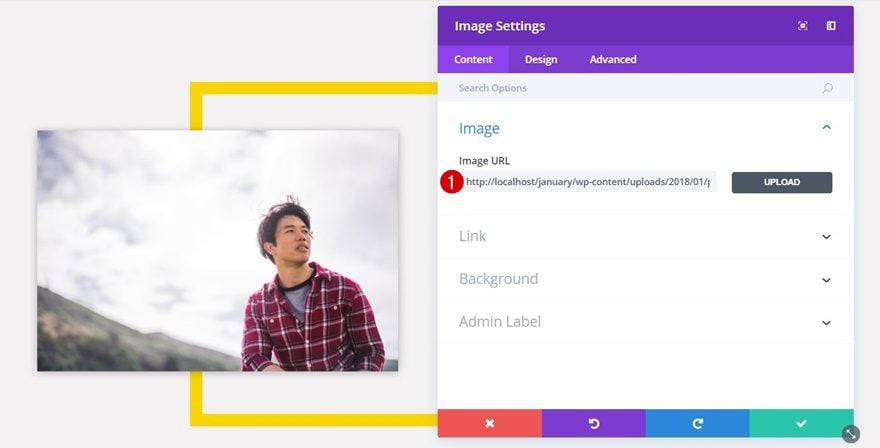
Upload Image
Right below the Image Module containing the rectangle, add another Image Module. Upload a rectangle image to make the design work.
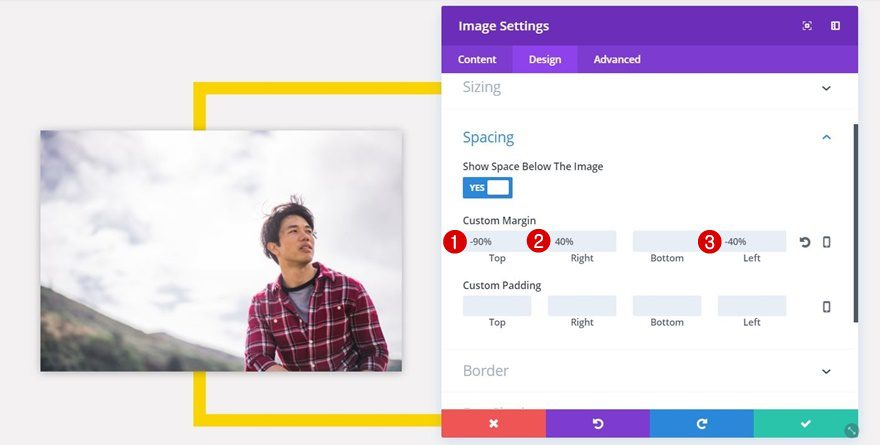
Spacing
To make this Image Module overlap with the previous one, use the following settings for the Spacing subcategory:
- Top: -90%
- Right: 40%
- Left: -40%
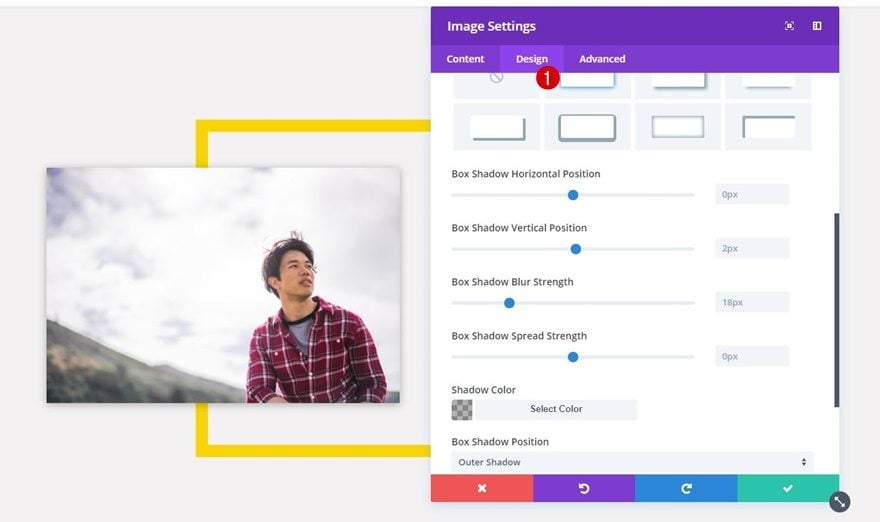
Box Shadow
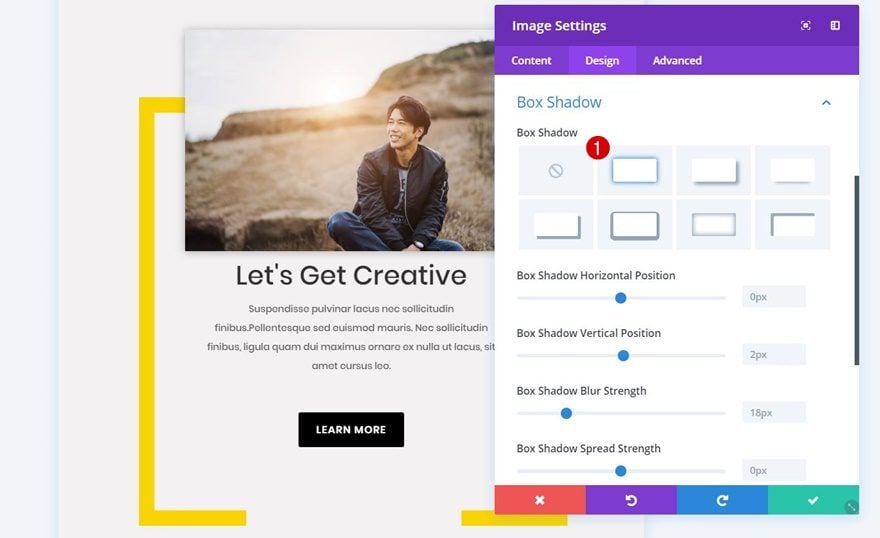
Lastly, select the first option within the Box Shadow subcategory to add a subtle box shadow to your image.
Add Title Text Module
Text Settings
Now, you can choose whether you use a Call to Action Module or two Text Modules in combination with a Button Module. We’re going to choose the last option to create our example. Add a first Text Module to the second column of your row and choose ‘Dark’ as the Text Color within the Text subcategory.
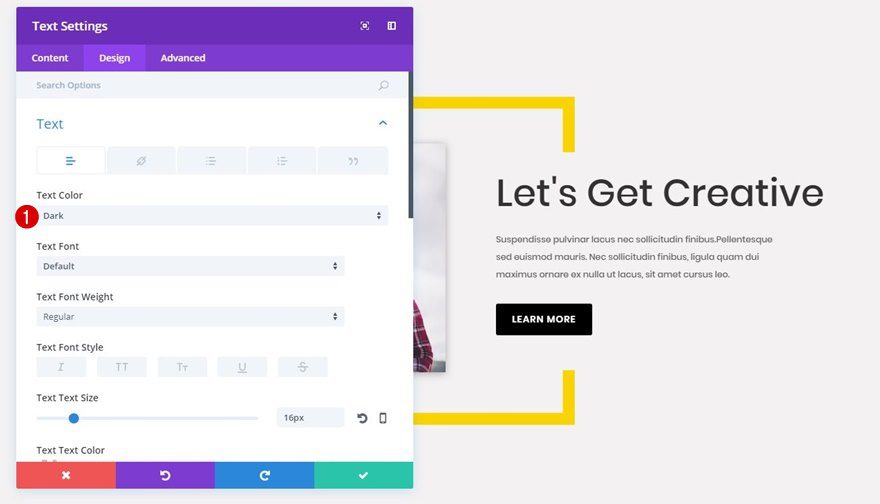
Heading Text Settings
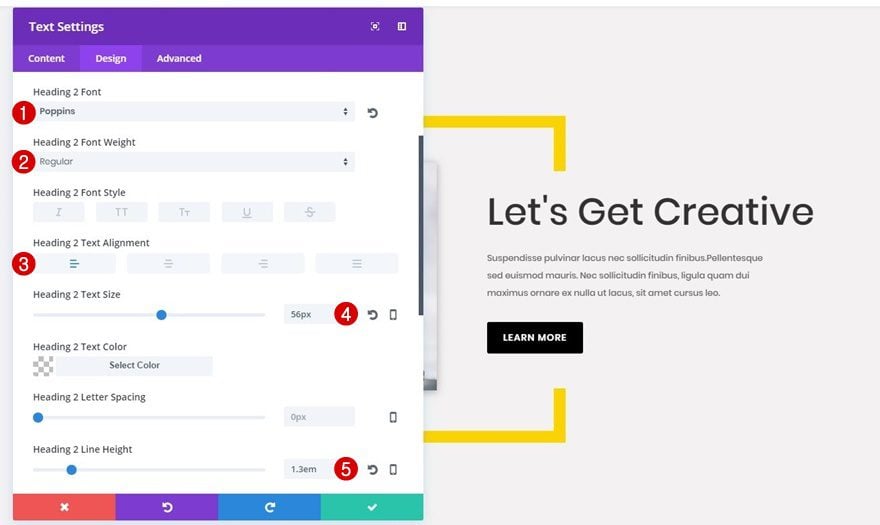
Then, open the Heading Text subcategory and apply the following changes to it:
- Heading Font: Poppins
- Heading Font Weight: Regular
- Heading Text Size: 56px
- Heading Line Height: 1.3em
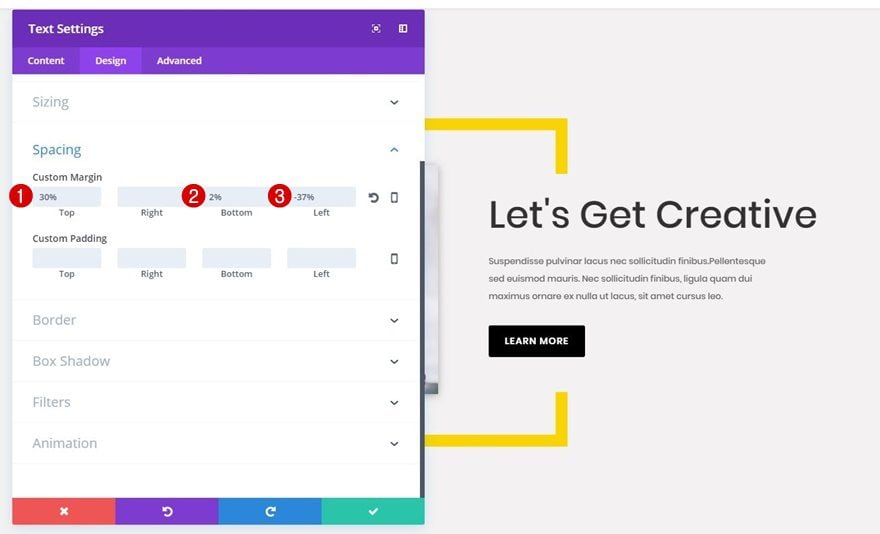
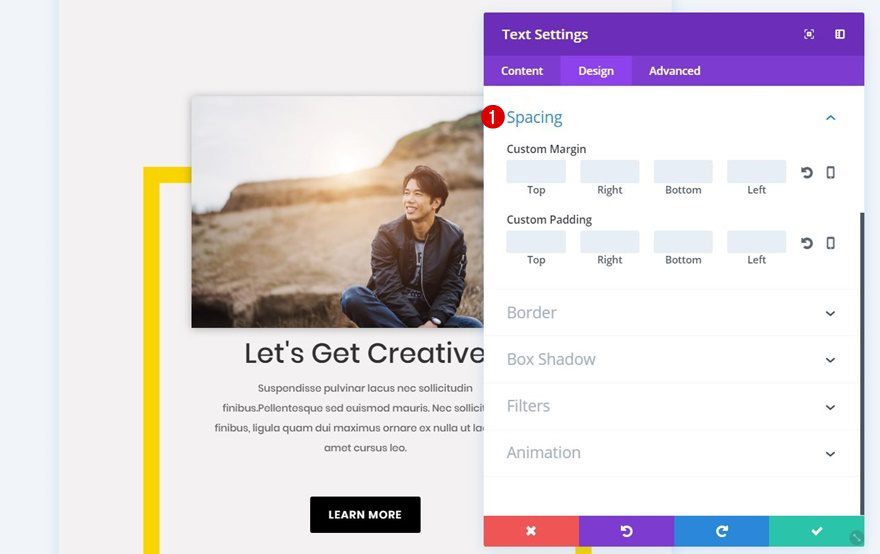
Spacing
Lastly, you’ll need to add some custom margin to your Text Module that will allow the text to appear right within the square Image Module:
- Top: 30%
- Bottom: 2%
- Left: -37%
Add Body Text Module
Text Settings
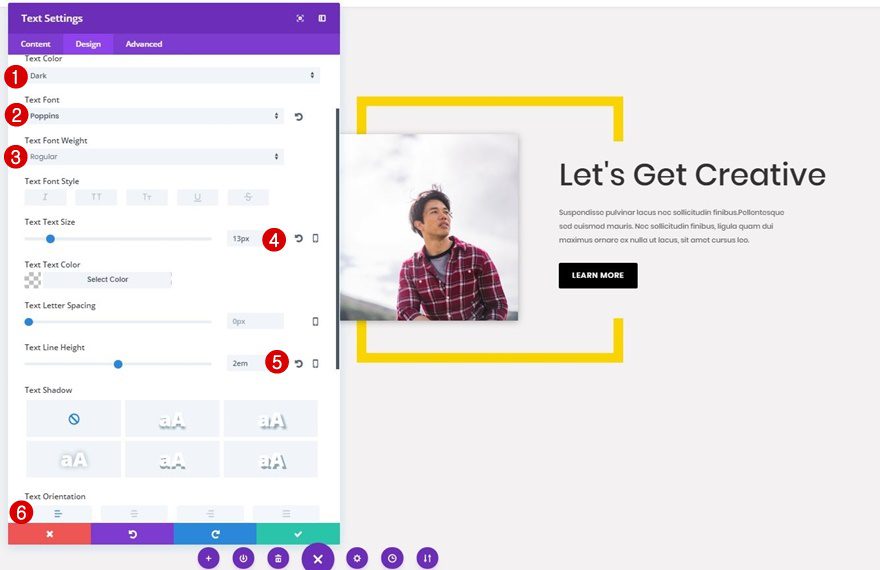
Right below the Text Module you’ve added, go ahead and add another Text Module. Use this one to share the description of your CTA section. Move on to the Design tab and apply the following changes to the Text subcategory:
- Text Color: Dark
- Text Font: Poppins
- Text Font Weight: Regular
- Text Size: 13px
- Text Line Height: 2em
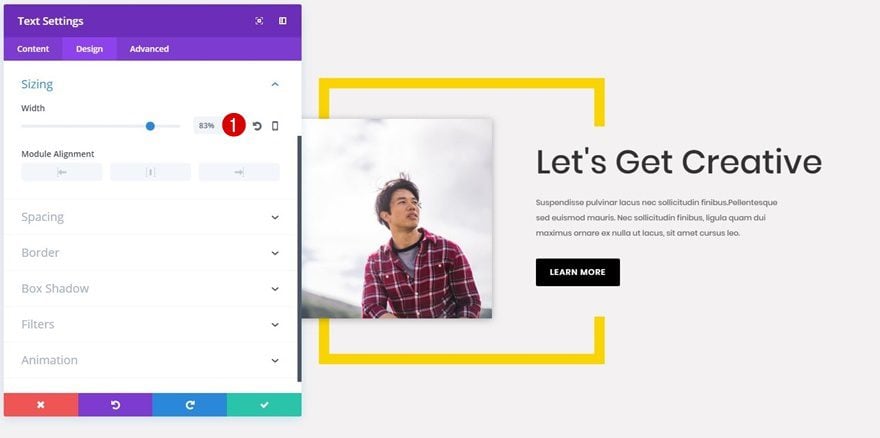
Sizing
Next, open the Sizing subcategory and use ‘83%’ for the Width.
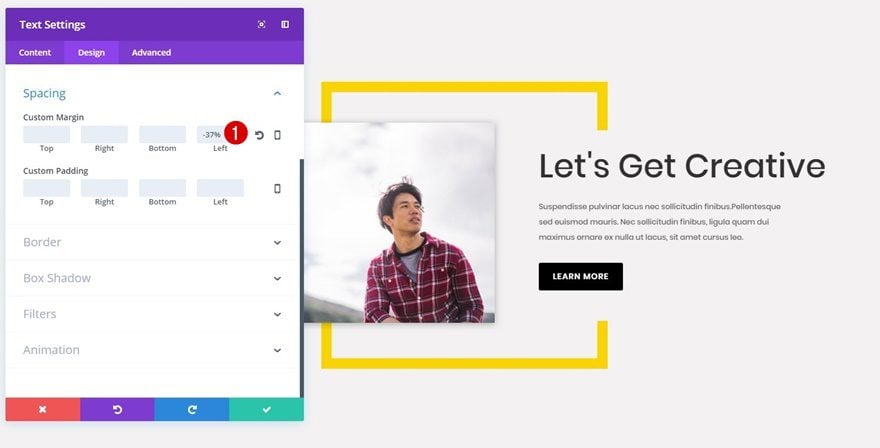
Spacing
Lastly, add ‘-37%’ to the left margin of your body Text Module as well. That way, the Text Module will appear right below the previous Text Module within the rectangle Image Module.
Add Button Module
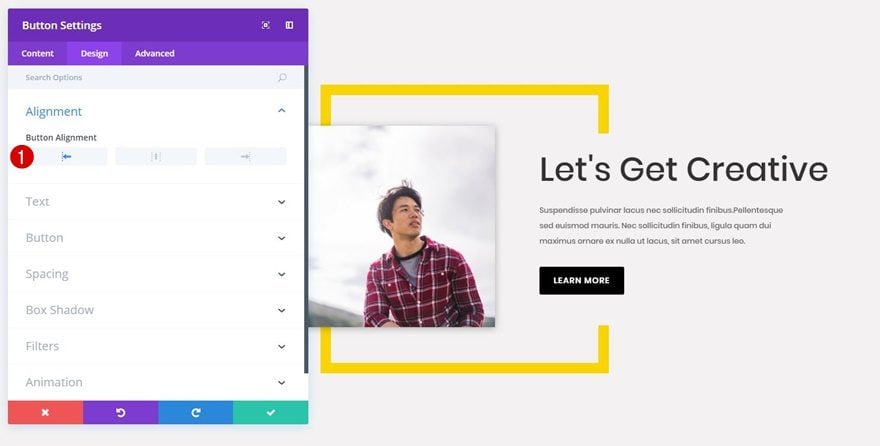
Button Alignment
Last but not least, you’ll need to add a Button Module to the second column of your row. This Button Module requires a left Button Alignment within the Design tab.
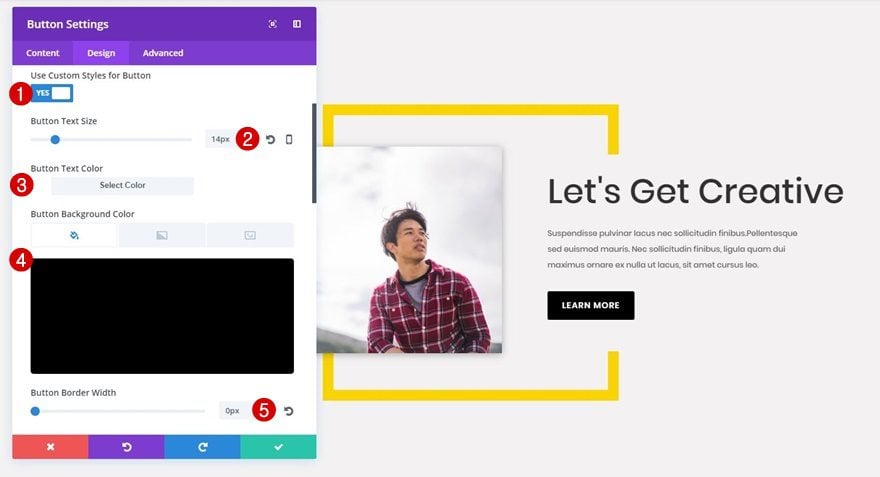
Button Settings
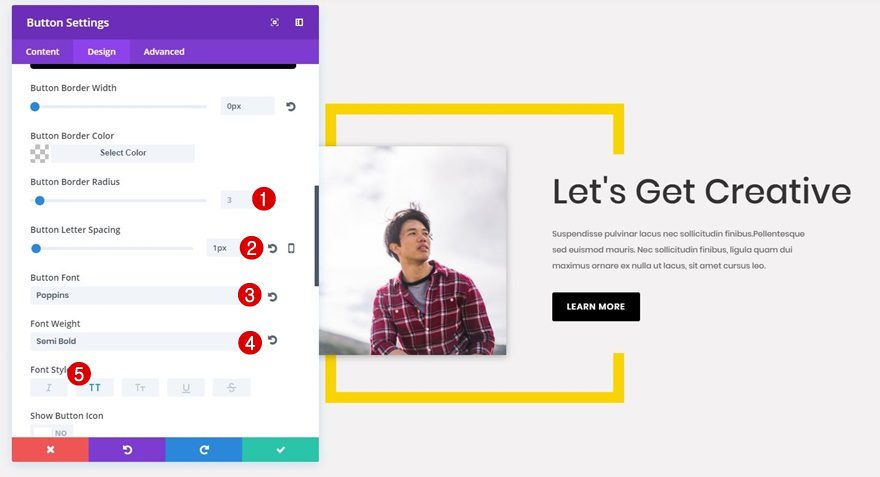
Then, open the Button subcategory and apply the following changes to your button:
- Use Custom Styles for Button: Yes
- Button Text Size: 14px
- Button Text Color: #ffffff
- Button Background Color: #000000
- Button Border Width: 0px
- Button Border Radius: 3
- Button Letter Spacing: 1px
- Button Font: Poppins
- Font Weight: Semi Bold
- Font Style: Uppercase
Spacing
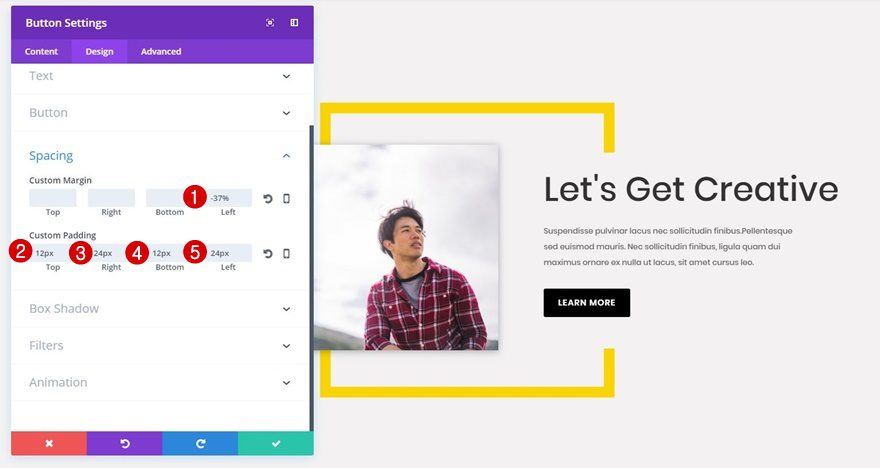
Lastly, apply the following spacing to your button to make it fit with your Text Modules:
- Left Margin: -37%
- Top Padding: 12px
- Right Padding: 24px
- Bottom Padding: 12px
- Left Padding: 24px
Clone Row
Change Background Color Border Image Module
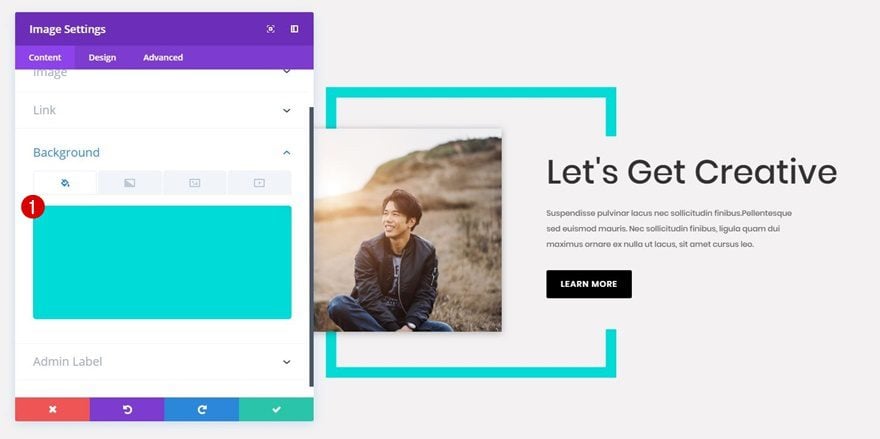
Now, clone the row you’ve just created and change the background color of the border Image Module into ‘#00dbd7’ or any other color.
Change Image Module
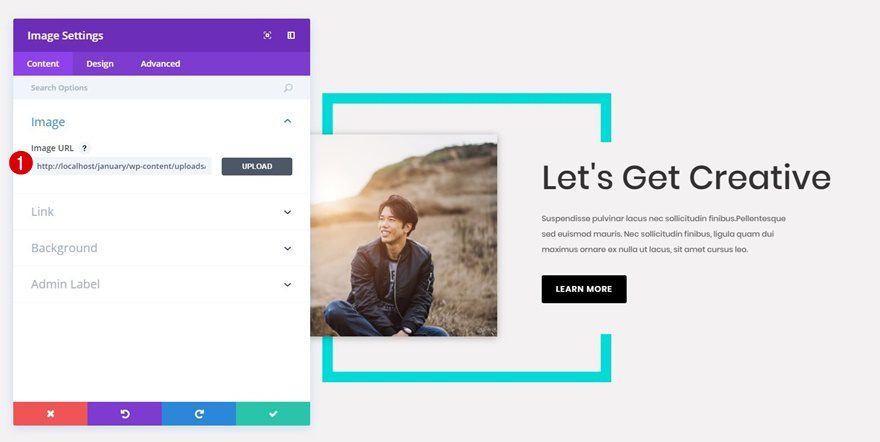
Likewise, you can also change the image within the second Image Module to create two CTAs that differ.
Recreate Tablet & Phone Version
Add New Row
Column Structure
Now that we’ve created the desktop version let’s move on to the version for tablet and phone. The first thing you’ll need to do is add a one-column row to your section.
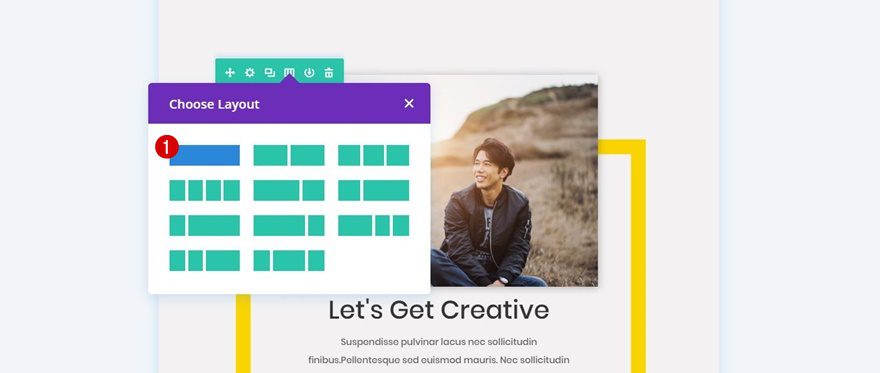
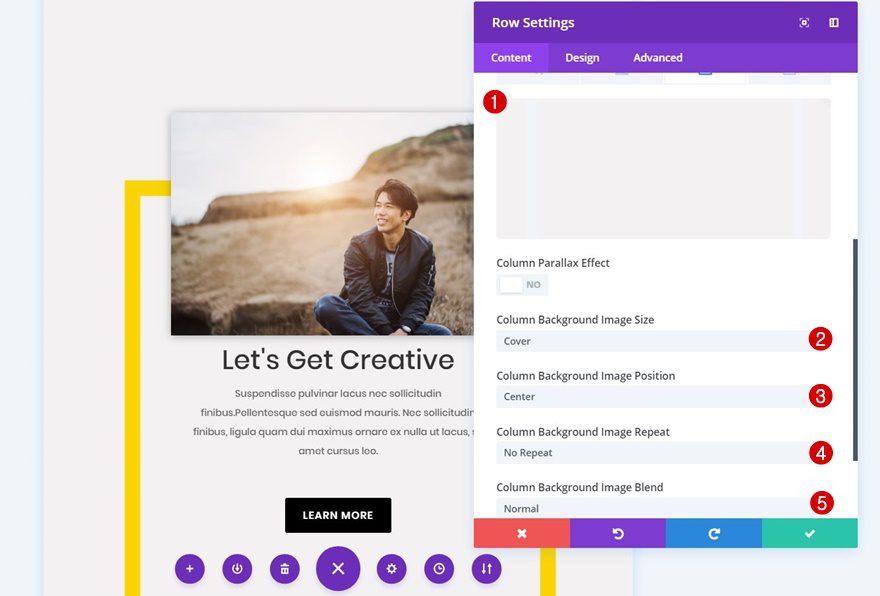
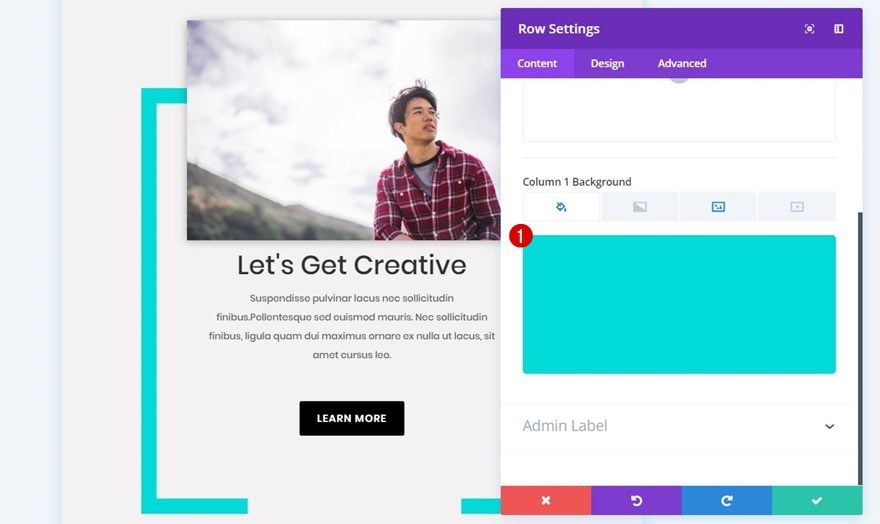
Column 1 Background Image
Then, open the row settings and choose the square image file you’ve created for tablet and phone in the Photoshop part of this tutorial as the background image of the column. Along with the image, use the following settings:
- Column Background Image Size: Cover
- Column Background Image Position: Center
- Column Background Image Repeat: No Repeat
- Column Background Image Blend: Normal
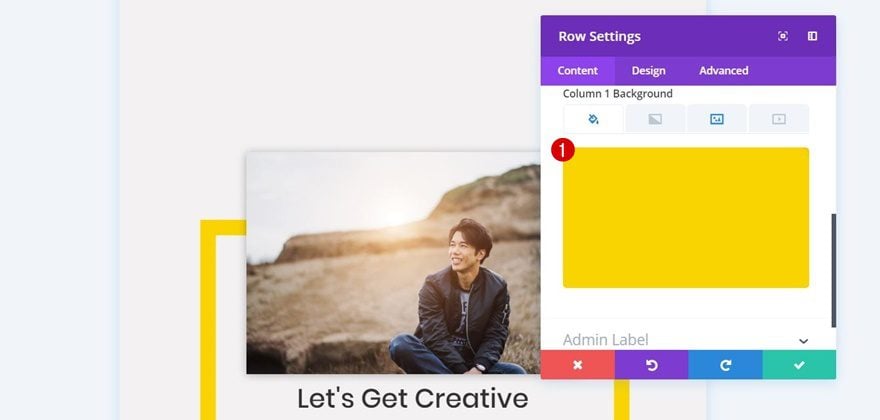
Column 1 Background Color
Add a background color to the first column as well. In this case, we’re using ‘#f9d400’.
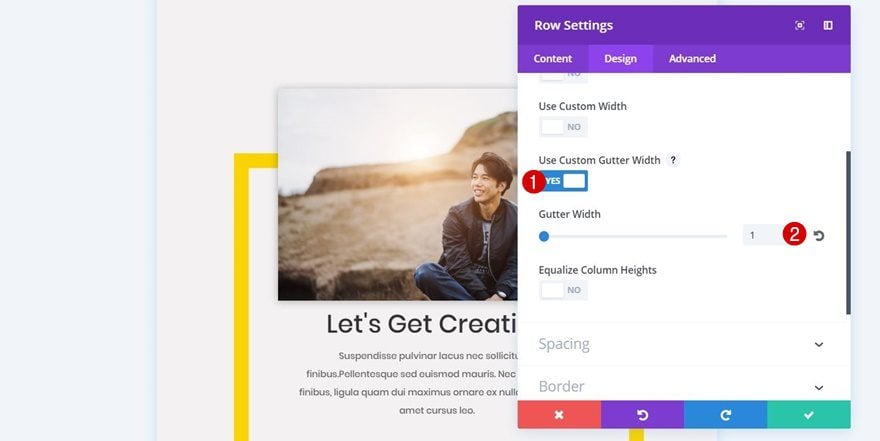
Sizing
Next, open the Sizing subcategory within the Design tab of your row, enable the ‘Use Custom Gutter Width’ option and use a Gutter Width of ‘1’.
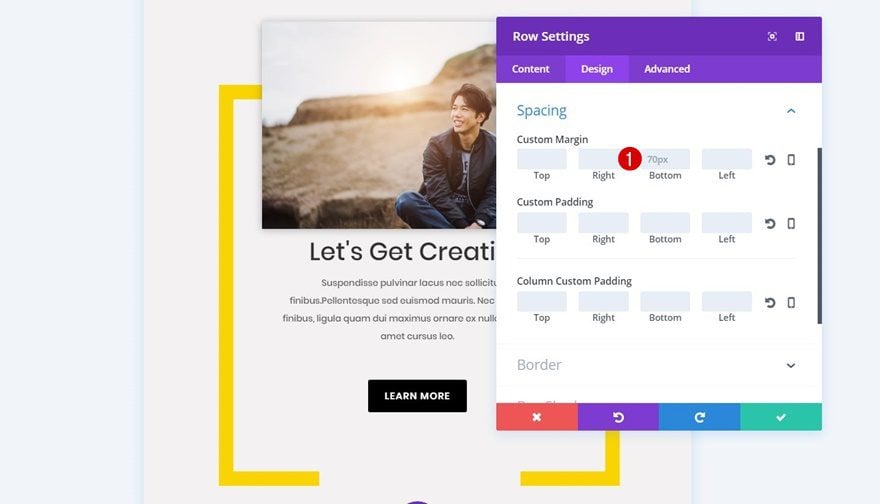
Spacing
To keep some space between this row and the next row you’ll create, add ’70px’ to the bottom margin within the Spacing subcategory.
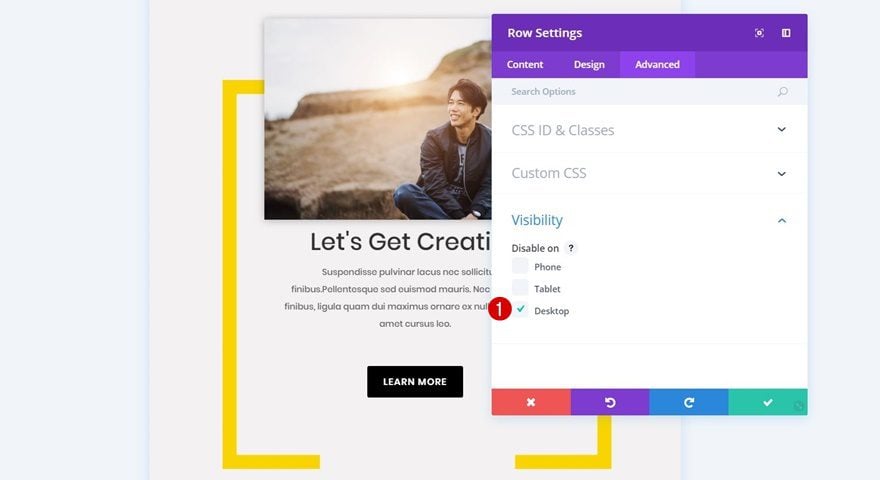
Visibility
Lastly, disable this row on desktop.
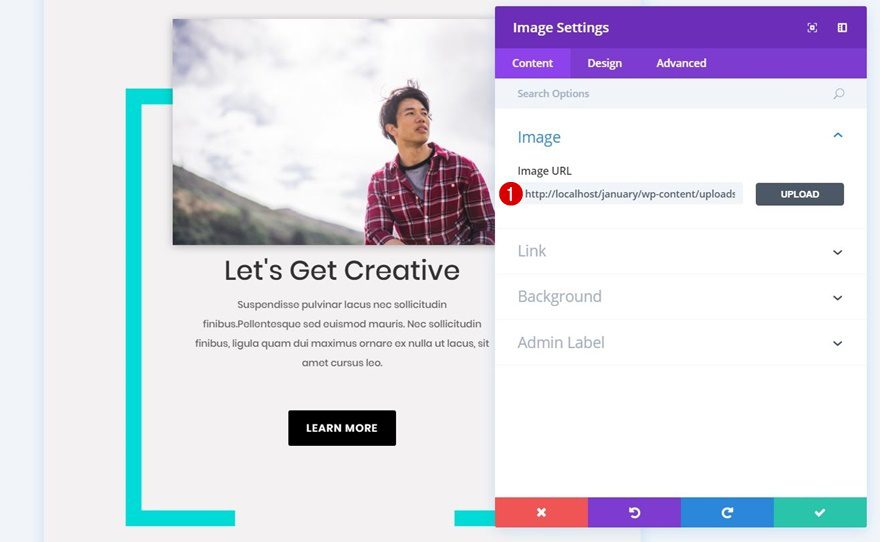
Add Image Module
Upload Image
The first module you’ll need to add to your row is the Image Module.
Sizing
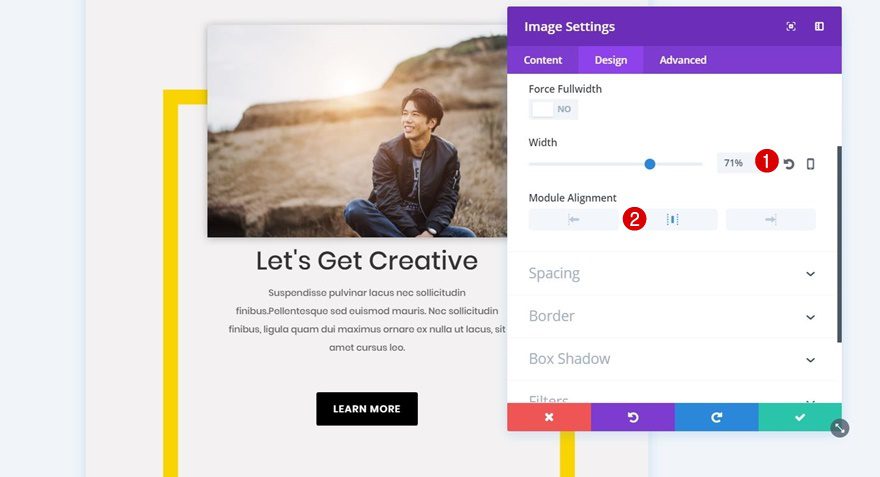
After choosing the image you want to appear, move on to the Design tab, open the Sizing subcategory and use the following settings for it:
- Width: 71%
- Module Alignment: Center
Spacing
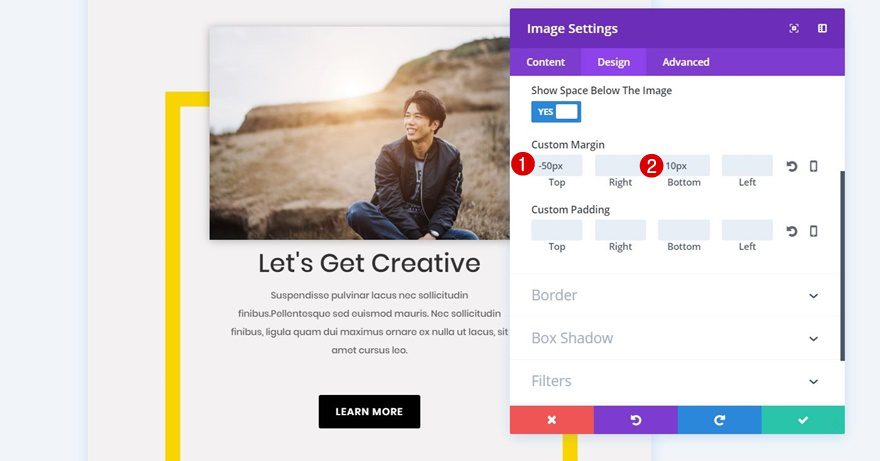
We want this Image Module to overlap with the square background image. For that, we’re going to use the following custom margin for the Image Module:
- Top: -50px
- Bottom: 10px
Box Shadow
Lastly, we’ll apply some Box Shadow to this Image Module as well. We’re going to use the first option in the row without making any changes to the default values.
Clone Text Modules & Button Module of Desktop Version
Change Text Size & Text Orientation of Title Text Module
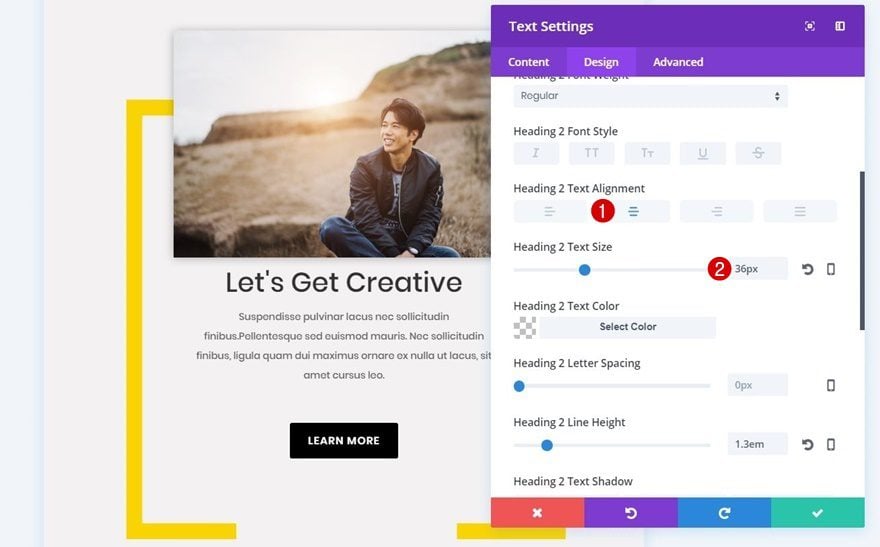
Clone the Text Modules and Button Module of the desktop section and place them right below the Image Module you’ve just created. You’ll need to make some additional settings to match the tablet and phone screen size, though. The first changes you’ll need to make to the Heading Text Subcategory of the first Text Module are the following:
- Heading Text Alignment: Center
- Heading Text Size: 36px
Remove Spacing of Title Text Module
While editing the title Text Module, open the Spacing subcategory and remove all of the custom margin that’s present.
Change Text Orientation of Body Text Module
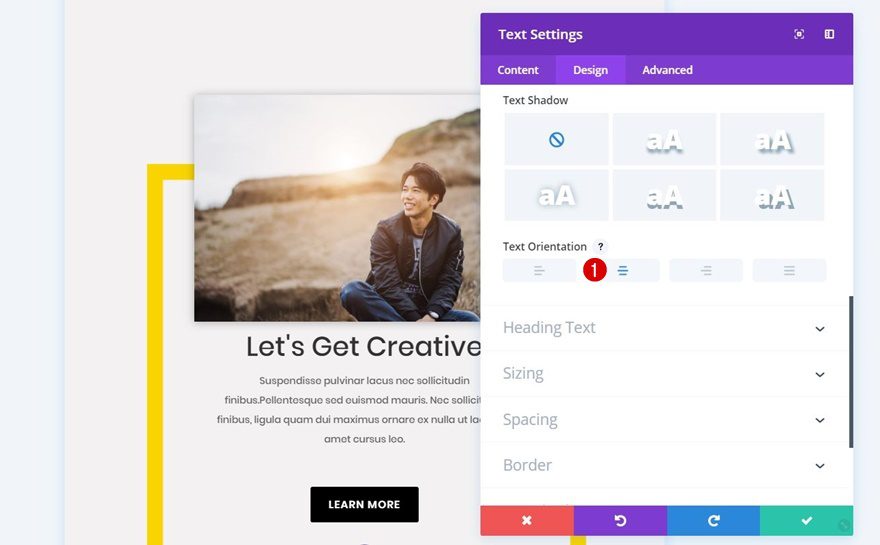
Next, open the body Text Module and change the Text Orientation to ‘Center’ within the Text subcategory.
Change Sizing of Body Text Module
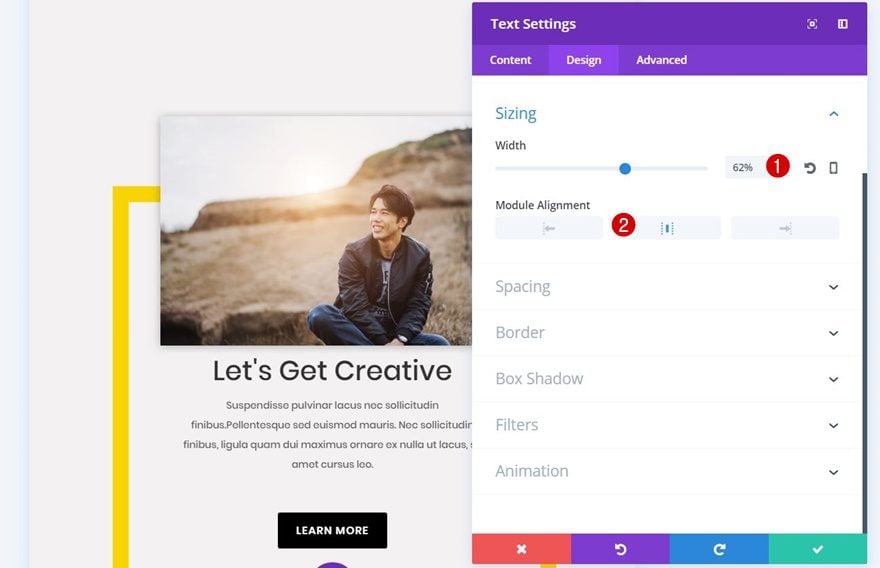
The Sizing subcategory of this Text Module will need some modifications as well:
- Width: 62%
- Module Alignment: Center
Change Spacing of Body Text Module
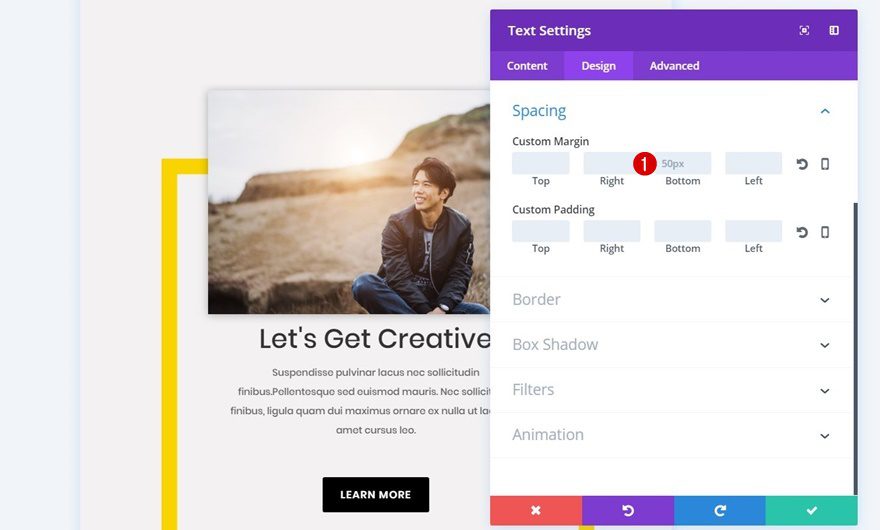
Lastly, the only value within the Spacing subcategory that is needed is ’50px’ for the bottom margin.
Change Alignment of Button Module
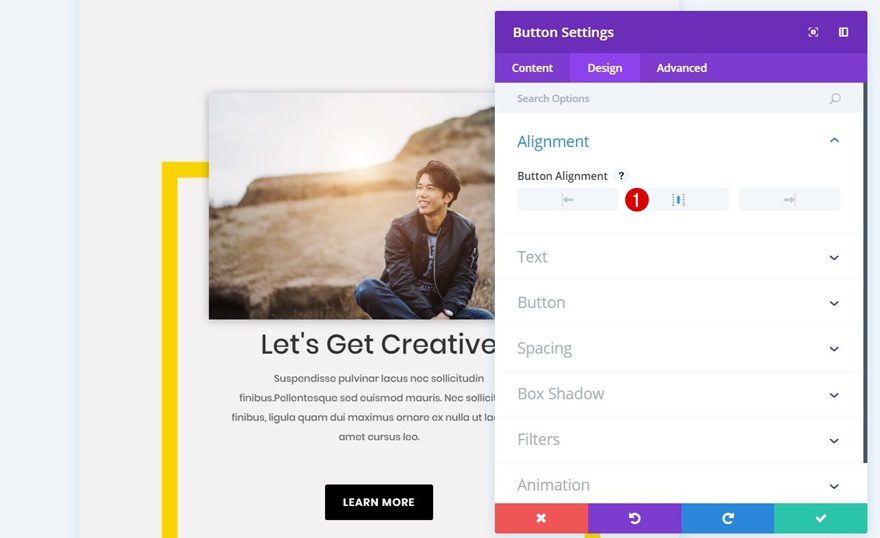
The Button Module is the last module we’ll need to change. The first thing you’ll need to do is change the Button Alignment into ‘Center’.
Change Spacing of Button Module
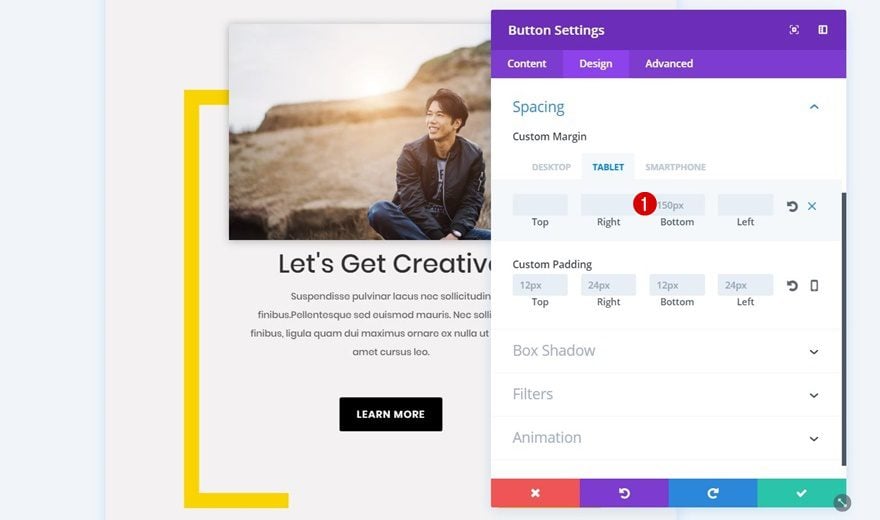
Then, make sure ‘150px’ bottom margin is the only value you use for the custom margin of your Button Module.
Clone Row
Change Column 1 Background Color
Now that you have the first row in place, you can clone it and change the column 1 background color into ‘#00dbd7’ or any color of your preference.
Change Image Module
Change the image within your Image Module within your row as well to create two unique calls to action for tablet and phone.
Result
Now that we’ve gone through all of the steps, let’s take a final look at the result on different screen sizes.
On Desktop

On Tablet

On Phone

Final Thoughts
This tutorial shows you how to create a vibrant CTA section by combining Divi’s built-in options and Photoshop. You can use the CTA section that’s been recreated within this tutorial for any website. If you have any questions or suggestions, make sure you leave a comment in the comment section below!
The post How to Create a Vibrant CTA Section for Your Next Project with Divi appeared first on Elegant Themes Blog.
