There are three major issues that come up when someone starts down the path of being a podcaster. They need to know where to host their podcast (generally Blubrry or Libsyn), what software to use to get the best sound quality, and how to record interviews. It’s weird how convoluted getting a good interview recording can be . I mean, it’s so easy to talk to people online by VOIP. FaceTime, Skype, Discord, Google Duo, Facebook Messenger…all of these options and more are free and right at our fingertips. But if you want to record them? Not a lot of options, and even fewer good options. Thankfully, there’s Zencastr.
What in the World is Zencastr?
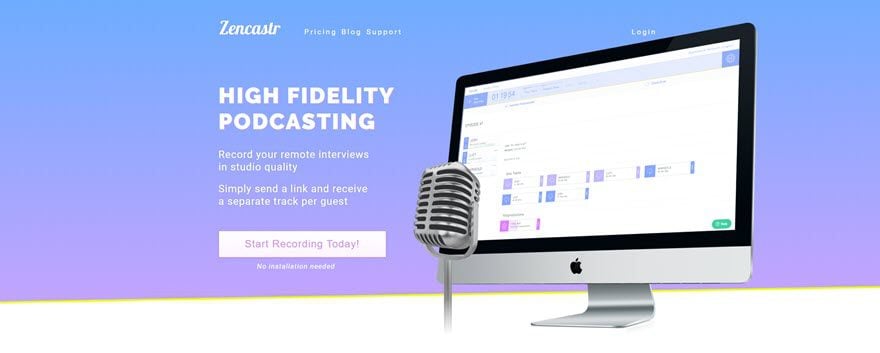
I love the name Zencastr because it’s one of the most appropriate names I’ve ever seen for a piece of software. It makes podcasters so chill, they’re downright Zen. Don’t believe me? You’ll see.
Zencastr is a really simple concept: you and a guest (or guests) get on a voice call through your browsers. Zencastr then records local audio from each person and uploads it to Zencastr’s servers. The host can then download either the individual tracks to splice together, or the software can do it for you automagically. Not to mention there are some post-processing effects available for you, too, like volume leveling and noise/hum reduction.
Oh, and the best part? Neither you nor your guests have to install a single thing. It’s all cloud-based. Not even a browser extension.
Sold yet? Cool. Me, too. So let me break this down for you, so you can break it down for your guests.
Starting Up
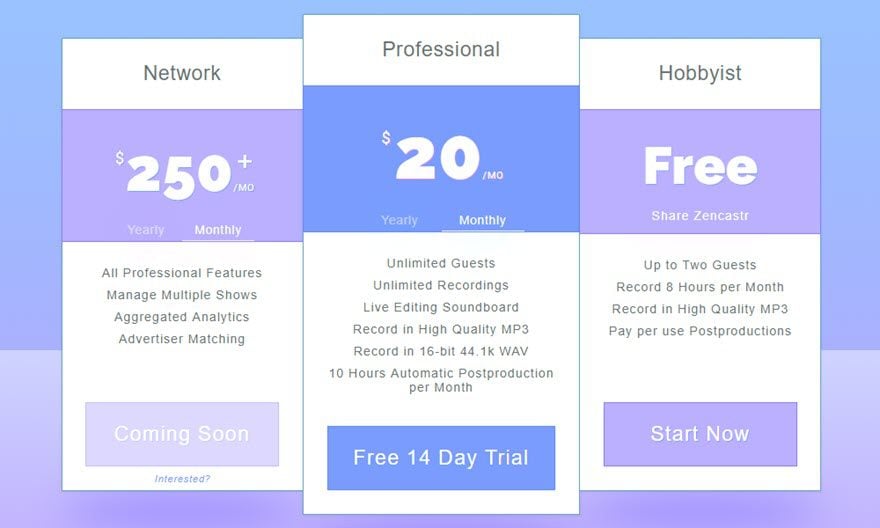
Getting started with Zencastr is honestly as simple as opening your browser. You will need an account to use the service (but none of your guests do! How cool is that?), and while there are paid tiers, the free option (Hobbyist) has a ton of options. Unless you need the lossless .WAV recording or to record more than 8 hours of guest/co-host podcasts a month, you’re fine on free.
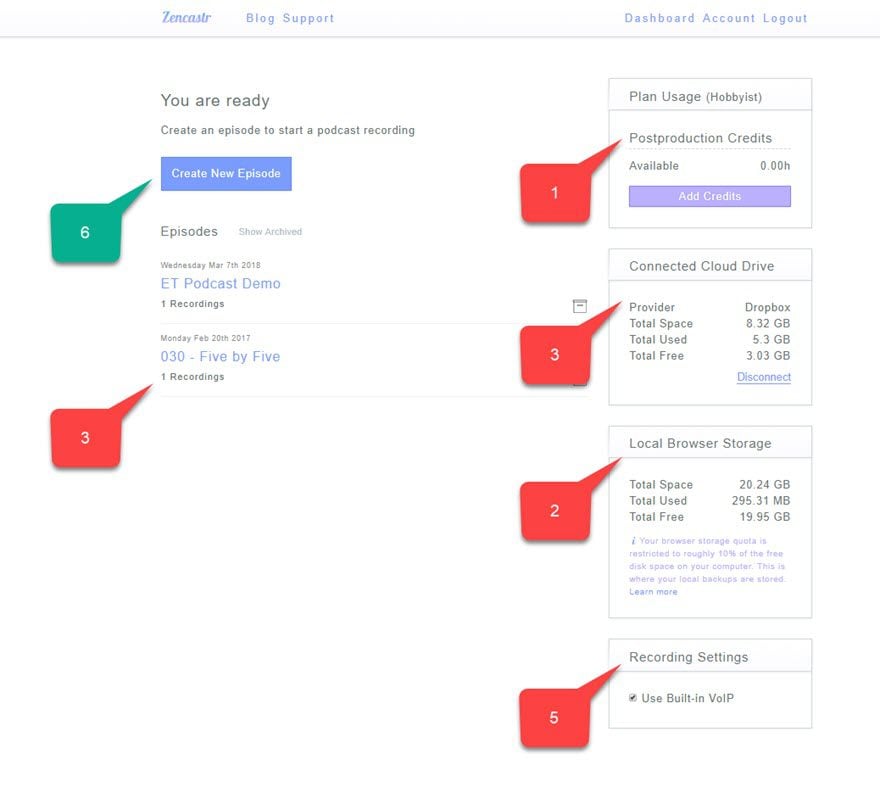
Once you’re signed up and logged in, you should be taken to your dashboard. You’ll see not only the simplicity that is Zencastr, but also all the cool stuff it does.
- post-production credits to the upper right,
- browser’s storage limit (where the recordings are temporarily stored prior to upload)
- a list of previous and scheduled recordings
- cloud drive storage (Google Drive or Dropbox) for export (Zencastr doesn’t keep the recordings forever)
- built-in VOIP toggle (in case you want to do the talking with Skype, for example, but record with Zencastr)
- And, most important of all, the Create New Recording button near the top.
Recording an Episode
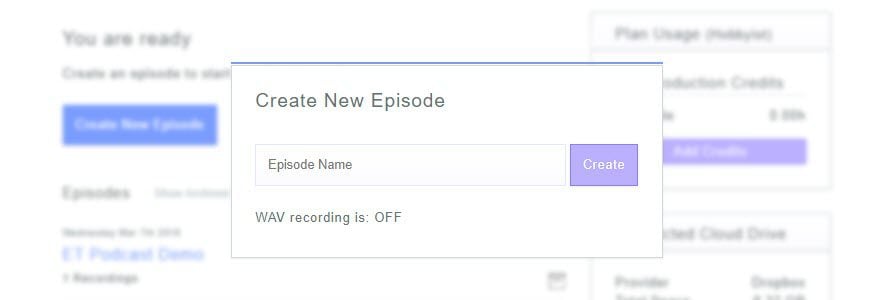
Whenever you click the Create New Episode button, a modal will pop up asking you to name the episode. Keep in mind, this is just for you to keep things organized, and it has nothing to do with the episode’s final, published title. So you can name this anything as ridiculous or as boring as you’d like.
The first thing that will happen is that your browser will ask for microphone access. Everyone involved will have to do this (obviously). If you don’t, Zencaster will not even let you into the session.

After that, you’re almost ready to record. Just check the settings gear in the upper right corner to verify your input/output devices. You folks who’ve been podcasting for a while know the pain of recording a whole episode on the wrong mic. So it’s always a good idea to check. When you’re ready to talk with your guests or co-hosts, just hit the Invite button, and you can send the link that pops up to anyone you want to join (remember, Zencastr limits the number of people who can be in a single call by payment tier – 2 guests for free Hobbyists).

When your invitees click the link you give them, they will be prompted to put in their name. No registration, nothing. That’s all on you. The guests have two clicks and they’re good — the link itself and the join button. When they get in, the guest dashboard will look exactly like yours.

When everyone is connected, y’all can talk and get ready without the mics being hot. It’s just a typical VOIP call when you’re off-air. Once you’re ready, only you (the host) can hit record. You’re live! Now you can all marvel at the waveforms dancing across your screens screen in real time.

Signing Off
When it is time to sign off and go off-air, you just press the Stop Recording button, and it goes back to a normal VOIP call. Remember that you as the host are the only one who can start and stop recording. And when you’re finished with the pleasantries and saying your goodbyes and thank yous, the host can then choose to end the call completely and hang up.
As things wrap up when recording is stopped, Zencastr starts to do its thing. Local tracks get sent to the cloud. Be sure to let your guests know to keep their browsers open long enough for Zencastr to complete the media uploads. (It usually doesn’t even take a full minute in my experience, but they gotta stay open even if the call has ended.)
Once they’re finished floating upward to the cloud, you can start doing your business. Each person can download their own files, but only the host of the call can download files from other people.

For your guests and/or co-hosts, they are done. They just have to be patient enough for the host to edit and publish the podcast so they can shout it out to their audiences to boost the signal.
For the host, though, you have a few more steps (but not many, really).
Final Steps for Hosts
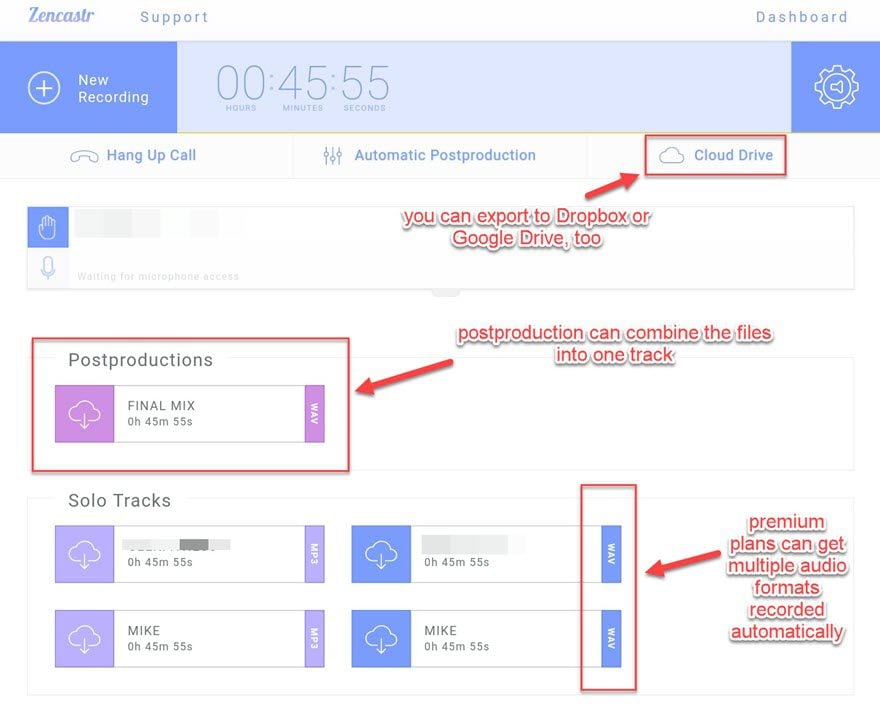
If you have a paid plan or purchased credits, you can use the Automatic Postproduction tab. When you run the enhancements, you will get a Final Mix file based on the formats you ran through (I did the .WAV files in the example above, so a .WAV file was the output.) If you still want the separate tracks, just check the Separate WAV Tracks option under Advanced Options in the modal.
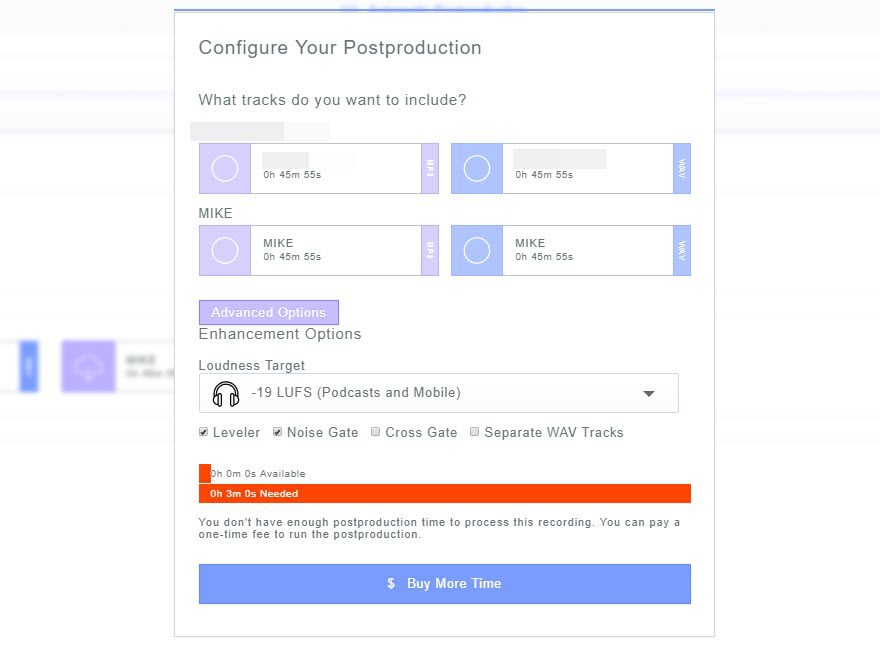
As much as I love Zencastr, there’s not a lot of reason to pay for the postprocessing a la carte. If you’re on a paid plan, absolutely do it. It’s amazing, and you’re paying for it anyway. But if you’re a freebie user, here’s what you do.
- Download the separate audio tracks
- Use Audacity to sync up the tracks’ time signatures and export them as a single .mp3 file
- Then use Auphonic to run their automated leveling and noise reductions
Yes, you can do the leveling and noise reduction in Audacity or your DAW as well. I tend to suggest Auphonic because getting the levels right in the DAW can take a little more tweaking than trusting the presets (though you get much finer control), and some people (read: me) are lazy and don’t want to deal with that noise — literally.
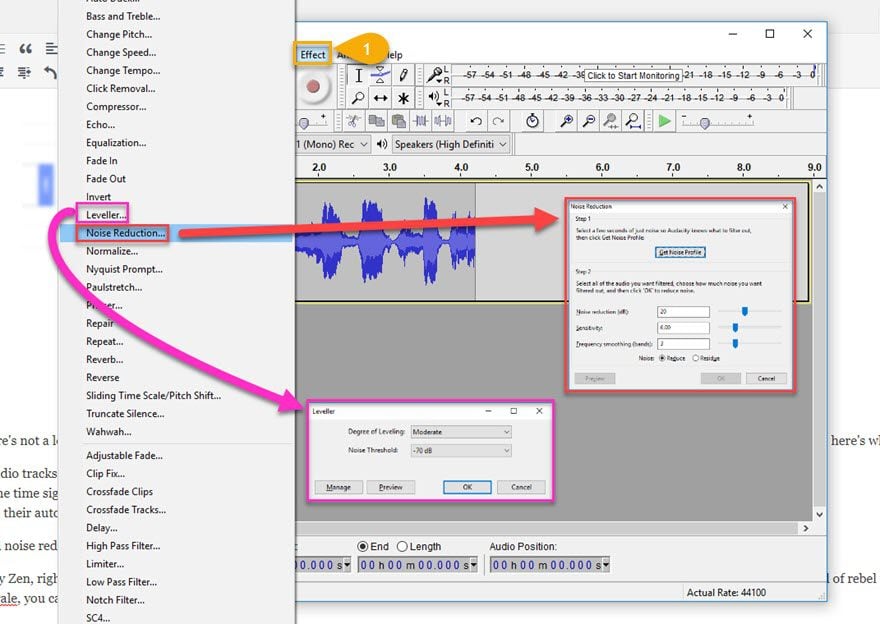
Either way, you’re done with Zencastr at this point. Your own workflow will differ as you get the episode ready to publish, so you might have a lot of work ahead of you. Unless you’re a rebel like me and tend to throw my solo casts into the wild au naturel. But in terms of the actual recording process with Zencastr…pretty Zen, right?
In Conclusion
Zencastr is a great way to record podcast interviews while avoiding some of the most common setbacks and pitfalls of other popular options–like Skype, Hangouts, and other popular services paired with separate recording software. But of course, only you will know if this is the right solution for what you’re trying to do.
What is your favorite way to record podcast interviews? Let’s share our favorite in the comments!
Article featured image by tynyuk/ shutterstock.com
The post How to use Zencastr for High-Quality Podcast Interviews appeared first on Elegant Themes Blog.
