WordPress is constantly being updated. Automattic and the WordPress Core Contributors are dedicated to bringing new features, security fixes, and quality-of-life improvements to all of us on a regular basis. The same can be said for plugin and theme authors, too. Developers are always trying to smooth out as many wrinkles as they can. And it’s a great thing to have the newest software. As long as you know what to expect from the new versions.
Some WordPress users see an update is available, and they automatically install it. Others are wary of any update. They are afraid the slightest change in their files will cause an avalanche of bugs, glitches, and crashes. These folks rarely if ever installing new releases and running on legacy software until it just stops functioning. Neither of these approaches is really a best practice, so we want to talk about how to manage WordPress updates safely and easily.
But First…Backup!
Anytime there’s a pending update, make sure that you run a backup of your site. If you’re using UpdraftPlus or a similar plugin, the whole process is quick and painless. Doing this will save you a lot of time if there is any kind of incompatibility with whatever update you run. Being able to restore from an update from mere minutes/hours ago will result in the easiest cleanup and as little data/revenue loss as possible.
And Second…Know What The Updates Mean
Once you’re backed up, you’re ready to click that Update Now button. Updates can be a little scary. And lots of WordPress users aren’t aware of the differences between major updates and minor updates, or how to read the changelogs and release notes that come with each new piece of software. We’ve put together an easy-to-understand overview of the differences and how to read this kind of documentation. You can make sense of this even if you’re not a dev or that technically savvy. We promise.
How to Manage Your Updates with Easy Updates Manager
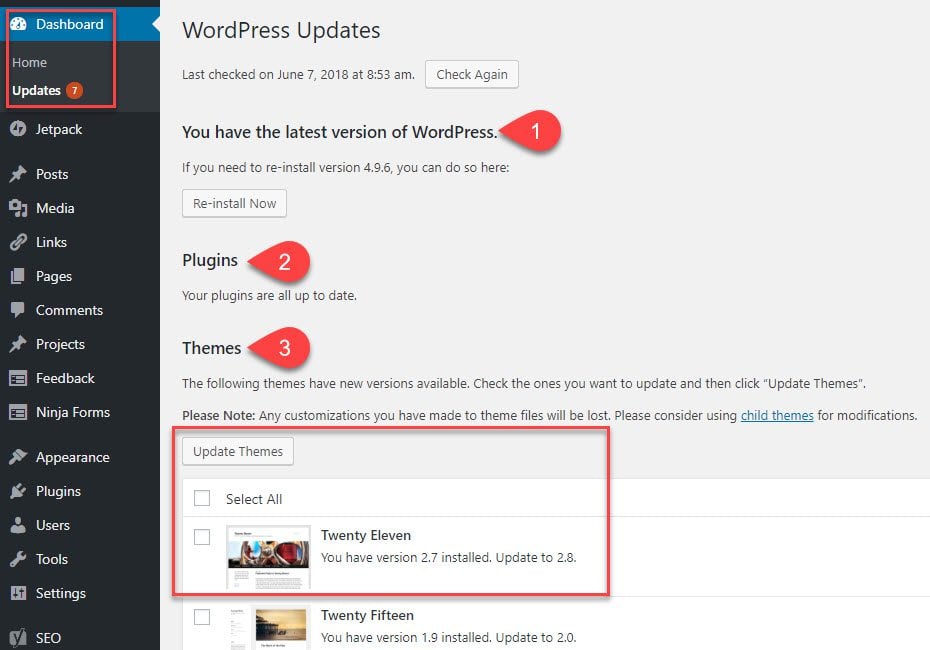
You’re probably used to seeing an update screen like this, where all your theme, plugin, and core updates are listed at once. For most people, they’ll check this box, click Update Themes, and move on with their lives.
Or maybe you update your plugins from the Installed Plugins menu.

You may even see individual updates from your grid of themes where you can pick and choose which parent themes to update.
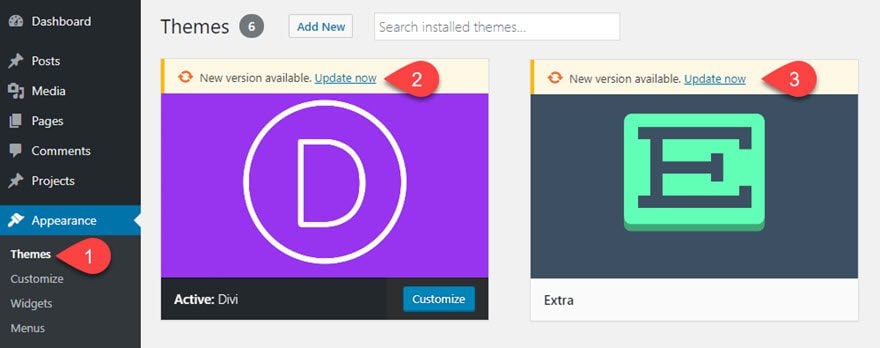
And outside of those three screens, you don’t get a lot of options. Any of your admins have the ability to run the updates whenever they want. That’s one method, sure. We are going to dig into the Easy Updates Manager plugin so we can get a little more control.
Install the Plugin
Just head over to the WordPress.org repo and download the plugin. You can also add it from your WP dashboard under Plugins – Add New.
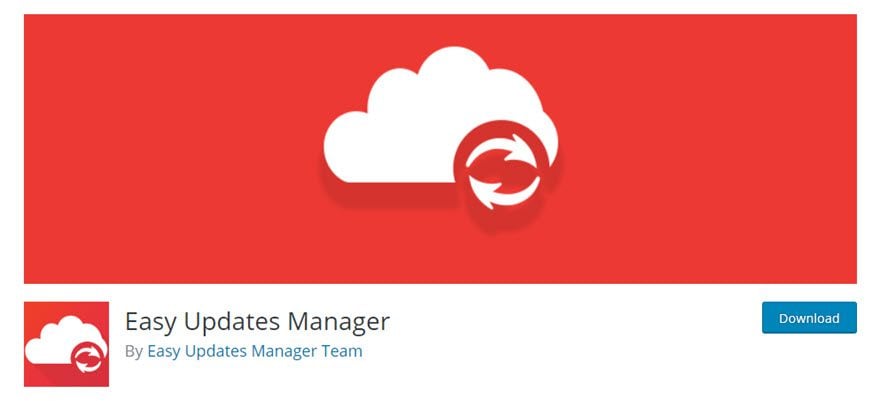
Once it’s activated, you will have a new menu item under the Dashboard heading called Updates Options. Inside,the controls you get for managing all of your WordPress updates are in four tabs. General, Plugins, Themes, and Advanced.

General Update Settings
The General tab deals with WordPress Core updates, rather than individual themes, plugins, and user permissions — all of which you’ll want to tweak to your liking.
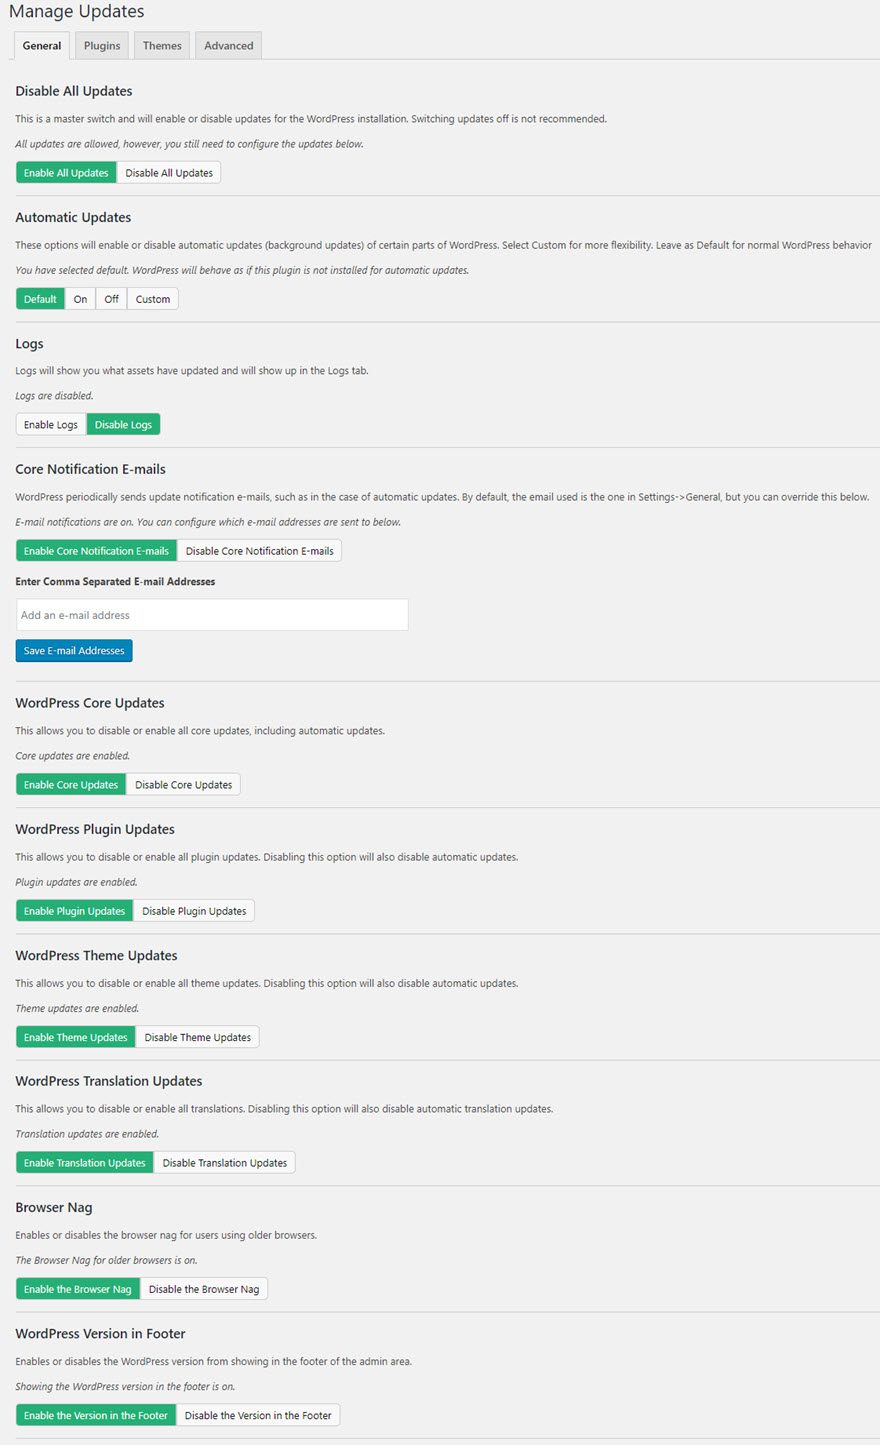
The first toggle you see is Disable All Updates, which is the master switch as the devs put it. With it off, nothing at all will update. Nothing. No plugin updates, no themes, and no new WordPress versions. With this option enabled, you won’t even see pending updates, even if you’re an admin. (You can still install new plugins and themes, however.)
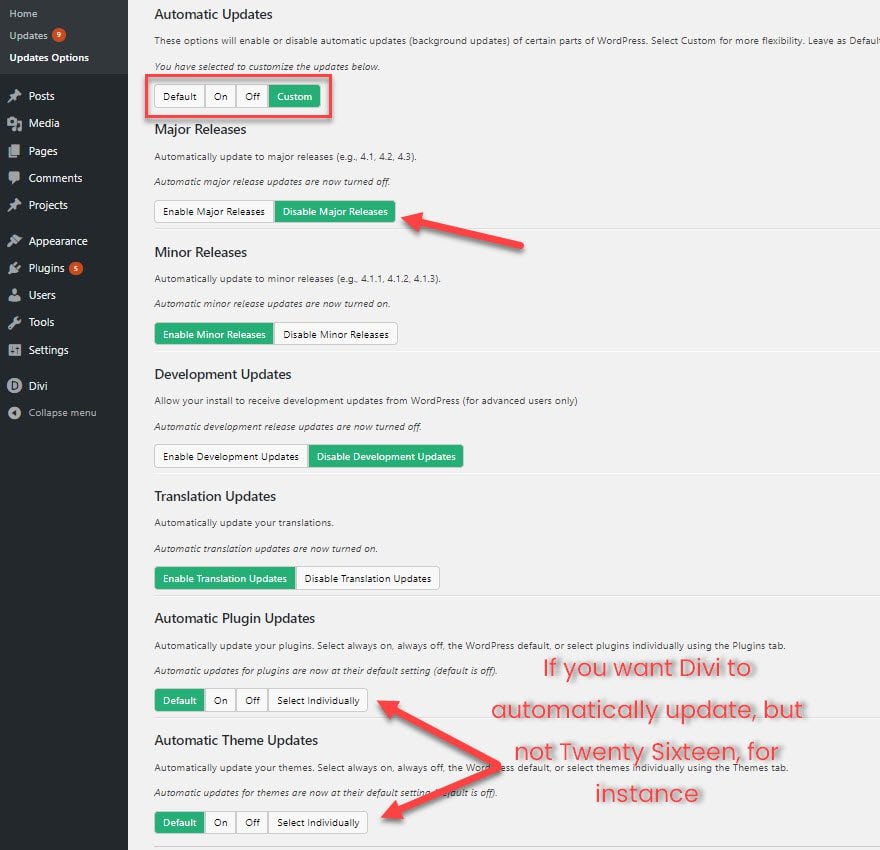
That’s kind of the nuclear option, though. You will likely want to keep it enabled and use the Custom toggle under Automatic Updates. You will choose between Major, Minor, Plugin, and Theme updates. When the options mention major and minor updates, this is what they mean: Major updates are full point releases (4.8, 4.9, 5.0), while Minor ones are security and maintenance updates (4.9.2, 4.9.6). Remember to read about the differences in point releases here, so you can make the right decision for your site.
Many sites opt to disable automatic updates for major releases (such as 5.0 which contains the controversial Gutenberg editor), but allow minor releases (such as 4.9.6 that included GDPR compliance features and security fixes that all users need). And if you’re really interested in the pros and cons of automatic updates, we did an overview of what you need to consider that’s definitely worth a read.
Plugin and Theme Update Options
Additionally, you will be able to choose which themes and plugins automatically update, and which ones won’t. You will make the individual choices in the Plugins or Themes tabs. You might opt to have plugins such as WordFence and WooCommerce to automatically update since they’re integral to running your business effectively, while keeping plugins like Jetpack or User Switching for manual updates during scheduled maintenance times.
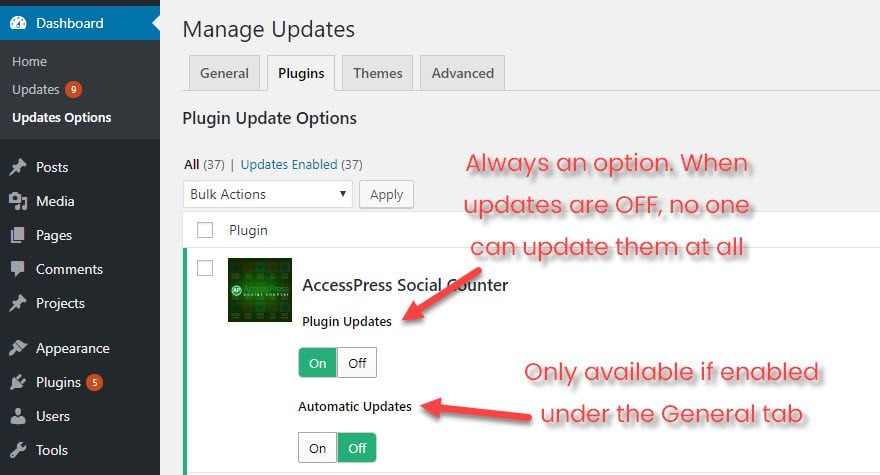
It’s really within these tabs that your WordPress update management comes into play. Where the General tab was just that, the Plugins and Themes tabs let you manage exactly how your site should be run. In both of these tabs, you have the options of enabling or disabling manual and automatic updates for any plugin or theme. It can be active or inactive, as long as it’s installed. You will need to check the Select Individually option under the Automatic Updates sections of the General tab (see the previous image) to make the Automatic Updates toggle appear.
Update Options
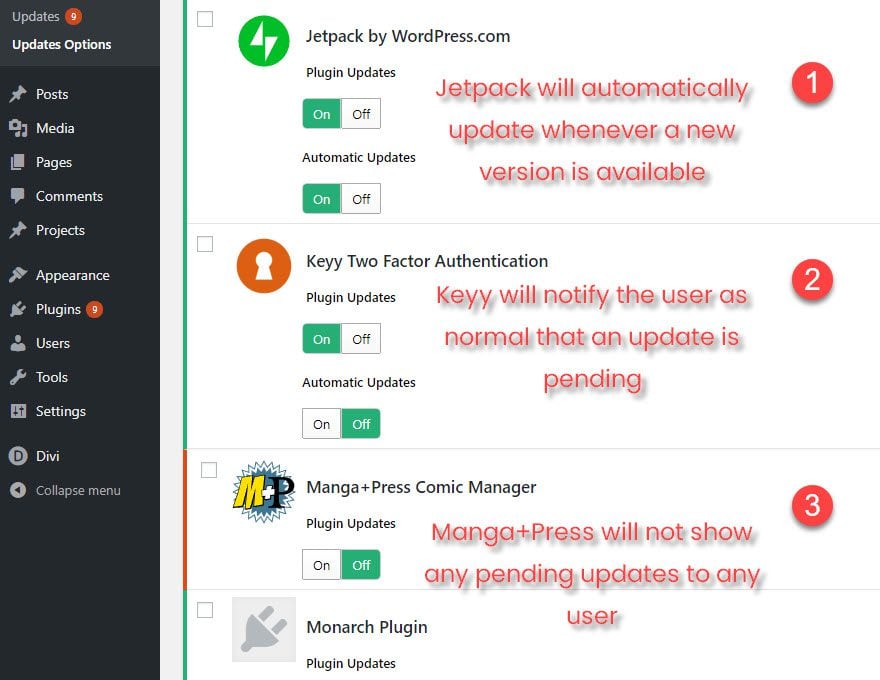
When you get into the Plugins and Themes tabs, there are three options for how you manage your plugins and themes.
- Updates: On, Automatic Updates: On
- Will automatically update whenever a new version is available
- Updates: On, Automatic Updates: Off
- Will notify the user as normal that an update is pending
- Updates: Off, Automatic Updates: N/A
- Will not show any pending updates to any user
Okay, technically there is a fourth option: no updates at all, for anything. If you have disabled Theme Updates in the General tab, you will see this flag. It indicates you have overridden any individual update settings.
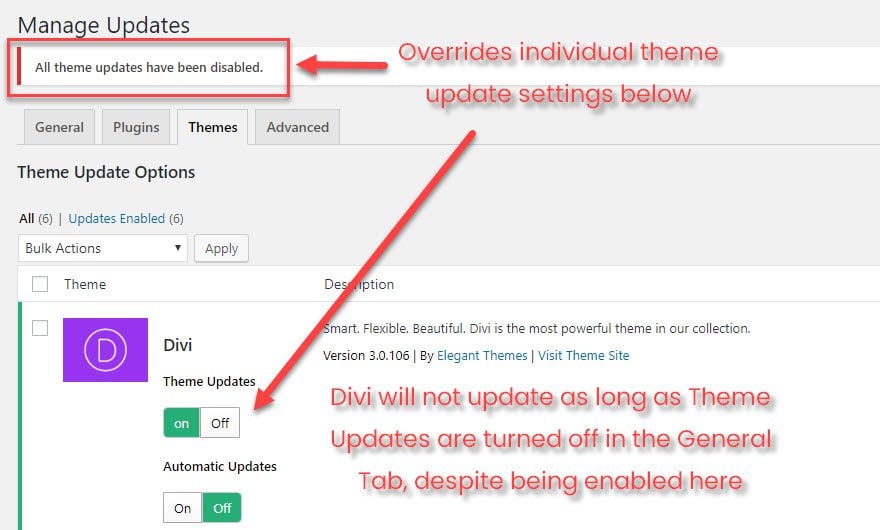
To enable the individual controls once again, adjust the settings under the General tab.
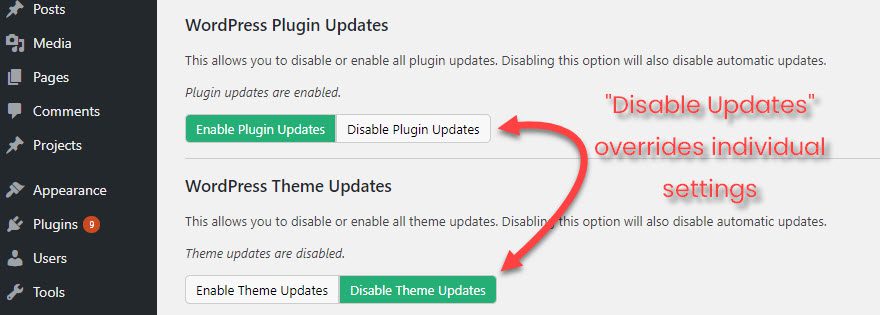
Within those three four options, you have nearly total control over how to manage your WordPress updates. Nearly total. The Advanced tab takes care of the rest.
Advanced Update Options
While the Advanced tab does have more than one option, pay attention to Exclude Users. The others are Force Automatic Updates for debugging (your one-stop, update-everything override button for all your other settings), Enable Logs so you can keep track of your update data and metrics, and Reset Options, which is pretty self-explanatory. They have their uses. They are just niche uses.
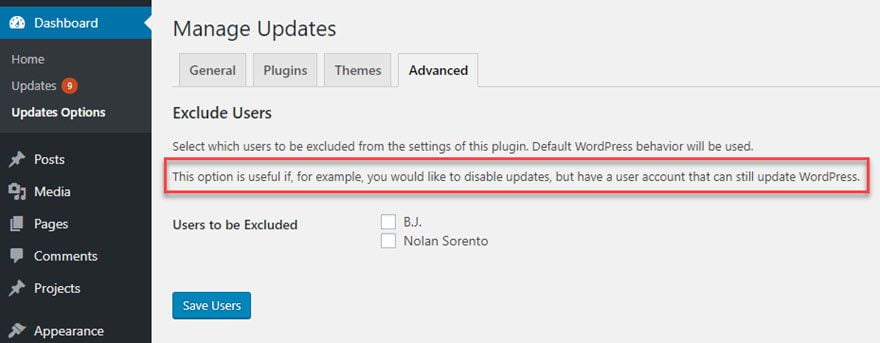
With Exclude Users, however, you can exclude specific users from the settings of this plugin. Basically, you can disable all updates so that nothing ever appears to be out of date. Except to anyone here whose box you check. As long as their box is checked, that user is excluded from the settings of the plugin. So if you have a site with multiple administrators, but only one needs the permission to update the site, check their box. They will be able to conduct business as usual. The other admins will be blissfully ignorant that any updates are even pending.
It’s Easy to Manage WordPress Updates
So with a plugin installation, a few check boxes, and a couple of toggles, your can manage WordPress updates as perfectly as possible. Important updates go through automatically, the ones that can hold off get held off, and that not everyone who could update the site can.
Managing updates with WordPress can be pretty scary when you remember that letting even a single incompatibility through can wreck your whole site. But with Easy Updates Manager, your plugins, themes, and core files are secure under as much control as you want.
What method do you use for managing WordPress updates?
Article Featured Image by ProStockStudio / shutterstock.com
The post How to Easily Manage Updates for WordPress on a Single Install for FREE appeared first on Elegant Themes Blog.
