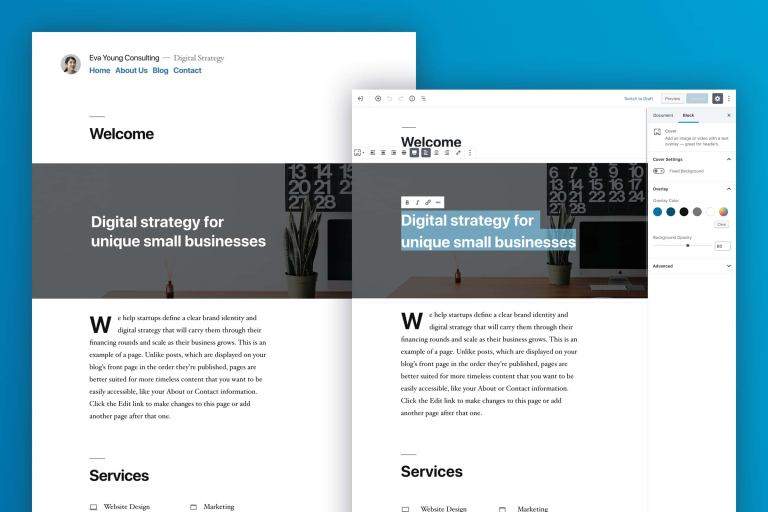
WordPress 5.0 was released on December 6th, 2018, replacing the classic content editor with the new block editor, also referred to as Gutenberg.
The easy-to-learn, user-friendly block editor has a lot of options for people who want more flexibility over their design. Improvements were made on the back end to help ease and streamline design, which creates better-looking content for the viewer. The block editor has also solved some annoying design issues that came along with the classic editor. The almost-non-existent learning curve is good news for WordPress newbies, but the block editor also speeds up the process for pros.
A WordPress 5.0 overview wouldn’t be complete without talking about the new default theme, Twenty Nineteen. This theme is specifically made to work with the block editor. Newbies should experiment with the Twenty Nineteen theme to get a well-rounded experience. You can always switch to another theme once you’re ready to create something that’ll go live.

Classic Editor vs. Block Editor
The classic editor was a text editor that resembled Microsoft Word in terms of its formatting buttons.

The pillars of this WordPress 5.0 overview are the content blocks. The new editor uses content elements in blocks to add content to your post, design the layout and easily move the blocks around however you want.

There are blocks for all sorts of content, including audio, images and galleries, lists, paragraphs, and videos.

If you can’t find what you’re looking for in the native editor, there are plugins you can install, too, like Advanced Gutenberg, Atomic Blocks and Stackable. You’ll be able to access blocks for creating a post slider, adding testimonials and featuring content.
Getting Started with the Block Editor
If this is your first WordPress 5.0 overview, it’s important to know that you’ll have the option to test the new block editor or stick with the classic editor.

Even if you do update (which we recommend), there’s still a way to use the classic editor through 2021.

When you use the block editor for the first time, there’ll be a walkthrough to help you learn the ropes.
If you switch to the block editor and then decide to switch back, hover over Plugins on the left sidebar and click Add New. Search for “Classic” on the top right. This is the plugin you want to install:

Click Install Now, then Activate. Now, when you go to your posts, you’ll see the classic editor. To switch back to the block editor, go to Plugins and then click Deactivate under Classic Editor. Now you’ll see the block editor when you go to a post.
Benefits of the Block Editor
The block editor makes it easier to create aesthetically-pleasing, modern posts, and you can go heavy on the multi-media if you want. According to WordPress, other benefits include doing more with fewer plugins, having your website work across all devices and screens, and creating blog posts that closely resemble your website.
The classic editor required you to install a plugin for certain content types, like tables. With the block editor, these content types come standard.

If you create websites for clients, the block editor lets you create a custom, reusable block. Clients can then add content on their own without damaging the look of the website.
There are benefits for developers, too:

Using the Block Editor
In this part of our WordPress 5.0 overview, we’ll go through the basics of how to use the block editor when creating a post. You can also use the block editor to create a page.
Create a New Blog Post
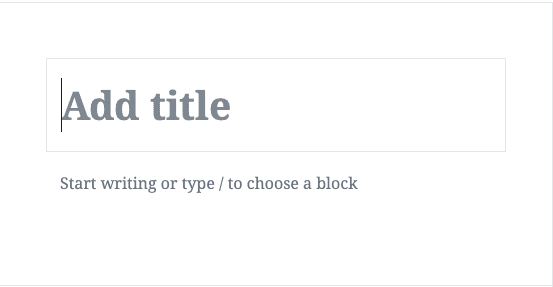
Go to Posts in the left sidebar, then click Add New. That will bring up a blank blog post page with the block editor. It doesn’t look like much yet, but you’ll quickly see how to use it.
Adding and Arranging Blocks
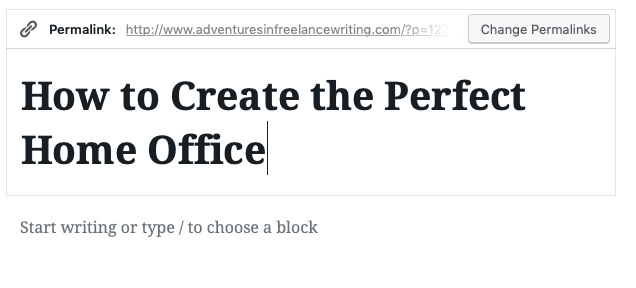
The first block, which is standard on every post, is the title. Just click Add Title to start typing.


To get to the block below the title, which is a text block, you can either click it with your mouse or use the tab key.
You don’t have to use text here, though. Click either the plus sign in a circle on the left side or one of the icons on the right side, which symbolize table, photo and text.

Clicking the plus sign on the left brings up the most used blocks and a search bar to find one that isn’t listed. Scroll down to see blocks grouped by category, too.

You can also add a block between two blocks. Hover over the block below where you want to add a block and move your cursor to the top center of the block. A plus sign will appear, letting you add a block here the same as you do elsewhere.

Alternatively, you can click on any block and then open the advanced settings in the toolbar. You’ll have the option to add a block either above or below the block you’re currently on.

If you want to rearrange the order of the blocks, hover over the block, which will show up and down arrows. Note that you can’t move a block above the headline at the top of the post.

If you want to know what type of block you’ve added, clicking on it will show the type of block on the top right.

Customizing Your Blocks
Let’s add text to the first block under the headline. As you start typing, a toolbar will pop up. There are also several settings on the right for further customizing the text. I enlarged the font, made it bold and white, and gave it a black background.

I then decided to remove the text and add a photo instead.

Just like with the text, you can access a toolbar and settings specific to this type of media.

Also, there are advanced toolbar sidebar settings you can play with. Access them by clicking the three vertical dots.

If you prefer to have this toolbar at the top of the editor, click the three vertical lines on the top right of the page and then check Top Toolbar.

If you want to get rid of the sidebar customization options, click Hide Block Settings in this menu. This will give you cleaner interface to work with.

Creating Reusable Blocks
When you create a block that you love or that you know you’re going to use over and over, you can save it. Click the block, open the advanced toolbar settings and choose Add to Reusable Blocks.

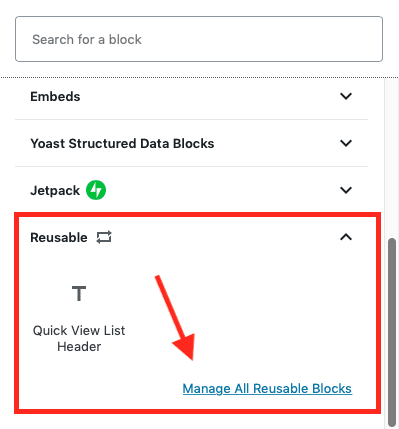
You can then title the block and save it. When you want to insert the saved block into a post, add a block as normal, scroll to the bottom of the menu and select Reusable. This will show all of the blocks you’ve saved and let you add them to your post.

To edit a block, click Manage All Reusable Blocks.

Removing Reusable Blocks
Let’s say you create a reusable block that you no longer want saved. Opening the toolbar settings gives you the option “Remove from Reusable Blocks.” However, choosing this doesn’t just un-save the block from Reusable Blocks, it removes the block from this post and any posts or pages it’s on.

Choosing Manage All Reusable Blocks also doesn’t give you the option to un-save the block as reusable while still keeping it in your posts.
For now, the safest bet is to keep all of your reusable blocks, even if you don’t use them anymore. You can rename them something like, “Unused 1” and “Unused 2” for organization.
Deleting Content Blocks
To delete a block, just click on it and press delete on your keyboard. You can also pull up the advanced settings and click Remove Block. What you don’t want to do is what I accidentally did: think you’re still clicked on a block and choose Move to Trash on the right sidebar – this trashes the entire blog post.

Helpful Blocks to Check Out
The new block editor makes it much easier to add certain types of content that the classic editor struggled with. We wanted to make sure our WordPress 5.0 overview talked about three blocks that solve previous design problems.
Buttons
Before, adding a button meant either using a plugin or writing HTML. Now, you can choose the Button block, add your text and a link, and customize the colors and style.

Multiple Columns
This may be my favorite block because you can create side-by-side content or a magazine-style post. The Columns block lets you make two columns, which you can then add all types of content to: images, lists, text, etc.

Columns are separated into blocks, just like the rest of the post. By clicking on the plus sign, you can decide what type of content you want there.

I added headers to both columns, created a list on the left and then added green font with a drop cap on the right.

Side-by-Side Image and Text
One thing that was always a pain with the classic editor was formatting text next to an image. The block editor has a block specifically for that, called Media & Text (if you search for it, use the ampersand – writing “and” doesn’t bring it up).

You can add an image and then text next to it, and the size of the text will change depending on how much is written per line. You can edit this in the sidebar settings if you want.

Document Options and Publishing
Since the right sidebar now includes block customization options, you may wonder where the metadata settings went. Just click Document on the top to access them.

Certain plugins will show up above the this menu. For example, my Yoast SEO plugin is accessible here.

In Conclusion
In this post we’ve shown you how to use WordPress 5.0’s new block editor. If you’d like to go a bit deeper, check out this article on how to create Gutenberg templates. And of course, be sure to check back every day for more WordPress tutorials and resources. If you have any questions about today’s post, please drop us a line in the comments below.
Featured Image via supercaps / shutterstock.com
The post An Overview of WordPress 5.0 and the New Block Editor appeared first on Elegant Themes Blog.
