Almost any website you visit these days has a pop-up in the corner offering you help. Someone is waiting to answer your question right then and there. You may even see one in the corner of this very post. That’s because live chat is becoming the go-to method of customer service for online businesses, and Intercom is probably the most popular choice. And for good reason. Using Intercom can increase satisfaction, engagement, and sales.
Intro to Intercom Live Chat
The basics of Intercom are simple: A user comes to your site. A few seconds later, a chat window pops up from the corner to ask if they need help. Just like that, the software connects them to your support team. They don’t deal with email threads, support forums, or putting in tickets. This lack of friction can help eliminate any potential blocks a user may have from closing a sale. If they have a question before they purchase, they can simply ask. It is as close as ecommerce gets to walking up to a counter in a brick-and-mortar shop.
In addition, live chat apps help existing customers get support so that they stay customers. Being able to respond to users’ questions personally and quickly can lower churn rate. And maybe more importantly, refund requests. Everyone wants to feel like they’re being listened to. Intercom live chat goes a lot way to making that happen for your users.
Fundamentally, Intercom’s basic functionality is similar to if you added Facebook Messenger or another live chat plugin to your site. The difference, however, comes in all the additional features. A simple IM pop-up just can’t compete.
What Intercom Offers
Because Intercom is a premium service, they offer a lot of features free chat apps simply can’t. That’s not to say that free chat apps aren’t fantastic. They are. If you’ve never tried one with your site before, there are free and easy options out there. However, if those don’t quite hit the mark for what you and your customer support team need, Intercom probably does.
Now, we’re talking about the Intercom live chat, but Intercom isn’t just live chat. It’s a premium suite of services that comes along with the monthly fee. When you break it all down, Intercom may have more in common with a CRM platform than a communications app. But the live chat and messaging are still at the heart of it all.

Pricing for the platform is not cheap. But then again, it is designed for enterprise settings and businesses at scale. Not for individuals and small shops. Though they do offer a program for those, too.
All that said, there are three parts of the Intercom platform: Inbox, Messages, and Articles.
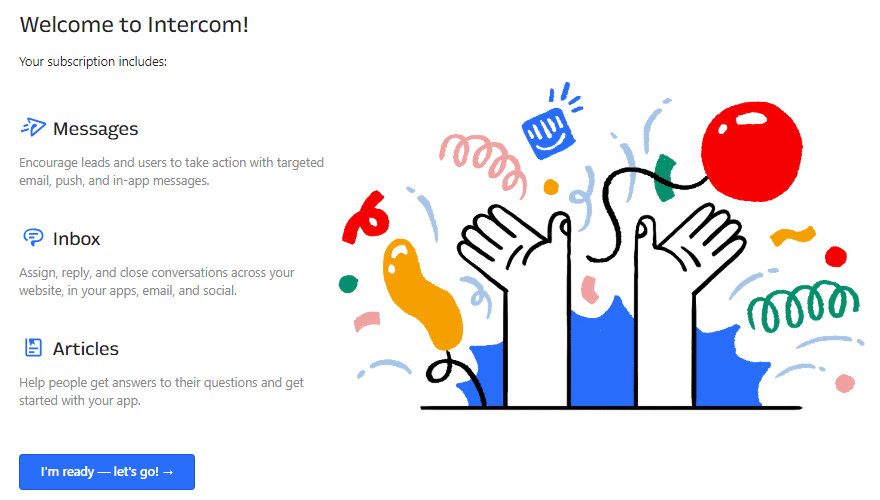
Each approaches the live chat a little differently. And you can combine them to customize them for yourself. The main package (at $202/month) comes with all three. Feel free to subscribe to just one, though.
Inbox
Inbox is probably the closest to being plain ole live chat as you can get. The Intercom puts it, with Inbox, you can “assign, reply, and close conversations across your website, in your apps, email, and social.”
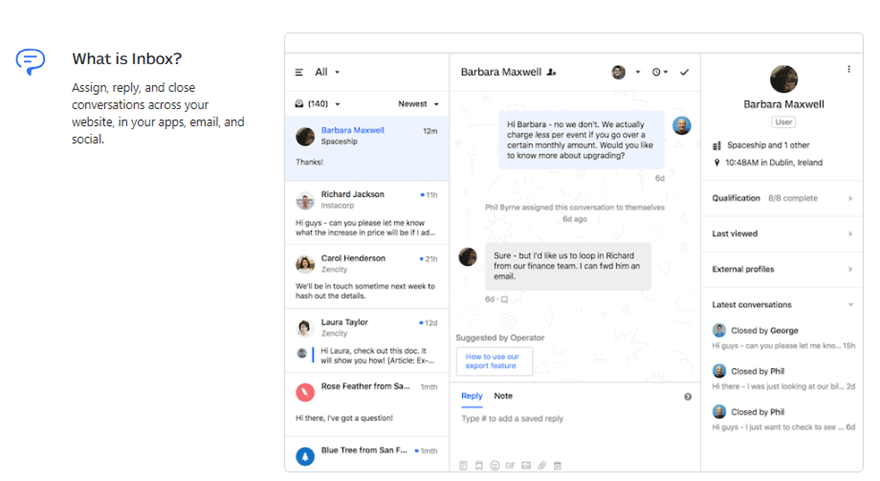
From your backend, Inbox appears like most email/chat clients. To the left, you have the archive of conversations, in the center, you have the active conversation, and to the right are your options and history for it. Like a CRM platform, the assignment, closure, and action history can be checked from within this screen. Your users, however, will not see these options. This view is just for your team.
You will customize your users’ experience so they get a less utilitarian view. Additionally, you can set up what languages your Inbox supports, and all the custom messages that pop up. Additionally, if you really don’t like the standard Intercom Messenger popup, you can completely disregard it and code your own.
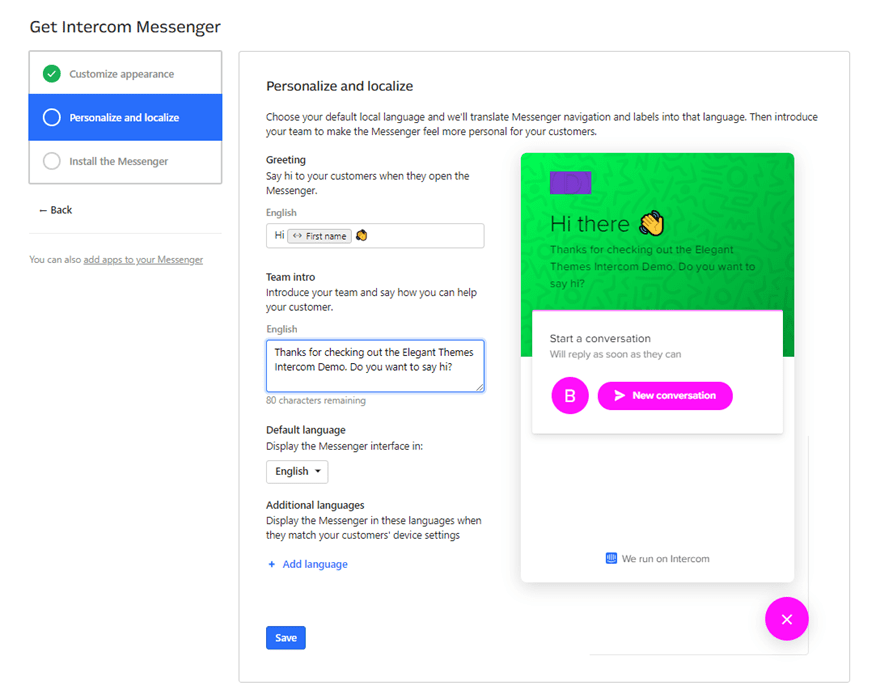
Next, installing the Intercom live chat interface to your site couldn’t be any easier. If you’re on WordPress, for instance, you just install the plugin and connect your account. If you prefer to use JavaScript, they give you the code to copy/paste. Even if you run an iOS/Android app and want to use Intercom to chat with users there, they provide the Xcode and Android SDK instructions and code to get it up and running.
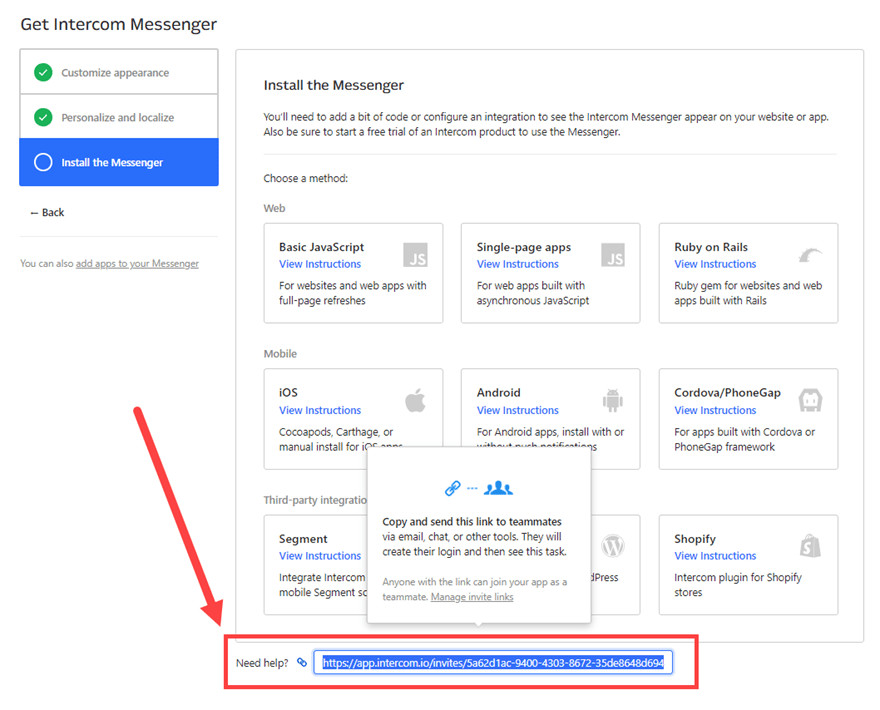
Even if none of that makes sense to you, they have a link at the bottom of the installation page that you can share with a teammate to whom it does and let them handle it.
The Inbox Messenger
Once you’ve gone through that setup, you still need to customize what it does and how you use it. You can run through a number of different behavioral, security, and styling options.
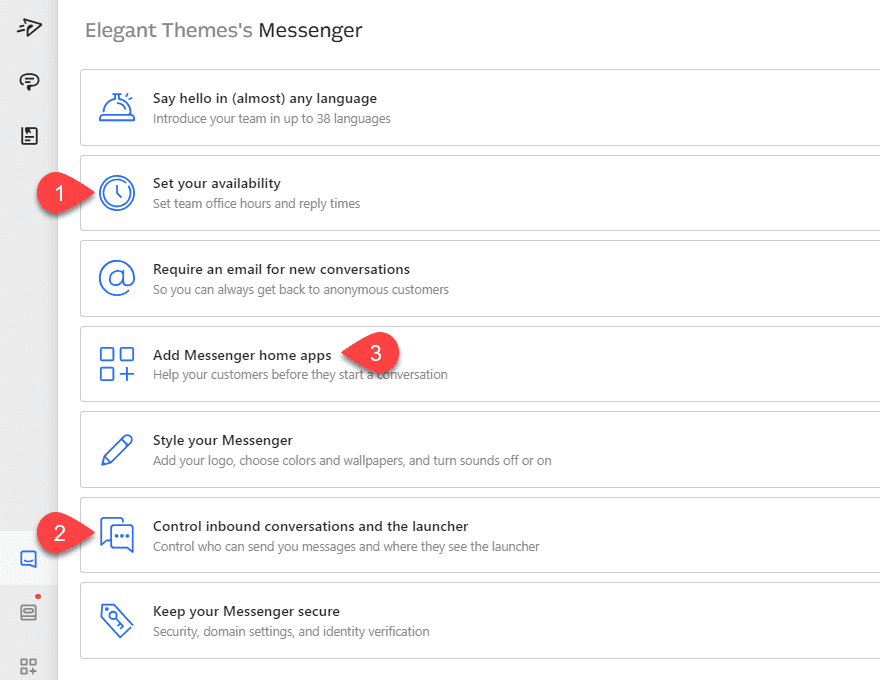
Primarily, however, we’d like to call your attention to 3 specific options you have here.
- Set up your availability – Let your users know when you will have people available. They want to know when they can expect a reply. This is invaluable. Without it, user frustration rises because they’re waiting for a live reply, but there is no live representative.
- Control inbound conversations and the launcher – This option will let you decide if visitors can contact you first, or if you need to be the one to contact them. Using this will probably depend on your support setup. Generally, you let the user contact first, regardless. It’s customer support, after all.
- Add Messenger Home apps – Apps are incredibly powerful within the Intercom live chat platform, letting you highlight contextual products, as well as offer a knowledge base solution (via the Articles service we will discuss later). Using apps to automate and supplement your support staff can not only help your users solve their problem faster, but also alleviate the load on your people to deal with the more complex issues that can’t be solved via automation.
Additionally, at the bottom of this screen, you have the Set up Operator link, which is very important to check out.

The operator is where you supply the chat app with logic to route the conversation and perform follow-up tasks for conversations.
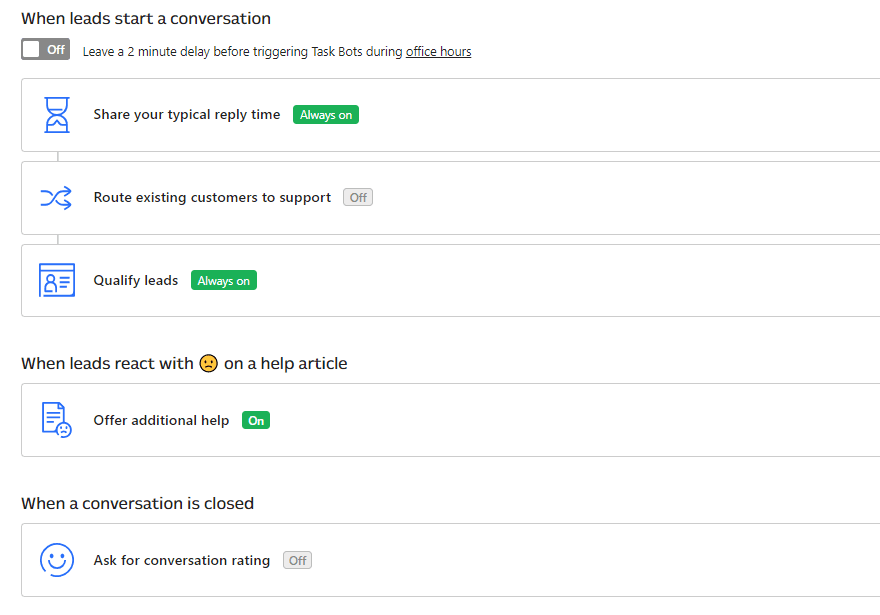
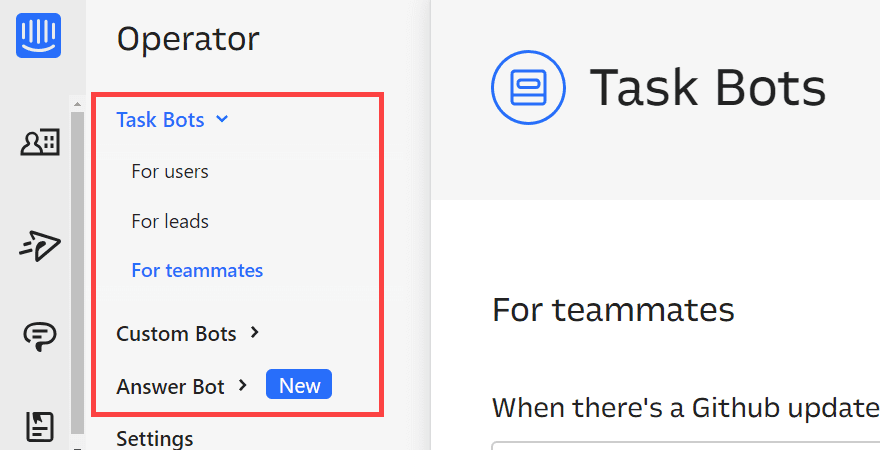
This automation is central to using Intercom live chat successfully. Customizing it to your team is imperative to that success. Additionally, you will find operator bots for your team or existing users (and more) in the sidebar of the Set up Operators page.
Messages
Inbox is the live chat side of Intercom. Messages (not to be confused with the Messenger software) is the direct marketing side of the platform. You communicate asynchronously with your users.
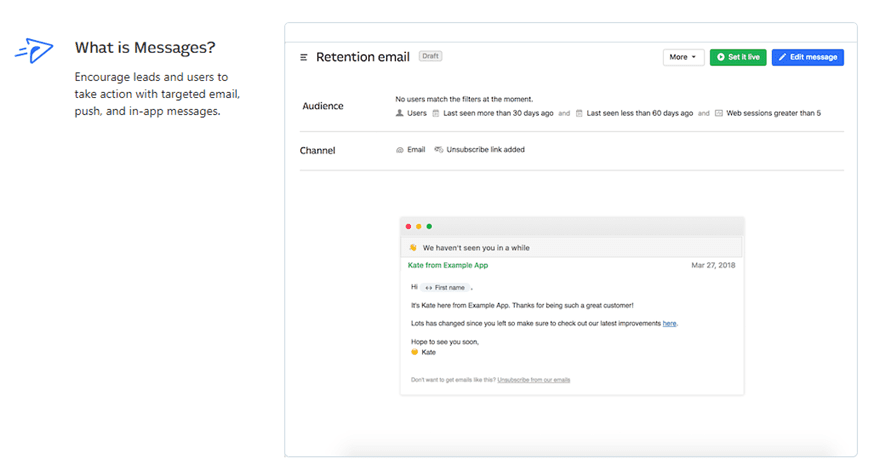
This element should appear relatively familiar to anyone who has used services like Aweber, MailChimp, Emma, or even CRMs like HubSpot or Zoho. However, the difference with Intercom’s Messages is that it not only sends out emails to users who have signed up, but it will also push notifications to people who have your mobile app and/or to people who are currently using your web app.

On top of that, it obviously integrates seamlessly with the other apps within the Intercom platform and cross-communicates. You can generate leads with live chat, then assign them to a segment. Finally, you give them a nudge on their iPhone when you have a new sale coming up.
The single limitation on this feature is that you have to set up a separate campaign for each platform. Even if you are sending the same message. This limit obviously makes sense so that you can keep campaigns separated and get more accurate and granulated data, but it requires more setup.
Additionally, you can send manual, one-off messages in real time. If you don’t want to run a campaign, but want to communicate with people who are actually using your app right then, you can do that, too. It is a very powerful tool. You just have to make use of it.

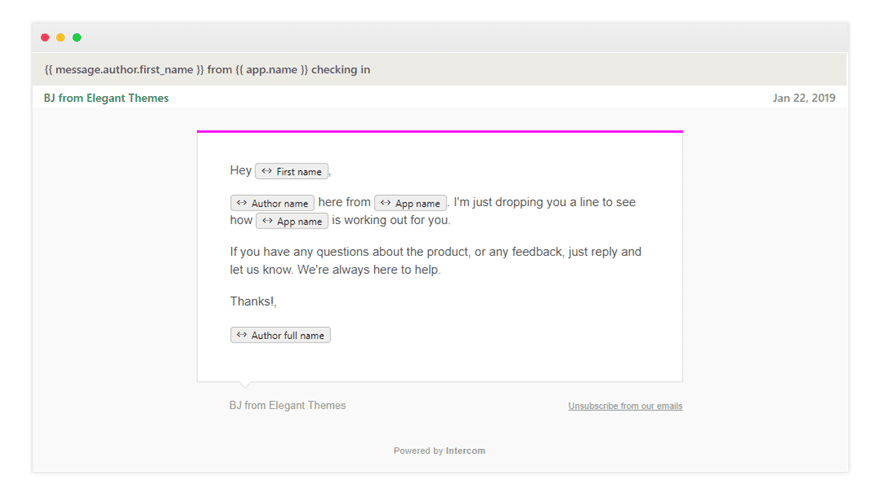
Within Messages, you can also set up full automations and campaigns with all the variables you’re probably used to with other marketing platforms. You can customize X email for Y app, then have a push notification for Z website’s sale. With each addressed to a specific person, using their name, and it would be able to come from a different team member each time.
Articles
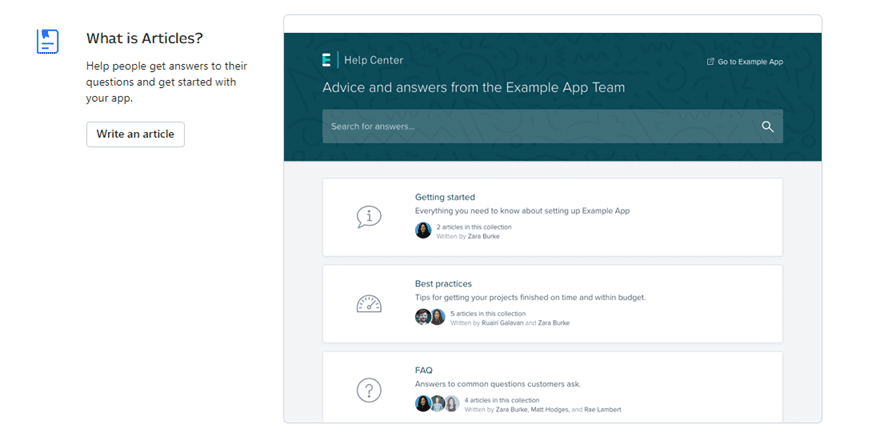
Articles is the third major aspect of the Intercom platform. Using this tool, you can create a whole knowledge base around your brand that users can both search to find the answers they need independently, but one from which you can suggest topics and link to within both Messages and Inbox.
Creating new articles for Articles is as simple as creating a blog post in whatever software you use. You start with a draft, add a title, and write the content paragraph by paragraph. If you have used a block editor like the new one that was released in WordPress 5.0, Articles will feel incredibly similar. The software is very straightforward and simple to use.
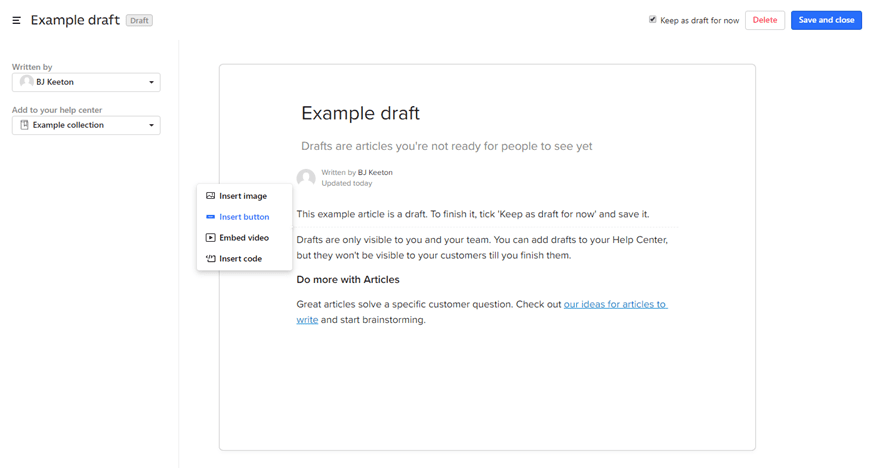
Each paragraph appears as a separate block, and you can use a context menu to insert buttons, images, videos, or custom code to enhance whatever instruction or information that your readers need from you. Once it’s published, you can check the analytics for every post. Readers can also react with a happy, sad, or indifferent face to indicate how helpful they felt the article was. Intercom will let you ask for additional feedback if they rate it with the sad face so that you can improve your documentation.

Additionally, you can add an article to what Intercom calls Collections. These are basically categories for your articles. For instance, you might have a Collection of Content Creation articles, one for Common Issues and Fixes, and another for Technical Documentation.
Users then search and browse these articles and Collections through the Help Center. You can display the Help Center articles individually in the pop-up modal, or you can use the separate knowledge base hosted by Intercom.
Intercom Articles Help Center
The help center is the only user-facing part of Intercom that’s not entirely contained within the pop-up modal. Intercom assigns you a domain name (which you can customize if you want) that will serve as the home for the Help Center.
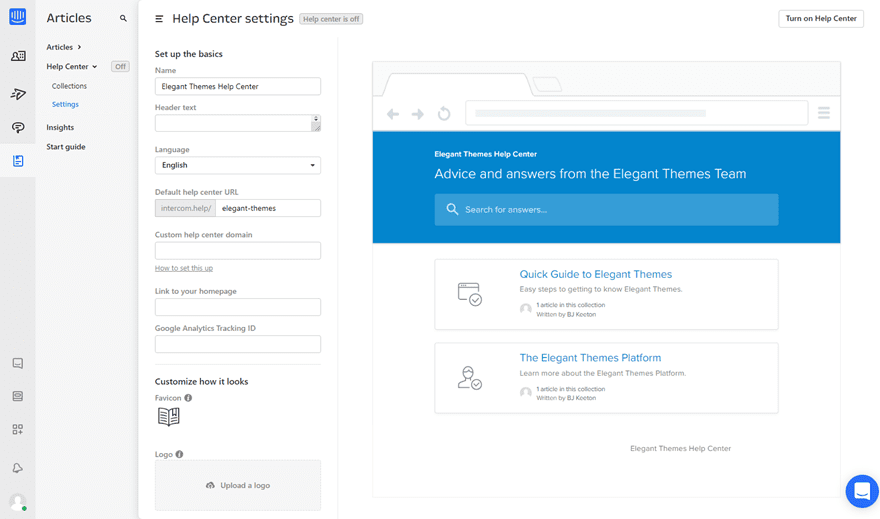
The truly fantastic part about using the built-in Help Center for your documentation and customer support is that users can search it themselves. You can also easily find and link to an article within the Help Center when necessary.
A Real World Example of Intercom Live Chat
We use Intercom here at Elegant Themes, and we take advantage of all the features they offer. Let’s walk through the process from a user’s perspective to show you how they all interact so that you can see how you can bolster your own customer support in the same way.
Each visitor is greeted by a pop-up in the lower-right corner letting them know we are available if they need assistance. They can then write a reply.
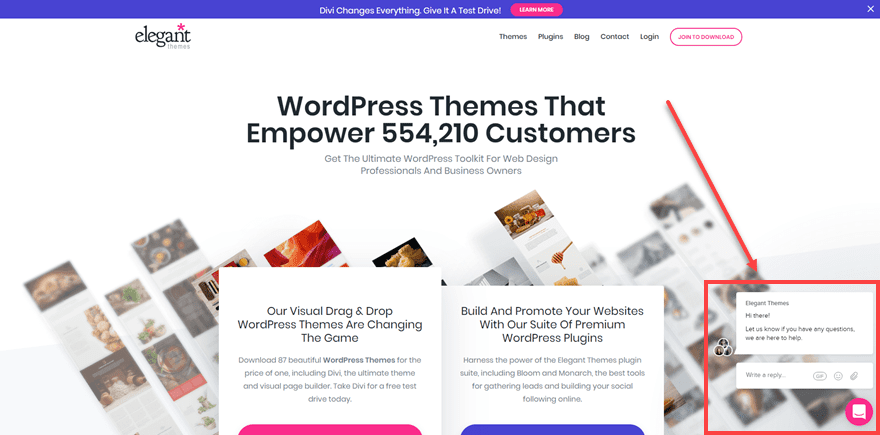
If they choose to do so, they will be greeted by a customer support member as well as a few automated messages. As you can see below, I was greeted with an automatic reply from the team (the thumbs up).
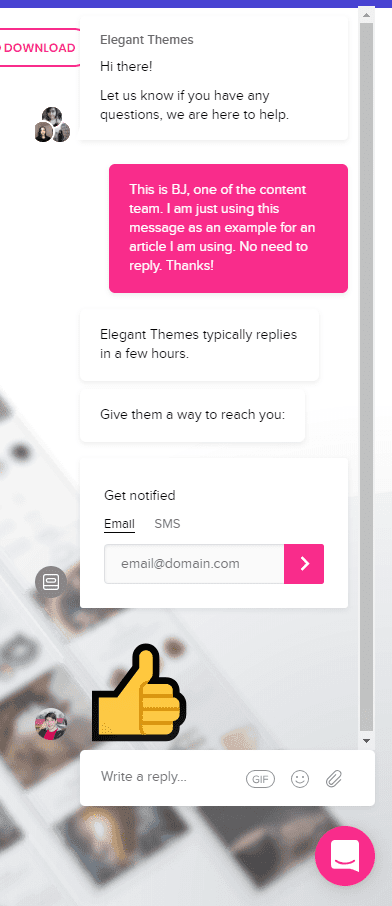
Had the conversation gone further, the representative would have been able to link to Articles or forward me to a different support member depending on my need. Inbox, the lead generation part of Intercom, handles this. Because after the initial conversation, the user needs to be assigned to the appropriate person to assist.
Also, notice the fields for either SMS or email updates in case an operator wasn’t standing by. You can use these kinds of fields within Messages on the back-end. Afterward, you could send an update on your support query (like we do). You could also use any of the campaign types we discussed earlier.
Now, if I had needed technical support regarding Divi, and/or I was in my member account help area, I would see a part of Messages similar to this:
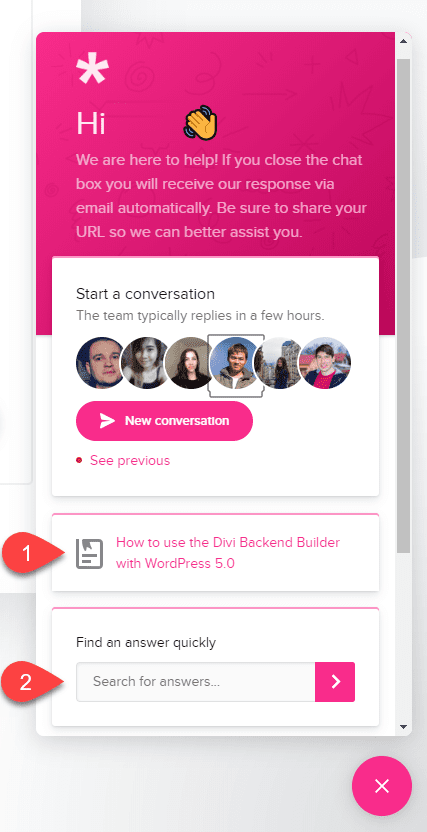
For us, the WordPress 5.0 release has been a common support question, so the article titled WordPress 5.0 and the Divi Backend Builder has been presented as a link for users to see immediately. If that’s not the reason for making contact, there’s a search box. When used, it presents the Help Center results in the existing modal.
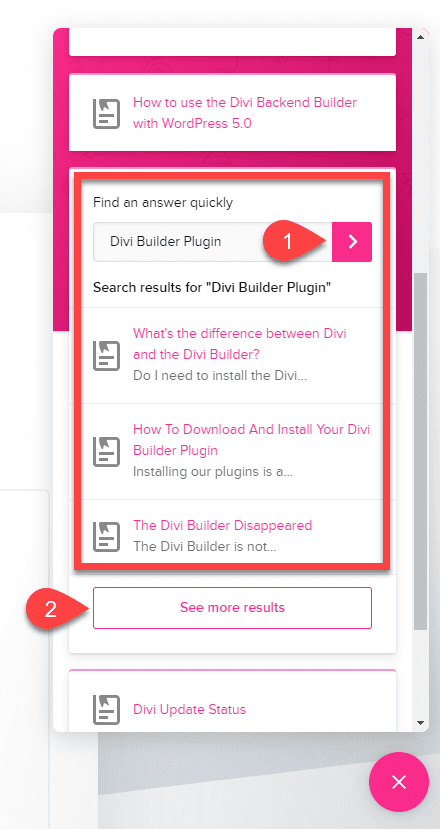
If none of those results are quite right, the See more results button will then open the full list of results from the Intercom-hosted Help Center.
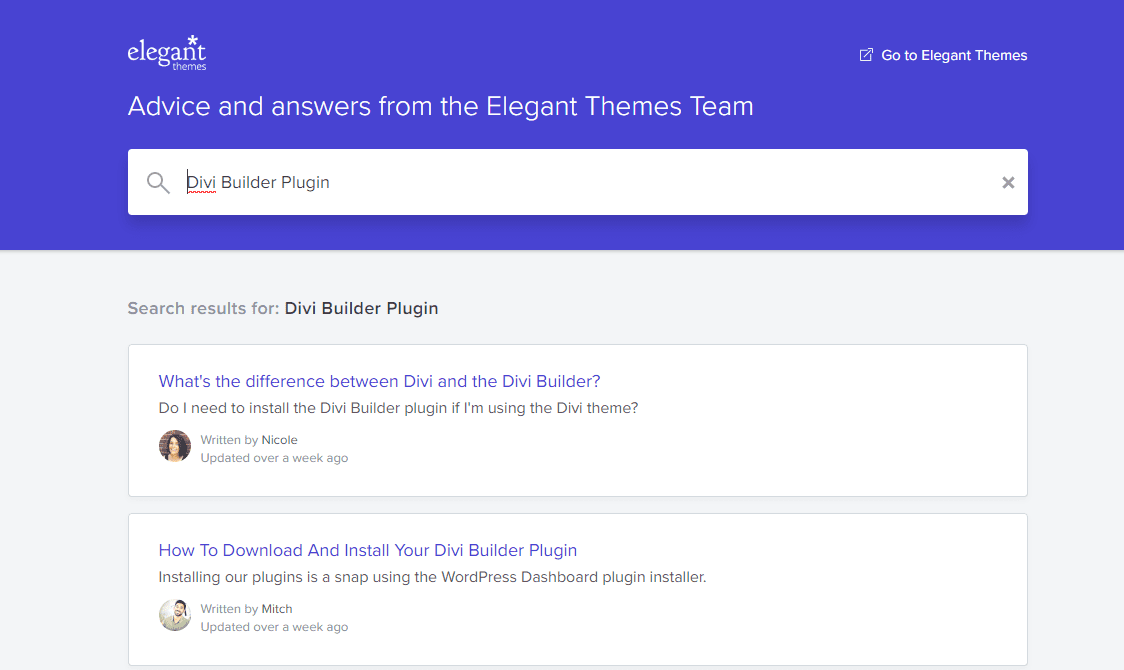
And that’s how you can make use of all the major parts of the Intercom live chat platform. On the user’s side, things appear seamlessly integrated together. Chat flows smoothly into suggested help to search to a full Help Center. And within each of these steps, the live representatives are still available. You never abandon your user.
Conclusion
The Intercom platform is more than a messenger service. Sure, that’s an important part, but what truly makes it stand out from a simple IM client are the campaign marketing, lead generation, and knowledge base-building that comes as a part of the whole platform. And while these services are designed to work together, you can piecemeal them together, too. The option to separate them out is available if you only need a capable knowledge base through Help Center, for instance. No matter which way you slice it up, the Intercom live chat platform can take your customer service to the next level.
What have been your experiences with Intercom for customer service?
Article featured image by Daria Sokolova / shutterstock.com
The post Using Intercom Live Chat to Bolster Your Customer Support appeared first on Elegant Themes Blog.
