WordPress and Divi do a lot of wonderful things out of the box to make it easy for us to build a website. But sometimes we need more advanced functionality that can only be accomplished with JavaScript.
With Divi, you can easily add JavaScript or jQuery snippets (chunks of code) to your theme or web page without a plugin, even if you don’t have a child theme set up. In this tutorial, we’re going to go over some best practices for using external JavaScript snippets with Divi.
A Quick Word on JavaScript and jQuery
JavaScript is the magic behind the dynamic functionality you see on a website. It is a client side coding language built for the web that can access all of your theme files and perform all types of functions through the browser that would not be possible with HTML or CSS alone.
JQuery (one of the most popular JavaScript libraries) has made it really easy to add JavaScript snippets to your websites that will work across different browser types. That’s why see a lot of jQuery being used on websites today. JQuery is also built in to WordPress so any jQuery code you add to Divi will work if it is properly formatted.
Proper JQuery Snippet Formatting in Divi/WordPress
Using the Document Ready Function
In most cases, I would suggest using $(document).ready() in your jQuery snippets. Any JavaScript added in $(document).ready() will make sure the document (or DOM) is loaded and ready before executing the JavaScript. This avoids certain situations where JavaScript may execute when the page isn’t ready to be safely manipulated.
In Divi, the function should look like this…
jQuery( document ).ready(function() {

    // Add jQuery code here to be loaded once the DOM is ready

});
Using “jQuery” instead of “$” when using jQuery in WordPress
Since WordPress already comes with a version of jQuery in compatibility mode, the standard $ for jQuery doesn’t work. This is to keep it from conflicting with other JavaScript libraries you may or may not use in WordPress. Instead, you will need to use jQuery in place of the $ shortcut.
So this…
$(document).ready(function(){
  $("p").click(function(){
    $(this).hide();
  });
});
Would need to be turned into this…
jQuery(document).ready(function(){
  jQuery("p").click(function(){
    jQuery(this).hide();
  });
});
However, if you want to keep the code less bloated and keep those $ shortcuts, you can use $ instead of jQuery if you add $ as an argument passed to the document ready function. This will allow you to keep the $ in the jQuery snippet contained in that function.
Here is what that would look like…
jQuery( document ).ready(function( $ ) {
    // Add jQuery code here, using $ to refer to jQuery.
    $( "div" ).hide();
});
Or you can pass the $ in for jQuery with a simple function like this along with the document ready function…
(function($) {

    // Add jQuery code here, using $ to refer to jQuery.
    $(document).ready(function(){

      $( "div" ).hide();

    });

})( jQuery );
Now that we understand some best practices on how to format JavaScript snippets, let’s explore how to properly add them to your Divi site.
Adding JavaScript Snippets to a Single Page using the Code Module
If you are looking to add a javascript (or jquery) snippet to a single page in Divi, you can use the Code Module. This will make sure the JS doesn’t get loaded on every page unnecessarily, causing a minor increase in page load time on pages that don’t even need it.
Here’s how to do it. First , activate the divi builder when editing the page that needs the JS snippet. Then, add a code module to your page.
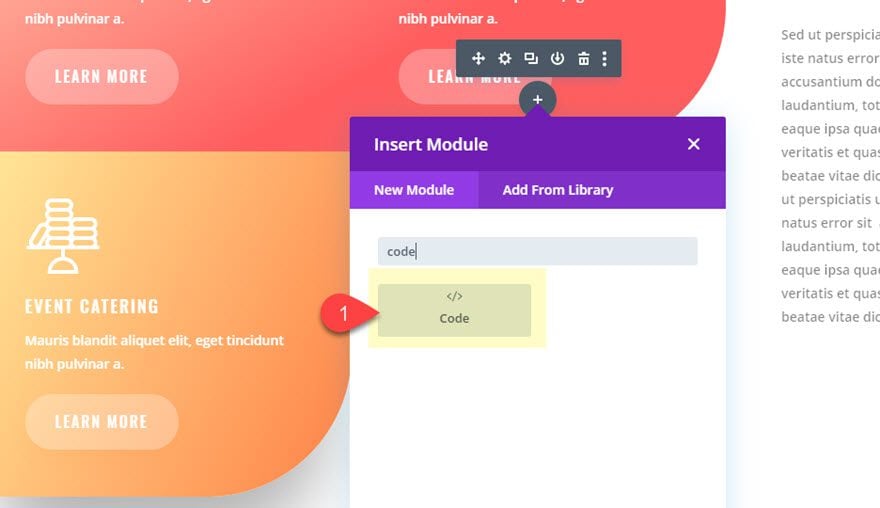
The code will work anywhere on the page so it is up to you where you want to put it.
After you add the code module, paste in the JavaScript snippet. Make sure to wrap the code in a tag so that the code is recognized as JavaScript.
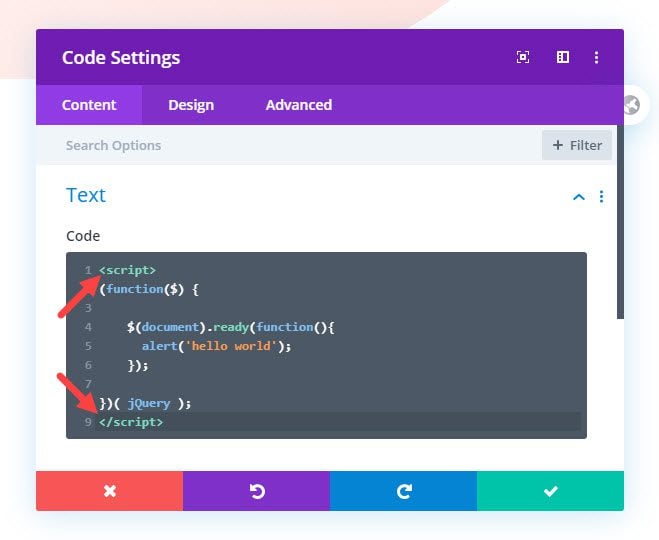
Don’t forget to make sure your snippet is coded properly formatted by wrapping it with the tag so that the code is recognized as JavaScript. And if you are using jQuery, include the document ready function so that it loads whenever the document is ready for it. Also, you will need to use jQuery in your snippet instead of the shorthand $.
That’s it! Your snippet should run on the page as expected.
Note: The tag usually requires that you specify the media type of the script as follows…
However, since the “text/javascript” is the default type, it is okay to leave it out when using it for JavaScript code snippets.
Adding JavaScript Snippets to All Pages/Posts Using Divi Theme Options (no child theme needed)
JavaScript snippets can also be added to Divi using Divi’s code integration tab under Theme Options. This method works well for JS snippets that you want to load on all pages/posts of your website. This is also a good option if you don’t have a child theme or if you only have a few snippets of JS that need to be added to your Divi site and don’t want to include them in an external JS file.
To find the code integration section, navigate to Divi > Theme Options and click the Integration tab.
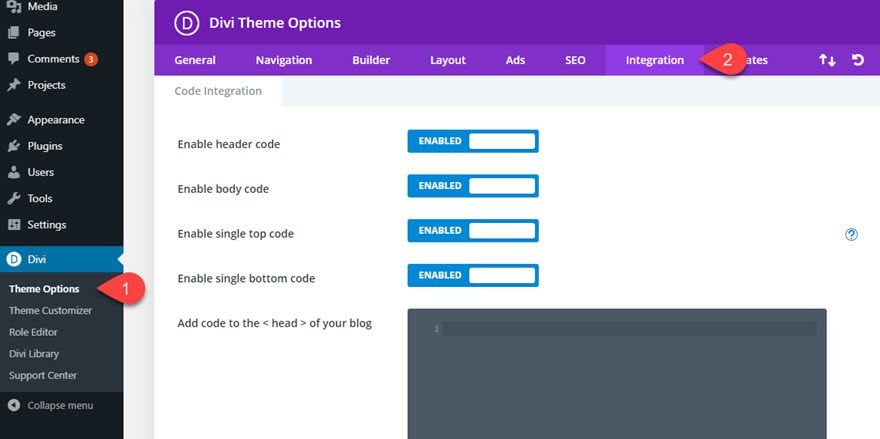
Figuring out Where to Put Your JavaScript Snippet
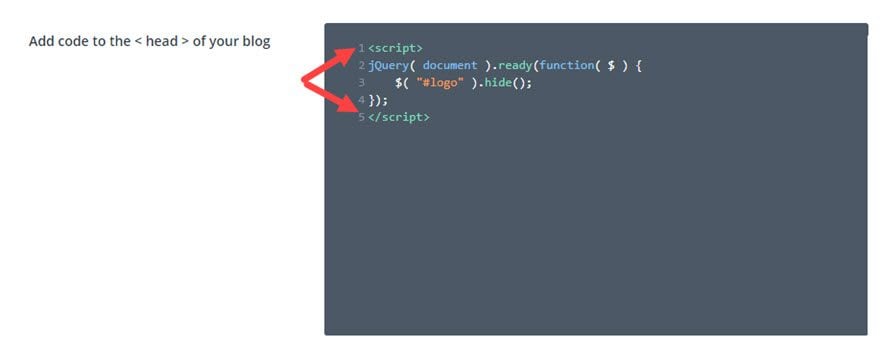
There you will see four areas you can add custom code to your Divi site. For most cases, it would be best to add JS snippets to the body. This will actually place your snippet at the bottom of your page so that it loads after everything else which is great for page load speed. In some cases, you may want to add the code to the head so the code can load sooner (or if your document depends on the JavaScript running sooner). So you will have to test and decide the best option that gives you the best balance of performance, timing and functionality.
For example, you may have a jQuery snippet that adds styling to your header. In that case, you wouldn’t want to load it in the body (at the end of the page) because the header would load initially without that styling until the snippet is read. This would leave your above the fold looking ugly for visitors for a brief moment. However, if you loaded it in the head, you wouldn’t have that delay in styling.
You may also choose to add the JS snippet to the bottom of your posts if you have code that only applies to blog posts. This will keep the code from loading on other pages needlessly.
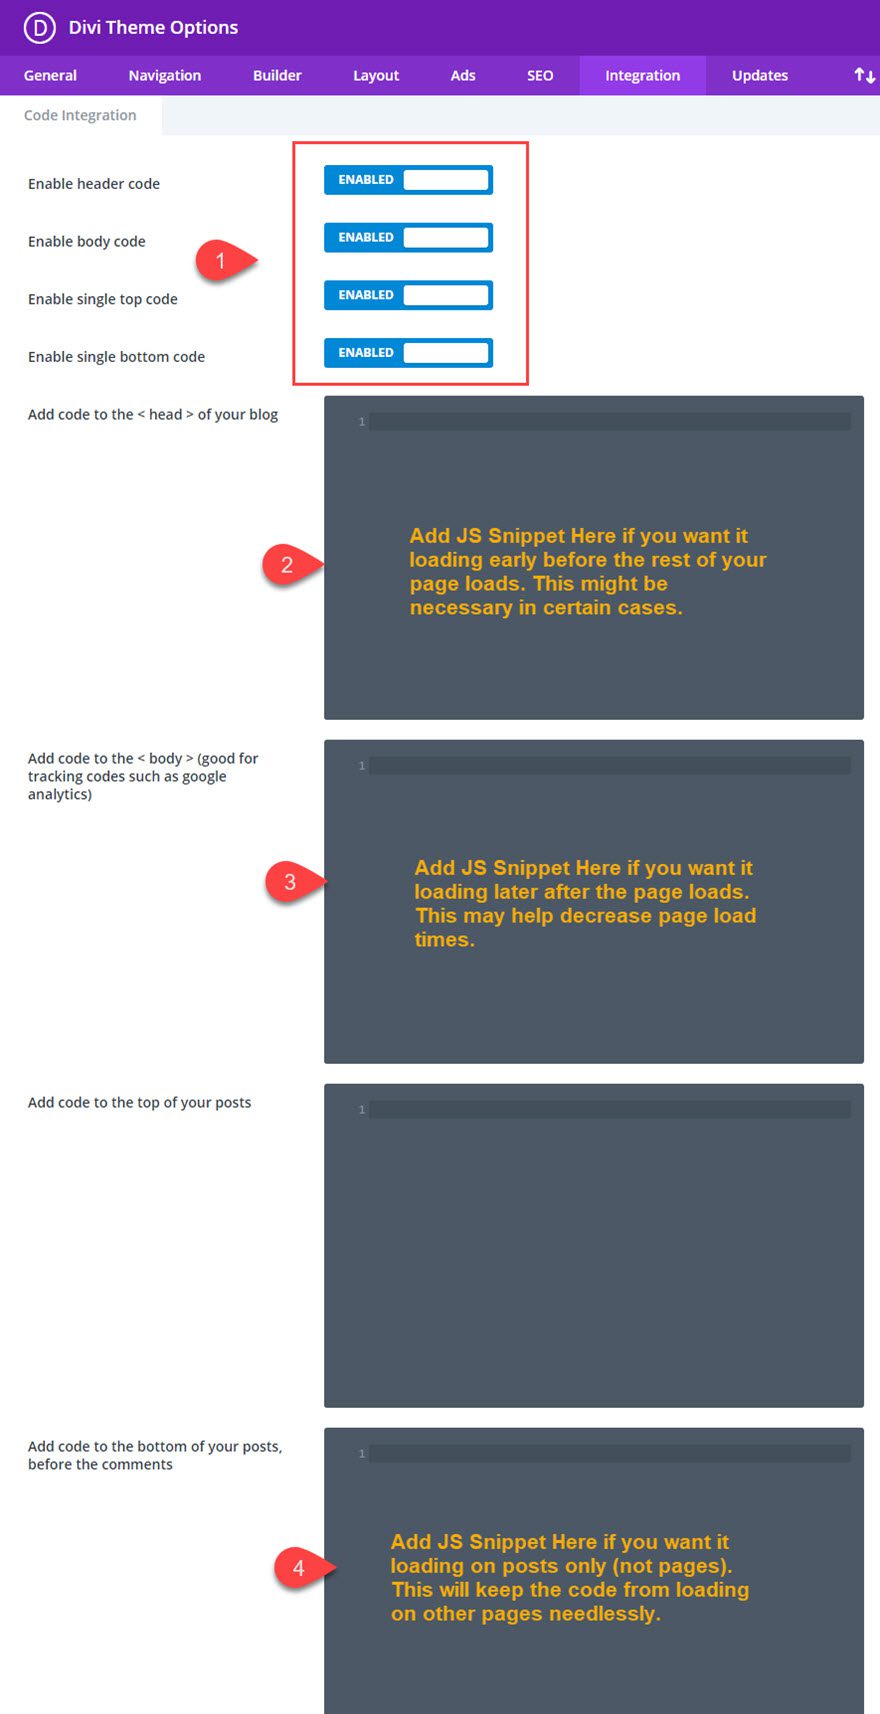
The code integration areas will be adding the code directly to your page, so you will need to wrap your code snippets with the tag.
Adding JS snippets to Divi from a separate JS file (using a child theme)
It is always recommended to use a child theme for your Divi site. And once you do have the child theme setup correctly, you might as well incorporate a JS file that can be used to hold your custom JS snippets.
This is definitely the preferred way to handle javascript in WordPress sites and it works well with Divi too.
Creating the JS file in your child theme
It is always a great idea to set up a Divi child theme, especially if you plan on making changes to the theme files. Once you have created a Divi child theme, you can easily create a JavaScript file where you can place all of your JS snippets in one place.
Here’s how to do it.
Create a JavaScript file and add it to your Child Theme Folder
Using a code editor, create a new file and save it as a JavaScript file. For example, if you saved the file as a “js” type with the name “scripts”, the complete file name would be “scripts.js”. This is where you would add all of the js snippets you want added to Divi. You don’t need to wrap the snippets in a tag since the file is saved as a js file.
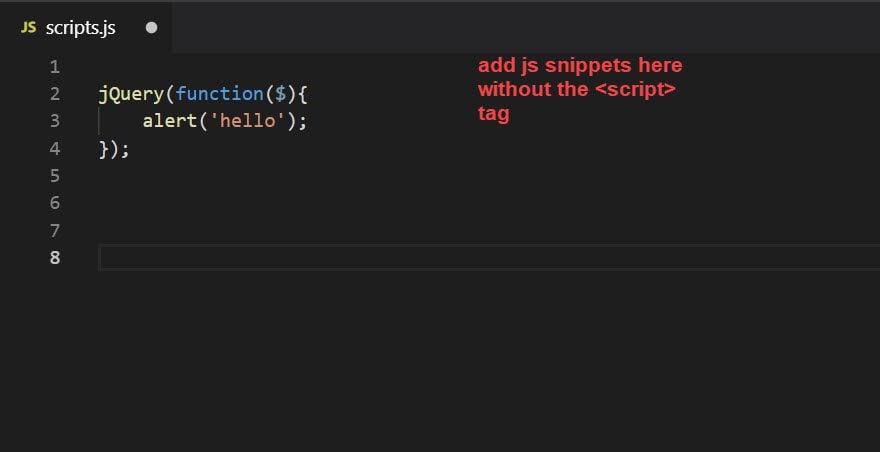
Once the file has been created, you need to add it to your child theme folder. I like to create a js folder to hold my custom js files for better organization. To do this, simply create a new folder named “js” at the root of your child theme folder and add the “scripts.js” file to that folder.

Enqueuing Scripts in your Child Theme’s Functions.php file
Now we need to enqueue the js file so that it is loaded in Divi. If you already have a child theme created, you should have a functions.php file already created where you have already enqueued the style.css file for the child theme which should look something like this…
function theme_enqueue_styles() {
    wp_enqueue_style( 'parent-style', get_template_directory_uri() . '/style.css' );
}
add_action( 'wp_enqueue_scripts', 'theme_enqueue_styles' );
Now you will need to do the same for your new js file. To do this, you will need to add the following snippet to the function.
wp_enqueue_script( 'custom-js', get_stylesheet_directory_uri() . '/js/scripts.js', array( 'jquery' ), '1.0.0' , true );
The final code needed for enqueueing the style.css and the scripts.js file would look like this…
function theme_enqueue_styles() {
    wp_enqueue_style( 'parent-style', get_template_directory_uri() . '/style.css' );
    wp_enqueue_script( 'custom-js', get_stylesheet_directory_uri() . '/js/scripts.js', array( 'jquery' ), '1.0.0' , true );
}
add_action( 'wp_enqueue_scripts', 'theme_enqueue_styles' );
Final Thoughts
If you are new to web design or just getting started with Divi, you may not be familiar with JavaScript or how to add it to your website. Hopefully, this post was helpful to point you in the right direction and provide some best practices even seasoned web developers can appreciate.
I look forward to hearing from you in the comments.
Cheers!
.inline-code{padding: 0px 4px; color: crimson; font-family: Monaco,consolas,bitstream vera sans mono,courier new,Courier,monospace!important}
The post Best Practices for Using External JavaScript Snippets with Divi appeared first on Elegant Themes Blog.

