It’s important to keep the content on your website’s pages succinct and organized, especially on your home page. Fortunately, the WordPress More block lets you give visitors a preview of your post, along with a link to the full text. Knowing how to use it properly can help you achieve cleaner, more effective WordPress pages.
In this post, we’ll explain how to add this block to your WordPress posts. Then we’ll discuss each of its settings and options, tips and best practices for using it effectively, and some frequently asked questions.
Let’s get started!
How to Add the More Block to Your WordPress Post
Adding a block to your WordPress content is quick and simple. To get started, navigate to the post where you want to insert the More block. Note that you can only add this element to your posts. Unfortunately, it’s not available for your WordPress pages.
In addition, it’s important to note that you’ll want to insert this block after the excerpt text that you want readers to see. For example, perhaps you want to cut the post off after the first paragraph. If that’s the case, you would insert this block between the first and second paragraphs.
To do so, click on the Add Block icon (1), type “More” into the search field (2), and select the first option (3):
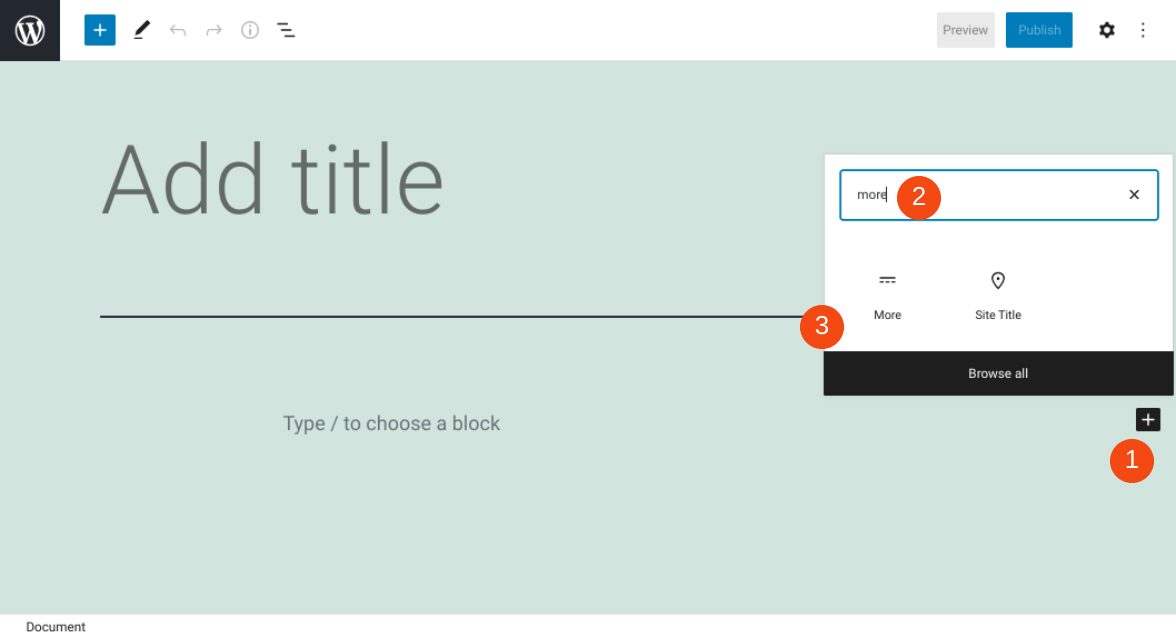
Alternatively, you can type “/more” directly into a paragraph block of the WordPress editor. Then hit Enter, and the block will automatically be inserted into the post.
You may already know that each WordPress block comes with its own unique set of controls and settings. Let’s take a closer look at what these are for the More block.
More Block Settings and Options
Once you insert this block into your post, a toolbar will appear along the top. It only has two icons. The first one is Transform:
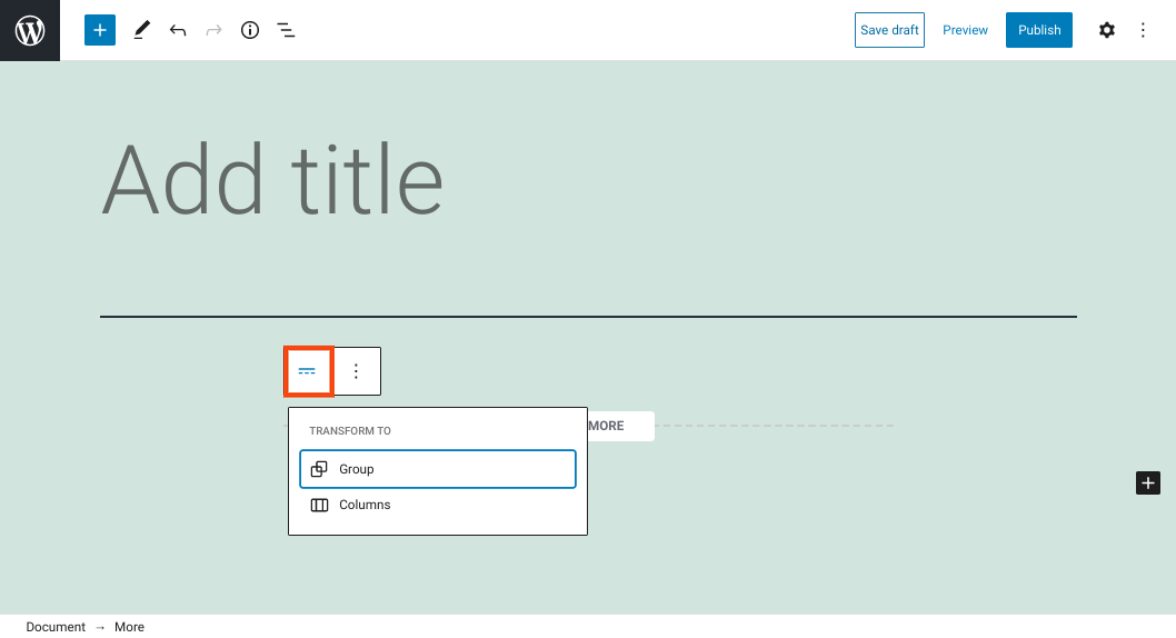
This option lets you change the style of the block. You can use it to create groups or columns.
The second icon leads to the block’s Options:
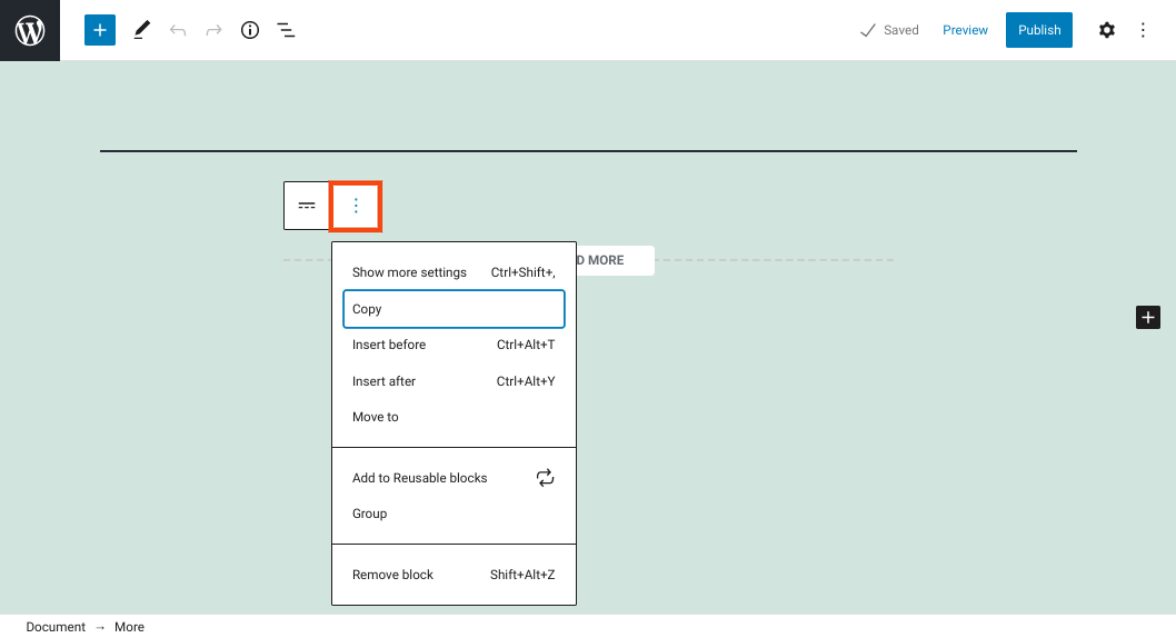
Here, you’ll find various other actions you can take. For example, you can copy the block, insert another element before or after it, or add it to your Reusable Blocks.
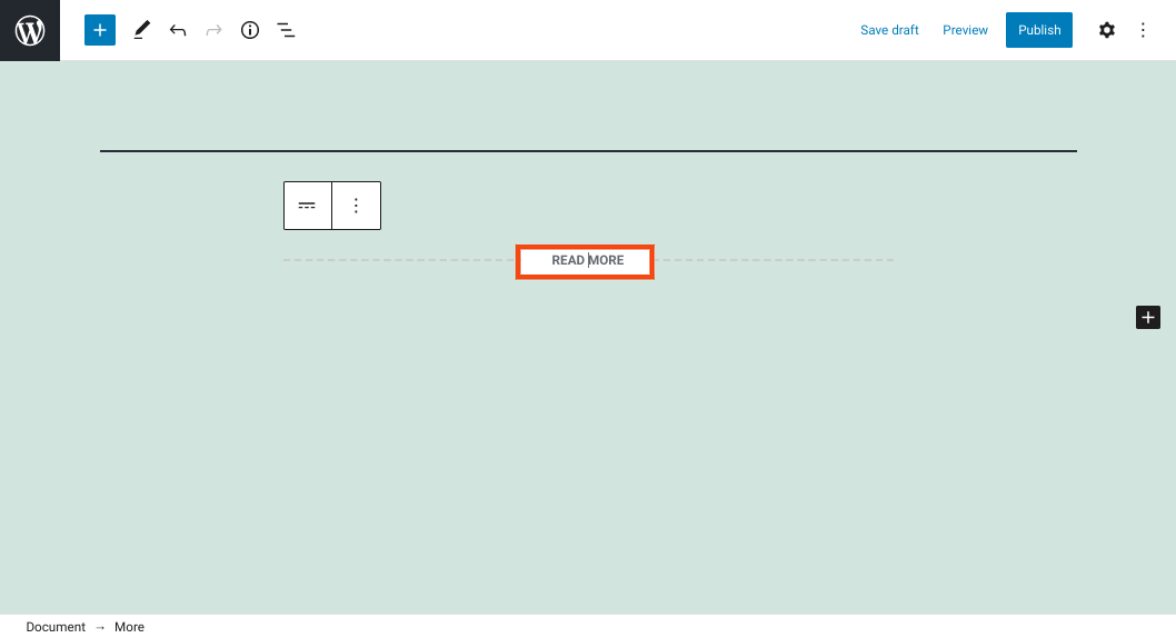
You can also edit the default text. To do so, you can click on the text, and then change it to whatever you want:
There is an additional setting located within the right-hand sidebar. If it’s not already visible, you can access this settings panel by clicking on the gear icon in the top-right corner. Then select the Block tab.
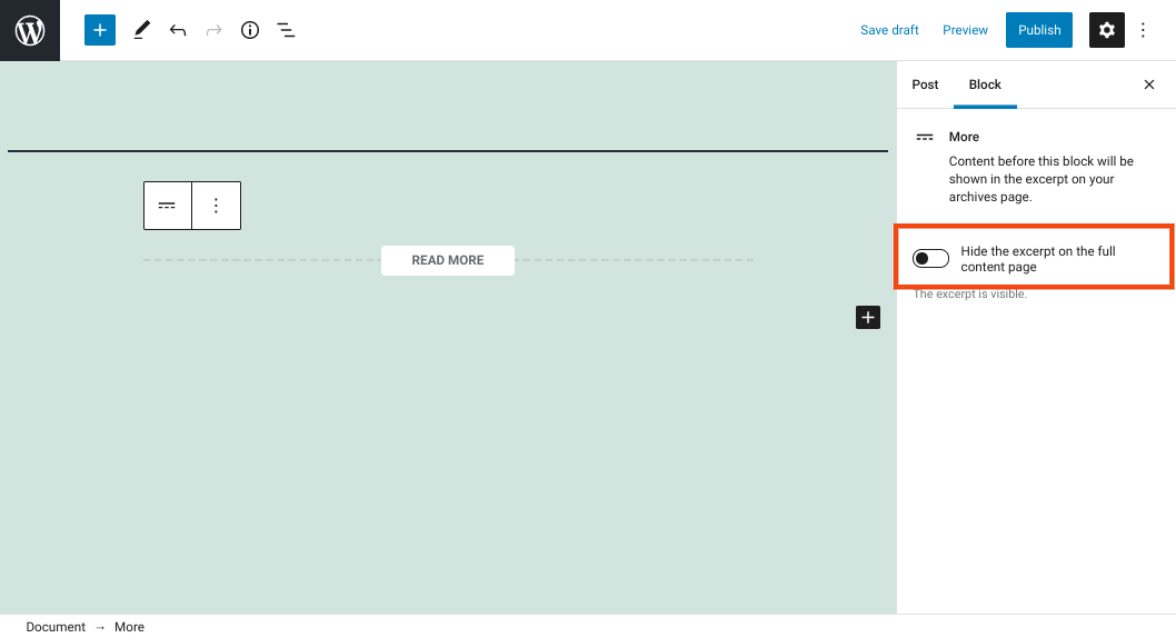
There is an option to Hide the excerpt on the full content page. If you toggle this switch on, your visitors won’t be able to see the excerpt after they click on Read More.
Tips and Best Practices for Using the More Block Effectively
Now that you understand how this block and its various settings work, you might be wondering how to go about using it. There are a few factors you can keep in mind that should help you to leverage it effectively.
First, remember that you can change the text that’s displayed. By default, the block uses “Read More” as the link text. However, you can edit this as you see fit, in order to match your site’s style and tone. Some examples include:
- Continue
- Read Full Story
- Next Page
Also, we recommend being strategic about the excerpt you choose to include above the Read More link. Since you can’t feature the full text, it’s important to make sure you pull out or write up an engaging bit of content, in order to grab visitors’ attention. Doing this can go a long way towards incentivizing readers to actually click on the link, which can boost your engagement and conversion rates.
The purpose of the More feature is to offer a simple yet effective way to truncate your blog entries. However, this element can be useful in a variety of situations. Many WordPress users apply it strictly for blog archive pages or home pages.
However, there are some additional situations where it can come in handy. For example, if you have a FAQ page, this block lets you easily add a concise answer to each question, along with a link to a detailed explanation.
Frequently Asked Questions About the More Block
At this point, you should know pretty much everything there is to know about this WordPress element, including what it is and how to use it. Before we go, let’s recap the key information by answering some of the most frequently asked questions about this block.
Where Do I Find This Block in WordPress?
You can find this block by navigating to any post on your site. Then, after the excerpt paragraph where you want the Read More link to appear, click on the plus icon (the Add Block button). You can search for the block in the text field.
Alternatively, you can find it by typing “/more” into a paragraph block. Then hit Enter to insert this element into the post automatically.
What Does This Block Do?
In a nutshell, this element provides an easy and accessible way for you to present a preview or excerpt of a post, without actually having to include the full text. Instead, you can insert the block after your teaser content, along with a Read More link. You can also customize the link text to say whatever you want, such as “Read Full Story”.
Where Can I Add This Block in WordPress?
You can add this block to any of your WordPress posts. Unfortunately, you cannot currently insert it on your pages. It’s also important to mention that some themes may not support this element. If you’re having trouble locating it, you might try switching to a default theme to see whether your current theme is the problem.
Conclusion
When creating your home and archive pages, you probably want to include links to many different posts. However, to entice your visitors to actually click on and read full articles, it helps to insert a brief excerpt of each to grab their attention.
As we discussed in this post, the More block is a helpful feature that you can use to give users a preview of a full-text post. You can add it to any of your WordPress posts, and customize the default text however you like.
Do you have any questions about using this block? Let us know in the comments section below!
Feature Image via VectorMine / shutterstock
The post How to Use the WordPress More Block appeared first on Elegant Themes Blog.
