The Divi Theme Builder’s strongest selling point is that you can fully customize your site in just about any way that you can imagine. You can set global designs, use specific layouts and templates for particular post types, and special rules for things such as using different headers on different pages and posts. And that’s what we’re going to walk you through today. With just a few clicks, you can have different templates on your site displaying different headers. Let’s go ahead and get into it!
How to Use Different Headers with Different Templates
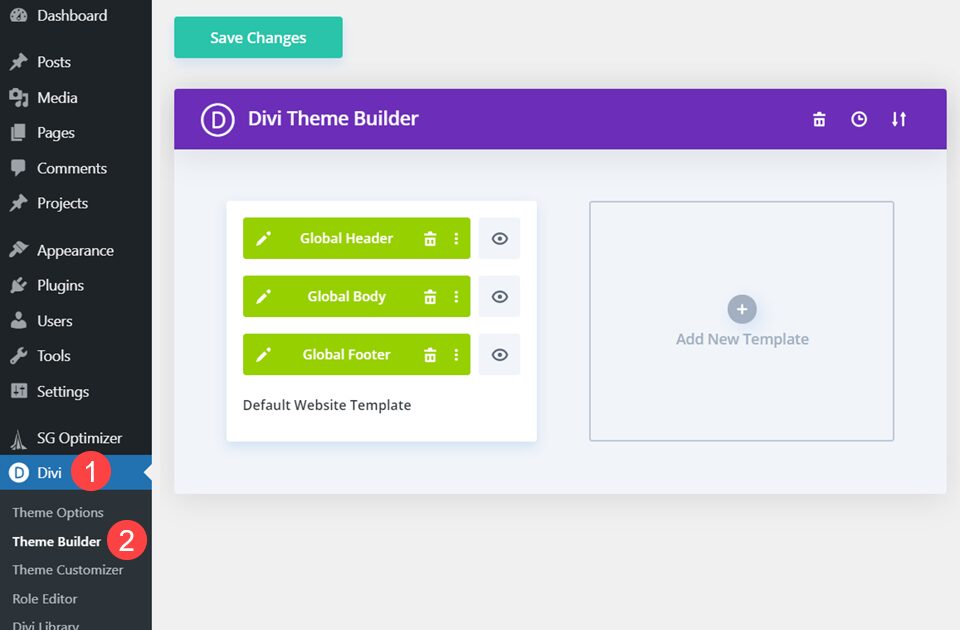
To begin, you will need to be in the Divi Theme Builder area of your WordPress admin dashboard. If you’re not familiar with it or new to Divi, you can find it under Divi – Theme Builder in the left-hand menu, near the bottom of the dashboard.
Create Multiple Templates
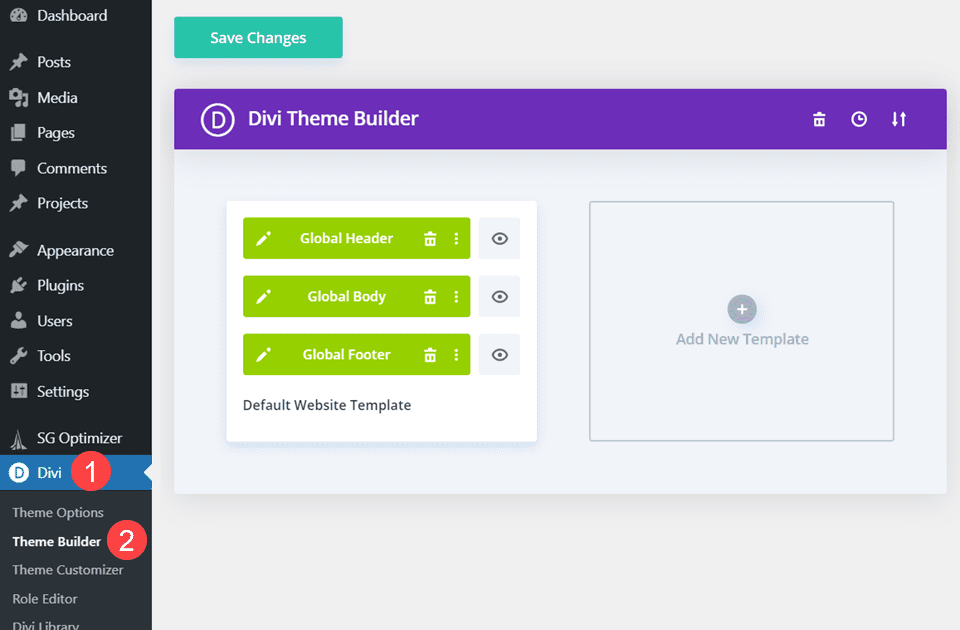
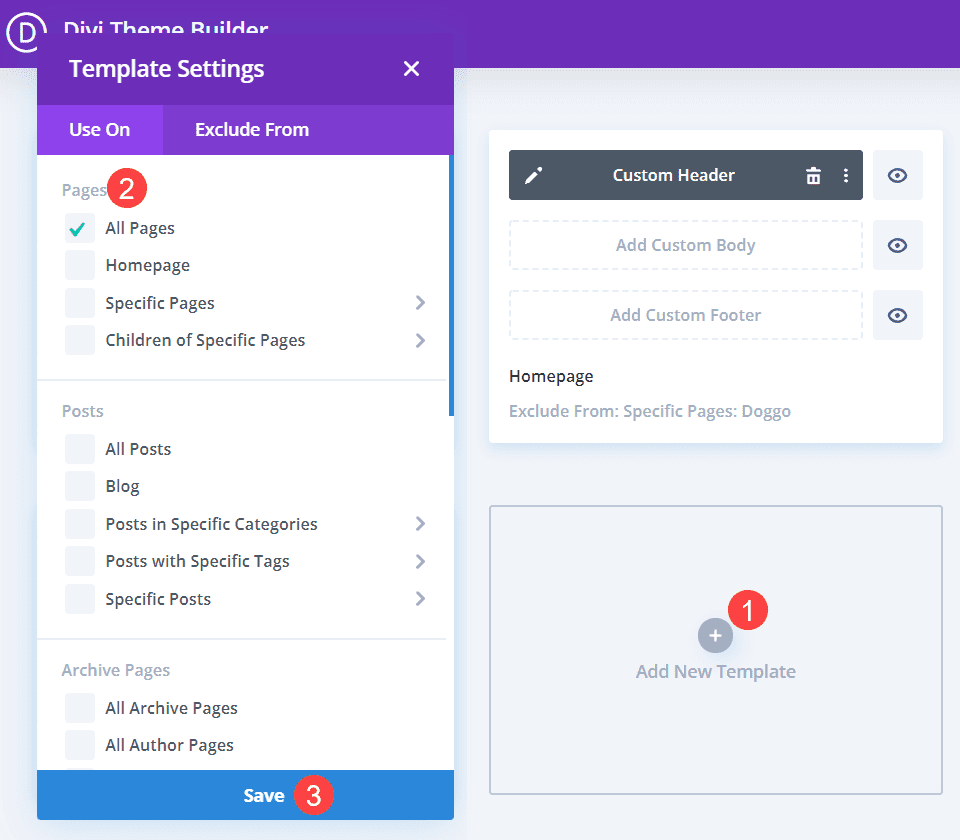
The only real requirement for this tutorial is that you have multiple templates assigned to different posts and pages using criteria in the theme builder. It doesn’t matter whether you use a Global Header or not, though. You just need to have different templates created. To do so, you will click the Add New Template button and select what specific posts or pages will use it. The theme builder allows you to create a template for as little as a single blog post, a whole category, or anything in between.
Just repeat this process for as many templates as you want to use different headers.
Create Header Layouts
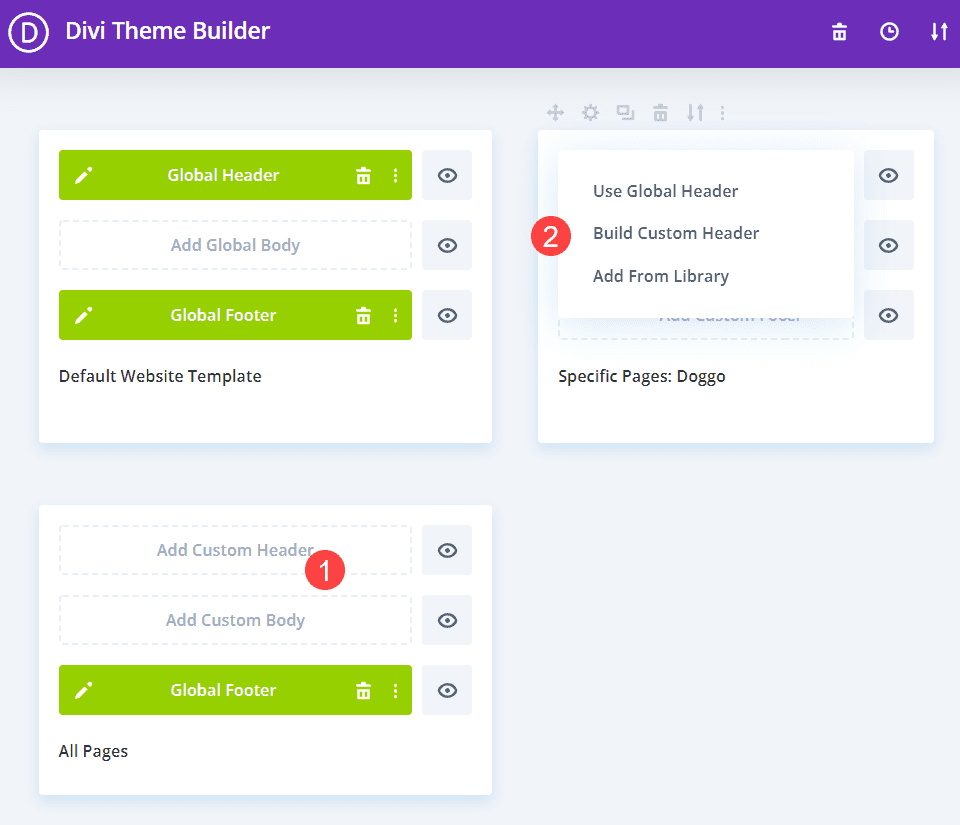
Inside each theme builder template, you can create a custom Header, Footer, and Body. Each of these can be unique to the template or part of the global design of the website. Start by clicking the Add Custom Header button, and then selecting either Use Global Header, Build Custom Header, or Add From Library. If you have existing layouts imported or created, you may also copy one of those.
Assign the Header
Regardless of which way you choose to create your headers, you need to make sure they’re assigned to pages. Doing so is very easy. Simply hover over any template and click the Gear Icon. Or you can right-click the template and select Manage Template Assignments.
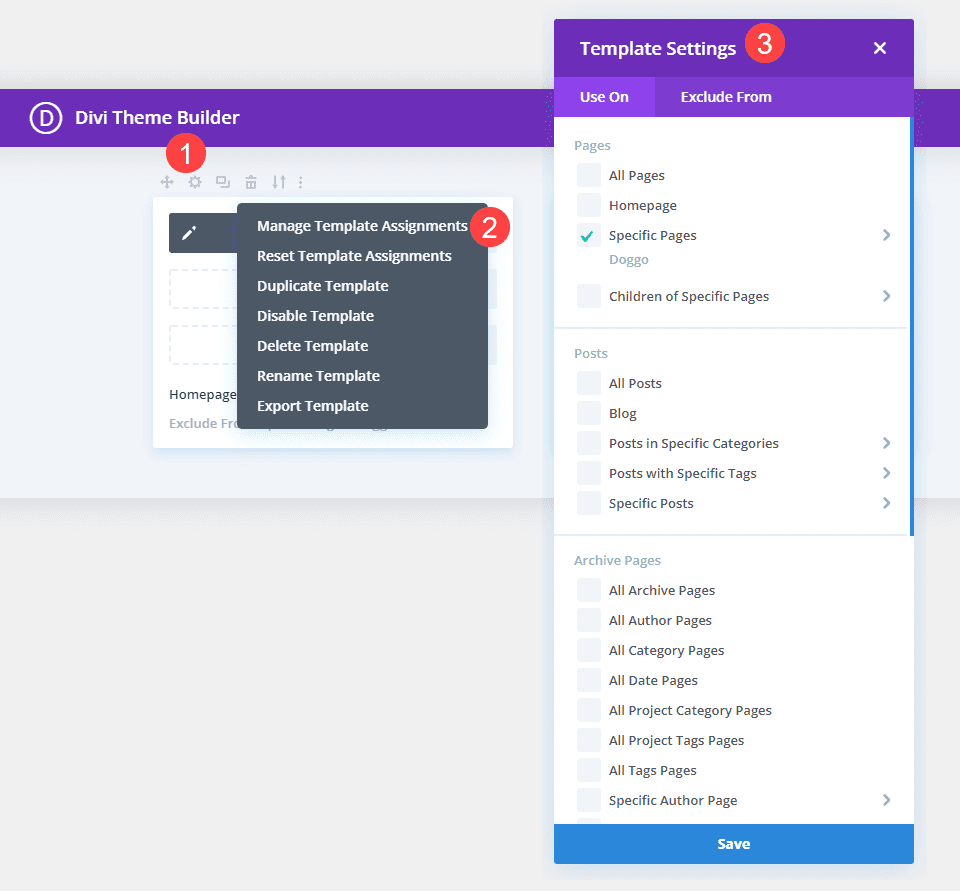
Now, you will see those assignments at the bottom of the template. You may have a single page on there, a particular blog post or series of posts, or even full archives. It doesn’t matter. All of them will show up with the Header, Footer, and Body you’ve assigned.
When this is done, you can use a different header on different templates multiple ways. Let’s take a look at them.
1. Disable the Global Header
The easiest way to make a template use a different header is to take the Global Header and then disable the global trait. Doing so will give you the base design of the Global Header, but you will then be able to edit it for the specific assignment, rather than affecting the whole site.
Just right-click the header layout you want to be different, and then select Disable Global from the context menu.
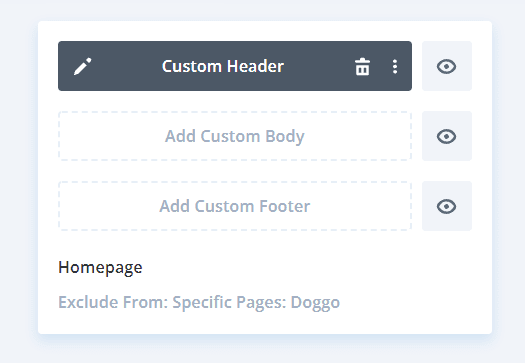
Doing so will change the green box to a black one that says Custom Header that you can edit as you see fit.
2. Create new Headers
The second way to use different headers is to create and design multiple headers using the Divi builder. To create a header, follow the steps we show above of clicking Create New Template then select Build Custom Header.
You will then be able to enter the Divi Builder and design the header as you would anything else with Divi. Add the sections, rows, modules, etc. that you want.
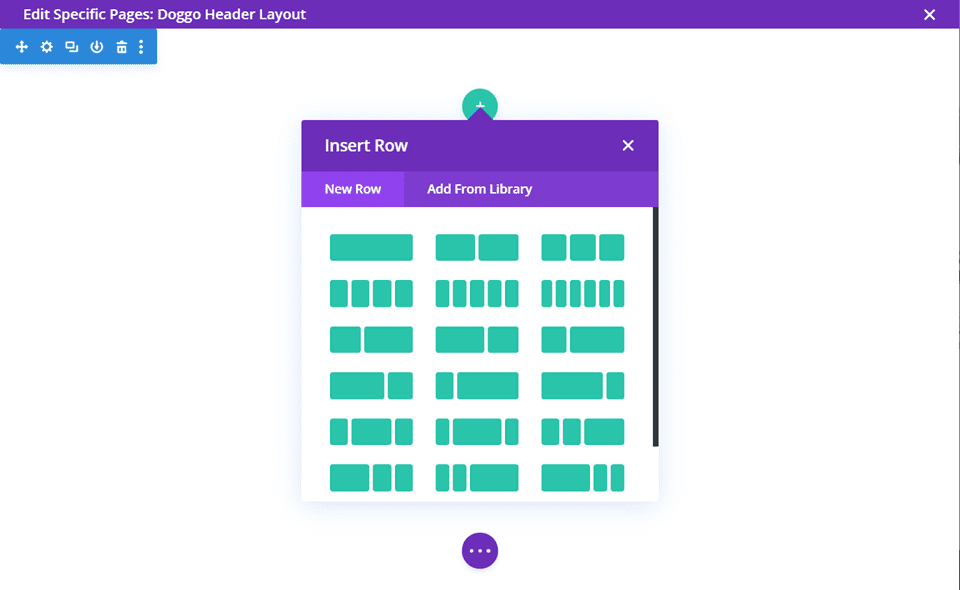
Do this for each different template you want to use different headers. By assigning specific pages and posts to the templates, you are telling Divi to use that template instead of the Global Website Template. In the Divi Theme Builder, specific assignments trump global ones.
In the image below, each of the templates with Custom Header have different headers, even though there is a Global Header set in the Default Website Template.
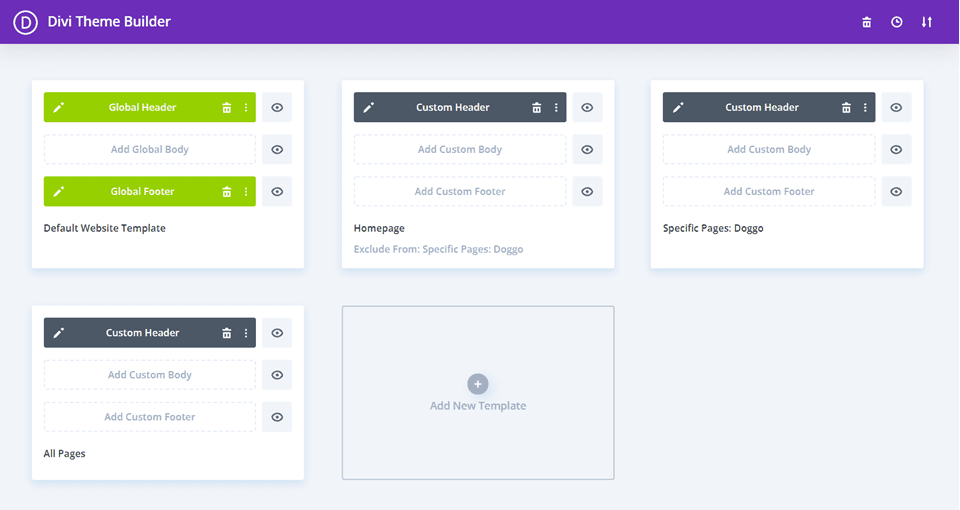
This means that any pages or posts that don’t fall into the criteria specified will use the Global Header, otherwise the different custom headers that you have designed will apply.
3. Import Different Headers
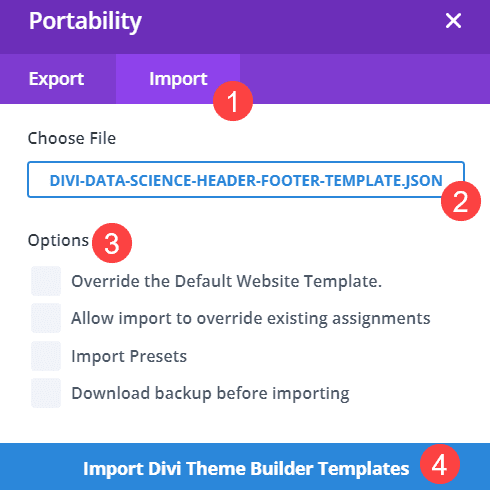
You might also import multiple header files that you’ve acquired elsewhere. We post many new header and footer designs on the blog that match our layout packs. Click the double-arrow icon to use the Divi Theme Builder’s Portability options to import the JSON files that we provide (or that you might have exported as backups or acquired somewhere else).

You will then find the JSON file on your local machine that corresponds with the header you want to upload. Note that you want all of the checkboxes unmarked. If you do not, your entire website’s design may be overwritten.
When the import finishes, you should see a new, unassigned (red text) template with the new design. You can then treat this template as you did before, assigning any content that you want to have a different header.
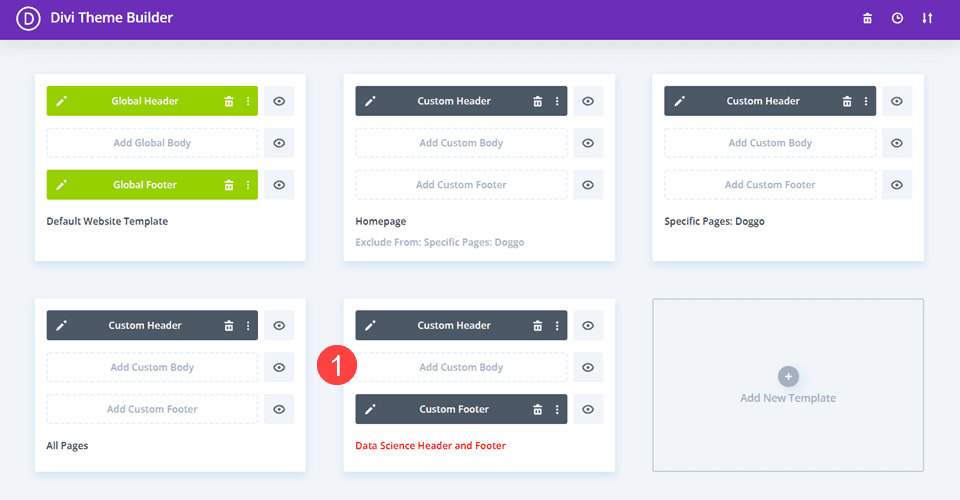
You can also keep the newly imported header as a base template to use later without assigning it anywhere. When you click Add New Template, an options should appear to Copy From Template. You can select the newly imported header for a different template that way, as well.
Wrapping Up
With the Divi Theme Builder, you can use different headers with different templates in a number of ways. Maybe you need one of those headers to just be slightly different from the overall global template. Or perhaps you need different headers for different pages, different posts, and various archives around your site. Regardless, you can customize just about every nook and cranny of your website using the Divi Theme Builder, putting as many different headers on your site as you could ever want.
How many different headers do you use on your website?
Article featured image by Duet PandG / shutterstock.com
The post How to Use Different Headers for Different Templates with Divi appeared first on Elegant Themes Blog.

