Divi’s condition options allow you to have complete control over your site’s content like never before. Part of that control comes in decluttering your site from having content that doesn’t apply to all users. Such as a login form. Many times, sites will have a login form that takes precious real estate in the sidebar or header (or even a whole page to itself). With Divi‘s condition options, you can set a site-wide login form that’s present for non-logged in users only, while your logged in users have a less-cluttered experience catered to them. Let’s take a look at how you can do this.
How to Add a Display Form for Non-Logged in Users
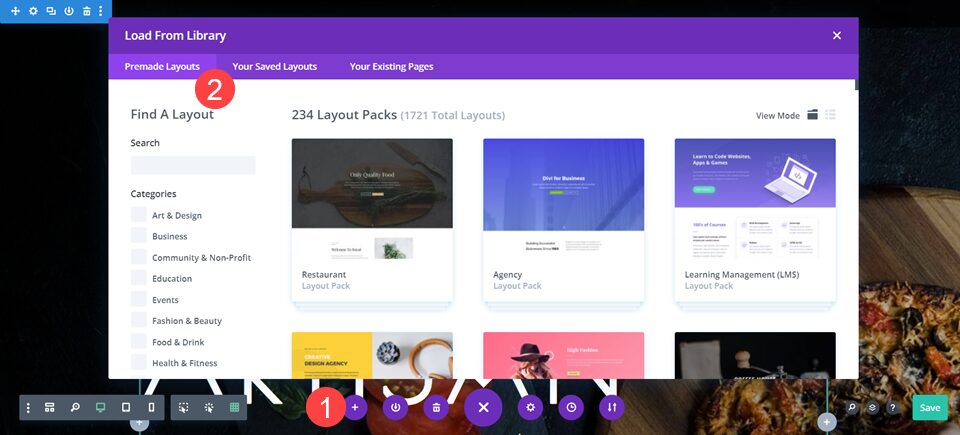
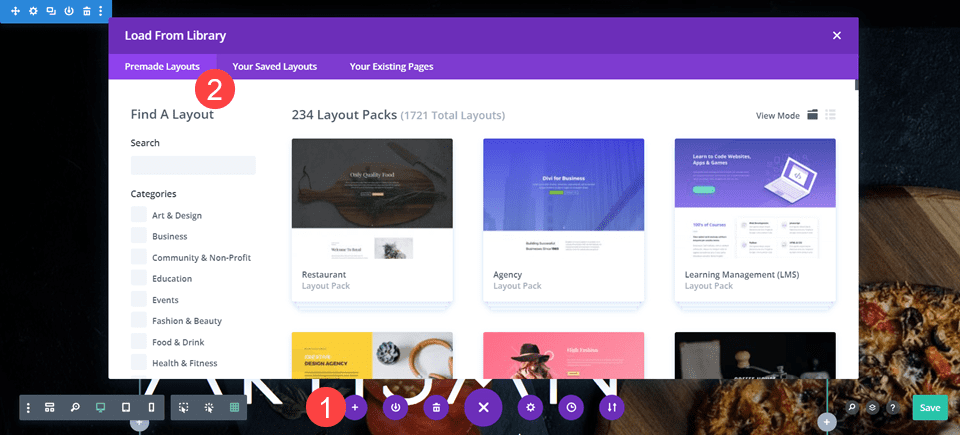
In this tutorial, we’re going to work under the premise that you have an existing site on which you use a login form. Or intend to use a login form in some way. If you do not, then you can easily follow along by using any of our pre-made layout packs within the Divi Builder by choosing Use a Premade Layout when opening the builder for the first time. You can also add a layout by selecting the purple + icon in the bottom menu and choosing one under the Premade Layouts
Go to the Theme Builder
When you have a site set up and ready, head into the Divi theme builder. It’s easy to find. Login to your WordPress admin dashboard, and scroll down until you see Divi – Theme Builder.
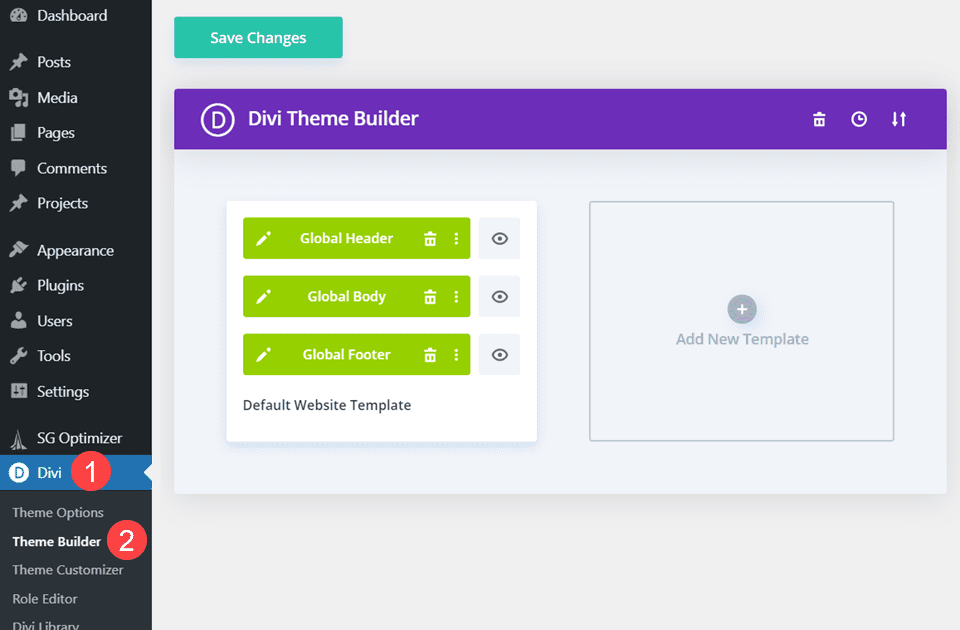
To display a login form for non-logged in users, we’re going to add it to the Global Header so that the vast majority of your site will have the logic for the form, except for specific instances where you use a different header. (You can always copy the login form to those headers, too, though.)
Edit the Global Header
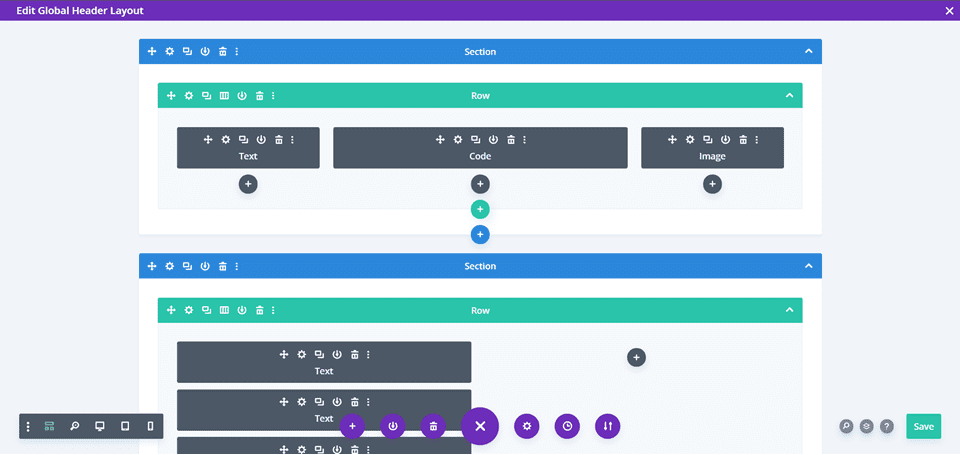
To begin with, double-click the Global Header in the Default Website Template or click the Edit button.
Add a Login Form
Next, find the a spot where you want the login form to appear. For this example, we’re going to add it into a second column for the header. Click the black + icon and select the Login module from the dropdown window that appears.
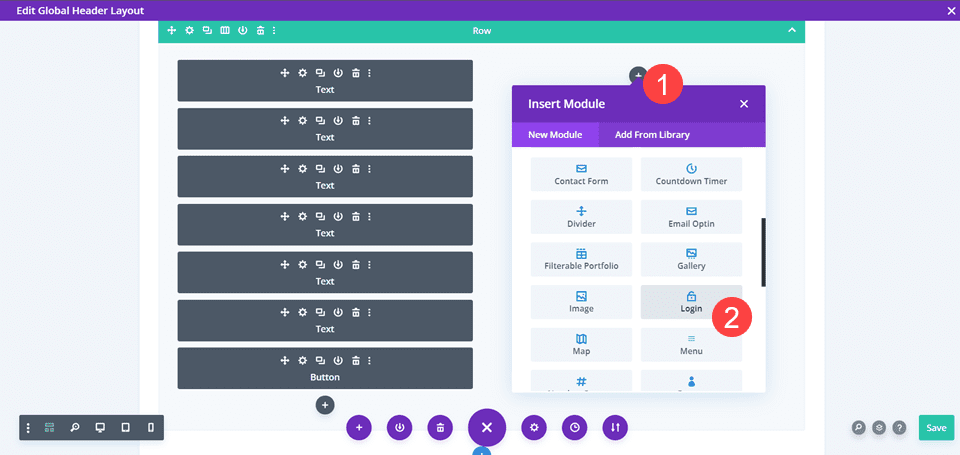
This adds an unstyled login form to the site, and you will have to take the time to match it to whatever header you’re currently using.
Style the Login Form
Even if it’s something just as simple as changing the background color to match your page’s design, making sure the login form is eye-catching is important.
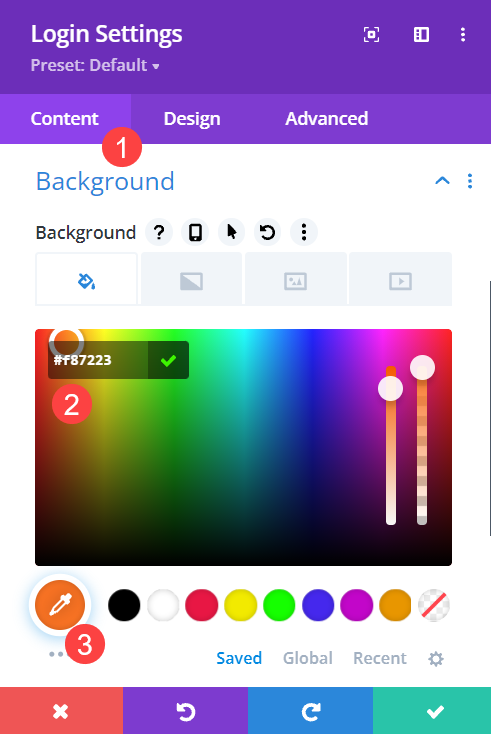
We used #F87223 as the color for this one to match other elements on the pizzeria layout pack.
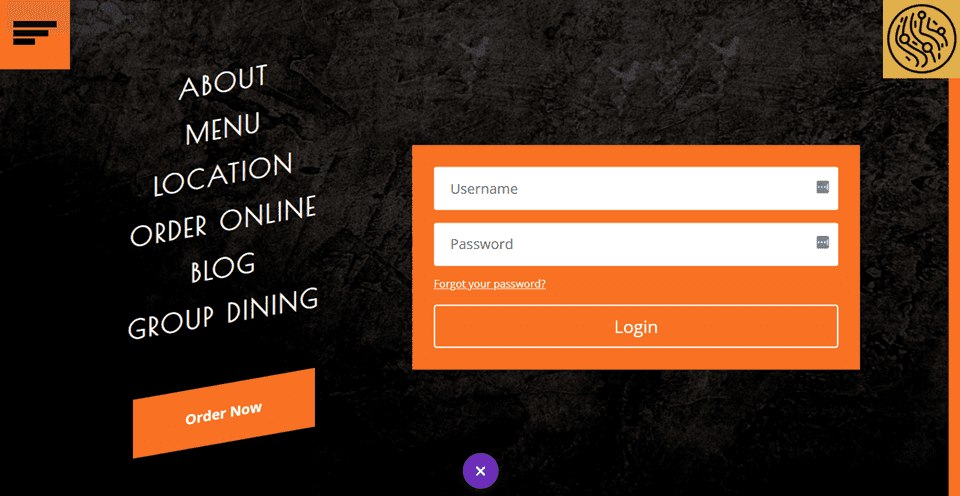
Even just this simple change blends it in better. If you’re on a solid background, using a transparent background to show just the fields and button is also a simple choice that matches anything.
Open Login Module Condition Options
In order to show the login form to only non-logged in users, you will be using the Divi condition options. If you are not familiar with these, they can be found under the Advanced tab for any Section, Row, or Module. Additionally, you can find condition options for individual Columns within rows, too.
This means that even though we are going to be adding the logic to the login module itself, you can choose which element of your site will work the best to display to non-logged in users only. If you want the column containing the login form to be what appears, simply follow the below steps in that element’s settings rather than the Login module itself.
Now, to add the conditional logic, enter the Login Module settings and head to the Advanced tab like we mentioned above. Find the Conditions area, expand it, and click the grey + icon that reads Add Condition.
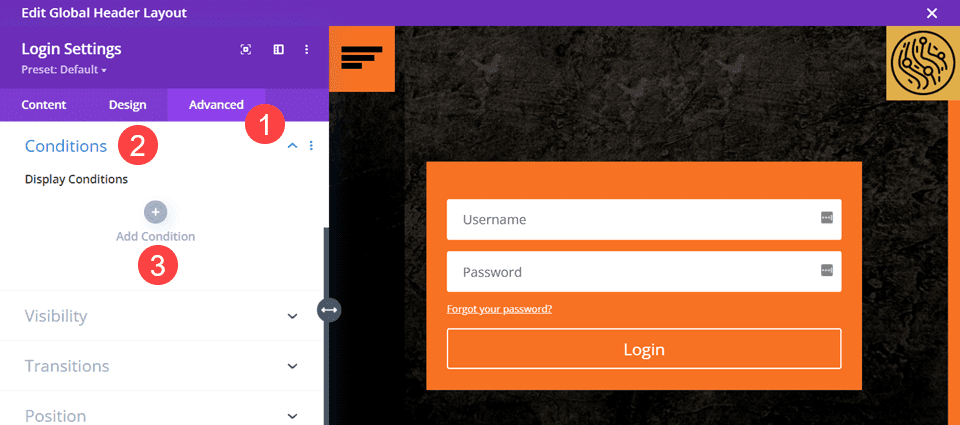
Add a New Condition
Clicking the Add Condition button will open a huge list of all the different choices you have for conditional logic. We are going to use a single condition for this tutorial, but you can use multiple conditions for the same element, creating advanced logic so that you can truly customize your site to your users’ needs.
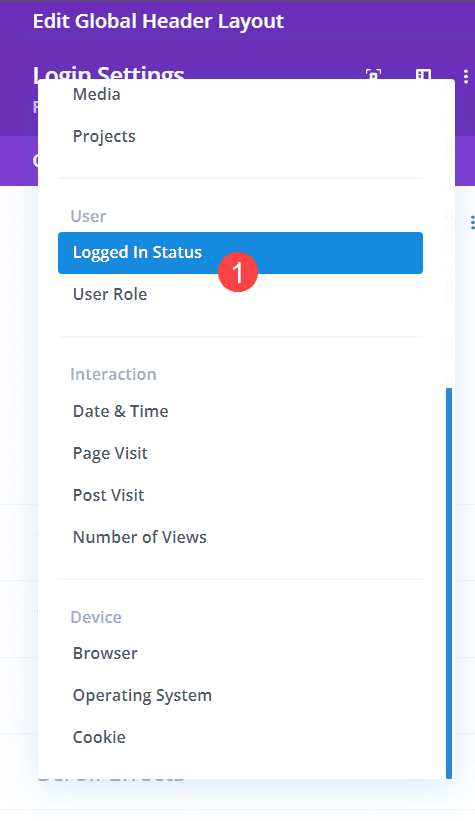
From the list, scroll until you find the User subsection. Choose Logged In Status as your condition.
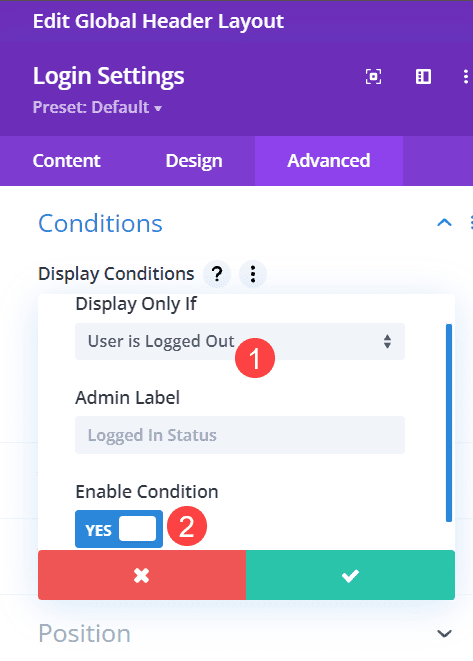
Next, be sure to select User is Logged Out under Display Conditions. You will also want to make sure that the Enable Condition toggle is enabled. If, at any point, you need to disable this particular condition, you can come in here and simply toggle it off until the better time.
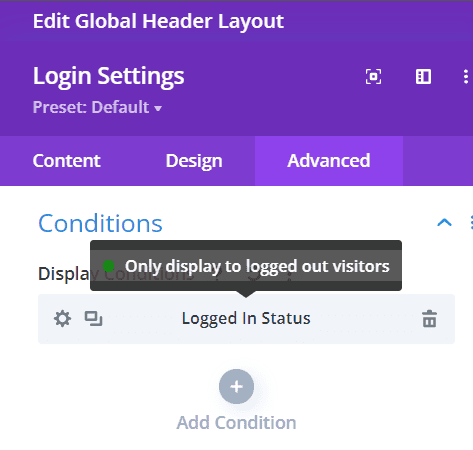
When you save the condition, you should see the it in the list under Advanced. Also, when you hover over any condition, the specific criteria you set will appear. You will also see a green dot that indicates whether the condition is enabled or disabled.
And that’s it! That’s all! When a user loads the page that uses this particular template or layout (in this case the Global Header), any user not logged in will see the form in the space you designate. Otherwise, the user will see nothing but the content you intend.
Wrapping Up with How to Display a Login Form
Regardless of the reason you might need the login form hidden from logged in users, the Divi condition options allow you to do it with very little fuss. Just choose where you want logged out or unregistered users to see the form and use the conditional logic built right into Divi to display the login form to only those visitors. While this tutorial used the Global Header as a location because that’s what most visitors to your site will see, you can do this in any spot on your site that you can add a Divi login module.
Why do you want to display a login form to non-logged in users but not those already logged in?
Article featured image by AnyaPL / shutterstock.com
The post How to Display a Login Form for Non-Logged In Users Only appeared first on Elegant Themes Blog.

