Trends in web design change drastically year to year. Something that seems to have taken hold and stayed, however, is the use of animation. The more people use mobile devices and apps, the more they expect the sites they visit to use some of the same principles. Using animation well can boost user interaction, allowing you to guide your site’s visitors through the experience you want them to have. This is where the Lordicon service comes in.
What is Lordicon?
Lordicon is a collection of cool animated icons that can be used in multiple digital formats. Each icon is available in JSON, GIF, EPS, SVG, and PNG formats. Additionally, you can copy and paste standard HTML codes. Using HTML makes it possible to integrate icons in most CMS and static HTML environments without the need for any plugins.
Lordicon offers access to over 5,600 animated icons in their library. You can use over 1000 of those Lordicon icons for free. However, if you want access to the full library, you’ll need a subscription. Getting started with Lordicon is simple. Sign up with your email address, set a password, and you are ready to browse their extensive library. If you’re a developer, signing up with GitHub may be the easiest way of all.
![]()
You’ll have two icon categories to choose from upon sign up.
- Wired icons are more modern and expressive icons that are fully customizable. You may choose your colors, set the speed for the animation, choose whether to loop, or choose the animation style.
- System icons are more like the icons offered by Font Awesome and similar to the style that comes embedded in Divi.
![]()
Before we show you how to use Lordicon, let’s go over the pricing options so you can decide whether Lordicon is something you’d like to use on your websites.
How Much Does Lordicon Cost?
Lordicon is free to use! However, as we mentioned before, you’ll need a paid subscription to use all of the icon variations. Lordicon offers two price points. You can opt to pay monthly, which will cost $16 per month. If you choose to purchase an annual plan, your cost is cut in half to $8 per month or $96 yearly.
It should be noted, too, that with a paid subscription, you’ll also have more control over how you integrate your icons into your website.
![]()
Navigating the Lordicon Interface
The Lordicon interface is simple and well thought out. The first step is to browse for icons. Once you’ve found the one you’d like to use, simply click on it to bring up your options. With your icon selected, you can edit it with the options listed in the sidebar. Here you’ll set your colors and stroke width. From there, you can copy HTML, download it as a GIF or Lottie (JSON), or click the more button for additional options.
If you’d like full control parameters for your icon, simply click the arrow in the right sidebar to pull up the full editor.
![]()
In the full editor, you’ll get a few more options at your disposal. In addition to choosing your color and stroke size, you’ll be able to choose a variation for your icon. There are typically three different variations you can choose from so that you can match your site’s aesthetic regardless.
Additional options include trigger style, size, and scale. Once you’ve made the changes you like, you can download or embed your icon.
![]()
Download options include Embedding with HTML, Loridcon Lottie JSON, GIF, APNG, WebP, and MP4 formats. Additionally, you can download source files in EPS, Lottie JSON, or After Effects formats.
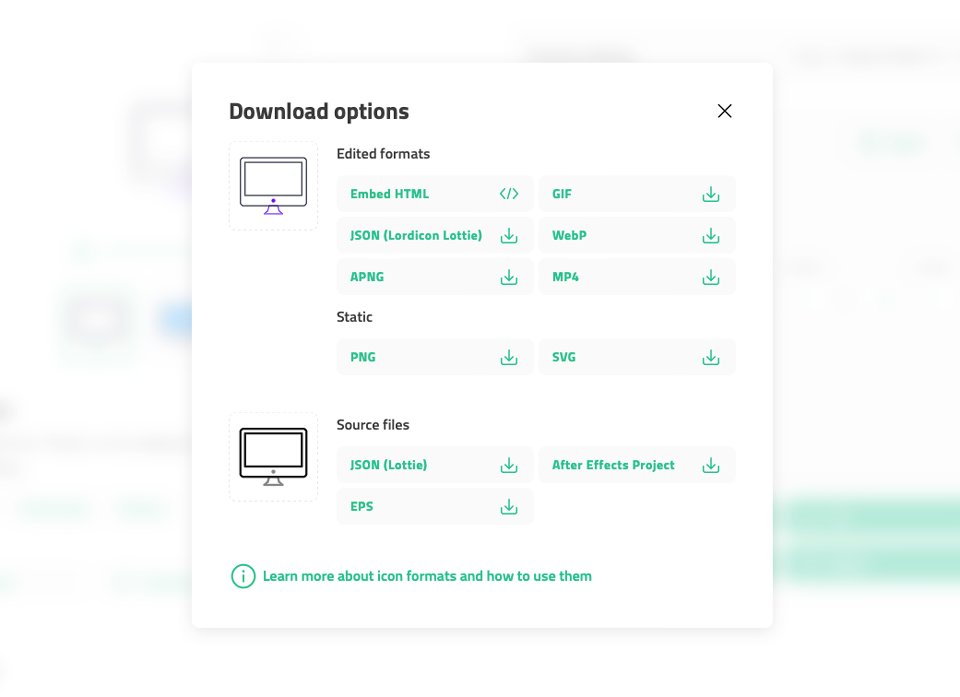
You can then import these files into WordPress’s media library for use as you see fit.
How to Use Lordicon with any WordPress Site
It’s quite easy to embed Lordicons on WordPress sites using Gutenberg blocks with the Lordicon plugin. Lordicon’s documentation states that their icons can be easily embedded on any WordPress website utilizing Gutenberg blocks or using Divi modules (or other site builders). Additionally, they have partnered with Slider Revolution to integrate their icons into sliders.
Using Gutenberg Blocks
Using Lordicon icons with Gutenberg is straightforward. There are two ways that you can do it. The first way is to set your design parameters in Lordicon and copy the HTML to use in a Custom HTML block in Gutenberg. The second is using the Lordicon Animated Icons plugin with its own custom block in Gutenberg.
First, you need to install and activate the Lordicon plugin from the WordPress dashboard. Once activated, create or edit a page or post on your WordPress website. Next, click the black + icon to choose the Lordicon Element block.
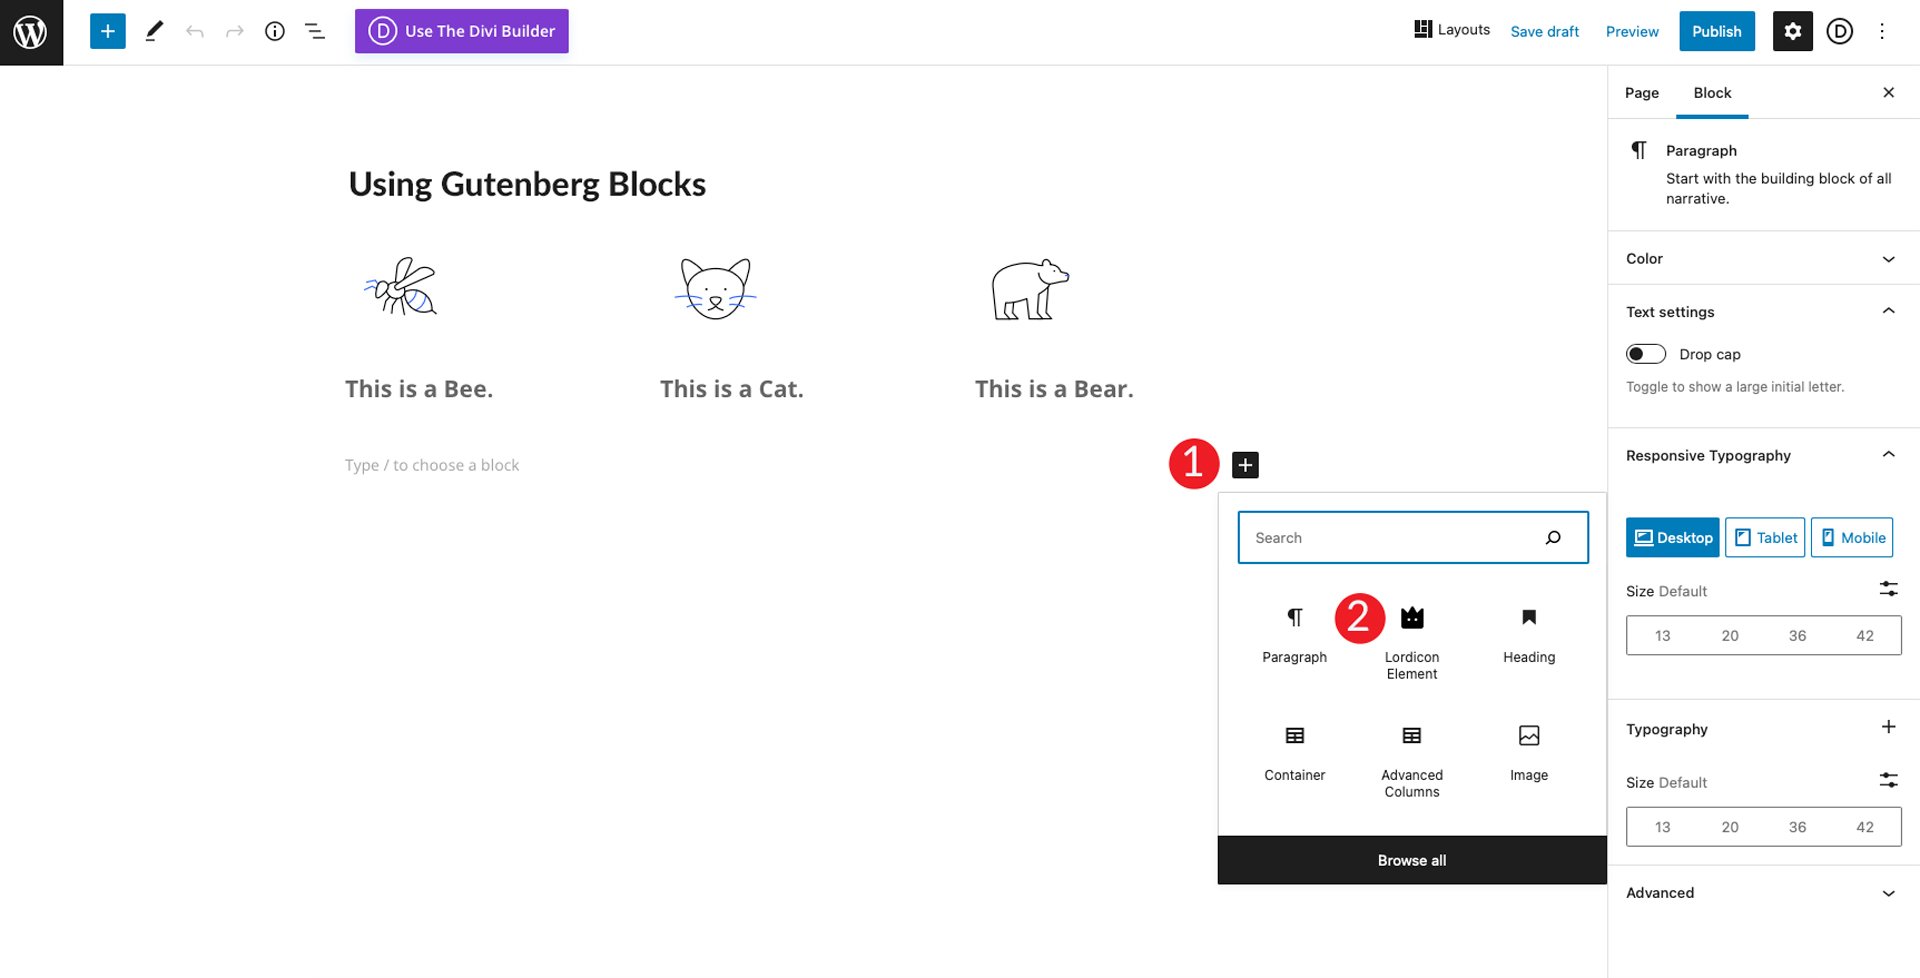
Next, head over to the Lordicon icon library. For this example, we’re going to use the bee icon. Search for the bee, then the arrow to open the full editor.
![]()
Embedding Your Icon in Gutenberg
Embedding your icon can be done one of two ways. The first way is to download the JSON file from Lordicon, then upload it to your WordPress site. The second way is to click the HTML button and copy the CDN link in the embed code to simply link to it.
Either way works well, but using JSONs on your site has the potential to slow it down. If you are only planning on using a couple of animation effects here and there, it’s perfectly fine. However, if you want to use multiple JSON files, it might be best to use the CDN link so Lordicon delivers the image themselves.
For this example, we’ll use the CDN link. To embed your icon on your site, click the HTML button on the bee icon screen and copy the CDN link.
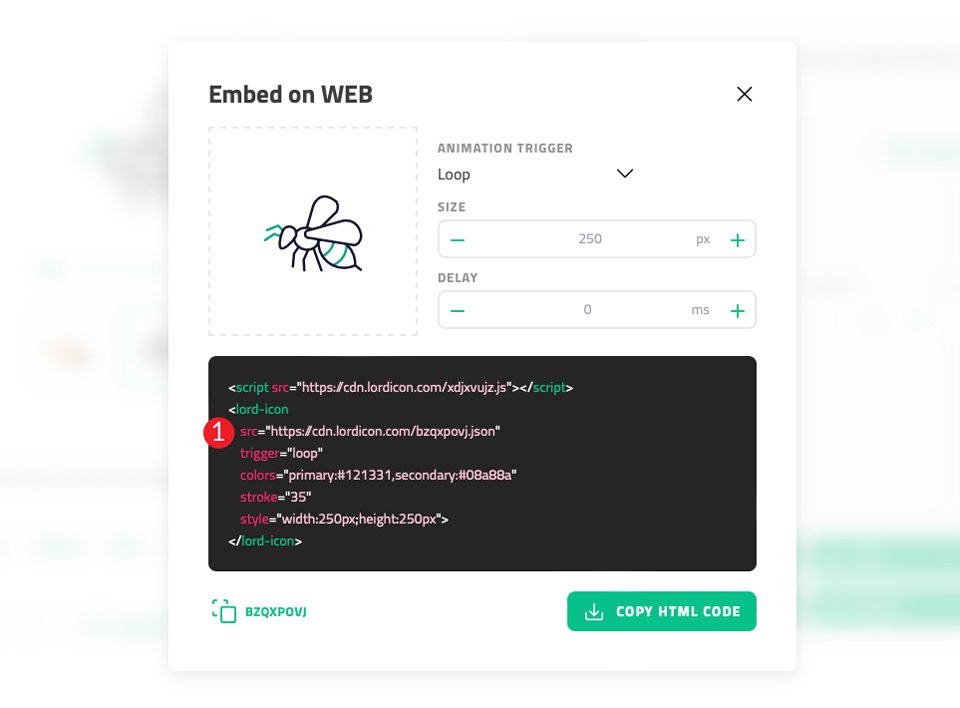
Head back over to your website and paste the CDN link into the Icon URL field of the block settings. Next, you’ll set your trigger, and choose a delay time (if desired). Finally, set your icon size, stroke weight, and colors.
![]()
That’s it. As you can see, Lordicon icons are simple to use and offer several ways to integrate them into your WordPress website using the Gutenberg editor.
If on the chance you don’t want to use the Lordicon plugin and choose code embed, you can follow the same steps that we outline in the next section, replacing the Divi Code Module with the Custom HTML block in Gutenberg.
How to Use Lordicon with Divi
Next, we’ll show you how to incorporate these animated icons in Divi. For this tutorial, we’re going to use the Mobile App Landing Page layout available (for free!) with your Elegant Themes membership. You can access all our pre-made layout packs from within the Divi Builder itself.
There are a few ways you can incorporate Lordicon icons in Divi. Using a GIF, adding HTML into a Divi Code Module, or using a shortcode. Let’s explore each option so you can choose which one is easiest for you.
Using a GIF
For this tutorial, let’s use the landing page from the Mobile App Layout pack. First, we’ll take the blurbs under the hero section and replace the image with Lordicon GIFs. Color pick the purple from the hero section and head over to Lordicon to choose the Clock icon. Click on the green default color and replace it with #6f4fff. Click apply to save your changes.
![]()
There are three styles for the icon. Choose the line style (the middle option shown in the screenshot below) for our icon.
Under preview settings, set the trigger to Loop on hover, and size to Big.
Next, set the available motion type to Hover-1. This will have your icon animate on hover and loop the animation.
Then, adjust the stroke width to 35%. Once you have the correct settings, click the GIF button to download your icon.
![]()
When the dialog box appears, select transparent for the background, 100px for the size, and leave the default 250ms for the delay. Click the DOWNLOAD button.
![]()
Add Your Icon to Divi
Head back over to the Divi builder and select the first blurb in under the hero section. Click the gear icon to edit, then select the Image & Icon section dropdown. Click on the already installed calendar icon to replace it. Select your newly Downloaded GIF to add it to the media library.
![]()
Next, click on the Design tab and scroll down to Image/Icon Width. Set the width of your icon to be 100px. Leave the alignment set to left, then click the green check to save the module.
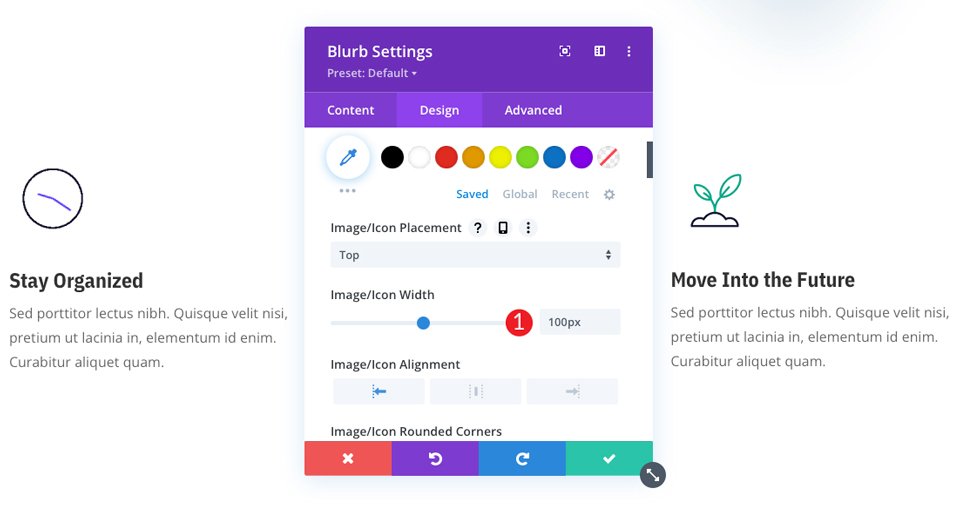
While embedding a GIF into your Divi website is simple, let’s explore an additional way you can incorporate Lordicon animated icons into your Divi site.
Using the Divi Code Module
This method will give you a bit more control over how your icon is presented. Embedding a GIF works great but limits some of the animation effects. For example, effects such as hover don’t function when using a GIF. In order to have true control over all aspects of how your Lordicon icon appears in Divi, we suggest using the Divi Code Module.
Using the Code module is simple. Using the same layout pack page, navigate to the second Blurb module on the page. This time, we are going to delete the image from the Blurb module and save it.
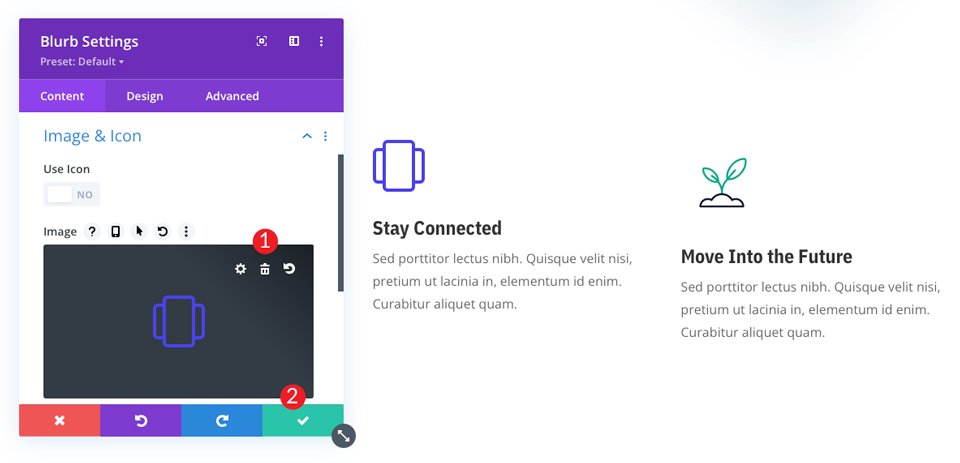
Once you’ve saved, click the black + icon and find the Divi Code Module. Add it to the section/row above the Blurb.
![]()
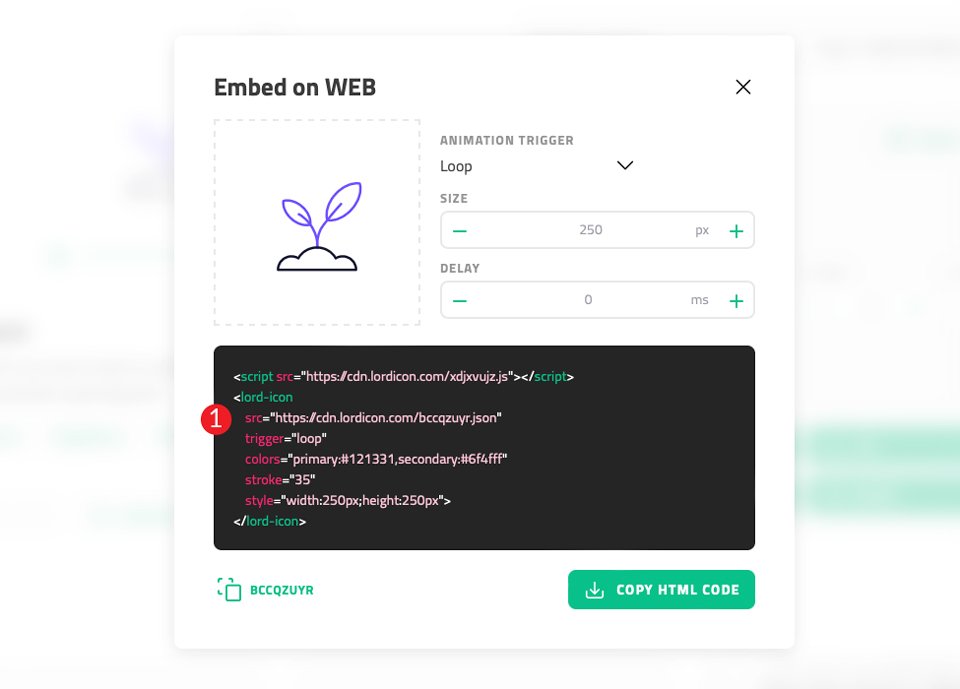
Head back over to Lordicon and click the EMBED HTML button. This will bring up the Embed on WEB dialog box. Make sure Loop on Hover is selected. Then make sure your size is set to 100px. Finally, click the COPY HTML CODE button.
![]()
Now, head back over to your Divi page and paste that HTML into the Code module. Save it, and the new Lordicon embed should appear above the Blurb module that you removed the image from.
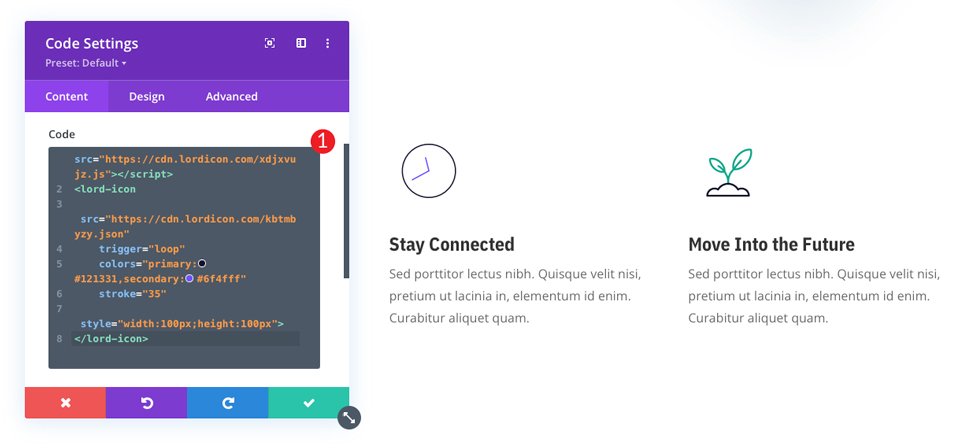
Using a Shortcode
The steps to use a shortcode are very similar to embedding HTML. In Lordicon, search for the growing plant icon. Under preview settings, set the trigger to Loop on hover and the size to big. Replace their standard green color with #6f4fff. Set the stroke width to 35%. Finally, download the JSON file by clicking the JSON (LOTTIE) button.
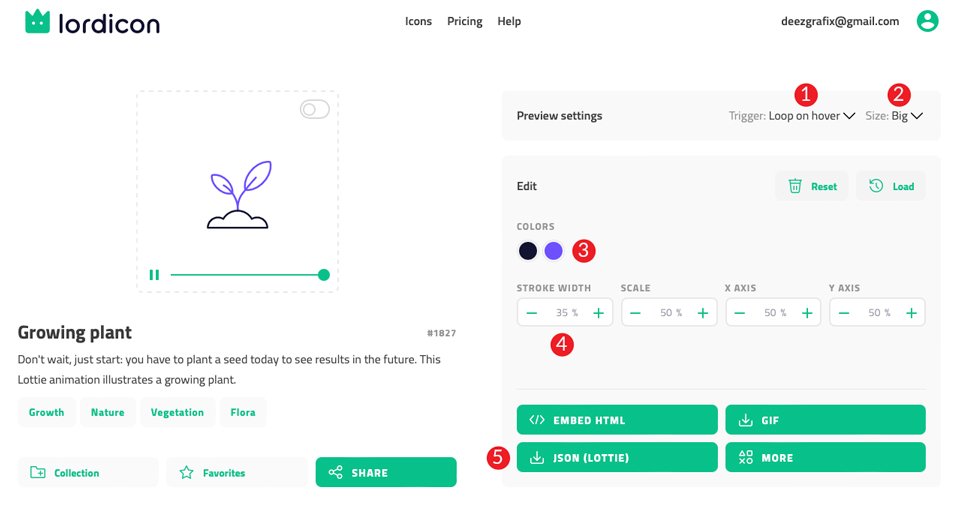
Next, you can either upload the JSON you downloaded from Lordicon to your WordPress media library, or link to a URL you’ll find in the HTML code.
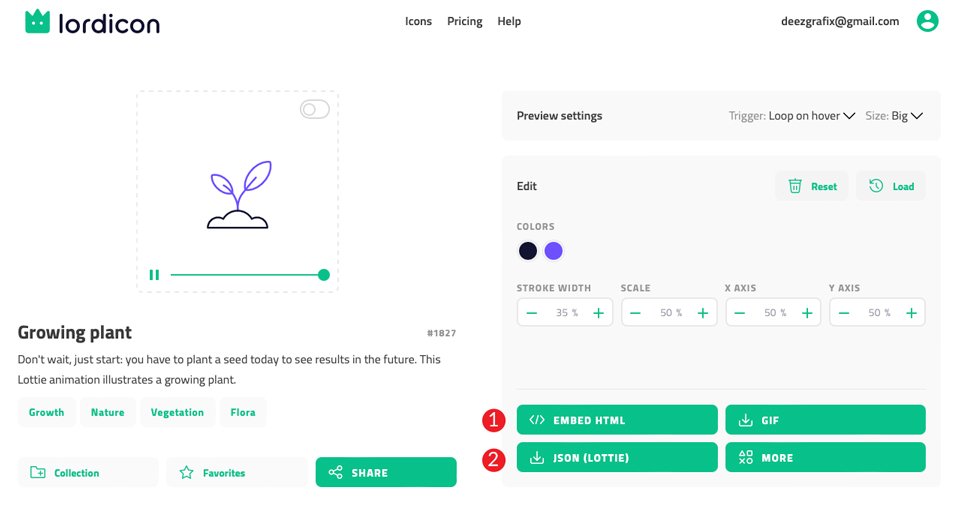
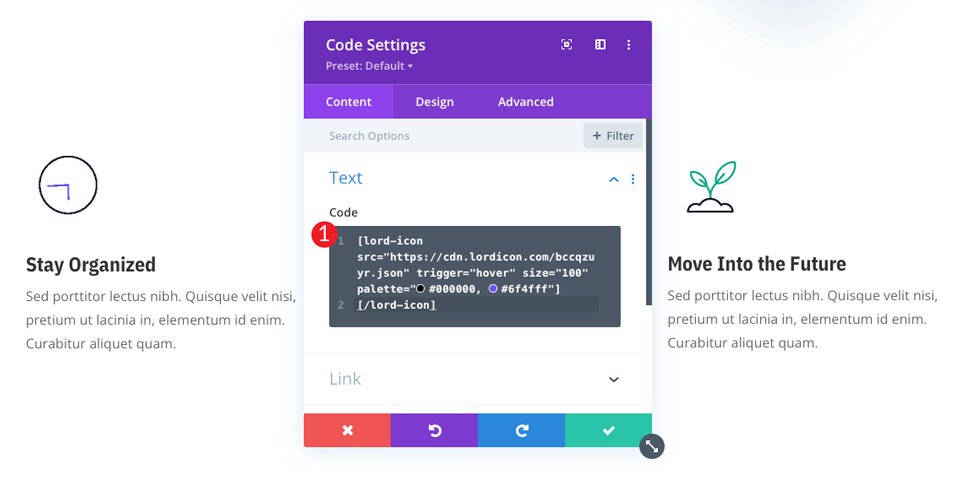
We recommend linking to a URL in your shortcode rather than uploading it to your media library. This will save space on your site, especially if you plan to use multiple icons, as well as server processes. Lordicon shortcodes begin with [lord-icon] and end with [/lord-icon]. If using a CDN link, your shortcode will look like this:
[lord-icon src="https://cdn.lordicon.com/bccqzuyr.json"
trigger="hover" size="100" palette="#000000, #6f4fff"]
[/lord-icon]
For the icon source (src=), you’ll copy the link from the growing plant icon in the HTML code. Make sure your animation is set to hover, size is set to 100, and your colors (palette) are #000000 and #6f4fff.
The last step is to place your shortcode into the Divi Code Module and save it. Your shortcode should look like the screenshot below.
Adding new icons throughout the site can be accomplished by copying the shortcode above, then changing out the CDN link along with your trigger style, size, and colors (if you wish to have different animation effects).
It’s important to note that these items are set when you create your icon on the Lordicon website.
Which Method is Best?
If you take a look at your page, you can see some differences between the GIF Lordicon icon and the HTML code you embedded. The first difference is that the GIF animates continuously. The code blocks we created animate only when hovered over. It’s up to you which method you choose.
Keep in mind that some of your users may be sensitive to movement. While having movement and animations on websites is a great way to keep users engaged, you don’t want to overdo it. Sometimes subtle interactions are all you need to create interest in your design.
Lordicon Icons Make a Great Addition to Your Website
With web design trending more towards the mobile app experience, animation has become an integral part of web design. Incorporating subtle animation is a great way to upgrade the look and feel of your website. With over 1,000 free icons and thousands more available with a Lordicon subscription, you should definitely take a closer look at their offerings. Especially with it being so easy to integrate into both WordPress and Divi.
Have you used Lordicon? If so, tell us about your experience below.
Featured Image via i_photos / shutterstock.com
The post How to Use Lordicon with WordPress and Divi appeared first on Elegant Themes Blog.
