In Divi, you can add background masks to any element in Divi. This creates a great opportunity to boost the design of your website’s footer with Divi. In this tutorial, we’ll show you how to easy it is to add a background mask to your footer template using the Divi Theme Builder. Once done, you will have a brand new footer design in place that is easy to tweak for your own website.
Let’s get started.
Sneak Peek
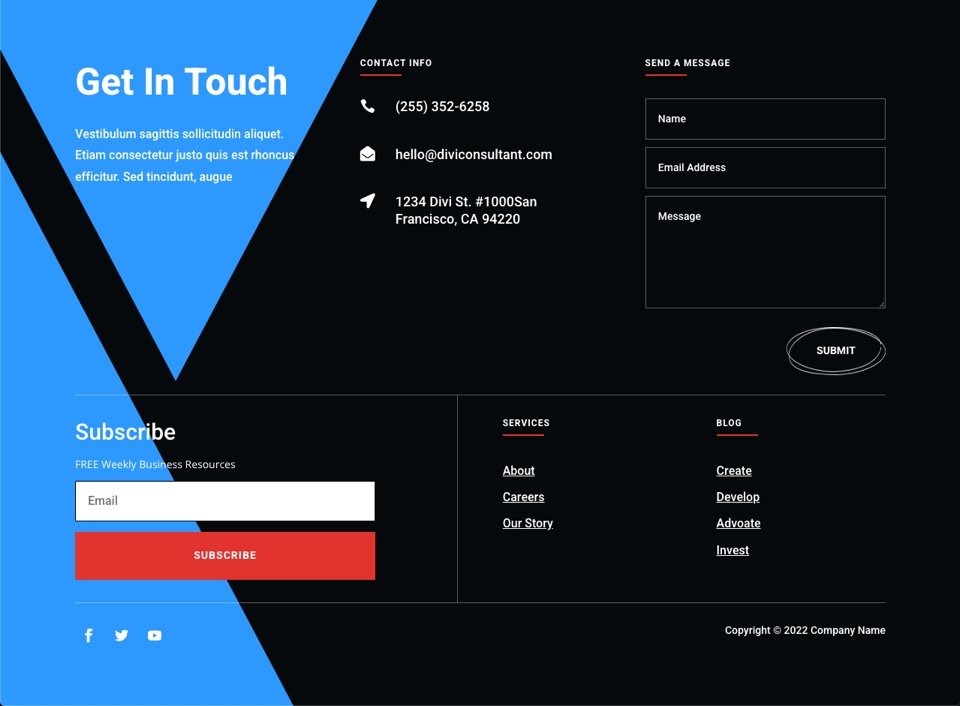
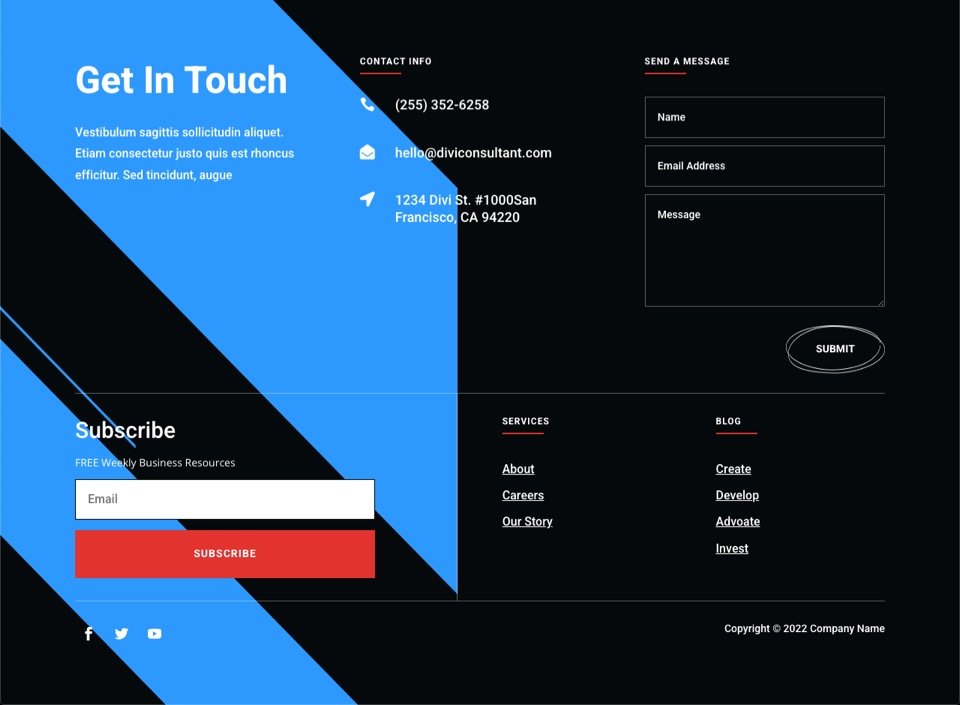
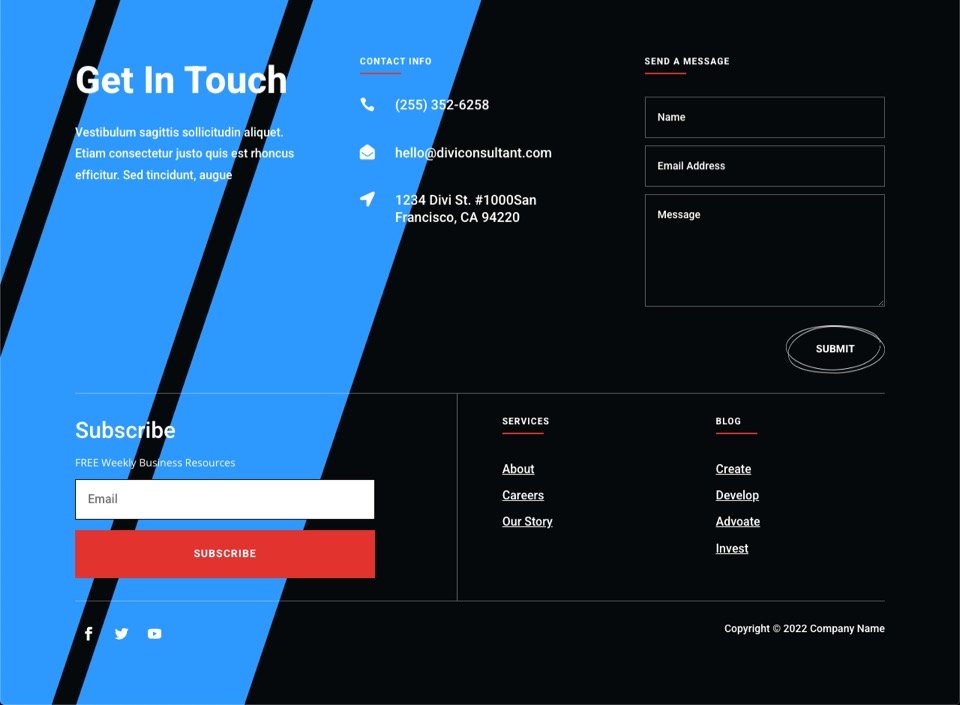
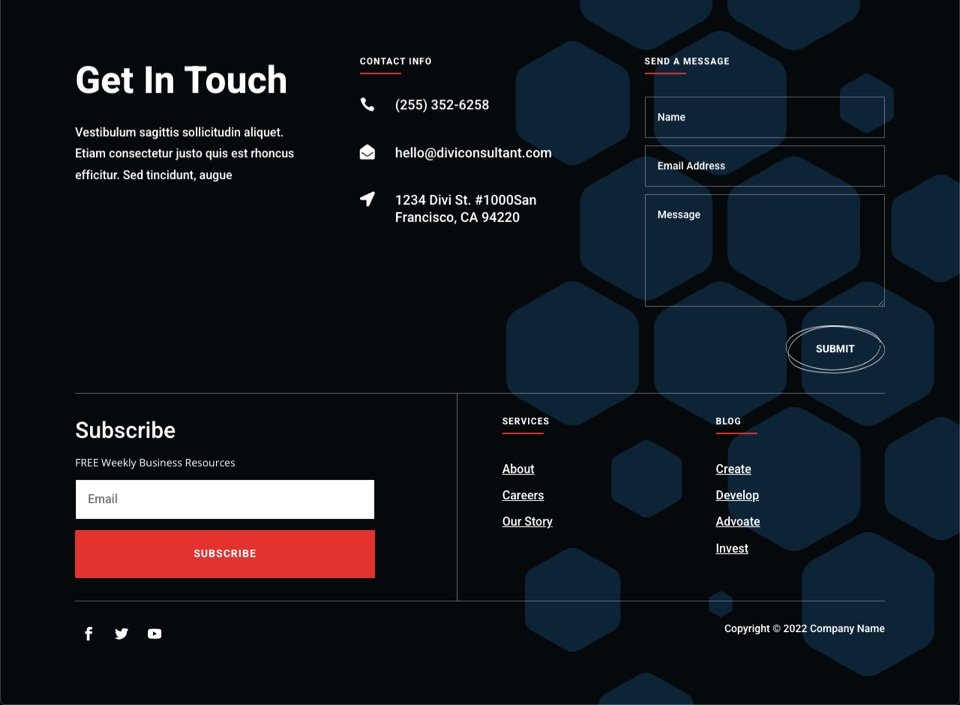
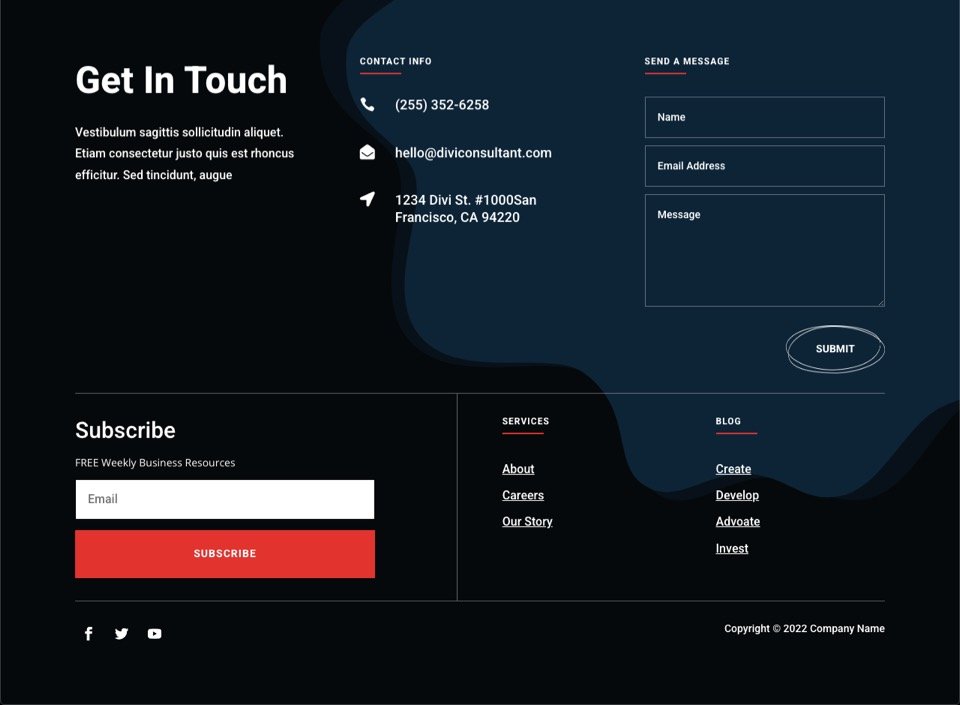
Here is a quick look at the footer designs with a background mask we’ll build in this tutorial.
Download the Layout for FREE
To lay your hands on the designs from this tutorial, you will first need to download it using the button below. To gain
access to the download you will need to subscribe to our Divi Daily email list by using the form below. As a new
subscriber, you will receive even more Divi goodness and a free Divi Layout pack every Monday! If you’re already on the
list, simply enter your email address below and click download. You will not be “resubscribed” or receive extra emails.
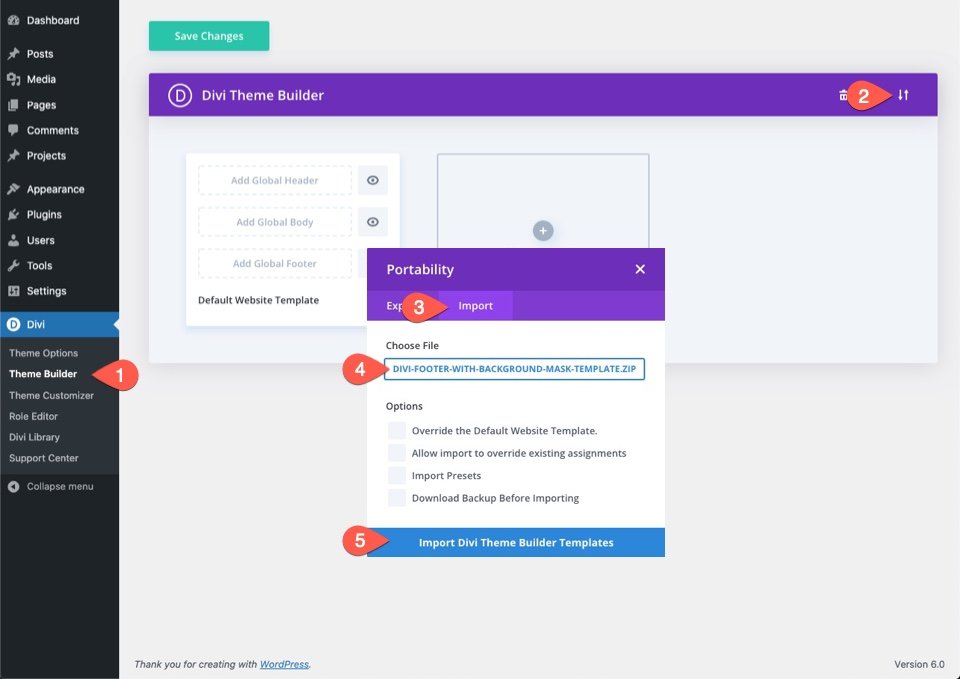
To import the footer template to your Divi Library, do the following:
- Navigate to the Divi Theme Builder.
- Click the Import button at the top right of the page.
- In the portability popup, select the import tab
- Choose the download file from your computer (make sure to unzip the file first and use the JSON file).
- Then click the import button.
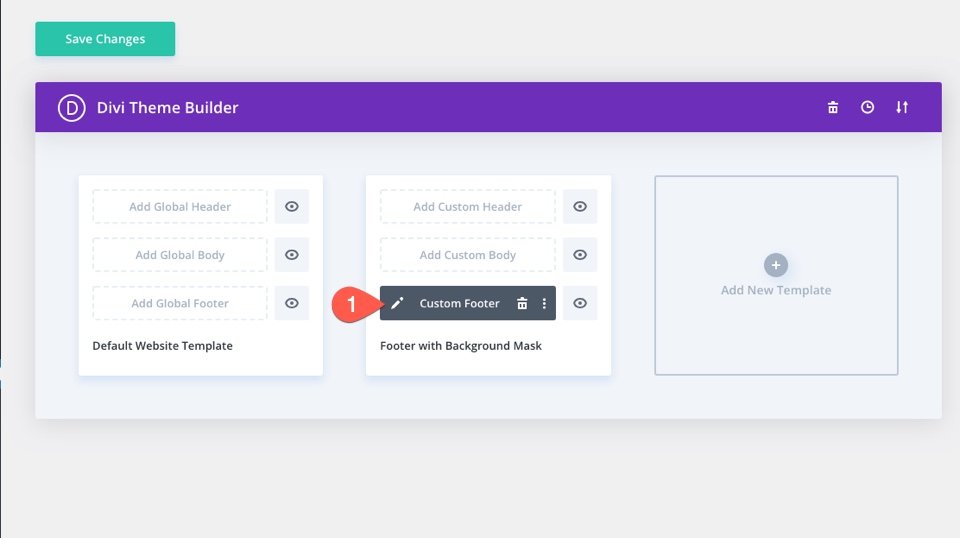
Once done, the template will be available in the Theme Builder. To edit the template, click the edit icon on the footer template.
Let’s get to the tutorial, shall we?
Getting Started with a Premade Footer Template
If you want to use your own existing footer for this tutorial, feel free to skip this step and jump in and edit your footer template. You can apply a background mask to any existing footer design.
For this tutorial, we are going to use the free header and footer template designed for the Consultant Layout Pack. Go to the blog post and download the template by entering your email address in the newsletter optin and clicking the Download the Files button that appears immediately after.

Once the zip file has been downloaded, unzip it.
To upload the unzipped JSON file to the theme builder, do the following:
- Navigate to the Divi Theme Builder.
- Click the Import button at the top right of the page.
- In the portability popup, select the import tab
- Choose the download file from your computer (make sure to unzip the file first and use the JSON file).
- Un-check the options that will override your current templates.
- Then click the import button.
- Select the option “Import them as static layouts…”.
- Then click the import button again.
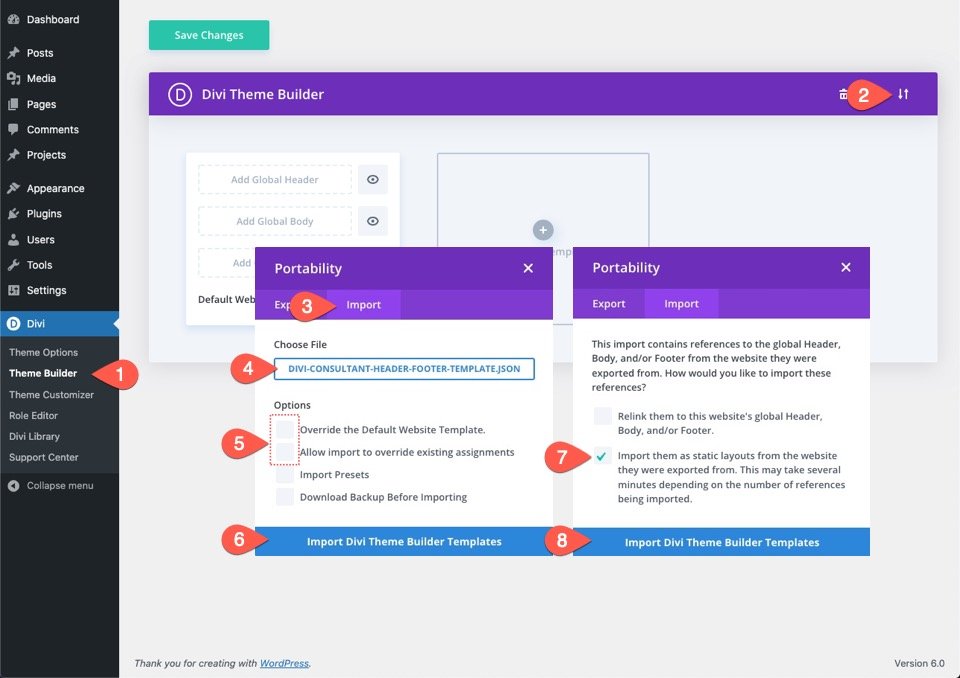
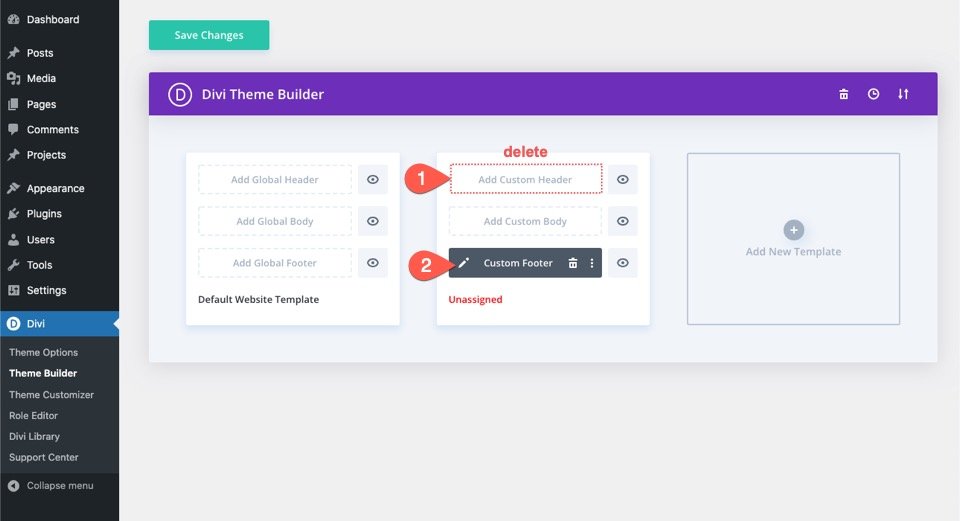
Once the template has been loaded to the Theme Builder, delete the header of the template (we won’t need it for this) and click to edit the footer of the template.
How To Add Background Masks to Your Divi Footer
Adding a Background Mask to the Section Containing the Footer Content
This particular footer is built with a single section. Since we are going to add the background mask design to the entire footer background, we can add the mask to the section that contains the footer content.
To do this, open the settings of the section. Under the background options, select the Mask tab, and add a background mask to the section as follows:
- Mask: Triangles
- Mask Color: #2c98ff
- Mask Transform: Horizontal Flip, Invert
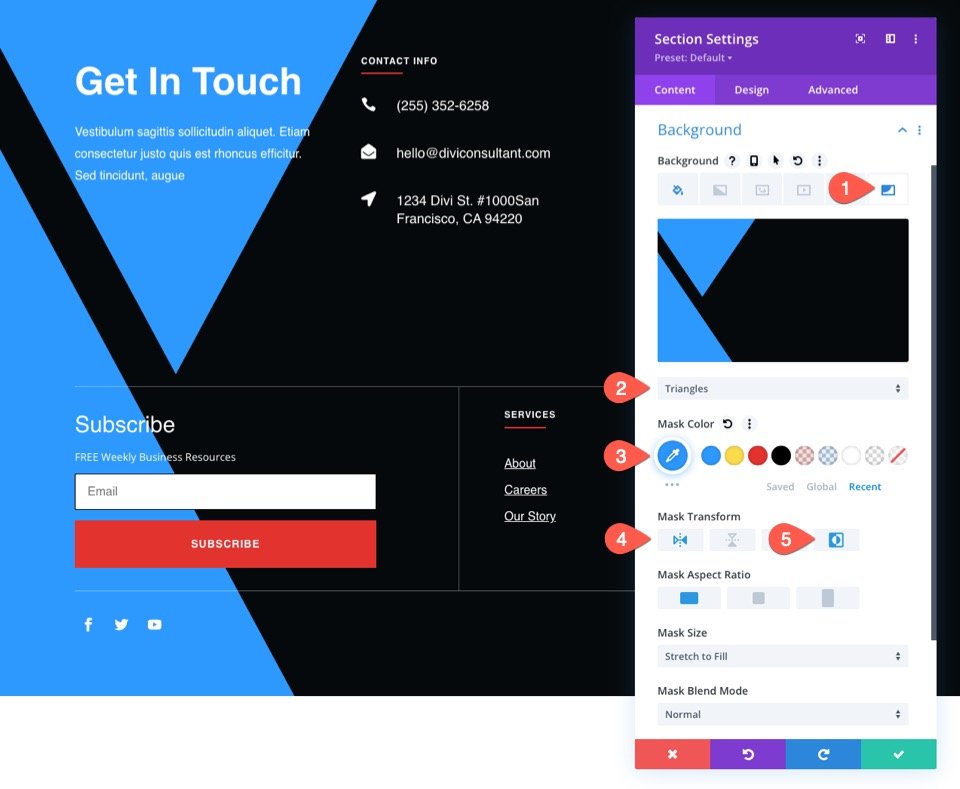
Here is the result.

Adjusting the Mask for Mobile
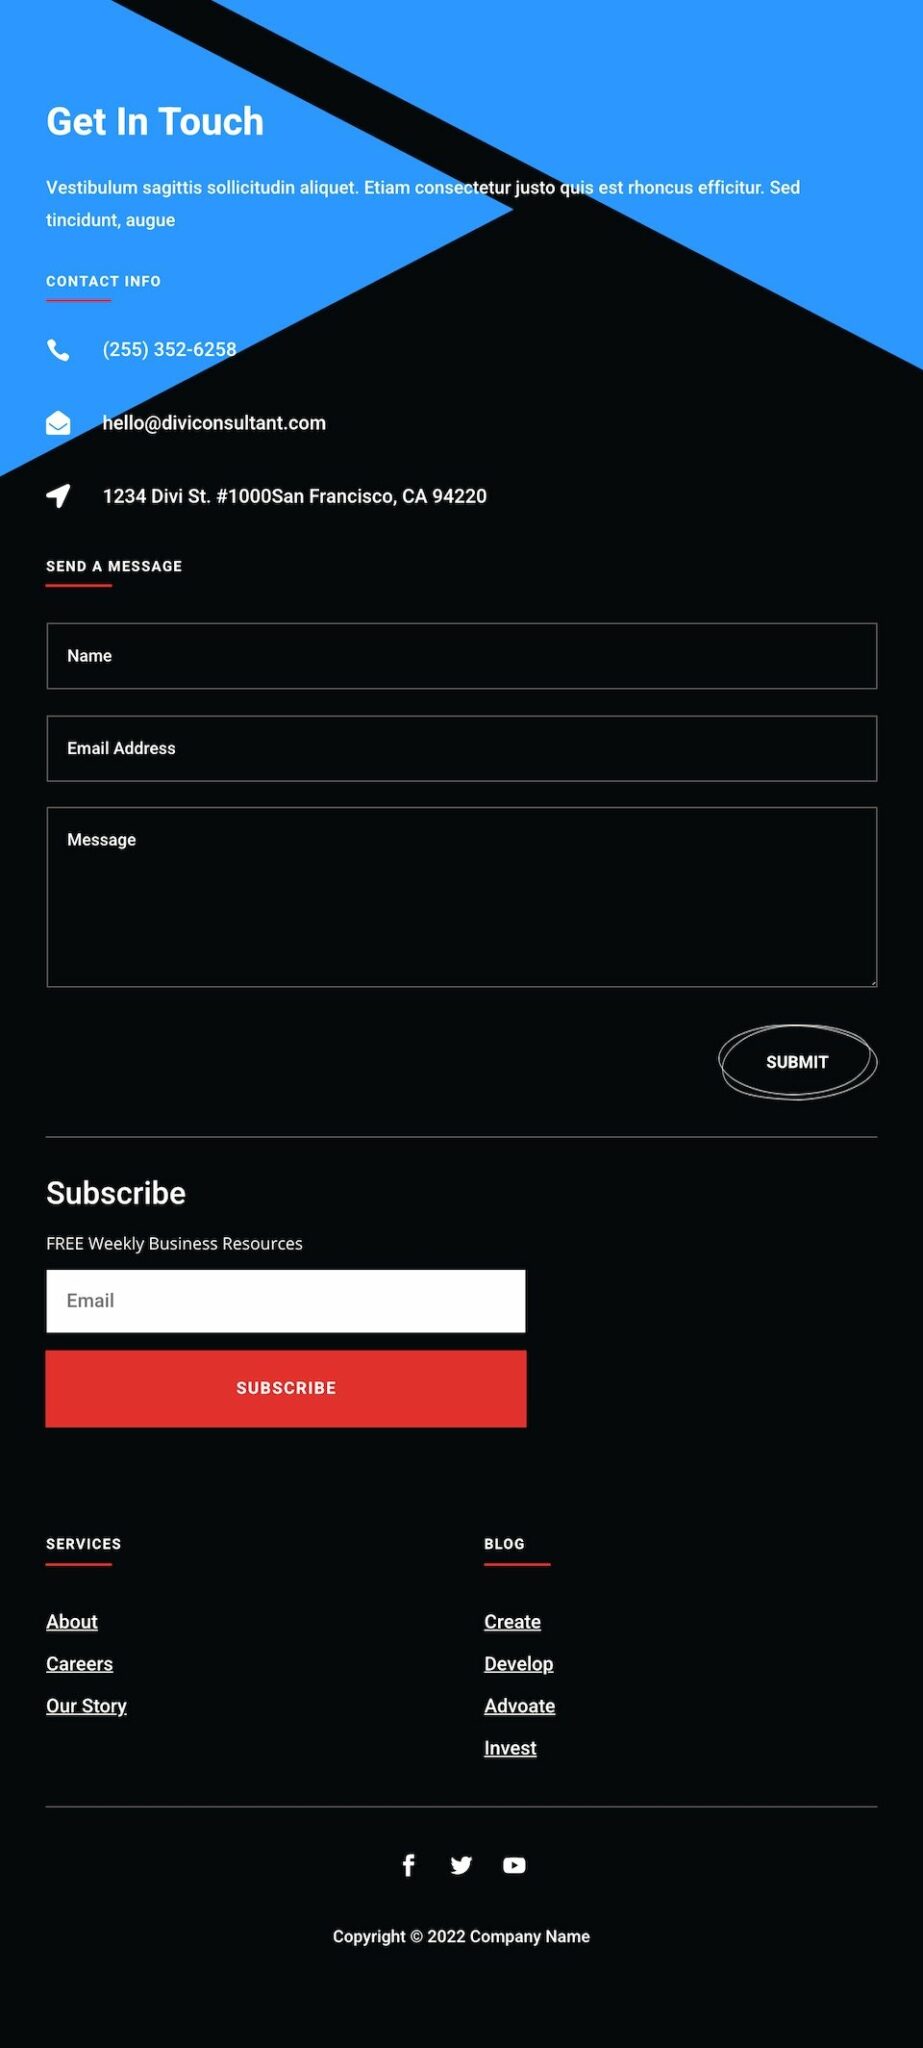
In order for the background mask design to look good on mobile devices as well, we will need to make a few adjustments. Each mask may need different adjustments, but in general, the following adjustment should work for most.
Activate the responsive settings/tabs for the background options and select the tablet tab. Then update the following Mask options:
- Mask Transform: Rotate
- Mask Size: Fit
- Mask Position: Top Right
Now the mask has a nice design for mobile.
Trying New Masks and Colors
Once the initial mask design is complete, we can try different masks and mask colors for new footer background design options. Since you can change masks with a simple click, we might as well see what a few others will look like.
Blades Mask
Open the section settings and change the background mask to Blades.
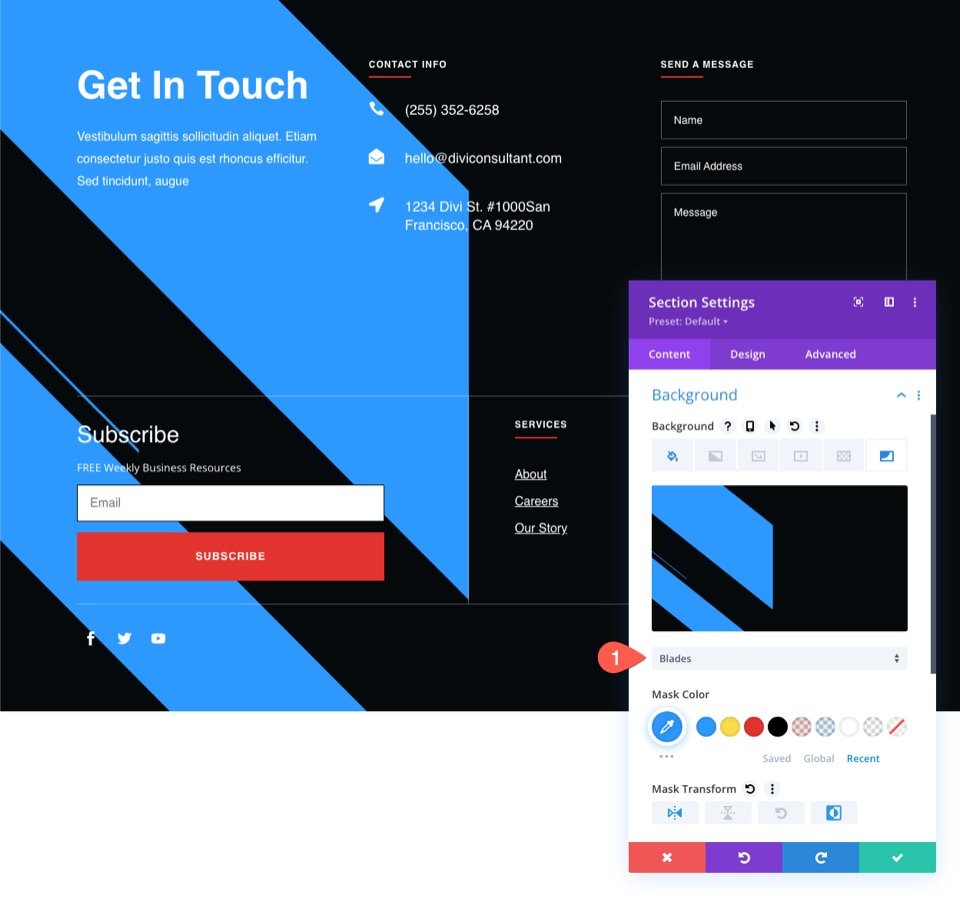
Here is the result.

Diagonal Lines
Select the Diagonal Lines mask for a different look.
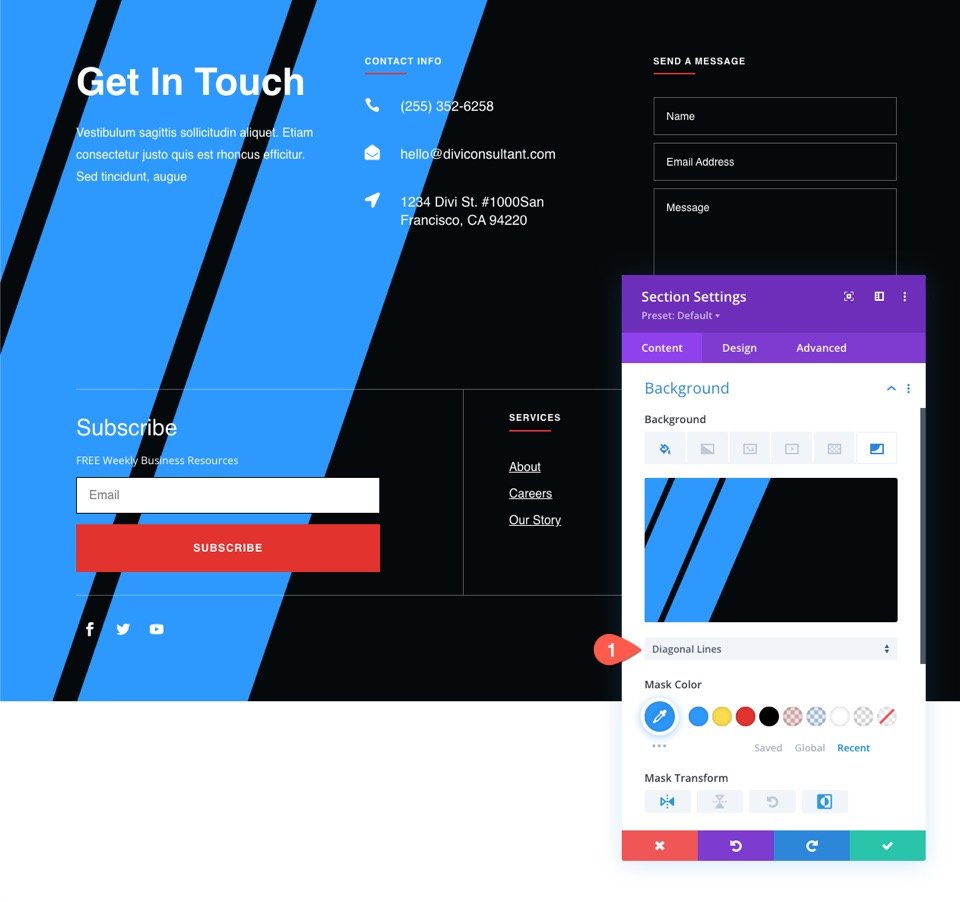
Here is the result.

Honeycomb (subtle)
To make a more subtle (and darker) background mask using Honeycomb, update the following:
- Mask: Honeycomb
- Mask Color: rgba(44,152,255,0.18)
- Mask Transform: Invert
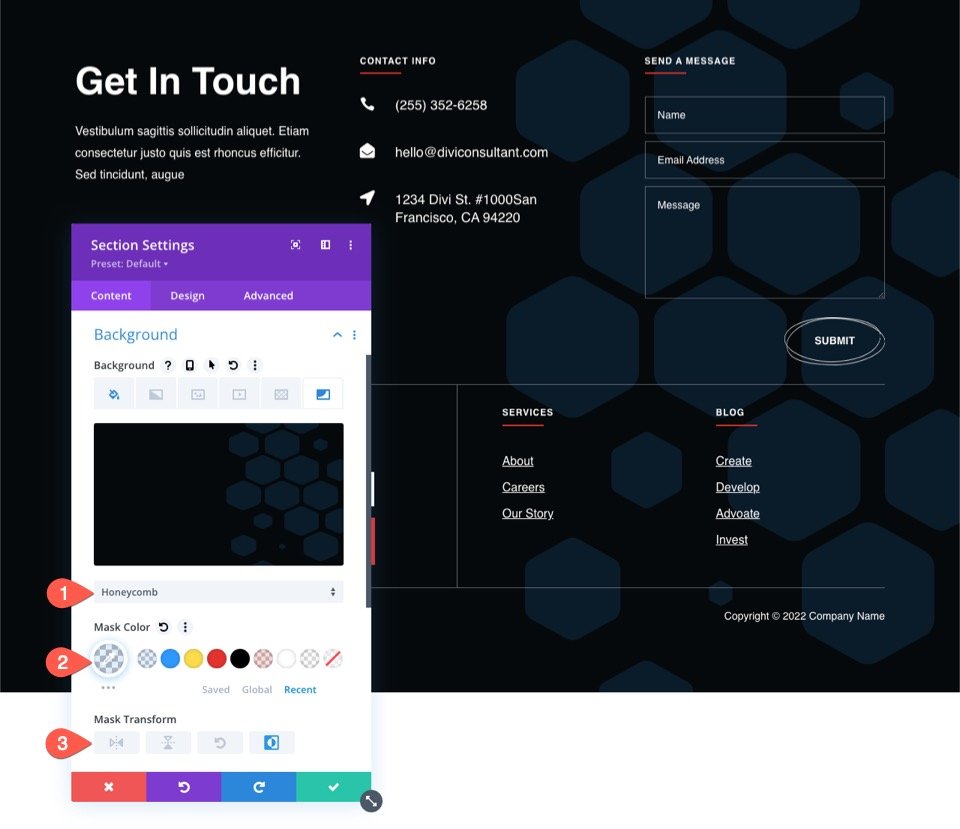
Here is the result.

Corner Blob (subtle framing)
You can use the Corner Blob mask to add a subtle frame design around the contact form inside the footer. Simply update the following:
- Mask: Corner Blob
- Mask Color: rgba(44,152,255,0.18)
- Mask Transform: Rotate, Invert
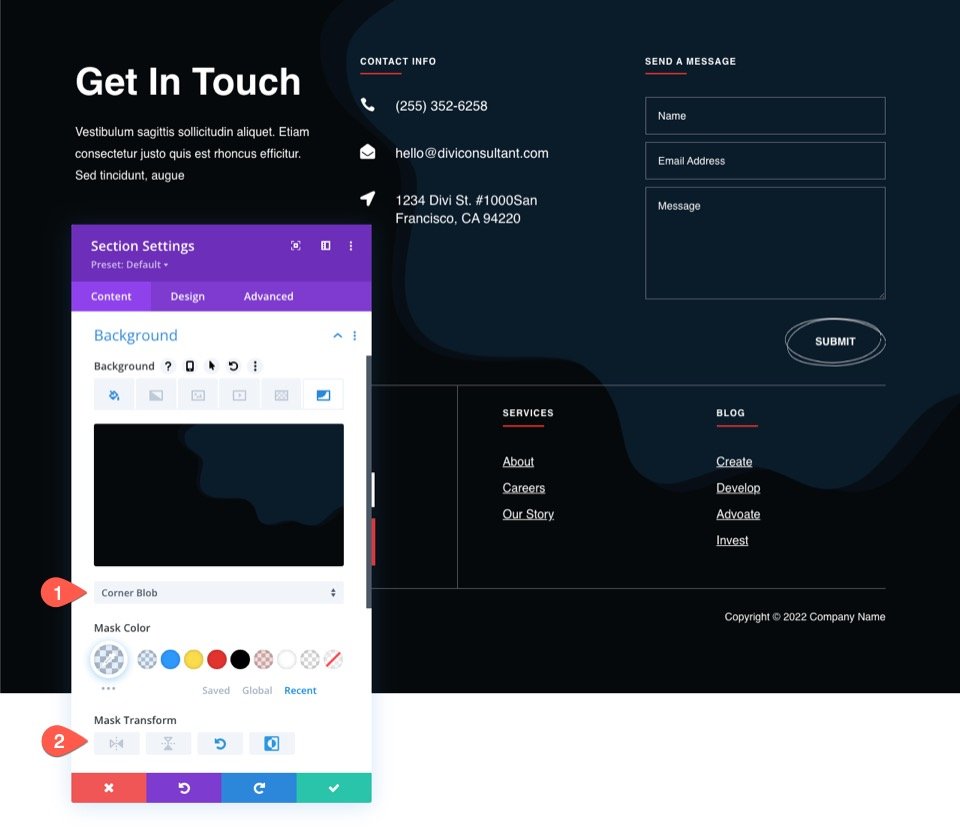
Here is the result.

Final Results
Let’s take a look at the final results.


Final Thoughts
Creating a background mask design for your footer is quite simple using the Theme Builder and Divi’s built-in background options. Simply click through the different masks and transform options to experiment and find the right one for your footer. Don’t forget to make the necessary adjustments for mobile. Hopefully, this will come in handy for your own website or your next project.
I look forward to hearing from you in the comments.
Cheers!
.inline-code{padding: 0px 4px; color: crimson; font-family: Monaco,consolas,bitstream vera sans mono,courier new,Courier,monospace!important} video.with-border {border-radius: 8px;box-shadow: 0 8px 60px 0 rgba(103,151,255,.11), 0 12px 90px 0 rgba(103,151,255,.11);display:block;margin: 0 auto;}
The post How To Add Background Masks to Your Divi Footer appeared first on Elegant Themes Blog.

