Points systems can reward loyal customers who frequently interact with your content or purchase items from your online store. They’re great for gamification and loyalty programs. However, WordPress doesn’t support this feature natively. Therefore, you might be wondering if the myCred WordPress plugin is a viable solution for implementing a rewards program.
In today’s post, we’ll review the myCred plugin and explain how you can use it to create a rewards system in WordPress. Let’s get started!
An Introduction to myCred Rewards Systems
myCred is a freemium plugin that enables you to add points and rewards to your WordPress website. With this plugin, you can gamify your content, maximize brand loyalty, and monetize your site:

For instance, you might offer points to customers whenever they make purchases in your store. Once they reach a particular balance, you can reward them with a discount on their next purchase or even a free item.
Alternatively, you could add a points program to your online courses. You might design a system in which students can accrue more points when they complete assignments or perform well on quizzes. Then, you can create a leader board and encourage friendly competition among eager learners.
Apart from points, myCred also enables you to allocate rankings and badges to your users. Plus, you can allow visitors to buy more points and use them to purchase other items in your store or even redeem them for cash.
An Overview of myCred Premium
myCred’s free plugin has all the basic features you’ll need to add a rewards system to WordPress. Furthermore, its premium plans include various add-ons, including:
- Treasure icons (gems, fitness badges, currency, and more) to award to your users
- Basic add-ons, such as notification email integrations, birthday and anniversary points, coupon customization, and more
- Gamification and payment gateway integrations
Premium plans start at $149 per year for two sites. More expensive plans include additional integrations and support for a higher number of websites.
How to Use myCred to Add a Rewards System to WordPress (In 5 Easy Steps)
Now that you understand more about myCred and why you might want to use it, let’s look at how you can use the plugin can add a rewards system to your website!
Step 1: Install and Activate myCred
Firstly, you’ll need to install and activate the plugin. You can do this in your WordPress dashboard by navigating to Plugins > Add New and searching for “mycred”:
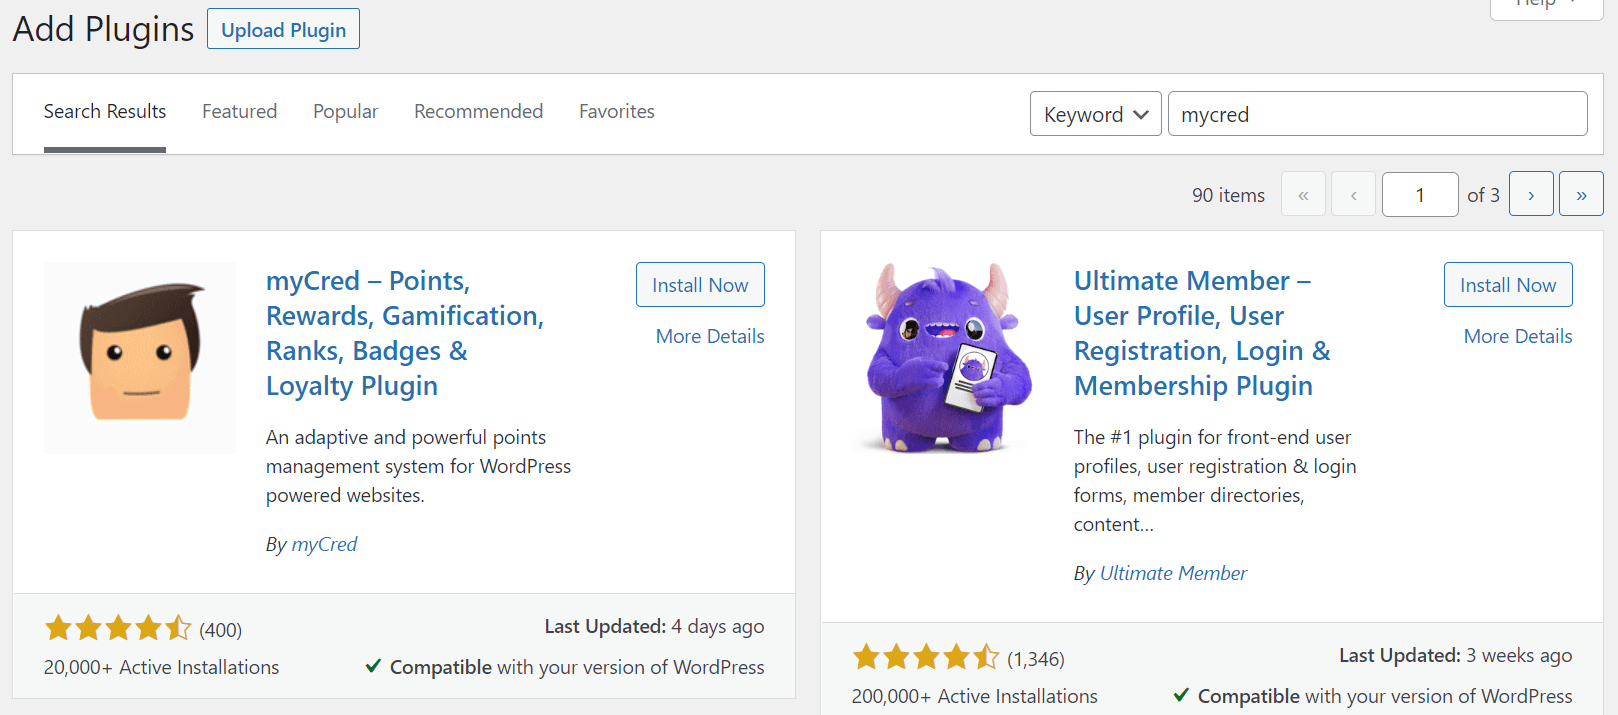
After you locate the plugin, click on Install Now followed by Activate. If you purchased a Premium license, you can now add it under myCred > License:

Finally, click on Save. The plugin is now ready to go!
Step 2: Configure myCred Settings
myCred can feel a little overwhelming when you first install it. You’ll see a long list of plugin settings across multiple menus in your WordPress dashboard, both under myCred and Points:
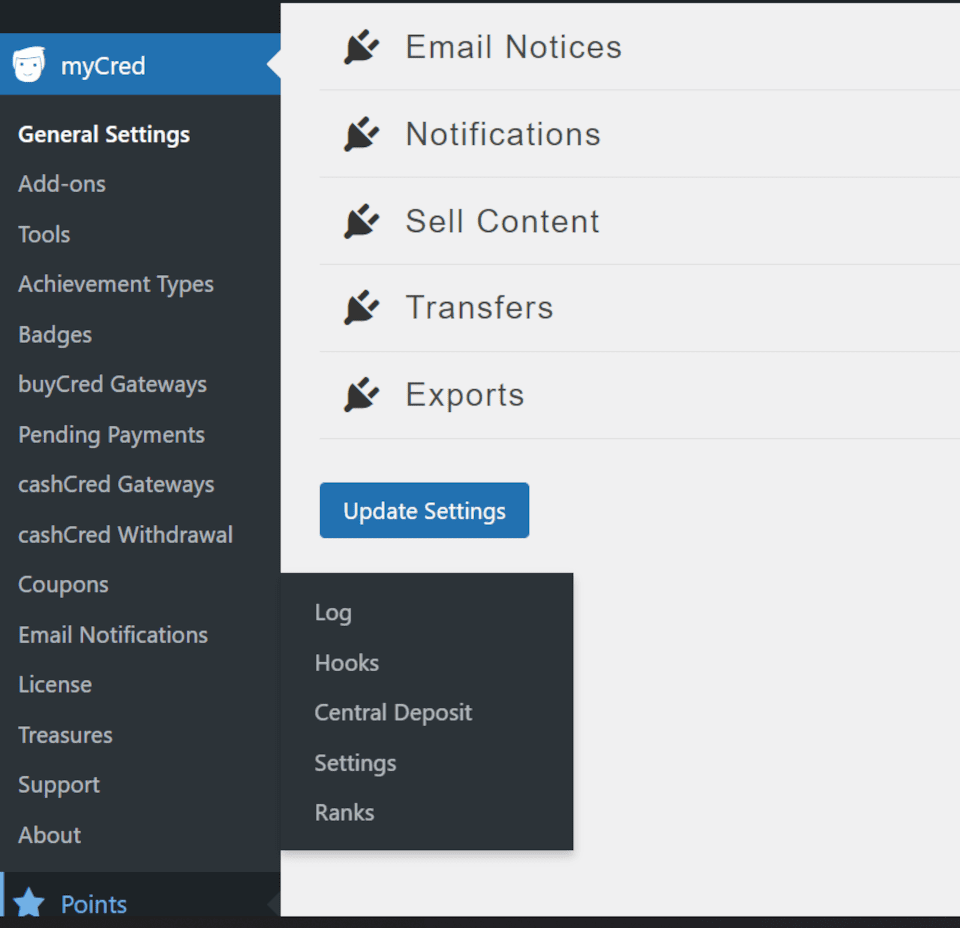
Under General Settings, you can configure display options for your badges and social sharing buttons. You can also configure settings for buying and selling points to your users, email notifications, coupons, and point transfers:
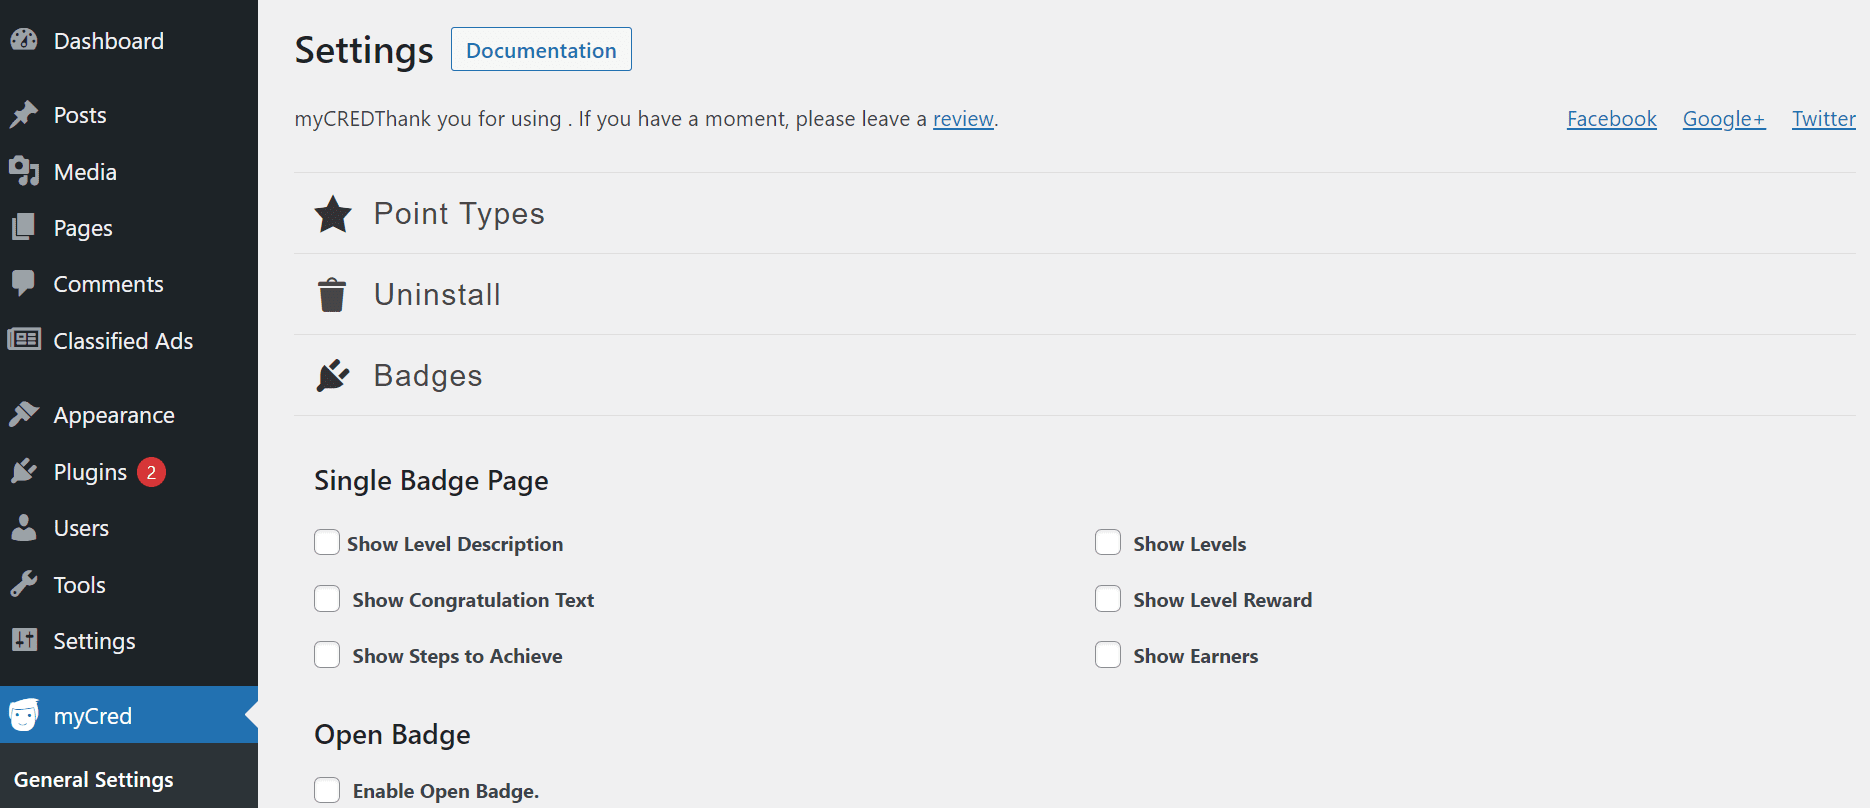
Since there are so many settings, we recommend clicking on the Documentation button at the top of the page. Then, you can refer to extensive myCred tutorials for setting up your rewards system.
At this point, you should also consider setting up your payment gateways for buying and cashing in points. You can do this under buyCred Gateways and cashCred Gateways. However, these settings are optional and not essential to your rewards program.
Now, jump across to Points > Settings. Here you can choose labels, icons, and security settings for your points. You can also configure some caching options and rankings for users on your site:
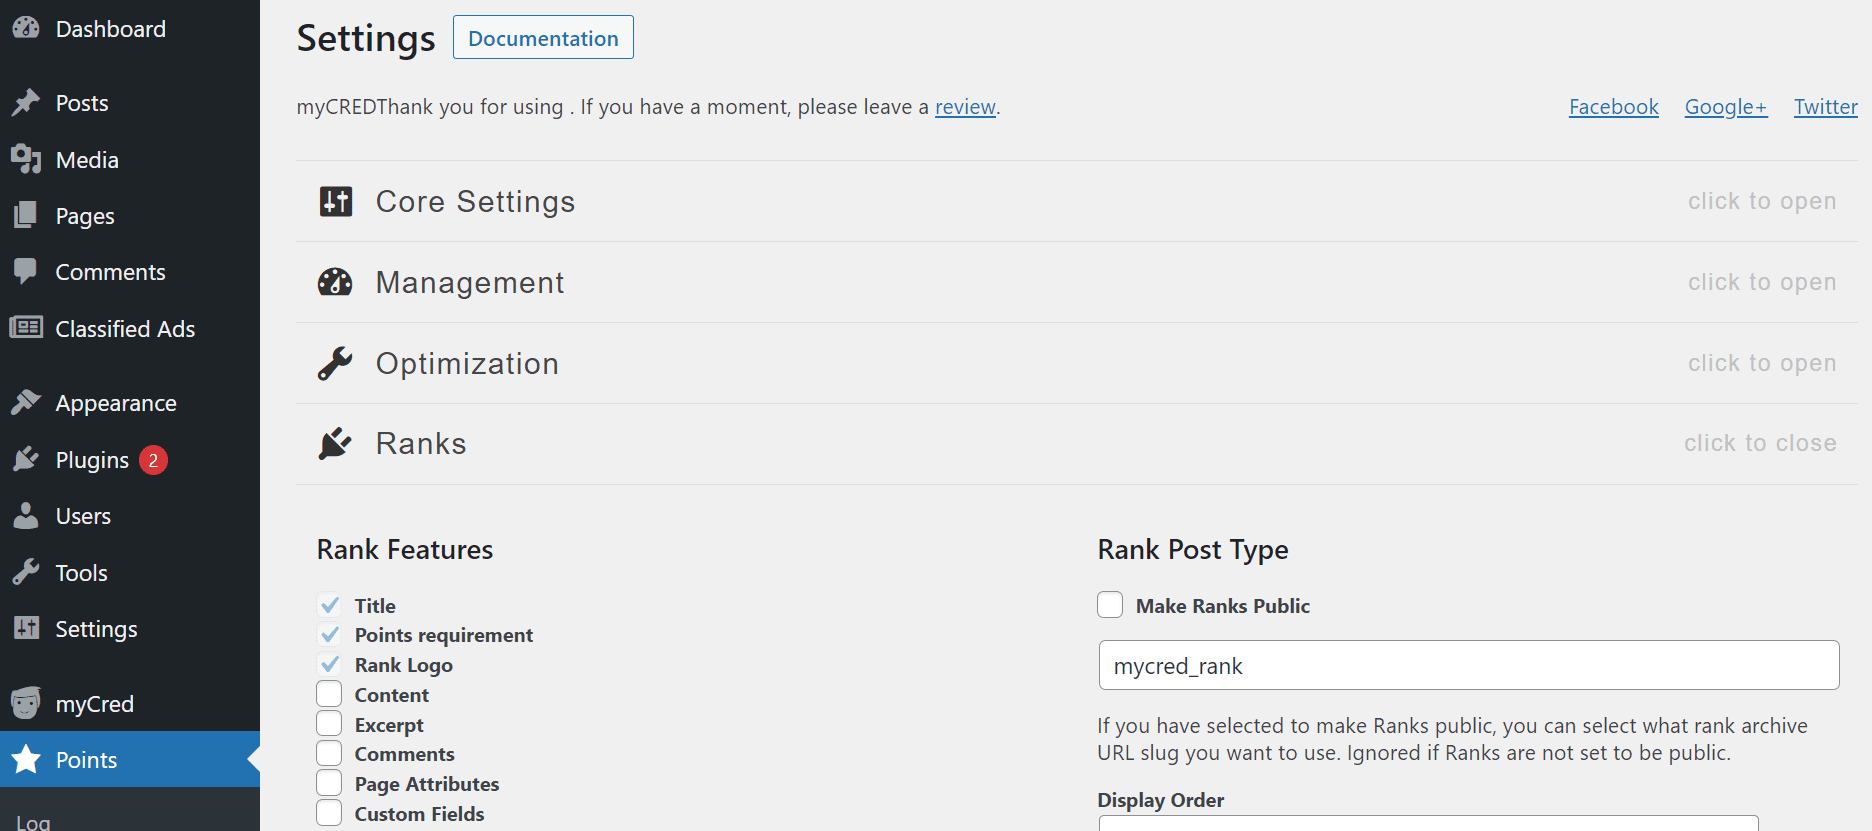
It’s best to take your time configuring your settings to meet the needs of your rewards system. Also, make sure to save your changes as you go.
Step 3: Enable/Disable Hooks
Now it’s time to determine which user actions will earn points on your website or online store. You can do this by navigating to Points > Hooks. Here you’ll see a series of hooks on the left-hand side that award or deduct points based on:
- Registrations
- Anniversaries
- Daily visits
- Viewing content
- Logins
- Publishing content
- Deleting content
- Clicking on links
- Viewing videos
- Referrals
- Buying points
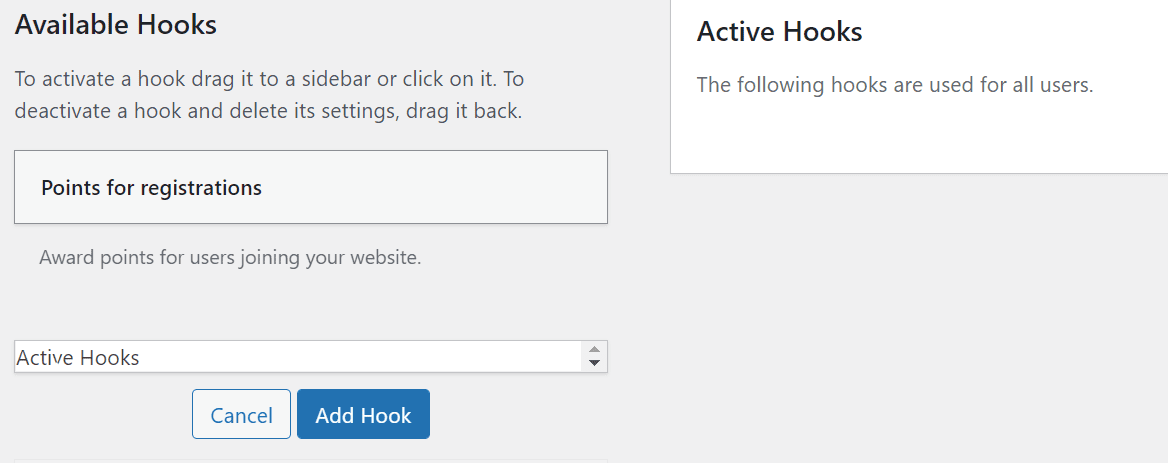
To activate a hook, simply click on it and then select Add Hook:
You’ll then be prompted to allocate a specific number of points to the action and save your settings:
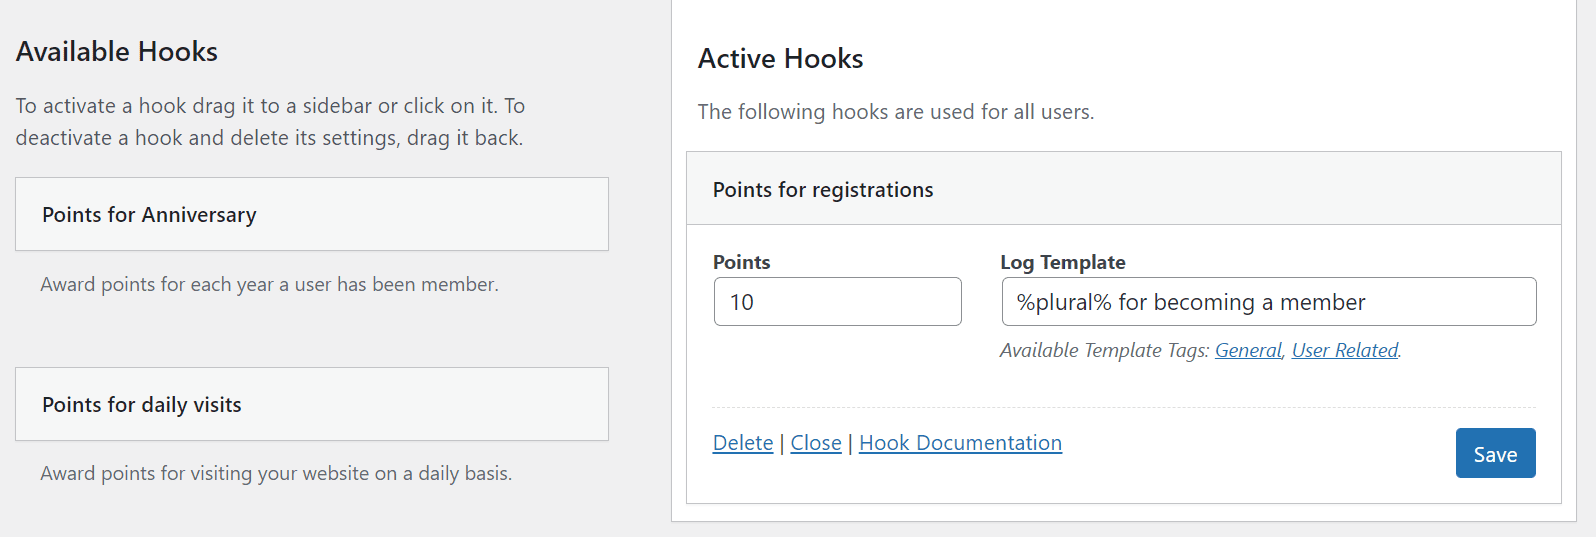
You can remove a hook by simply clicking on Delete. Furthermore, when you select Hook Documentation, you can access detailed tutorials for using the hook in question.
Step 4: Activate Add-Ons
Now it’s time to configure add-ons for your rewards program. Note that the available extensions will depend on which myCred plan (free or premium) you have installed on your website.
Head to myCred > Add-ons. Here you’ll see built-in, free, and premium extensions for your WordPress rewards program:

To start using an add-on, hover your mouse over it and then click on Install. If it’s a premium extension, you’ll be directed to the myCred store to purchase it. For free add-ons, you’ll be sent to the core WordPress plugin to install it on your site.
Here’s a quick rundown of some of the most useful myCred add-ons:
- Badges: Display achievement badges for your users.
- buyCRED: Enable users to buy more points.
- Coupons: Create coupons that can be redeemed for points.
- Notifications: Inform users when they win or lose points.
- Statistics: Create visual charts of user progress and behaviors.
- WooCommerce Plus: Let users make coupons, complete partial payments, and use loyalty points within your WooCommerce store.
- Arcade Game: Award users points in exchange for playing games on your site.
Let’s look at an example. You might install myCred LearnDash to integrate the Learning Management System (LMS) with points and rewards for completing lessons, quizzes, or entire courses:

Then, it’s simply a matter of installing and activating the add-on as you would with any other WordPress plugin. However, note that new add-ons will come with more specific configurable settings.
Step 5: Track Points
Now that your rewards system is set up on your WordPress site, you can track user points and achievements from Points > Log. This is where you can monitor progress from Today, Yesterday, This Week, and This Month:

Note that you can also limit the number of total points by heading to Points > General Deposit. Here, you can choose to allocate points from a central fund with a limited number of rewards:
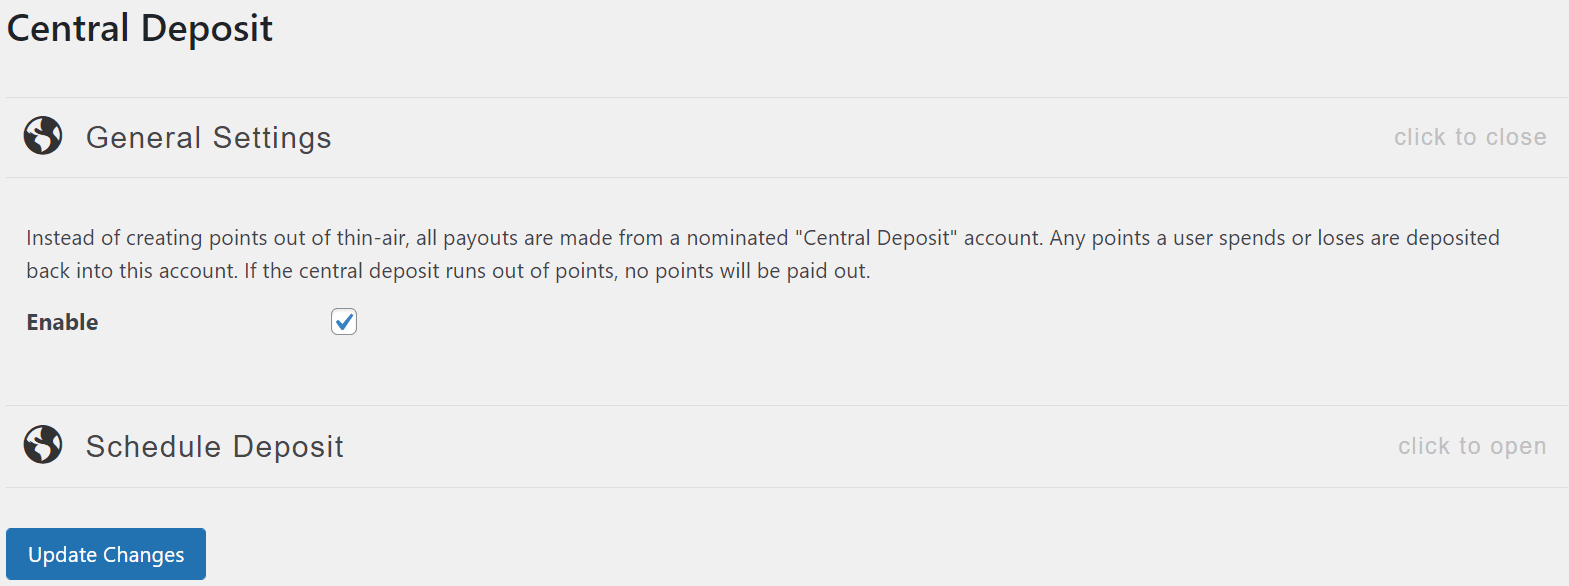
Furthermore, under Ranks, you can set rankings for your users. You can specify the number of points needed to progress to a particular rank, add a logo to distinguish it, and name it:

Now your rewards system is completely ready to go! You might consider advertising it to customers through promotional banners, email marketing messages, or popup forms.
myCred Pros vs. Cons
myCred is an extensive plugin with many customization options. Here are some of the advantages of using the tool:
- Build a rewards system for free.
- Add points, badges, and rankings to your rewards system.
- Increase sales by enabling users to buy points or redeem them for coupons in your online store.
- Integrate the plugin with page builders, LMS plugins, and payment gateways.
- Access detailed plugin documentation to learn more about the system.
- Customize logos and icons to make your rewards system match your branding.
However, myCred also has some disadvantages. Here’s a quick overview of the plugin’s cons:
- There are so many settings that it can feel confusing without a setup wizard guiding you through the process.
- The learning curve for the plugin can be steep at first.
- The plugin can get expensive if you invest in premium add-ons, which range from $29 to $69.
Overall, you might consider using the free version of myCred and seeing if it fits your needs. Then, you can purchase add-ons or upgrade your membership if you want to take your rewards system to the next level.
Conclusion
A rewards system can incentivize users to interact with your content and earn points. Furthermore, it can recognize customer loyalty and encourage consumers to purchase more frequently from your online store.
With the myCred WordPress plugin, you can quickly set up a rewards system for your WordPress website. It comes with multiple customizable settings and integrations to reward or penalize different actions. Although the learning curve can be a little steep, the payoffs can be significant.
For more great tools for your business, check out our best free WordPress plugins for business websites.
Do you have any questions about creating a rewards system with myCred? Let us know in the comments section below!
The post How to Use myCred to Add a Rewards System to WordPress appeared first on Elegant Themes Blog.
