When it comes to SEO, internal links are critically important to the success of your website. That being said, adding internal links to WordPress can be a daunting task, especially if you have tons of content that needs to be optimized. Thankfully, there is an easy way to set internal links in WordPress automatically with the Link Whisper plugin. In this post, we’ll demonstrate how to use Link Whisper as an essential part of your SEO link strategy. Let’s get started.
What are Internal Links?
Internal links are links that guide a user to another post or page on your website. They can be inserted into posts, pages, images, menu items, or projects in WordPress. Without them, your missing opportunities to send your site’s visitors to other areas of your website you wish them to visit.
Why are Internal Links Important to SEO?

Using internal links in WordPress is a huge piece of the SEO puzzle. Internal links help SEO by alerting your site’s visitors to other areas of your site that may be of interest to them. You can use them to highlight products, services, or a post or page that is relevant. You see, when search engines crawl your site, they aren’t only looking for keywords. They also look for both internal and external links. Internal links help Google to understand which posts and pages are most important on your website. Plus, pages with internal links are much more likely to be indexed, increasing the chances of your content ranking higher in SERPs. In short, Google likes them.
Using internal links is typically a good way to increase traffic to your site, but there are caveats if not done properly. You should ensure that you don’t put too many links in one page. Doing so can frustrate and confuse your site’s visitors. Also, make sure your links are relavant. If not, you could actually hurt your SEO. Knowing the importance of internal linking, you’re probably thinking to yourself, this could take forever with all the content I have on my site. No worries. We’re going to show you how to add internal links to your site automatically, using the Link Whisper plugin.
What is Link Whisper?

Link Whisper is a WordPress plugin that helps you add internal links to your content. Link Whisper will offer suggestions on where to add links, as well as what anchor text to use. Additionally, it helps to identify orphaned pages in your site, which can limit your chances of ranking high in SERPs. Link Whisper can also suggest links as your write new content, which is a huge time saver. Also, you can run a site scan to help identify which pages actually need them.
Link Whisper is offered in two variations. First, you can download the free version in the WordPress repository. It comes with some very basic features that provide you with automatic links suggestions as you write, a well as internal link reporting. In the reports, you’ll get insight on pages with orphaned content, as well as outbound internal and external links.
With the premium version of the plugin, you’ll get a few added bonuses. In addition to the features on the free version, you’ll get more in-depth reporting on links, as well as a robust auto-linking feature that enables you to add links in one click. You just input the keyword of your choice, specific the URL, and Link Whisper does the rest for you.
For this post, we’re going to show you how to add internal links using both the free and premium versions of the plugin.
How to Add Internal Links in WordPress Using Link Whisper Free
In order to use Link Whisper correctly, there are a few steps to take. Let’s walk through them one by one so you can get comfortable using it on your website.
1. Install the Plugin
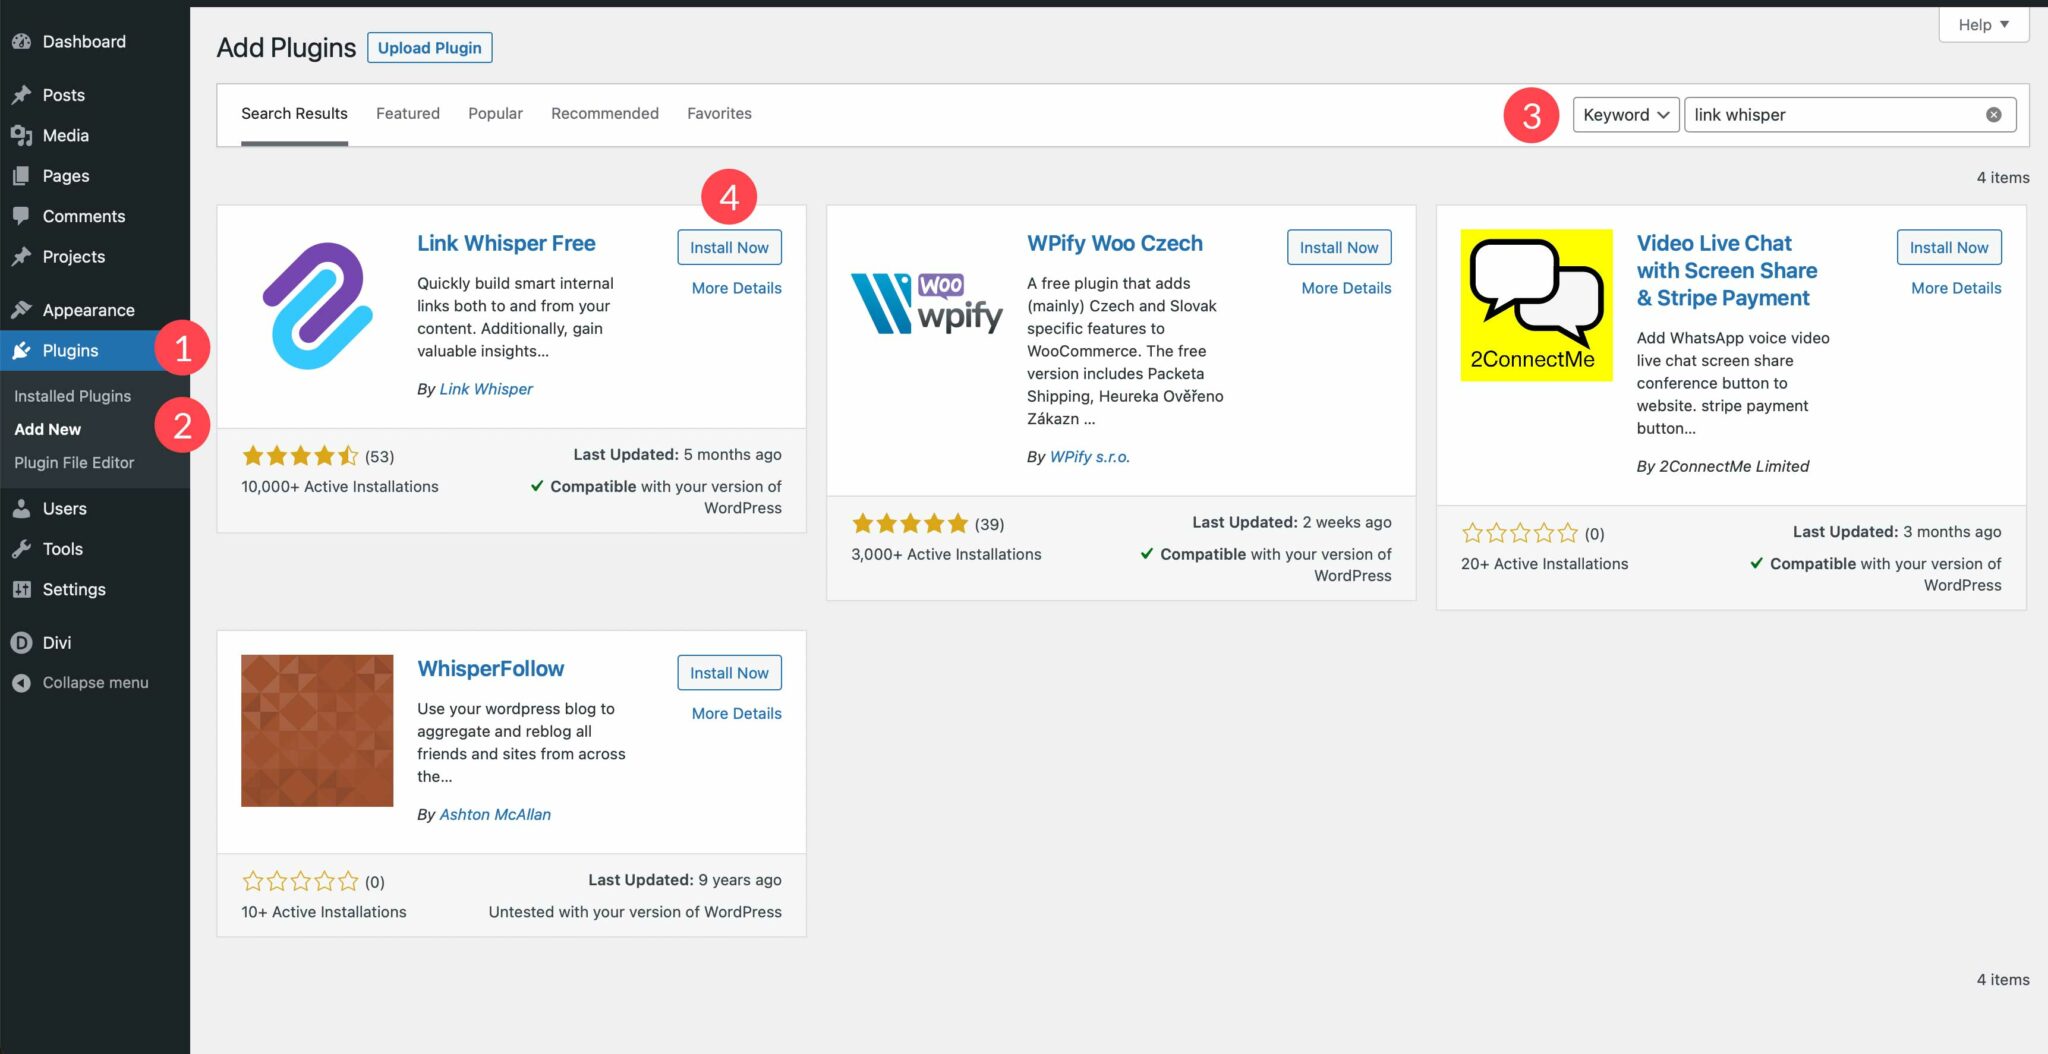
Log in to your WordPress website and navigate to Plugins > Add New. Enter for Link Whisper in the search bar. When the plugin appears, click Install Now to install the plugin.
2. Configure Link Whisper Settings
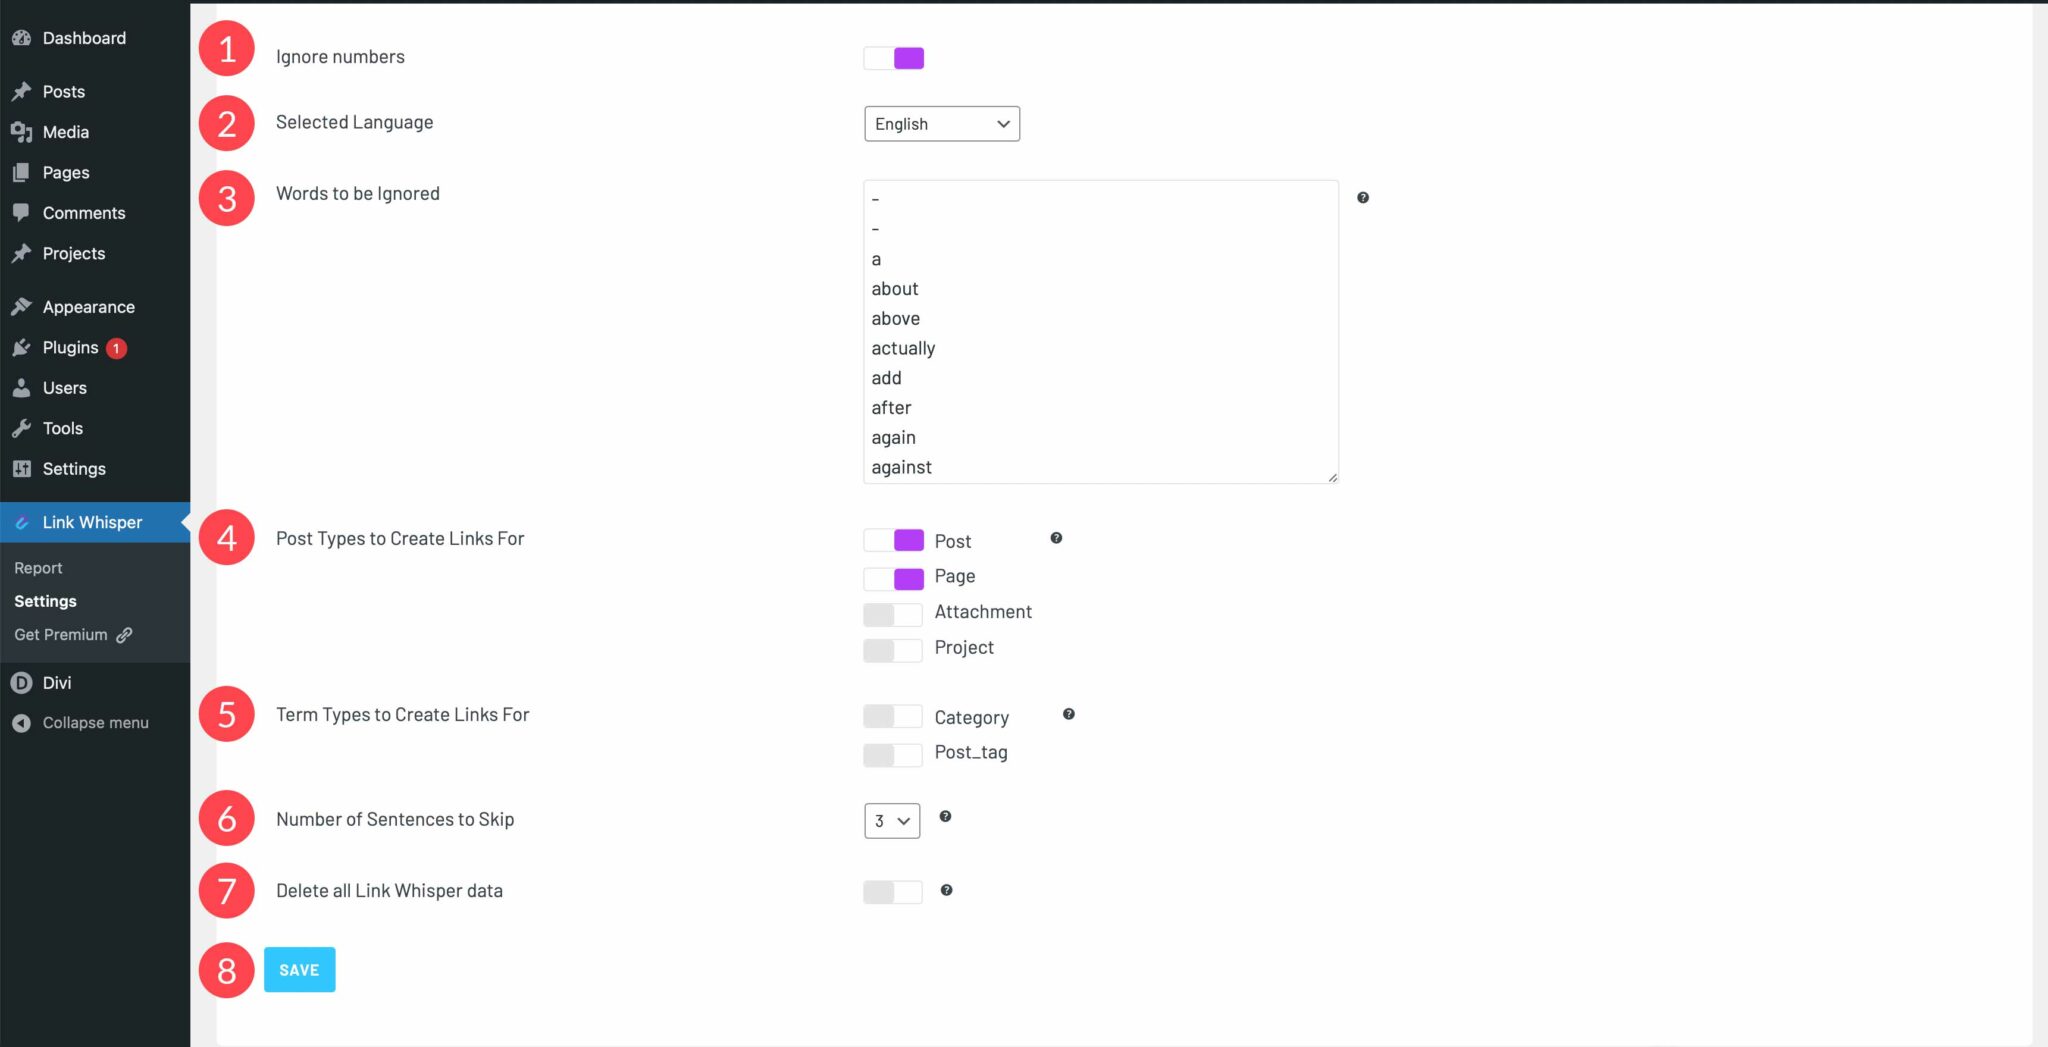
Next, navigate to Link Whisper > Settings in the WordPress dashboard. There are a number of settings here, some of which you may want to adjust depending on your setup. First, you can choose whether to ignore numbers. By default, this setting is enabled. Next select your language. Then, you can choose from a list of common words you can ignore. Under Post Types to Create Links For, choose any that you wish to omit from Link Whisper. This will vary depending on what taxonomies you have on your site. The next setting lets you choose the term types to create links for.
The next setting is a pretty important one. Link Whisper allows you to choose how many sentences to skip when it adds links. By default, there is selected. The reason this is important is to not add too many internal links to any one post or page. As previously mentioned, having too many links can confuse your site’s visitors and Google. Too many links can’t keep your site from ranking well. The last option, Delete all Link Whisper data, should only be enabled if you plan to start over on your links, or when planning to delete the plugin.
When finished with your settings, click the SAVE button.
3.Internal Link Reporting
Next, navigate to Link Whisper > Report. When the plugin was installed, it automatically ran a report of all posts and pages on your site. On the reporting page, you can see a list of any inbound internal, outbound internal, and outbound external links on your site.
4.Review Link Suggestions
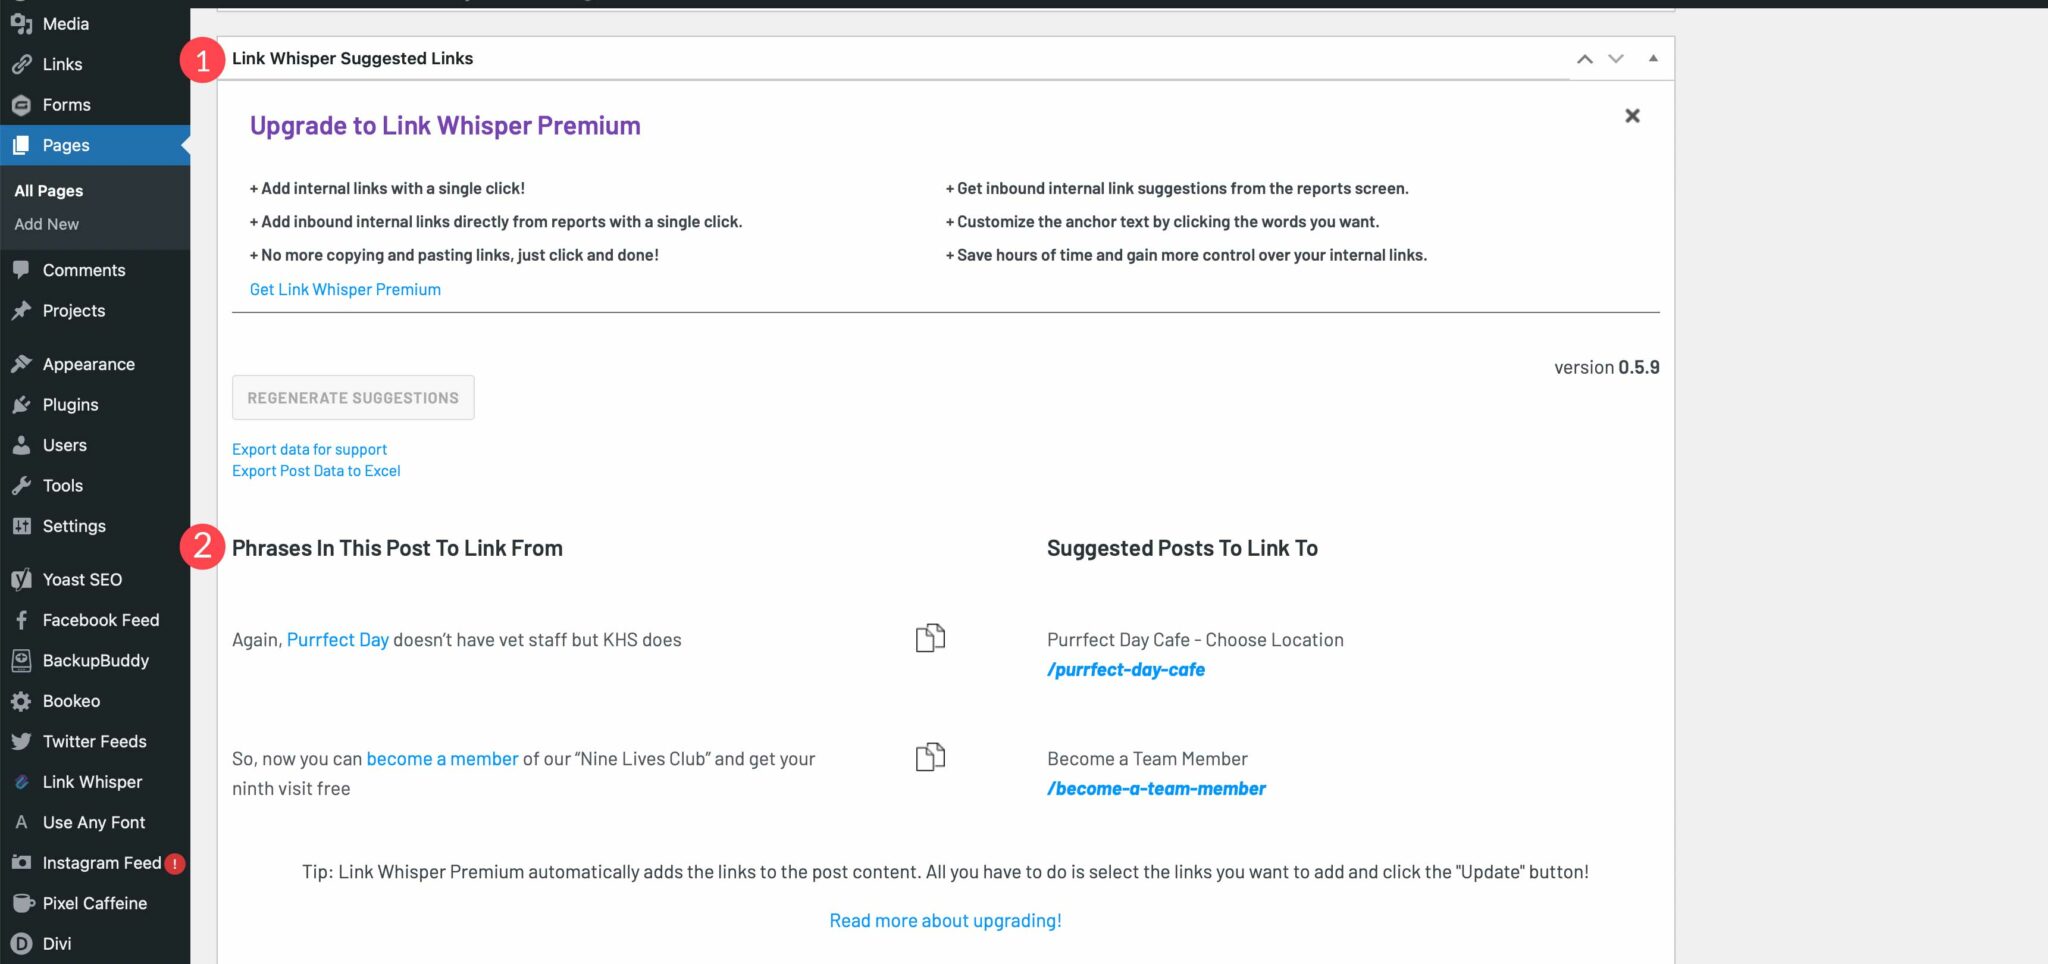
In the free version of Link Whisper, you can navigate to any post or page on your site and scroll down to the Link Whisper settings underneath your content. You will find suggestions for internal links to other posts or pages depending on keywords. Link Whisper will highlight the text in your content where it thinks an internal link should be.
5.Adding an Internal Link
With the free version of Link Whisper, you take the link suggestions given in the previous step and add the suggested links to your page or post. Although it won’t add it for you, you can easily copy the link in the suggested links area then place the link in the corresponding suggested text on your page.
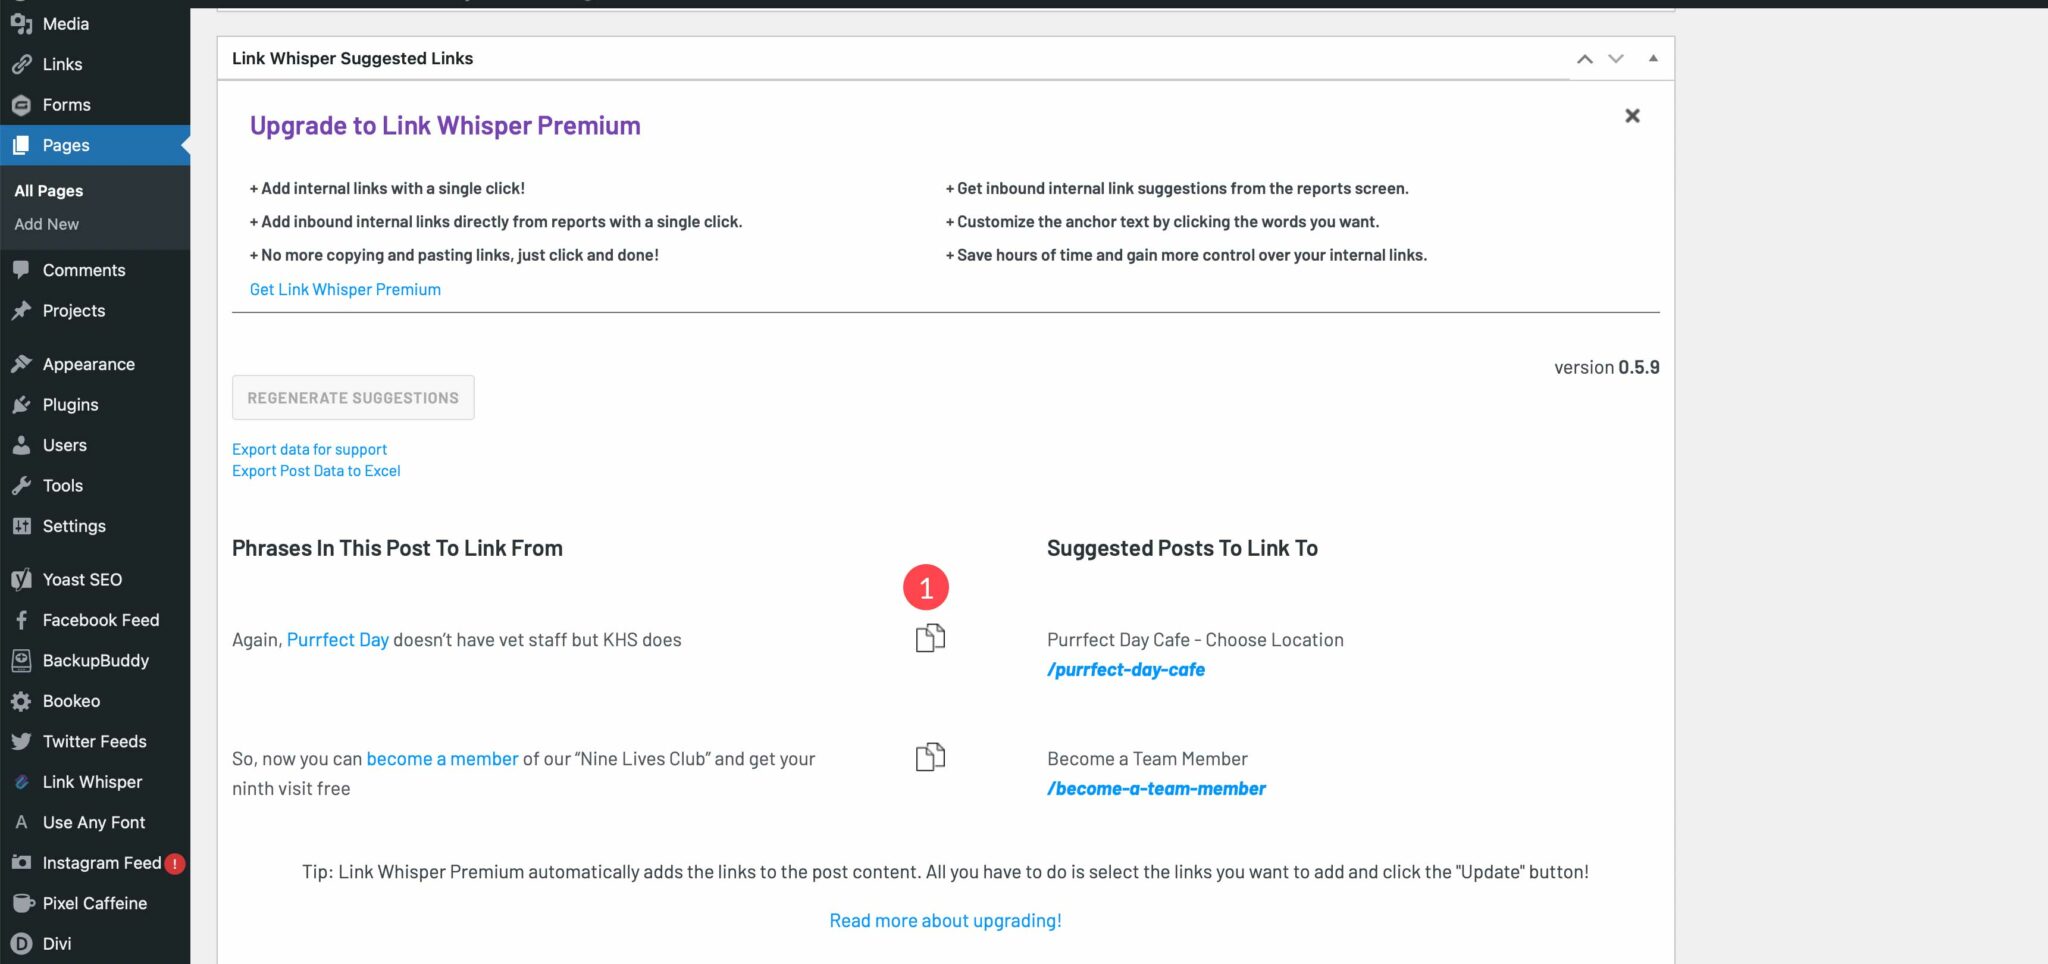
Adding Internal Links with Link Whisper Premium
The premium version of the plugin makes it simple to add internal links in WordPress, both inbound and outbound. Repeat the steps to run the initial link scan after plugin installation, then navigate to the links report in Link Whisper > Reports.
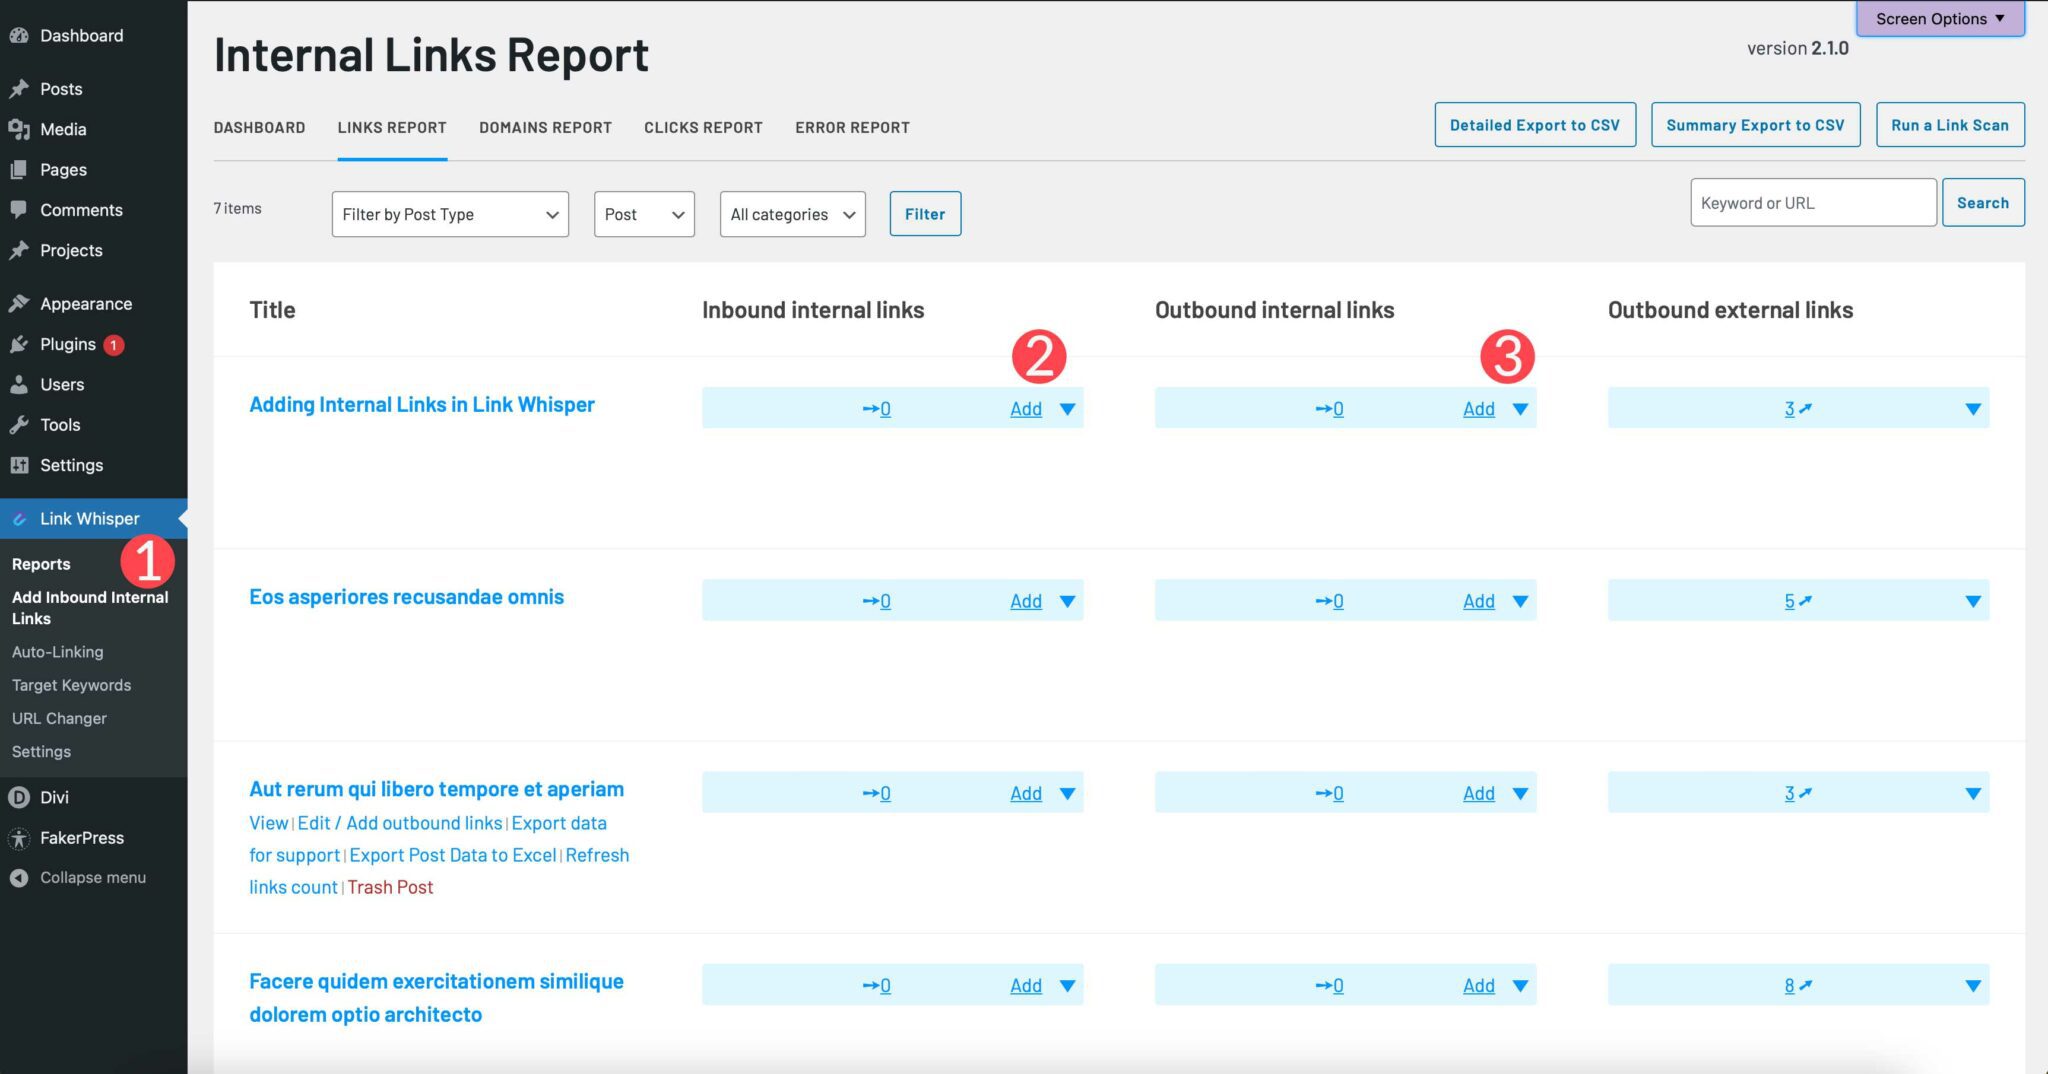
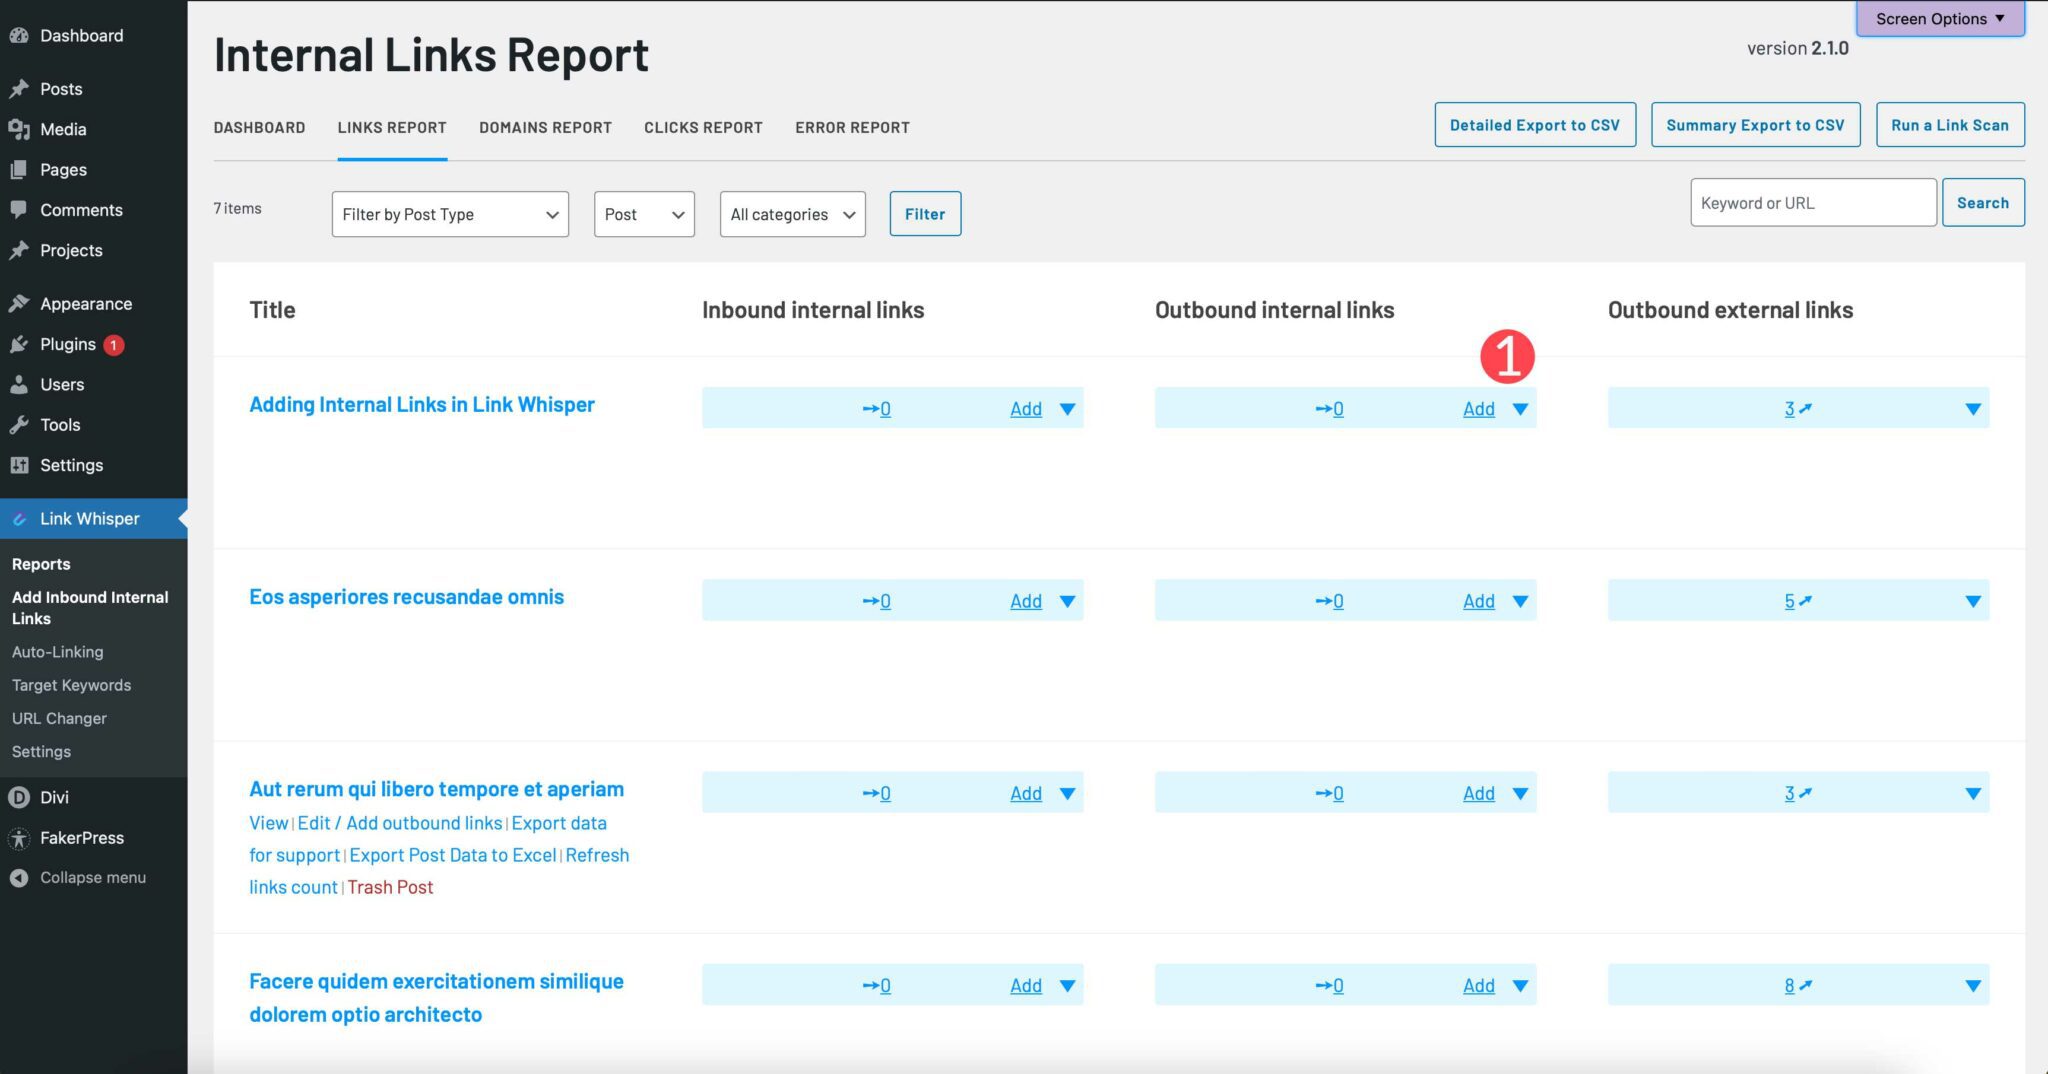
Next, choose whether you’d like to add inbound internal links or outbound internal links. Then, click Add on the post or page you’d like to add links to. For this example, we will add outbound internal links to a post.
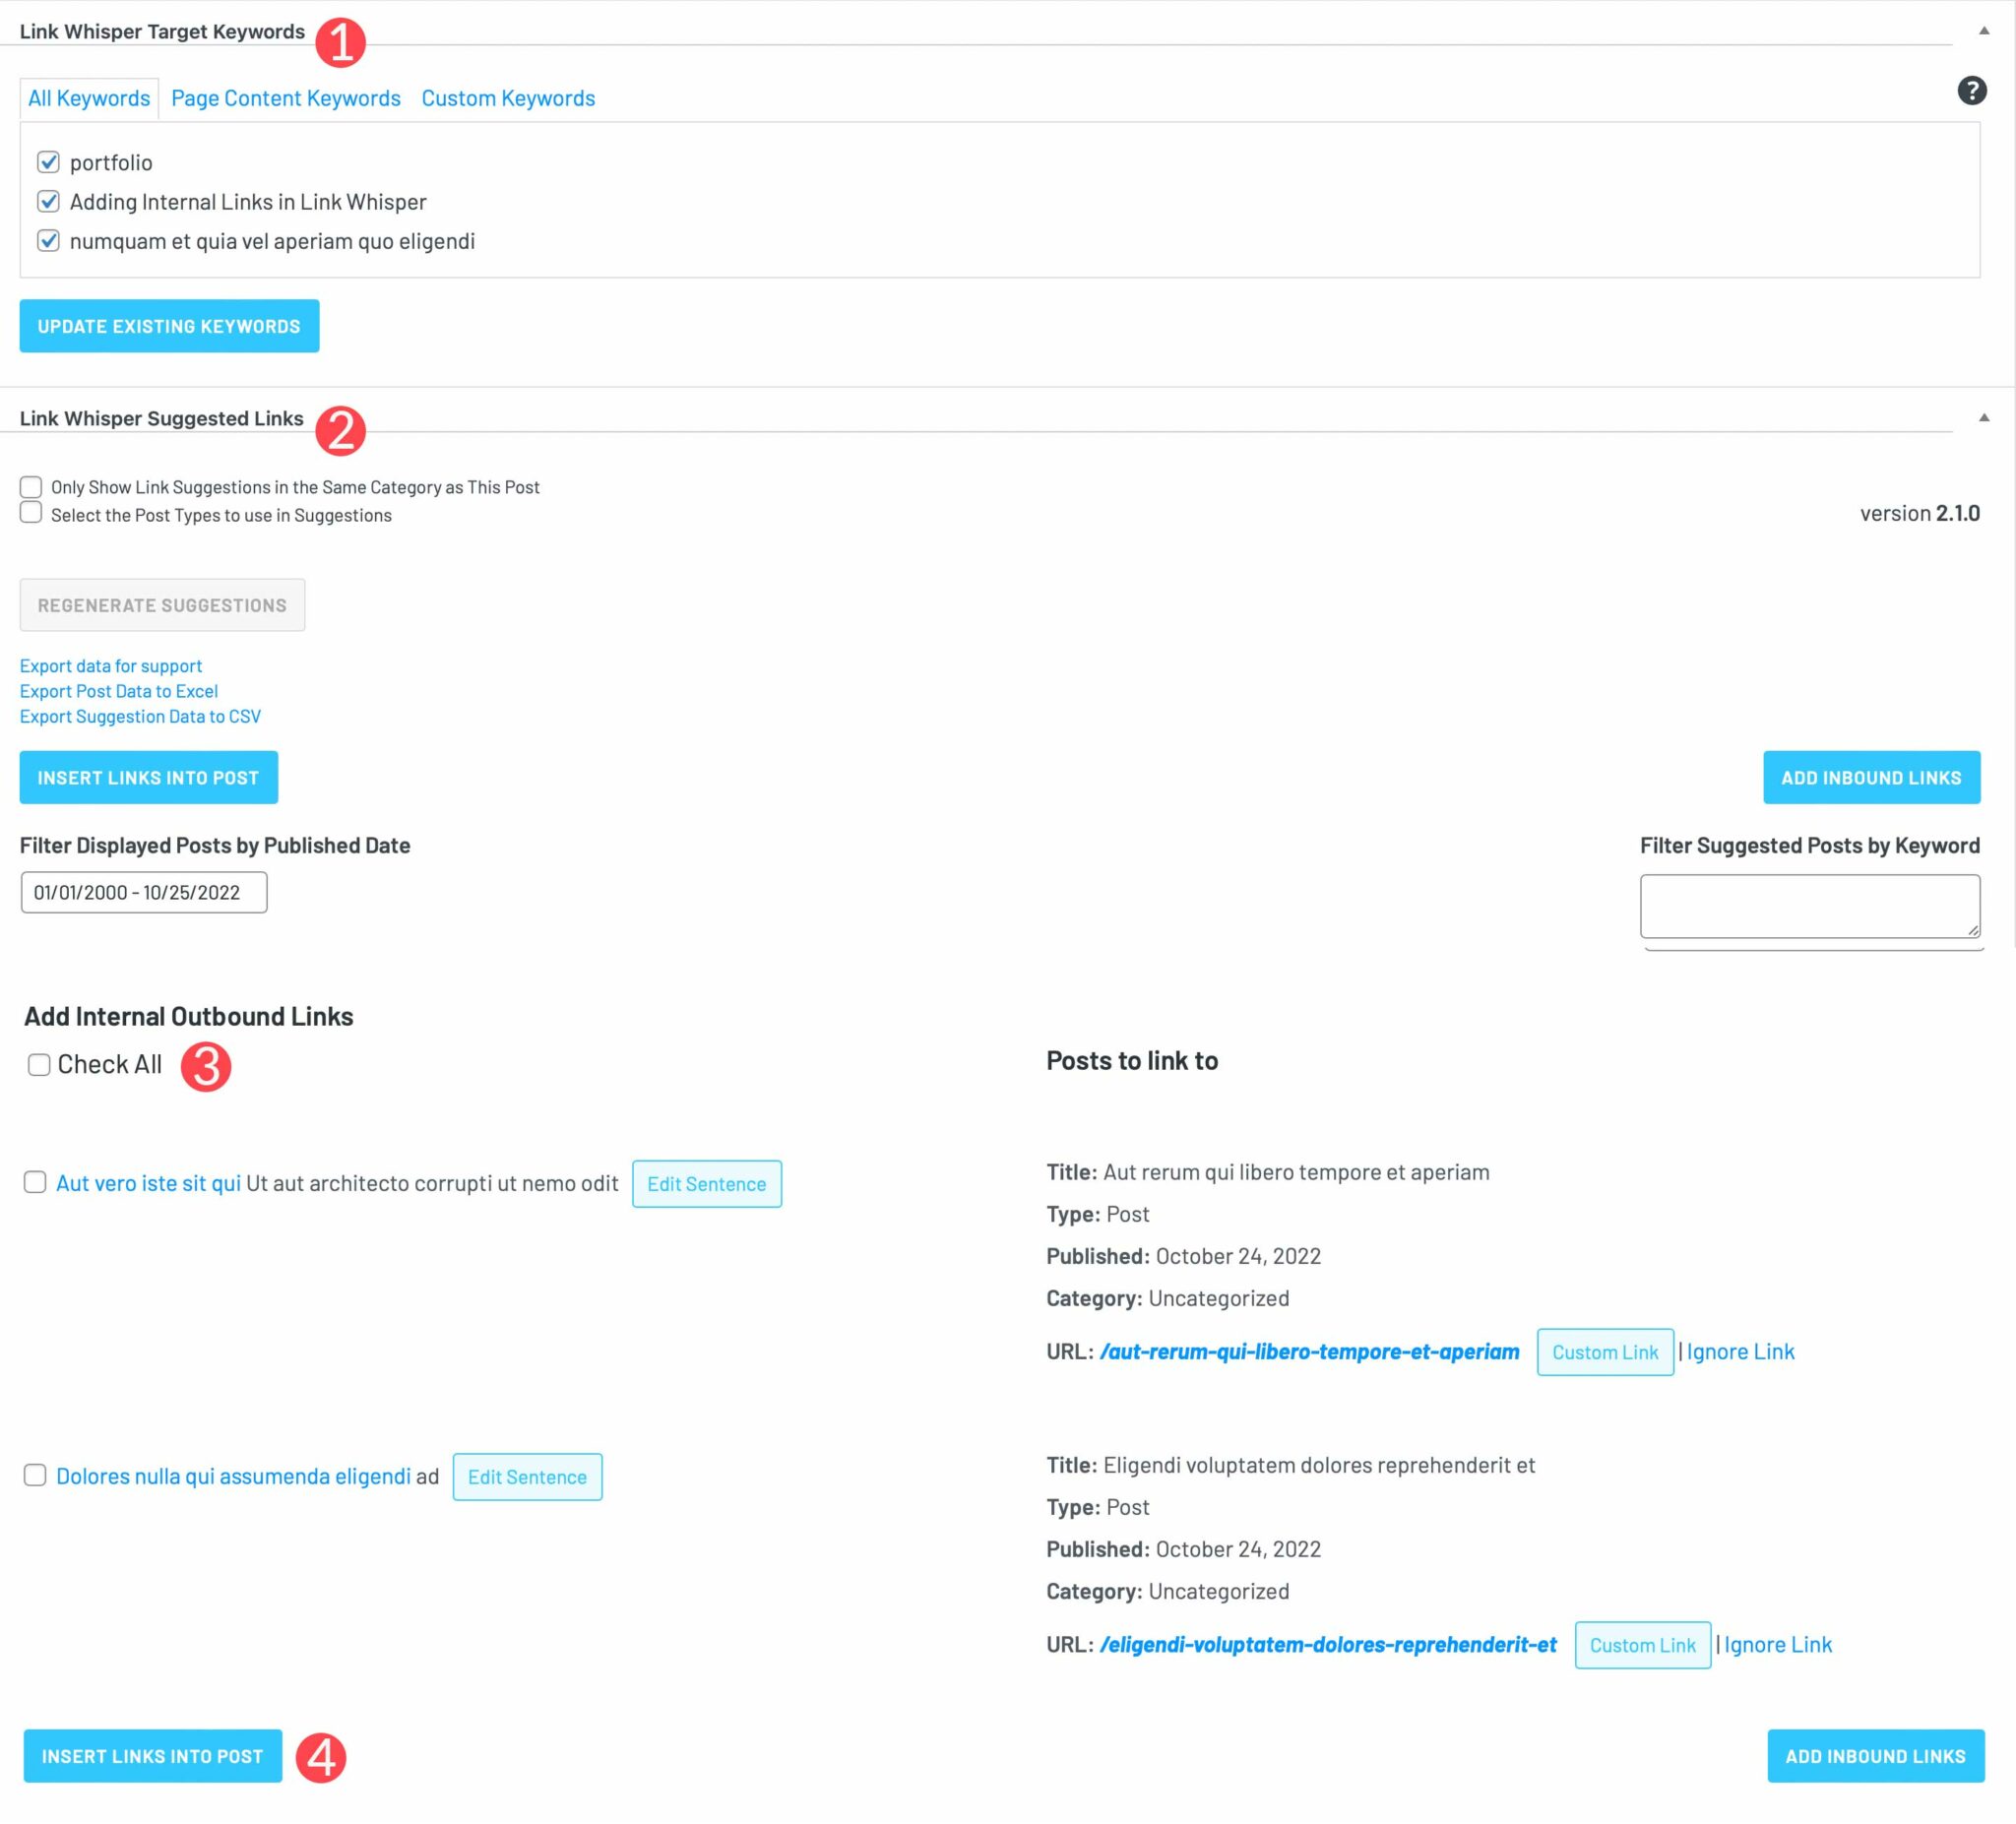
Link Whisper will open the post using the page editor. Scroll down to the Link Whisper settings. By default, it will suggest target keywords for your post, and provide link suggestions for it. There are a number of other settings you can configure as well. You can scan your page content for keywords, or add custom ones. Additionally, you can choose to show link suggestions for the same category, or select certain post types. Link Whisper will provide its suggestions for links, and enable you to add them with the click of a button.
To add all links, simply click Check All. Alternatively, you can select one or more by selecting the checkbox next to the suggested link. Finally, to add the link, click the Insert Links Into Post button.
Adding Internal Links to WordPress Is Easy With Link Whisper
Internal links are an important component to your site’s success in SERPs. Thankfully, using Link Whisper makes that a much less tedious task. The free version of the plugin has some nice features that will allow you to identify keywords in your posts and pages, then offer link suggestions. The premium version takes those suggestions to a different level with its auto-linking capability. Either way, Link Whisper provides an easy way to add internal links to your website.
For more, you may like these tips for SEO link building.
Do you have a tool or method you use to add internal links to your site? Let us know in the comments below.
The post How to Add Internal Links in WordPress the Easy Way (Using Link Whisper) appeared first on Elegant Themes Blog.
