Every eCommerce product page needs some basic elements to work properly. Excellent product page design includes both essential and non-essential elements. In this article, we’ll see an overview of the required elements for your Divi product page template to help you understand what you must include. We’ll also see the supporting elements and how to add all of them with the Divi Builder.
Let’s get started.
WooCommerce’s Approach to eCommerce Websites
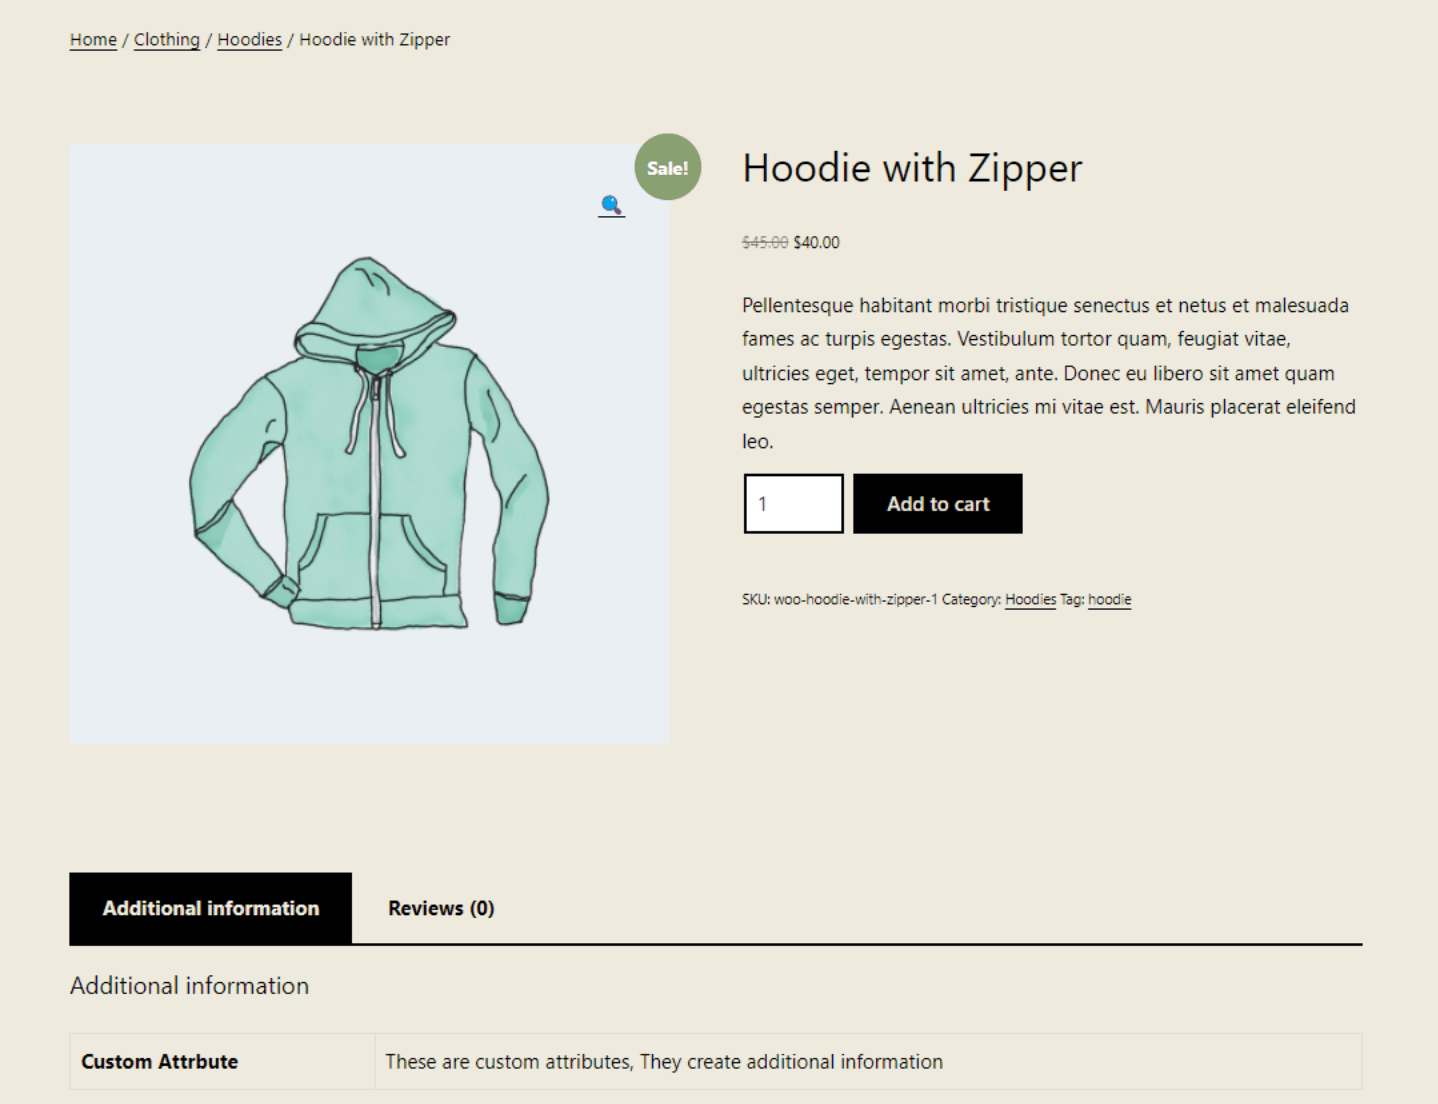
First, let’s discuss WooCommerce’s approach to eCommerce websites. WooCommerce creates a custom post type that presents several types of information about the products. This includes product images, descriptions, prices, sales information, add-to-cart buttons, and more. Each product posting is created with a simple editor.
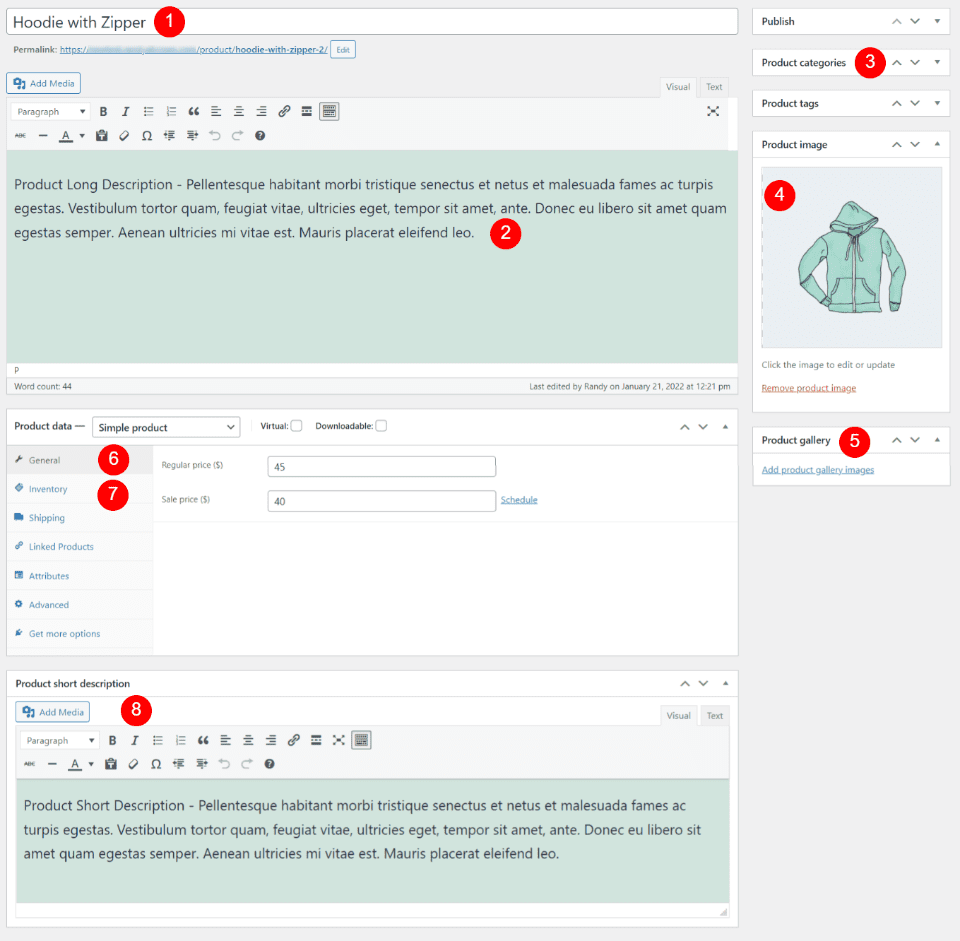
These are individual elements of the WooCommerce product post type. The dynamic elements, such as the title, images, description, and price, are added to their fields in the product editor. The WooCommerce post type displays them on the front end. Builders, such as Divi, can use these elements individually to create interesting layouts.
WooCommerce with Divi
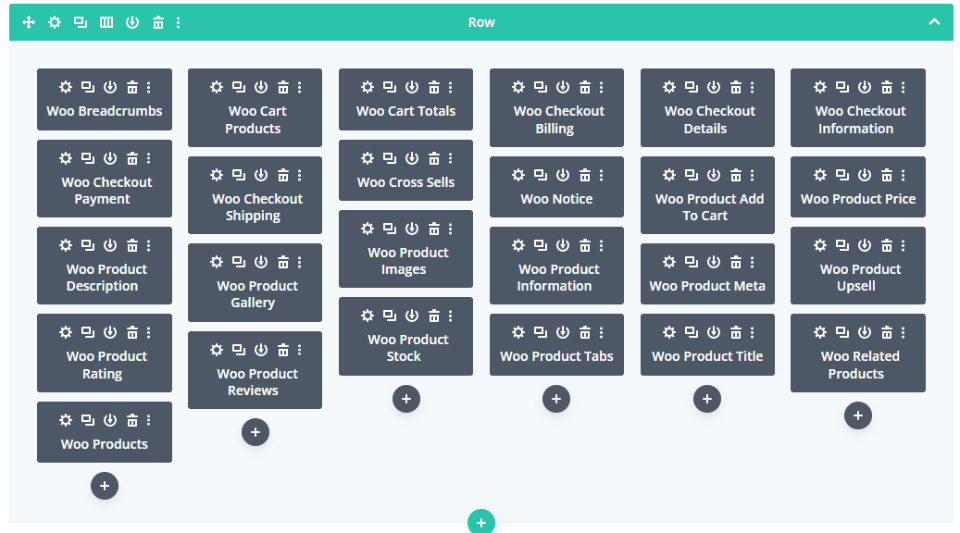
If you have WooCommerce activated, you’ll see 25 WooCommerce modules added to the Divi Builder. These modules allow you to present the WooCommerce elements anywhere within your Divi layouts. They’re automatically dynamic, so they’ll show the information for the specific product.
We can use these with regular Divi modules to create amazing product pages. Some of these modules are necessary to make the product page work, while others provide extra features.
Even though we have access to 25 different WooCommerce modules in the Divi Builder, we need to understand which of those elements are needed to make the product page operational and which create supporting features.
To help understand this, we’ll look at a Divi Product page template to see how it uses the modules. I’m using the Free Product Page Template for Divi’s Clothing Store Layout Pack for these examples.
WooCommerce Module Hierarchy and Product Page Design
A well-designed product page will keep the required elements together and they will be the main focus of the page. This creates a hierarchy for the page design. This hierarchy provides the user with the information they need about the product and helps lead the user through the purchase process. To see this, let’s look at a page layout.
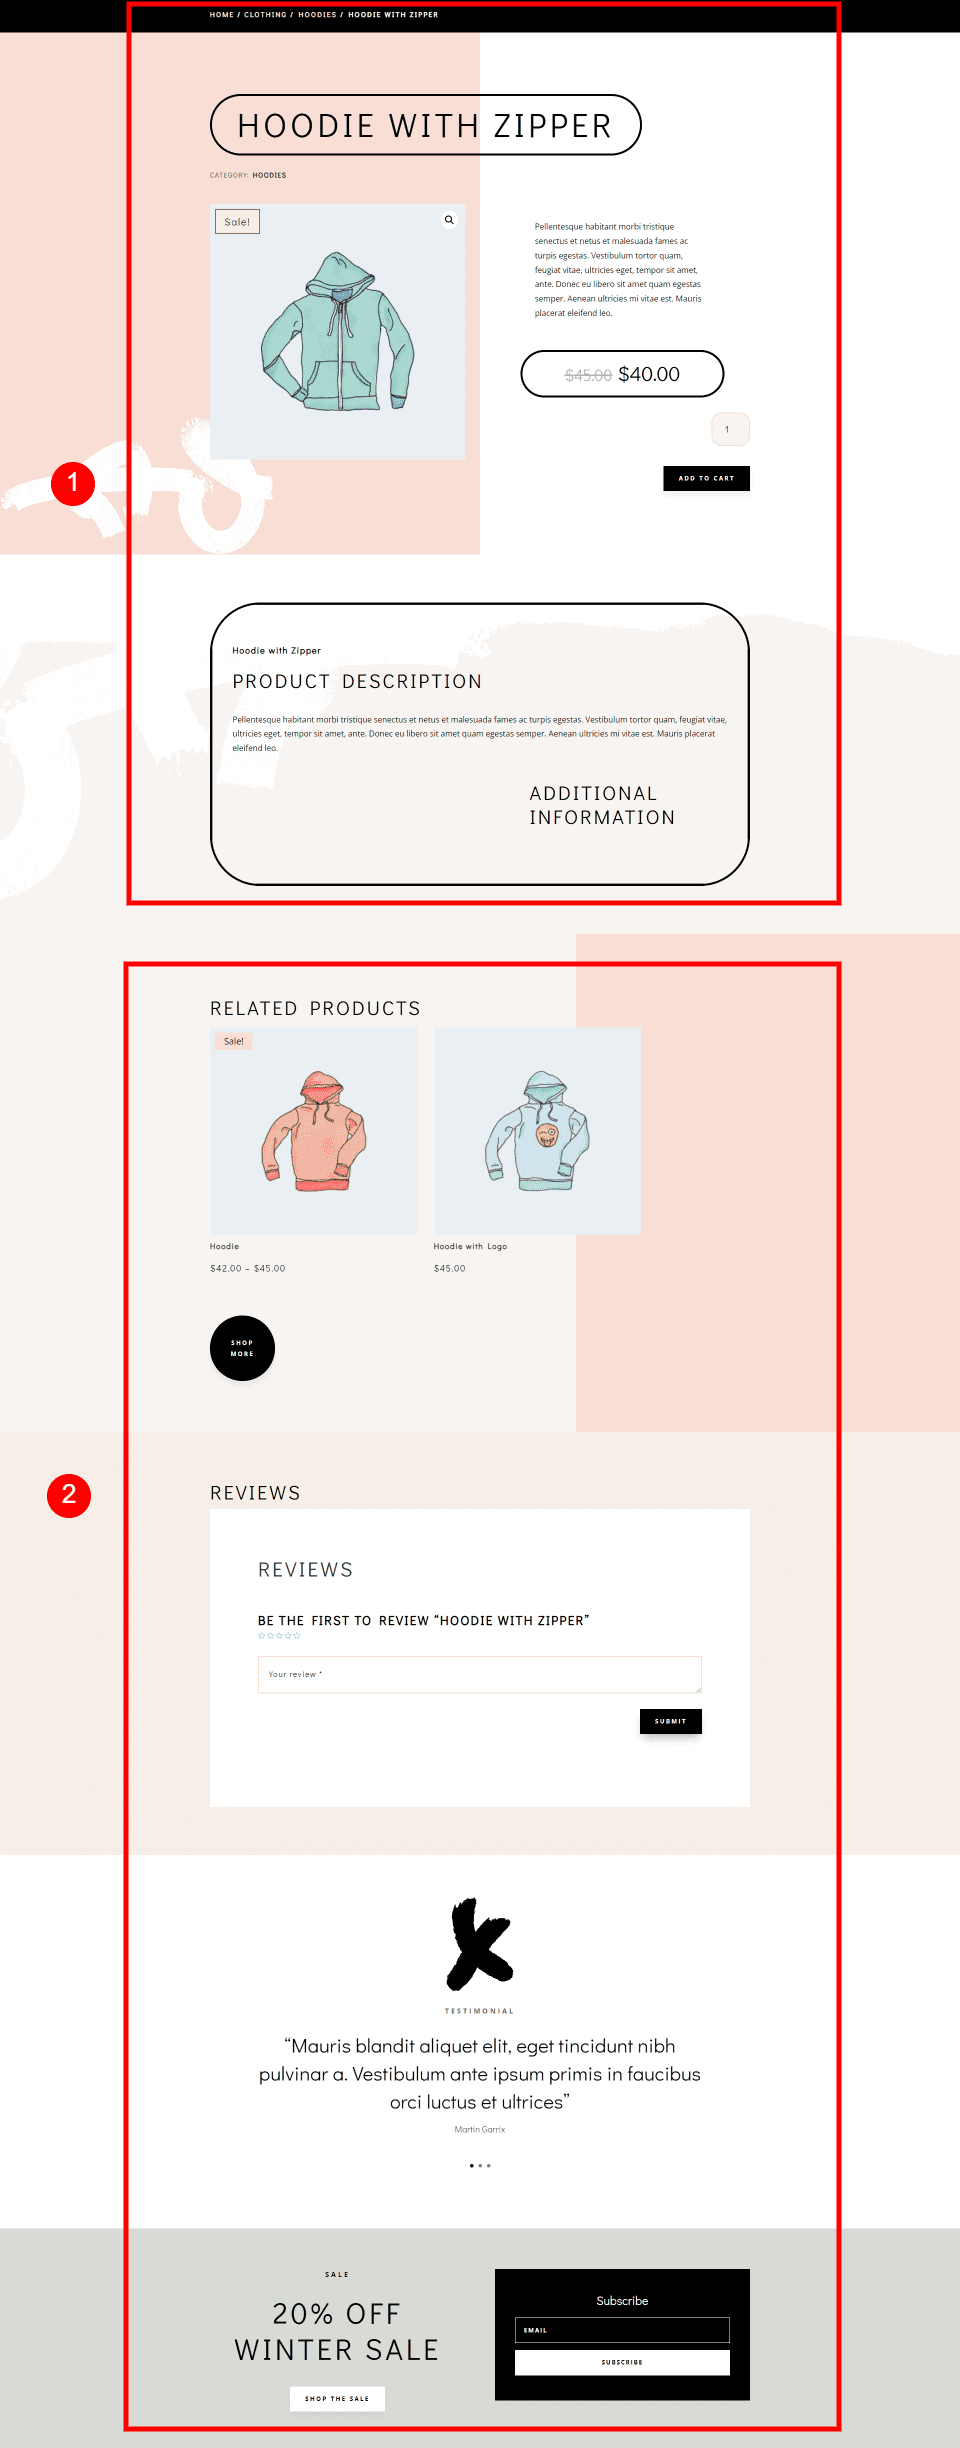
Here’s the full product page design from my example. This includes both essential and non-essential elements. This layout includes a top section, header, and supporting sections.
In general, the essential elements are at the top of the page and include the top section and header section. The non-essential elements are at the bottom under the essential elements. They help support the main elements and promote upsells or other CTAs.
Essential Product Page Elements
Now, let’s look closer at the essential product page elements. We’ll see what they are, why we need them, and how to add them to our Divi product page layouts.
Top Section
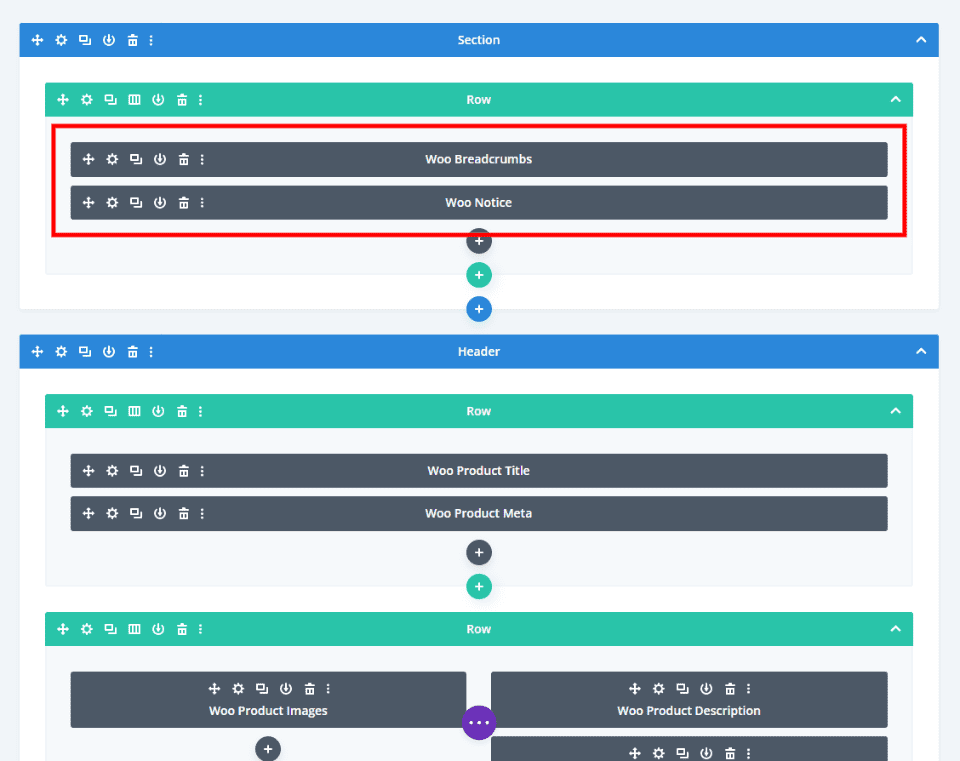
We’ll start at the top of the page. The top section of the Clothing Store Product Page includes Woo Breadcrumbs and the Woo Notice modules.
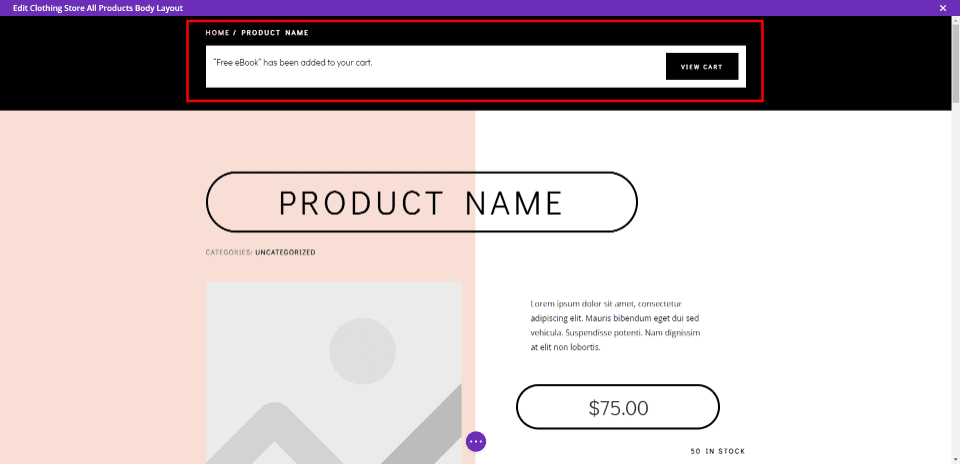
Here’s how they look on the front end. In this example, they’re placed in their own section at the top of the screen. The product page will work without them. However, this is important information, and this is the location where users will expect to see them.
Woo Breadcrumbs – shows the visitor where they are in the navigation structure. The breadcrumbs are great for navigation. The page will work fine without it, but breadcrumbs are great for identifying the current category.
Woo Notice – shows that a product has been added to the cart. This provides feedback to the user that the page responded to their click. It also provides a link to the cart.
Header Section
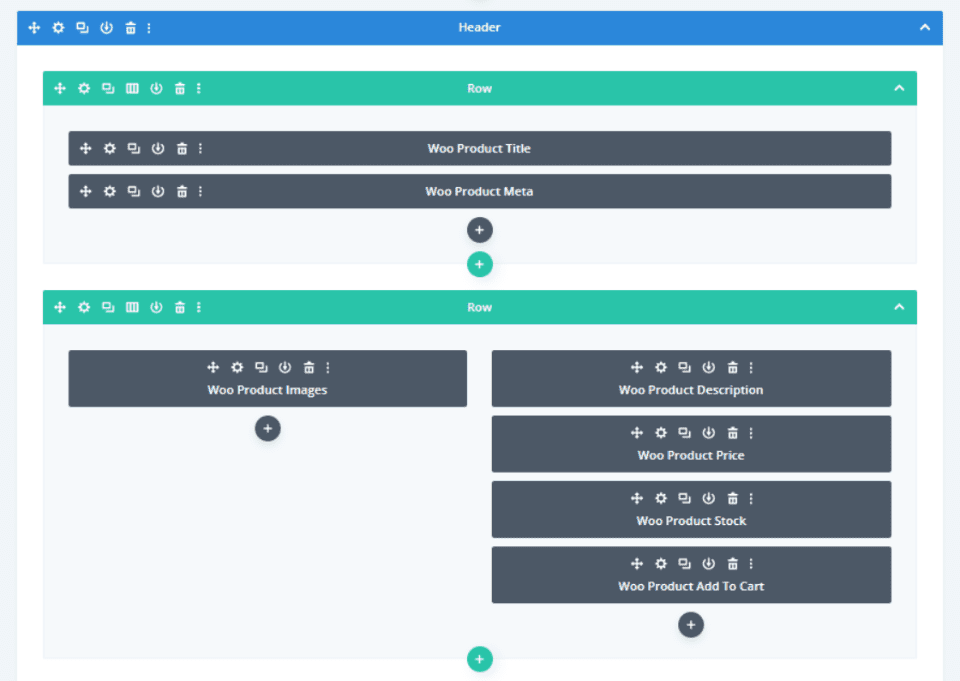
Next is the header section in the product page layout. This is the main section of the product page and contains all the essential elements for the page to work properly and smoothly.
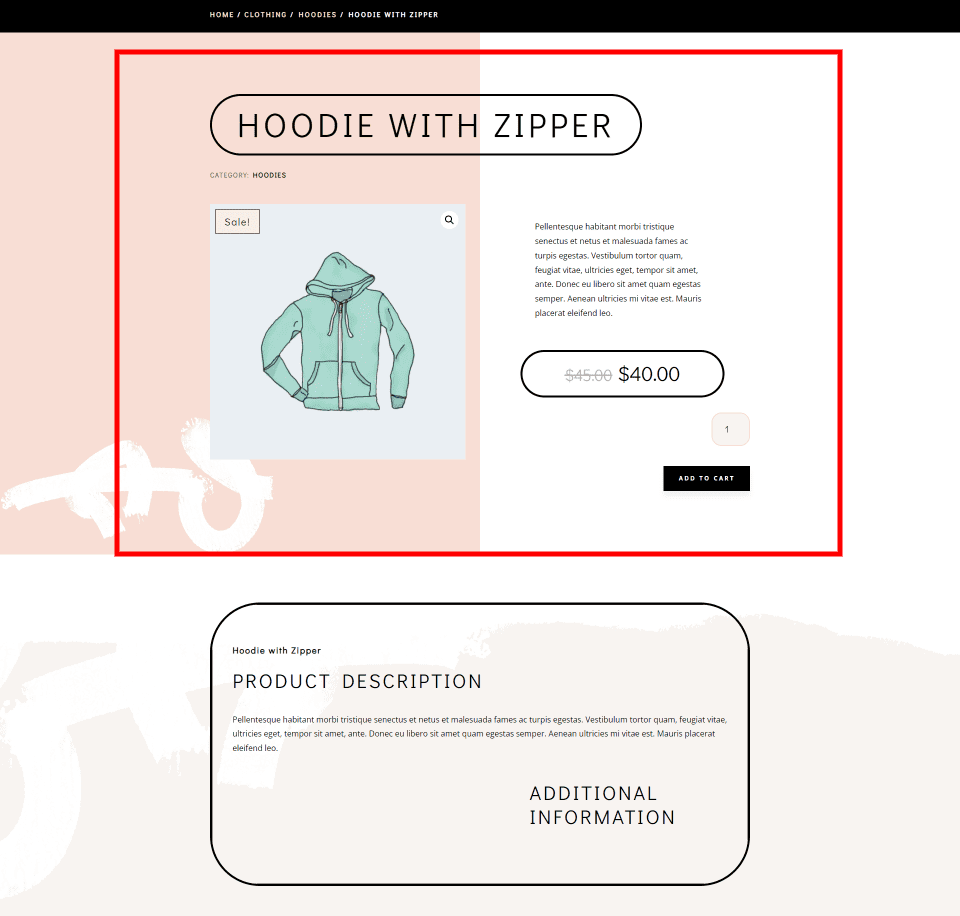
Here’s a look at the page design on the front end. The portion I’ve highlighted is the essential elements. These elements make the product page work.
The elements include:
Woo Product Title – this shows the title of the product.
Woo Product Meta – this module shows the metadata about the product. You can choose which metadata elements display.
Woo Product Images – this shows all the gallery images of the product. It adds a sale badge if the product is on sale.
Woo Product Description – this is the product description. You can choose between short or long descriptions.
Woo Product Price – this shows the current price of the product. It also shows the original price if it’s on sale.
Woo Product Stock – this module shows the number of stock available in inventory.
Woo Product Add To Cart – this is the button that adds the product to the cart.
Product Description
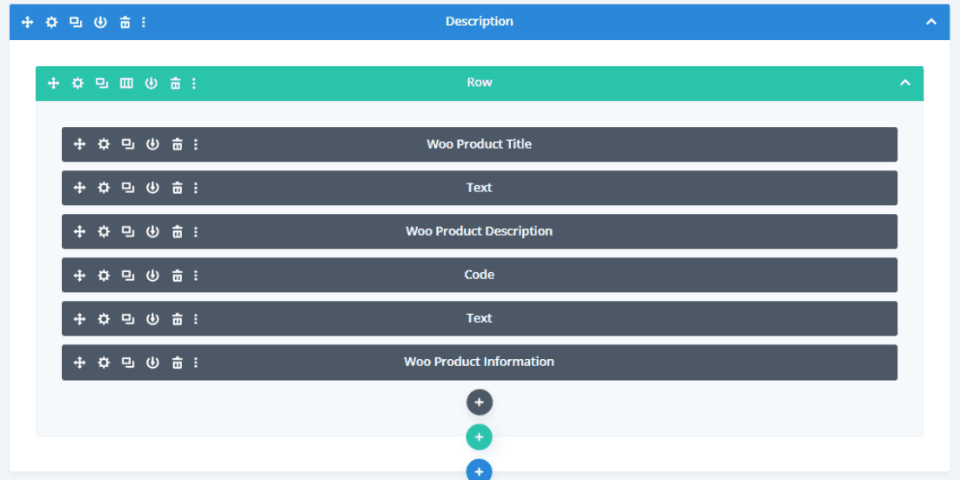
The product description expands on the information about the product. This isn’t required for the page to work. Instead, it’s supportive of the product sale and users will expect to see this information. In general, the more information you can add, the better.
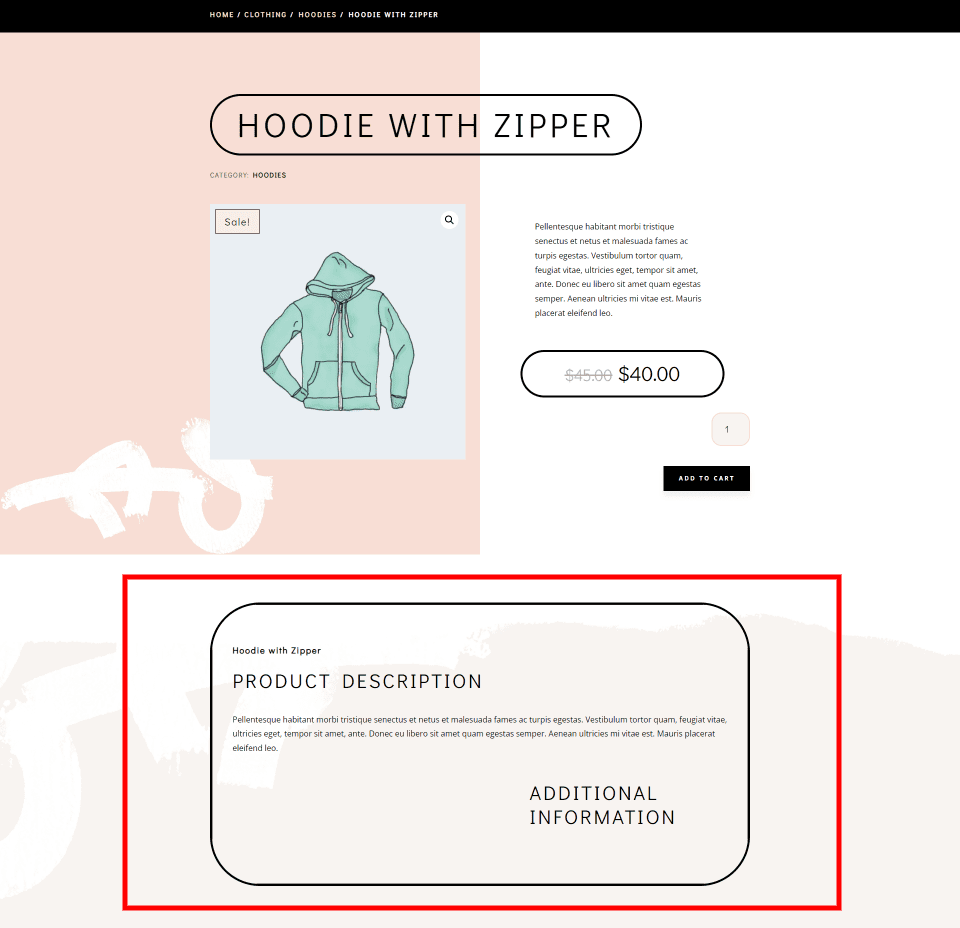
Here’s how it looks from the front end. I’ve highlighted the description area.
It’s created with:
Woo Product Title – this is the same product title as in the header section, but it’s style differently to fit its position in the page hierarchy.
Woo Product Description – choose to show either the long or short description. It’s usually ideal to select the short description in the header section and the long description in the description section. This allows you to expand on the information.
Woo Product Information – this shows additional information about the product.
It also includes a few text modules to create titles.
Optional Product Page Elements
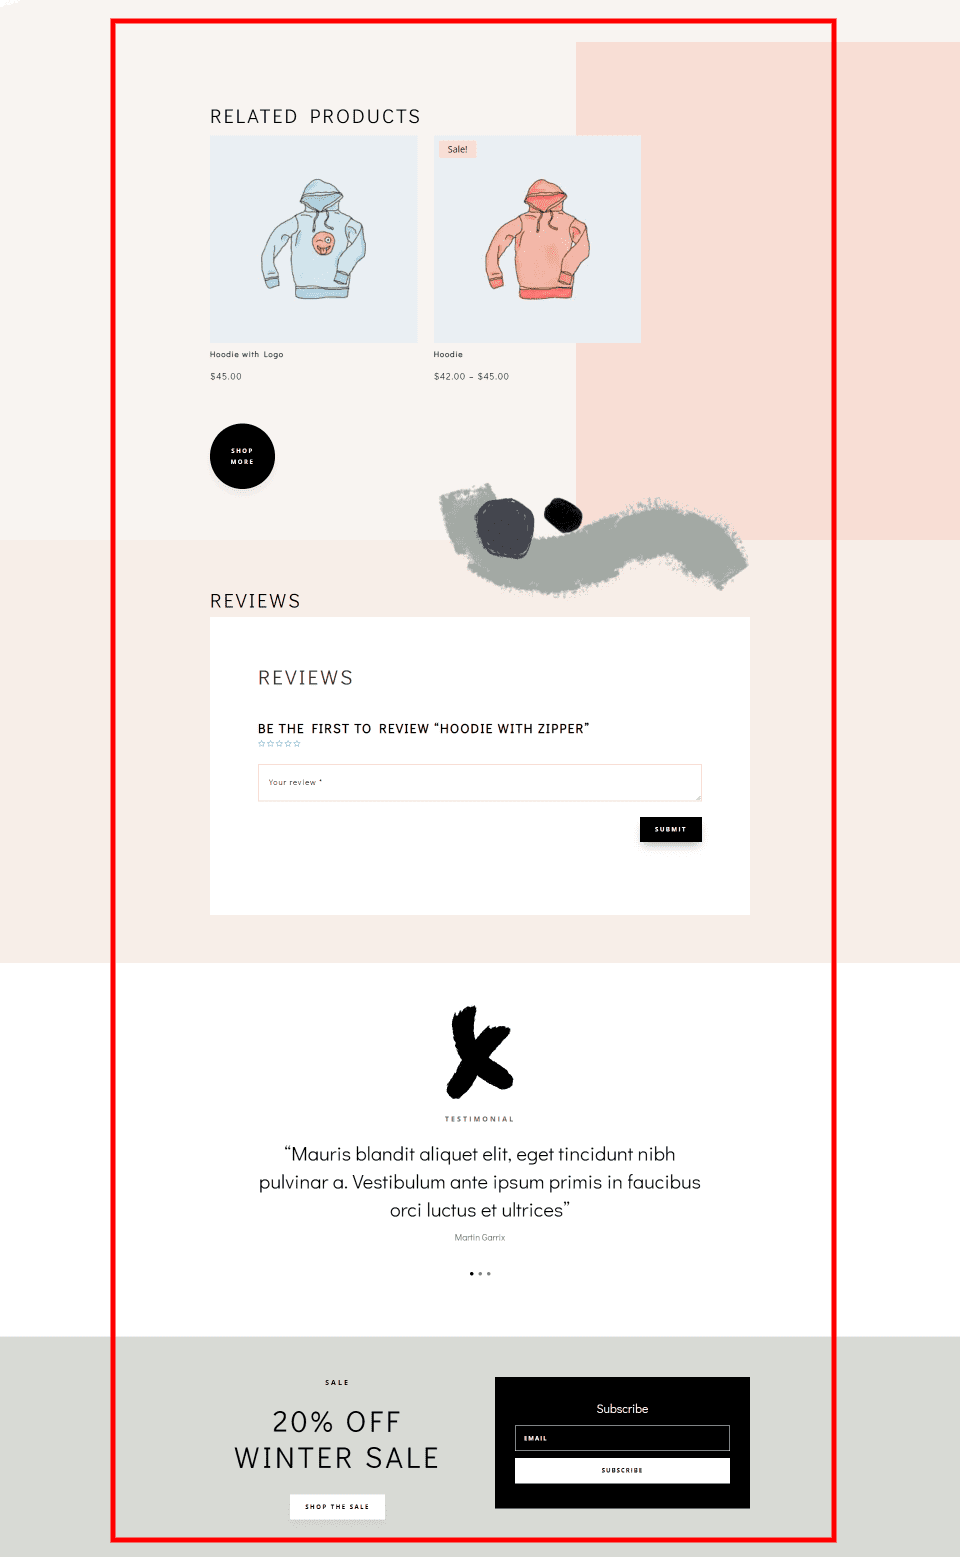
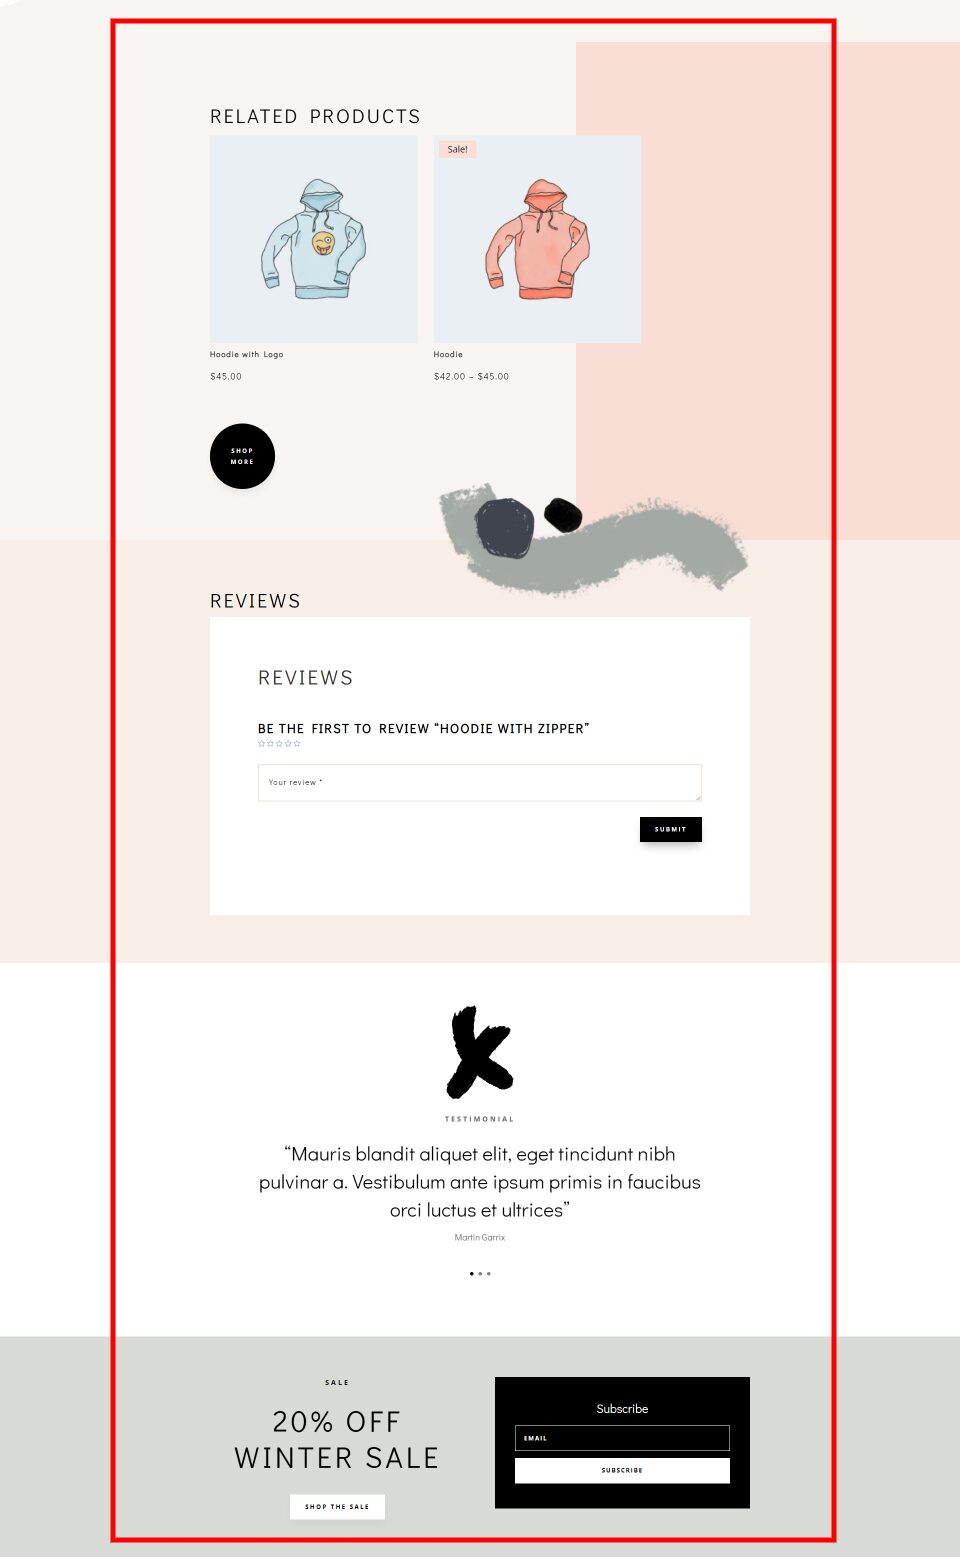
Next, we’ll look at the optional product page elements. There are lots of other WooCommerce elements you can add to the product page that improves sales. Some are made with WooCommerce modules and others are made with standard Divi modules. These sections are optional, but they’re good to include. We see them under the most important elements in our example layout, as I’ve highlighted in the image above.
They include:
Woo Product Rating – this shows the star ratings that users have rated the product. It’s sometimes added within the essential elements or next to the testimonials.
Woo Related Products – this shows a list of related products. You can select the types and number of products that display. Choose the categories, sorting, number of columns, and the elements that it displays.
Shop Categories – links to the various shop categories are often created with images and text modules. They work as CTAs that lead the user to their favorite areas of the shop.
Woo Product Reviews – this adds a review option with a field where the user can write a review. It also shows the reviews that other users have written. You can have it to show a star rating.
Testimonials – these are testimonials that users have sent through email or some other means. They’re often created with testimonial modules, sliders, text modules, etc.
CTA – calls-to-action are created with CTA modules, blurbs, images, text, buttons, and more. They’re great for showcasing a sale, a new product, an upcoming event, etc.
Email Optin – these are created with email optin modules and are ideal to build your newsletter list.
Social Follow – social icons are added with the social media follow module. They’re a great way to build your social following.
Module Examples
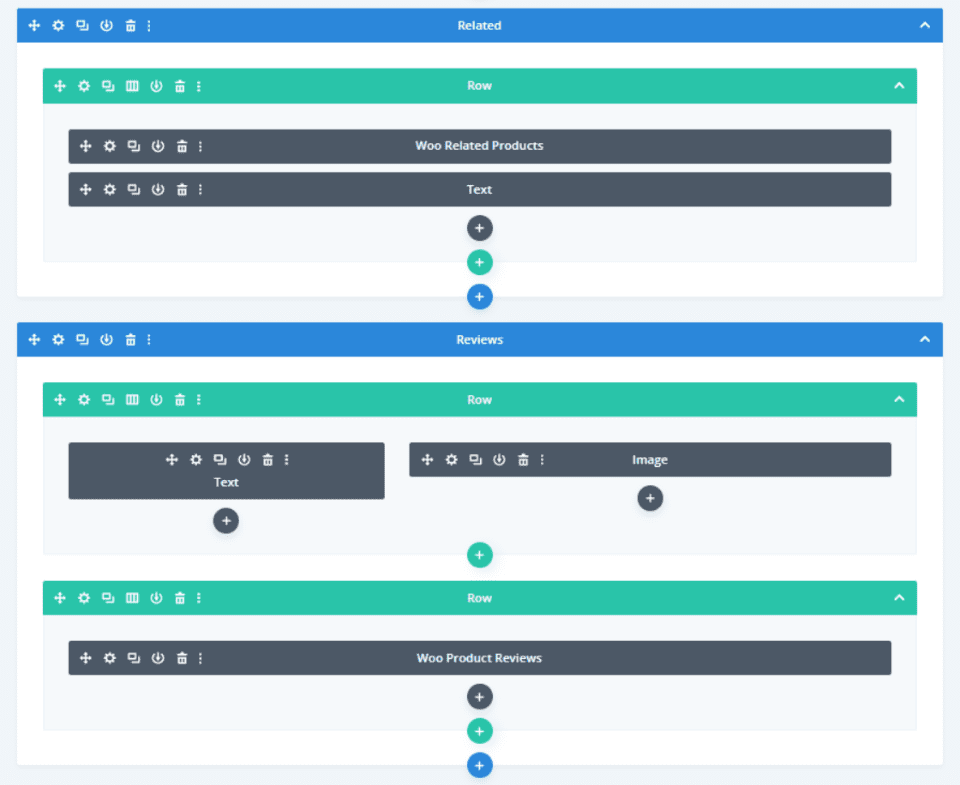
This example shows sections with related products and reviews. They’re created with WooCommerce modules and a few supporting modules including images and text.
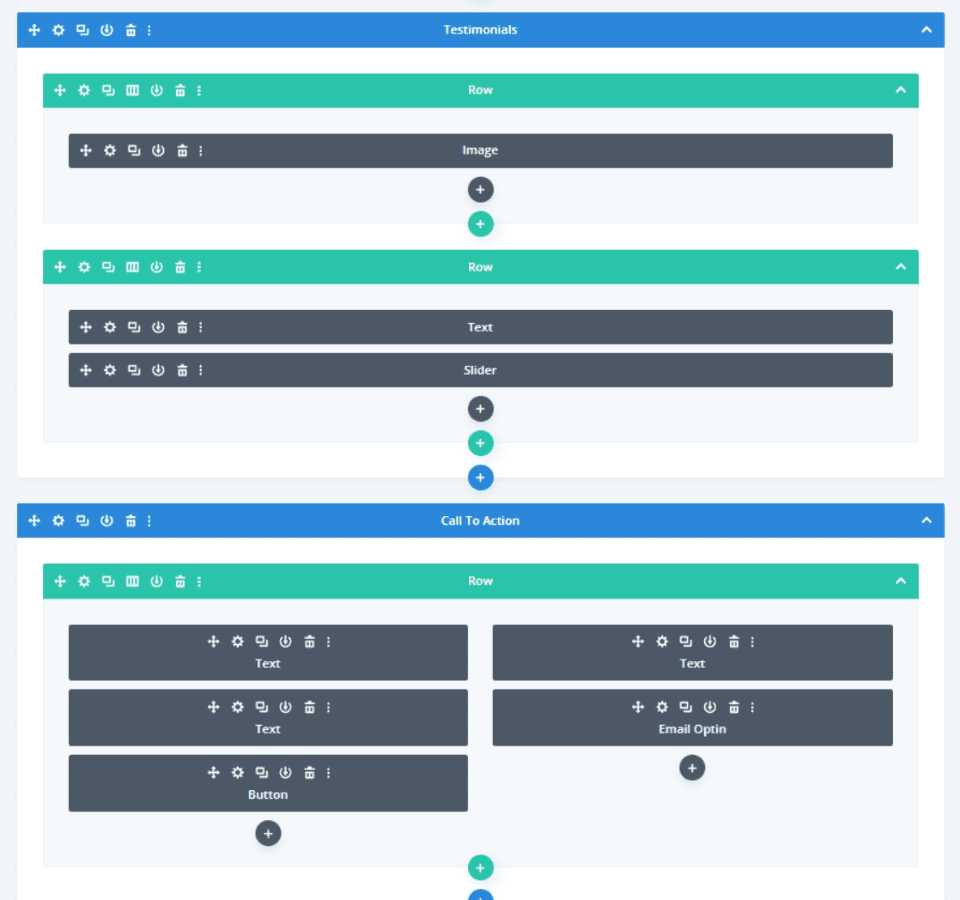
These sections include testimonials and a call to action. Testimonials are created with an image and a slider. The CTA was created with text modules and a button. This one also includes an email option.
How to Add Woo Modules to Your Product Page Template
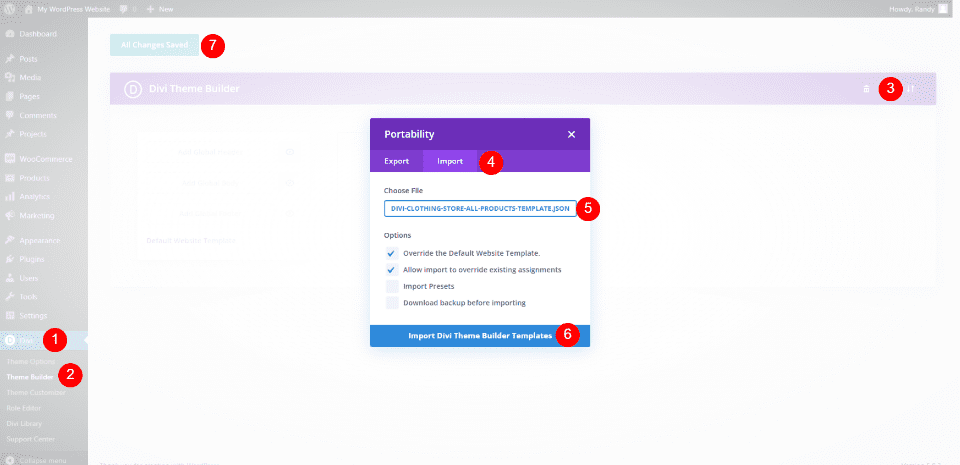
Create or upload a product page template by going to Divi > Theme Builder in the WordPress dashboard. To upload, select Portability, choose Import, navigate to your JSON file, and click Import Divi Theme Builder Templates.
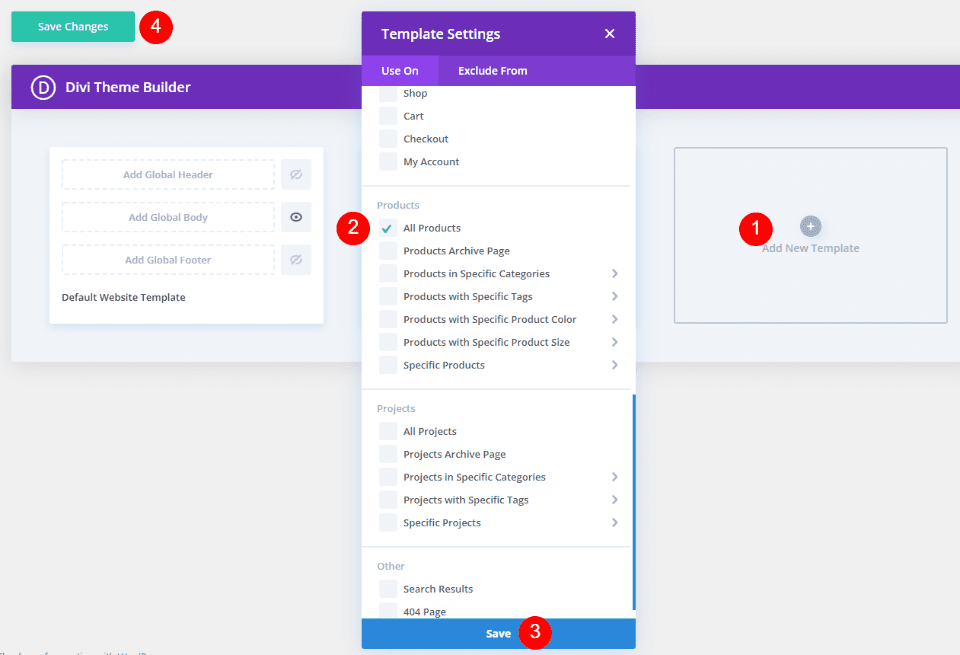
Create a template by creating a body template and assigning it to All Products. Choose Build Custom Body and add your modules.
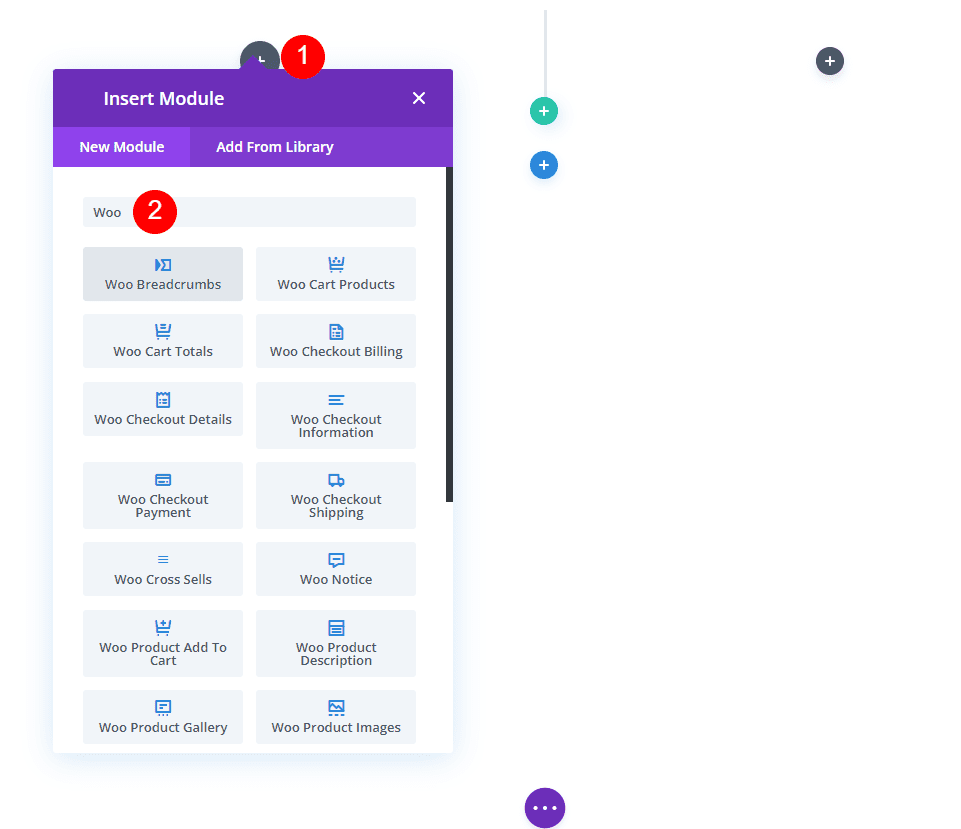
Make sure you have WooCommerce activated so the modules are available. To add your WooCommerce modules, click on the dark gray plus icon and search for “woo” in the search field. You’ll see all the WooCommerce modules available.
Where to Get Free Product Page Templates
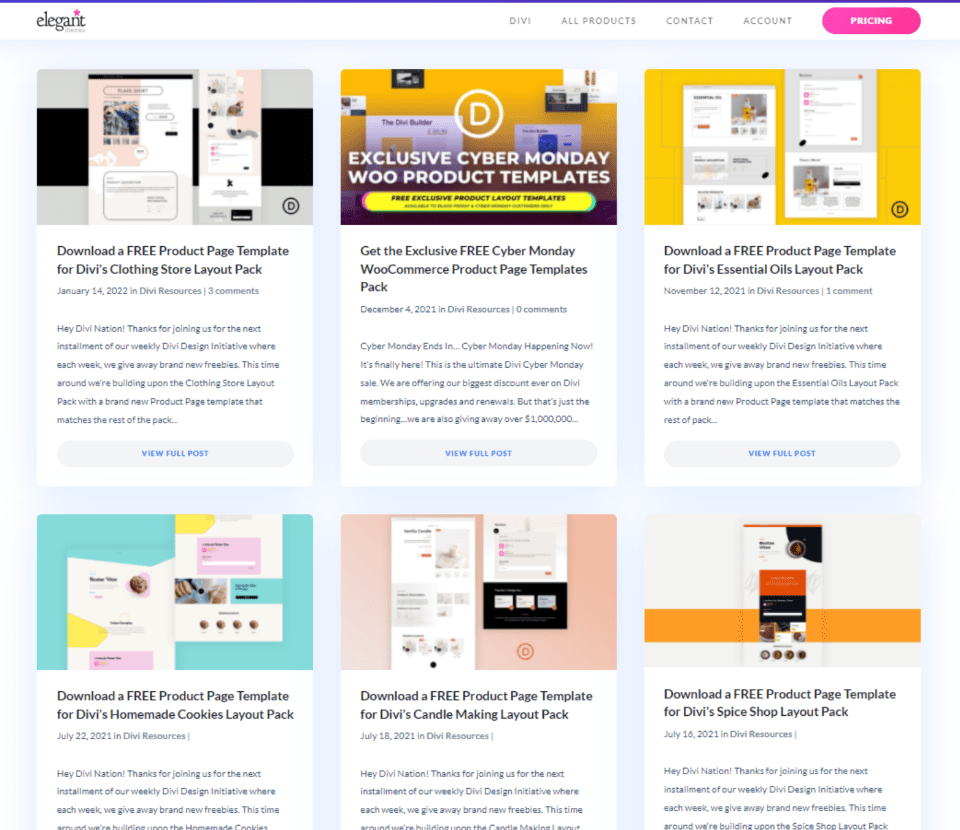
Elegant Themes provides free product page templates for the Divi layout packs design for online stores. You can find free product page templates in the Elegant Themes blog. Search the blog for “free product template” or similar keywords. Download and unzip your template files.
Ending Thoughts
That’s our overview of the required elements for your Divi product page template. It’s easy to see which are essential and which are optional. Always keep the essential elements together and make sure they’re the main focus of the page. Following these guidelines will help you design great product page templates with Divi.
We want to hear from you. Have you built WooCommerce product pages with these required elements? Let us know about your experience in the comments.
Featured Image via Letters-Shmetters / shutterstock.com
The post An Overview of Required Elements for Your Divi Product Page Template appeared first on Elegant Themes Blog.

