One of the most common types of plugin on the WordPress.org repository is the form builder. From Gravity Forms, Caldera Forms, Ninja Corms, Contact Form 7, and so on, the choices that you have are nearly endless. However, not all form builders are created equal. Each developer focuses on a slightly different user experience and set of features. Which makes it difficult to choose the best option. If you are looking for a plugin with conditional logic that handles as many complicated formulas and calculations you can throw at it, Calculated Fields Form stands out from the noise.
Calculated Fields Form
Not only does Calculated Fields Form stand out because of its utility, but the plugin is also one of the top-rated Gutenberg-enabled (the WordPress Block Editor) plugins on the plugin repository. That alone makes it worth checking out because even though the Block Editor is enabled by default, not every plugin you find has integrated itself with the new ecosystem.
The plugin is also perfectly compatible with the Classic Editor (and page builders like Divi, to boot), so regardless of how you design your site, Calculated Fields Form is going to work with it. We mention that because you aren’t always guaranteed that any given plugin will work across the board. So with CFF having been tested with the Block Editor, the Classic Editor, and page builders, we thought it was worth mentioning.
Some of the features worth mentioning are just what you can calculate with the plugin. Because this isn’t just a contact form plugin, you will very specific use-cases for it. Some of the most prominent features include
- accepting payment from the form itself (via PayPal) after the necessary calculations have been done
- a visual form builder
- multiple pre-made templates
- database submission and storage
- unlimited numbers of calculated fields
- conditional rules and logic
- multiple field types (radio, dropdown, checkbox, etc.)
- simple or advanced calculation options (common math as well as ternary operators)
- multi-page forms
- dependent fields
- value sorting
- form disabling for search engine crawlers
A Brief Overview
Installing CFF is simple. Navigate to the WordPress.org plugin repository, download the CFF plugin, then upload it from the Plugins – Add New menu option in your WP dashboard. After you do that, you’ll notice a new Calculated Fields Form option in your sidebar.
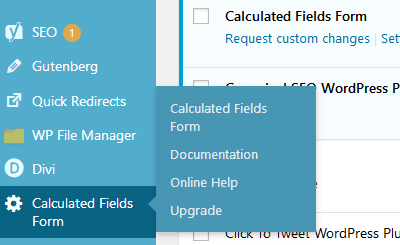
If you will notice, of the 4 options you’re presented with, only 1 of them is an actual settings link. The documentation link opens to the developers’ website and knowledgebase, and the Online Help link takes you to the WP.org support forum. Upgrade…well, it takes you to an upgrade page to move up from the free version.
Our point is that a plugin that has this much power under the hood is simple enough to use that you only need a single settings/options page to get the full effect. It’s really impressive, actually. Admittedly, the real options are done on a form-by-form basis, but a lot of calculated fields plugins can be overwhelming, and this one’s upfront simplicity makes it accessible.
Creating Forms
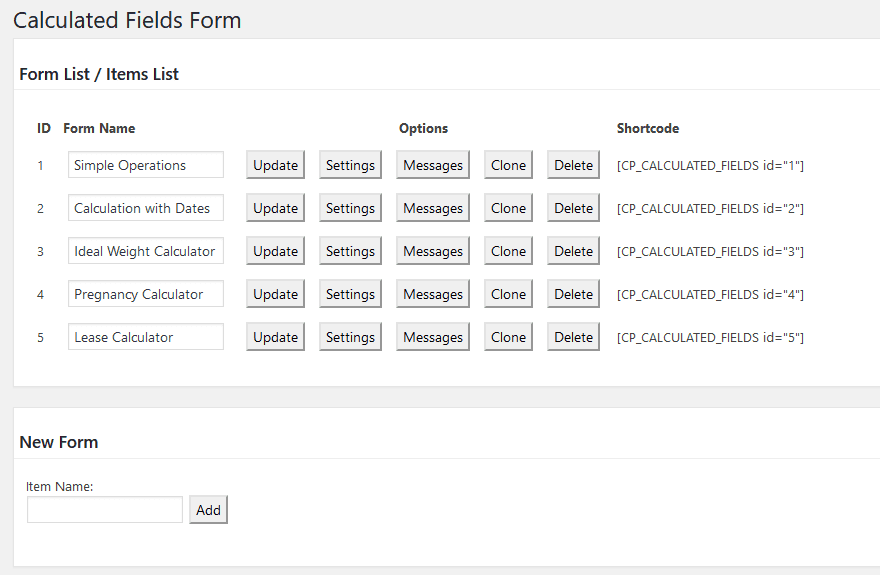
The free version (which we will discuss here) comes with 5 sample forms from which you can either duplicate and edit to your own specifications or, if they happen to be what you need, use straight out of the box.
- Simple Operations
- Calculation with Dates (for a bookings calendar, etc.)
- Ideal Weight Calculator
- Pregnancy Calculator
- Lease Calculator
You see each of these immediately when you load up this page.You can add the shortcode to the right in any spot that renders shortcodes, and you’re in business. You can also press Clone to duplicate the form and edit the calculations already there using the Settings button.
Under that list is the New Form button, which when used simply adds a new option to the bottom of the list of forms above.
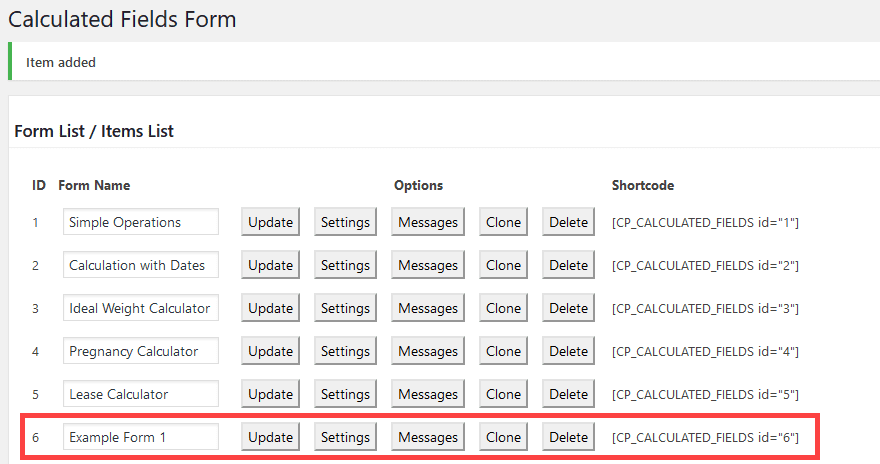
No matter how many forms you want, just label
Editing Forms
Regardless of what form you want to edit, pressing Settings brings you to the visual editor for that form. Since we started a new one, we’ll look at the blank canvas.
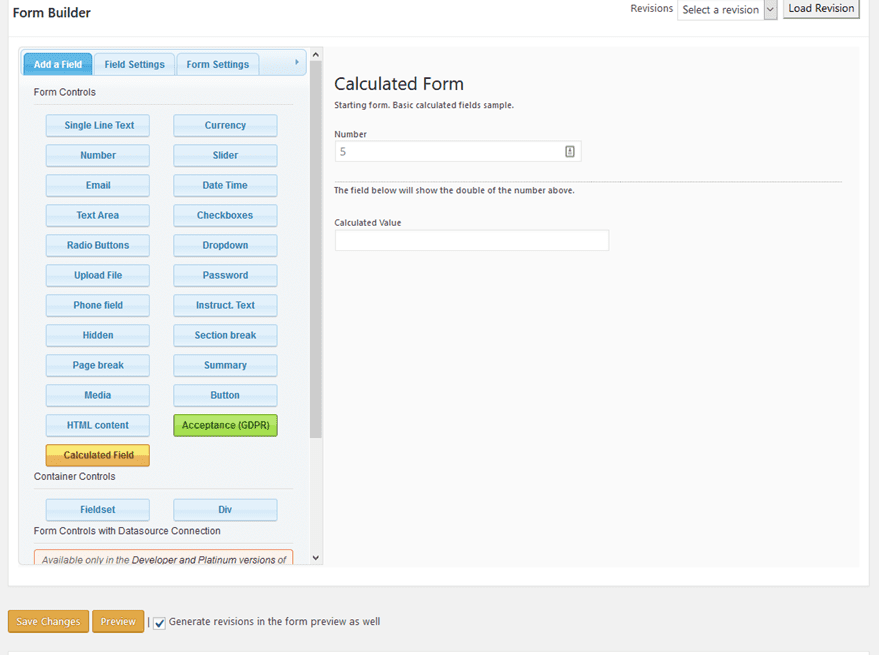
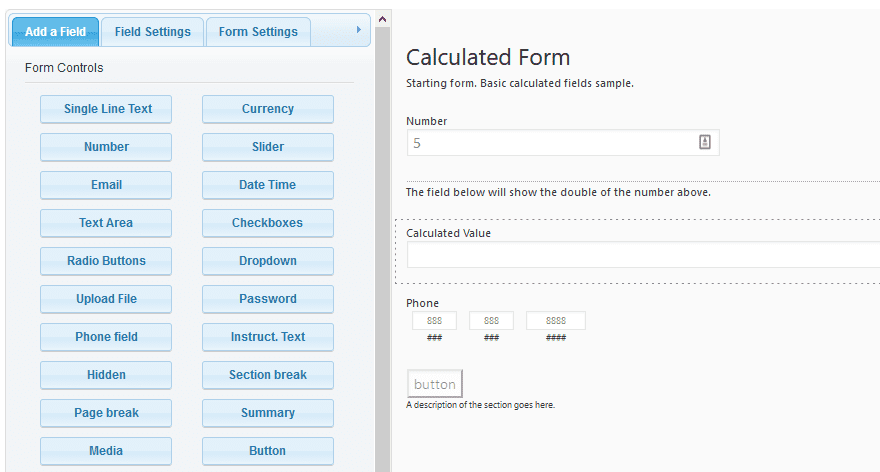
All you have to do is click on an item to the left, and it will appear to the right. At that point, you can drag it to any position you want in the form.

Click in to the newly appeared field to the right. The tab to the left will change from Add a Field to Field Settings.
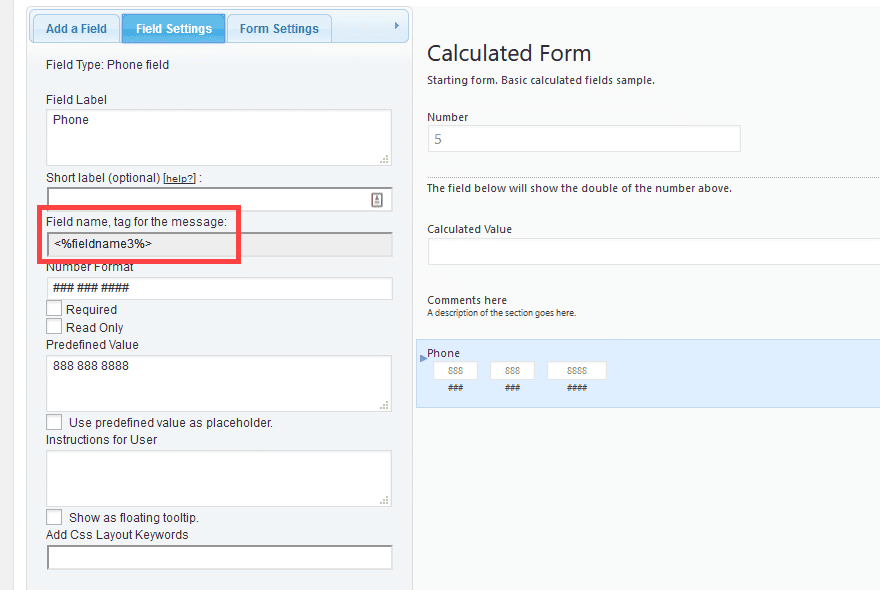
Each field has a slightly different settings page, but the universal one is the Field Name, Tag for The Message. Obtuse label aside, this is the variable tag that you are going to insert to reference the value of this field in any calculations that you add.
When you finish adjusting all the field settings you need, the Form Settings tab is pretty self-explanatory. You will adjust any of the overall options for the form, such as alignment, cookie persistence, templating, CSS, and so on.
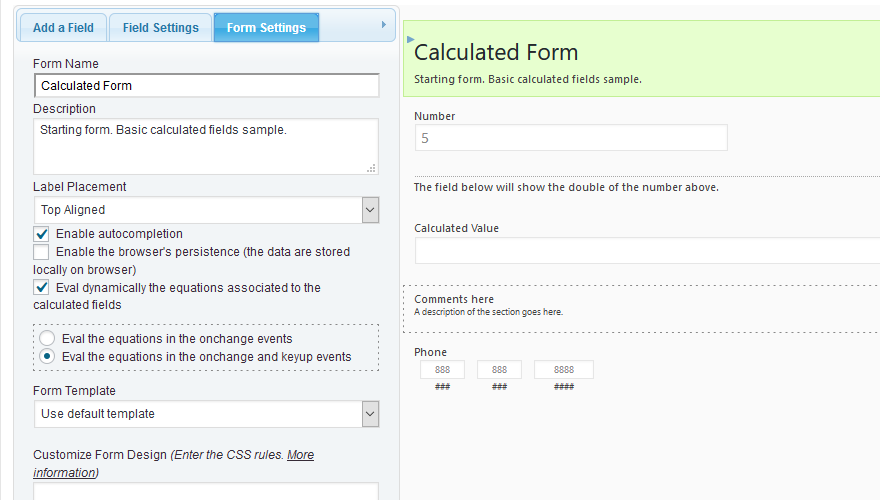
When you reach this point (or at any point prior to this), you must press Save Changes. If you do not, you will lose all of the customization you have done. There is no auto-save in the Calculated Fields Form builder. So whatever you do, press Save Changes. 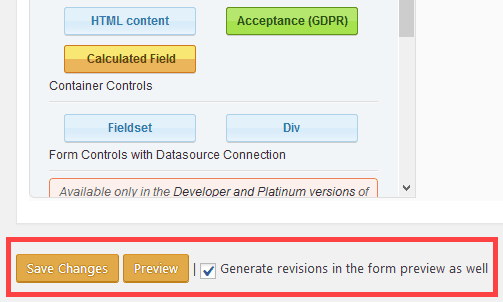
Doing so will take you back to the main page, but you can edit again quickly. It is much easier than losing your progress when doing calculation setup. (Learn from our mistakes in this case.)
More Form Options – Text and Validation
Below the Save Changes button is a secondary set of form settings and options.
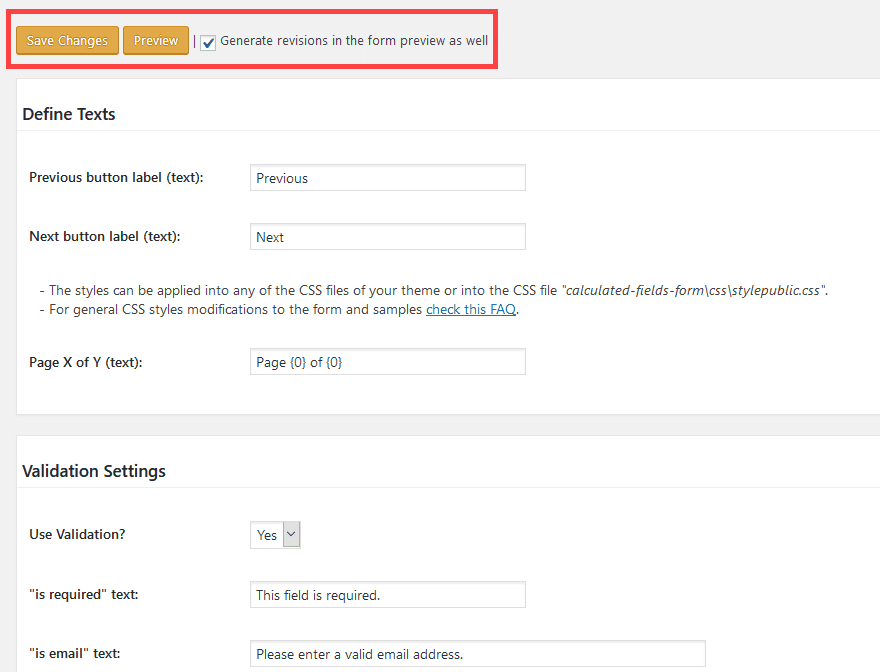
Many people will have very little use for these settings. You customize label text under Define Texts, choosing what users see on the previous and next buttons and pagination.
With Validation Settings, you determine whether you need to validate the entries (is this a real email? did they put text in a numbers field?) or not. If you decide that you do want to use validation (you do, more than likely), then you can use this section to edit the placeholder text your users will see. In general, the default text works and tells the user exactly what information is valid for the calculation.
In some cases, you might need to be more specific or use jargon or industry terms, and that’s when this settings field gets the most use. More than likely, however, you won’t use this and probably shouldn’t change anything. This is a class case of if it’s not broke, don’t fix it.
The Final Product
Get it? Product? It’s a math joke. Because we’re doing calculations.
Anyway, when you press save and see your form in all its glory, you should see something that looks like this in the form builder:
And something like this on the live site:
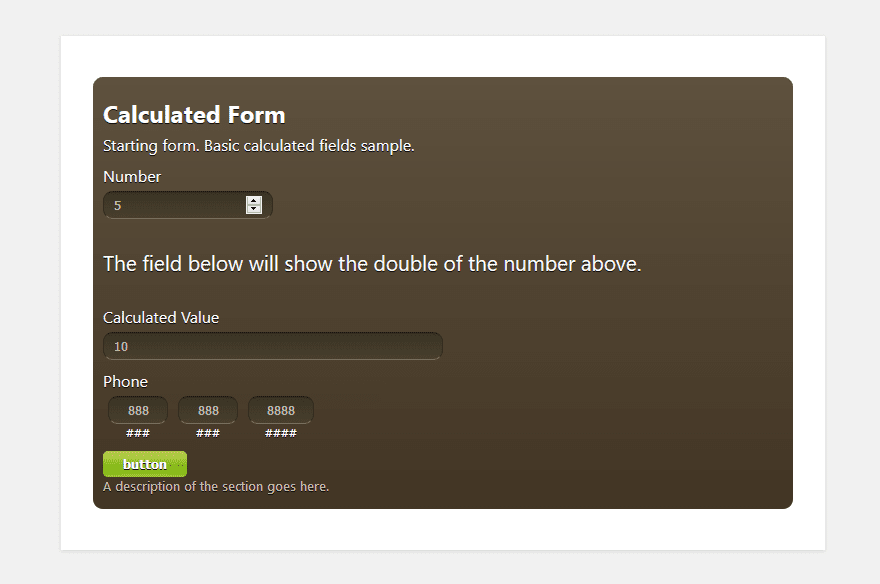
The final form above was using Template 2, set in the Form Settings tab.
Using the Block Editor
We mentioned above that Calculated Fields Form is compatible with the Block Editor, so we wanted to take a brief moment to show you how easy it is to use them together. To start with, you will still need to follow the same steps as above to create the forms and get the calculations in the right places.
After that, however, open the post or page in the Block Editor that you need to insert the form. Press the circle + button to add a new block, scroll until you find the Calculated Fields Form section, and click Insert CFF.
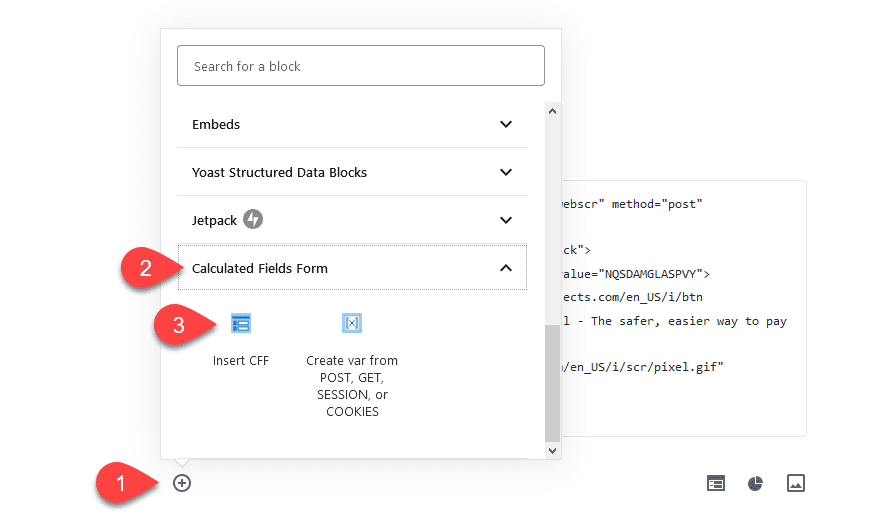
Then look at the right-side of the screen under the block settings. You can use the Forms dropdown to select the form you need. The CFF block will then update in the post in real time.
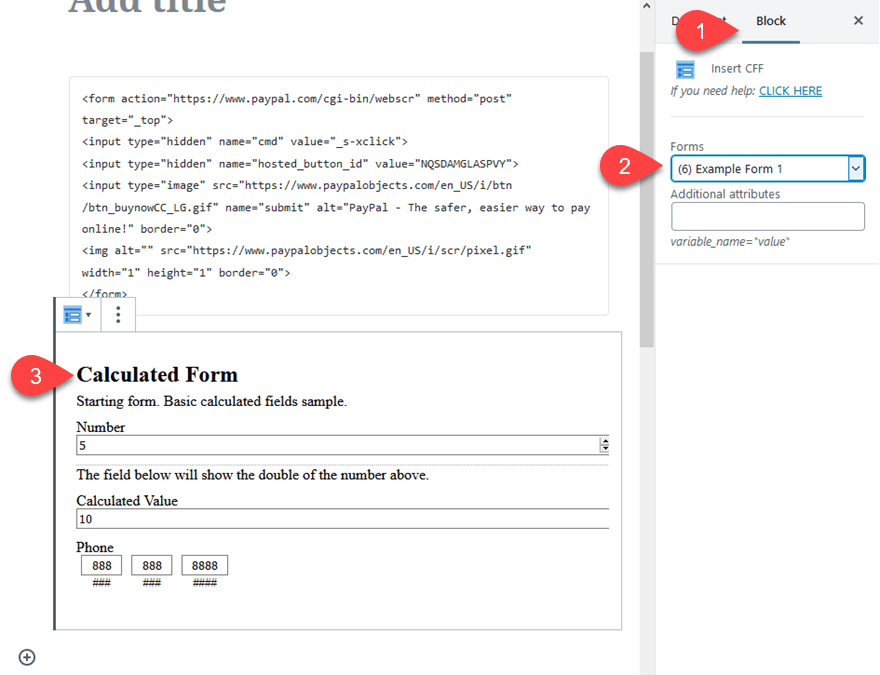
To make edits to the form, you will still need to use the visual form builder from above. But insertion and styling with the Block Editor is as simple as that.
Wrapping Up
As you can see, the Calculated Fields Form plugin can do some incredibly powerful stuff. Even in the free version. If you choose to upgrade, you get even more robust features, but for a lot of people, the free version is going to be powerful enough to get through any calculations and conditionals their users need. As we said above, there is a nearly infinite number of forms plugins on the repository, but we think that Calculated Fields Form is one of the better choices. Especially if you aren’t shopping for a contact form builder.
What are your experiences with CFF?
Article featured image by sibgat / shutterstock.com
The post Calculated Fields Form: Plugin Overview and Review appeared first on Elegant Themes Blog.

