It’s important for a website to have a well-designed 404 page. A 404 page informs the visitor that the content they’re looking for isn’t on the website. It should inform them they may have entered the URL wrong and possibly provide them with a way to find an alternative to what they wanted. The easiest way to create them is with Divi, but Divi doesn’t create or assign them out of the box. However, a third-party plugin called Divi 404 Page Builder makes it easy to build your 404 pages using Divi layouts.
Divi 404 Page Builder provides a simple screen where you select any Divi layout to use as your 404 page. It’s designed for SEO too. Rather than creating redirects, the plugin dynamically generates the 404 page using your layout and sends the 404 status to search engines so the page isn’t indexed.
Designing 404 pages is an art. Many designers have fun with them. Maybe it could list your most popular articles, popular categories, provide a search, or give them an awkward video. For some tips on designing your 404 page, see the article Creating Custom WordPress 404 Error Pages.
In this article I’m using version 1.0.0 of the Divi 404 Page Builder Plugin with Divi version 3.0.106
Installing Divi 404 Page Builder

Upload and activate the plugin as normal. Other than creating and assigning your 404 page no other setup is required.
Creating and Assigning a 404 Page Method One
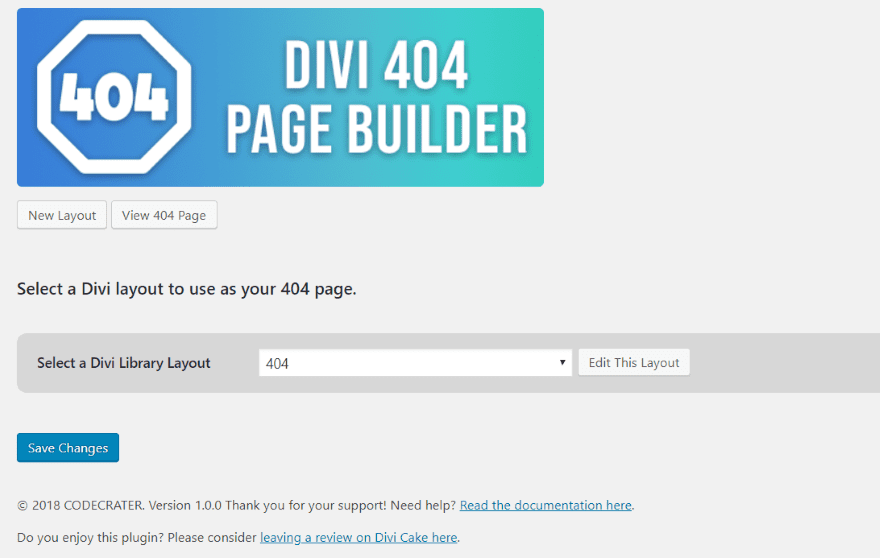
In the dashboard menu, go to Settings > Divi 404 Page Builder. Here you can create a new layout, view the current 404 page, select a layout, edit your selection, and save the changes. There’s also a link to the documentation.
Create a New Layout
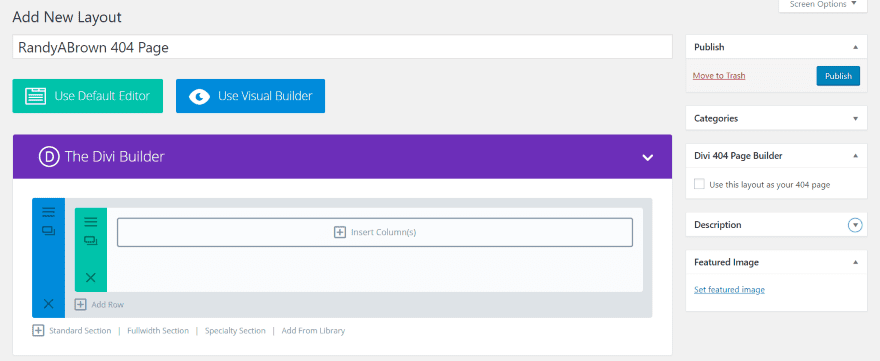
Clicking New Layout opens the Divi Builder where you can create the layout for the Divi Library. You can use the Visual Builder if you prefer. If you want to load layouts from the library to build your 404 page I recommend creating the layout within a page or post and saving it to the library. This way you can use a page from your layout pack or child theme or any other layout that you’ve imported.
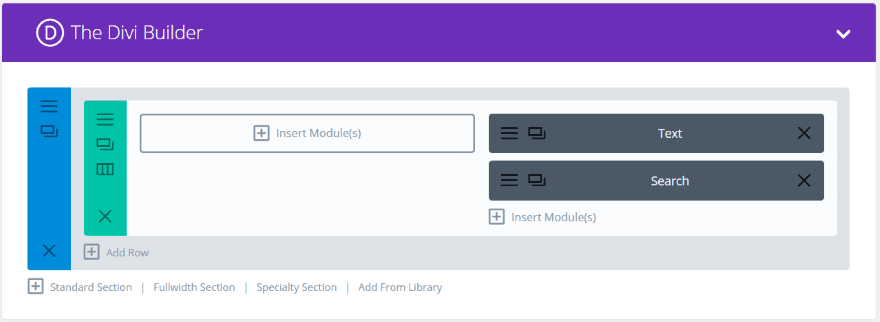
I’ve added a background image to the section and placed text and search modules over it to provide a short message. Once you create the layout you’ll need to publish it so it’s available in the list.
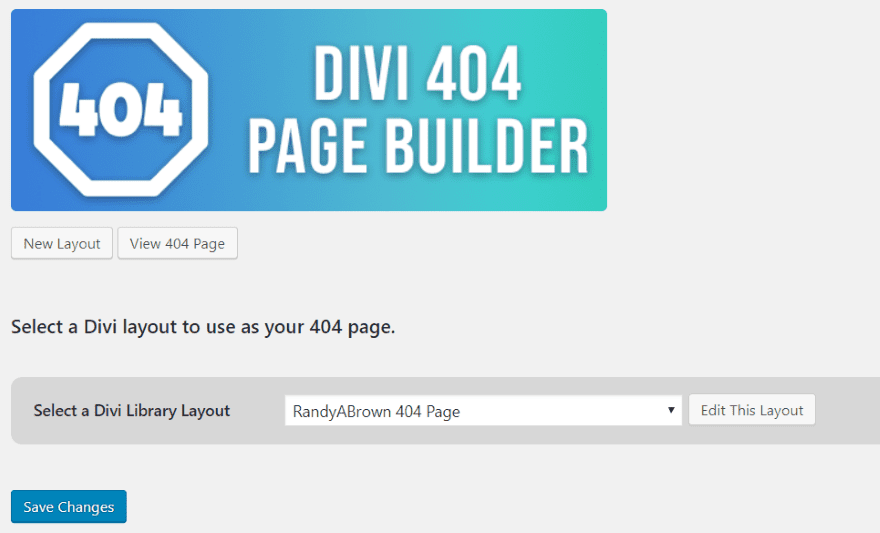
It now shows the new layout as the 404 page. I can edit or view the page. Save changes will assign it as my 404 page.
View 404 Page

Clicking View 404 Page opens a new tab that displays the page. This preview only shows the page you saved. A preview mode would be handy, but that’s probably more of a Divi Library preview issue than an issue with this plugin. In reality there shouldn’t be so many people seeing your 404 page that it would hurt anything to change to a new layout to view it. However, a preview option would save a few steps.
Creating and Assigning a 404 Page Method Two
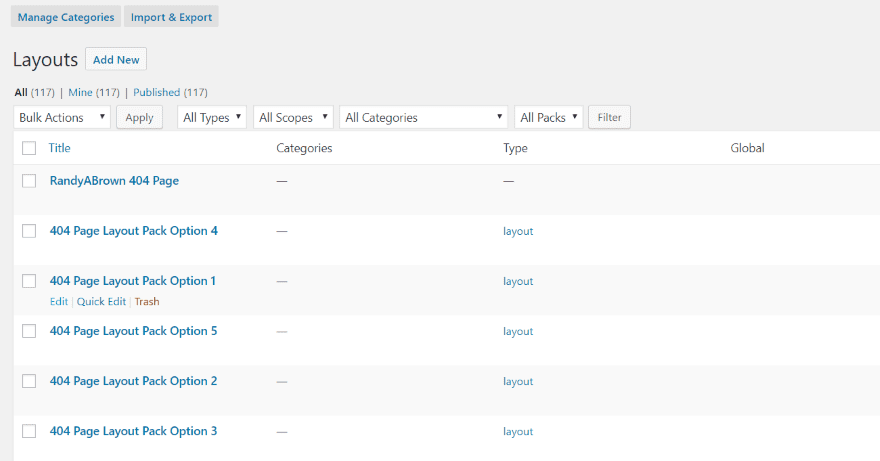
Another option is to use any page from the library and assign it as the 404 page from within its editing screen. You can create the page by clicking Add New, import a page, or create the layout from a page or post and save it to the library. In the Divi Library, click Edit on any layout you want to use.
I’ve imported the 404 Page Layout Pack, which is a stand-alone product that works with or independently or the plugin. It includes the 5 404 page layouts in the image above.
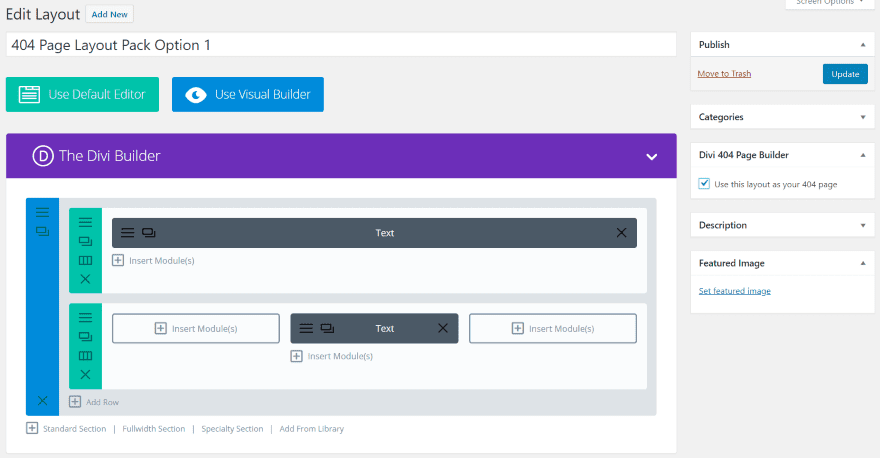
The layout opens in the Divi Builder. A new option has been added to the right side called Divi 404 Page Builder. It has a checkbox that you can select to use this layout as your 404 page. Check the box and click Update. You’re done. This layout is now the default and you don’t have to do anything else.
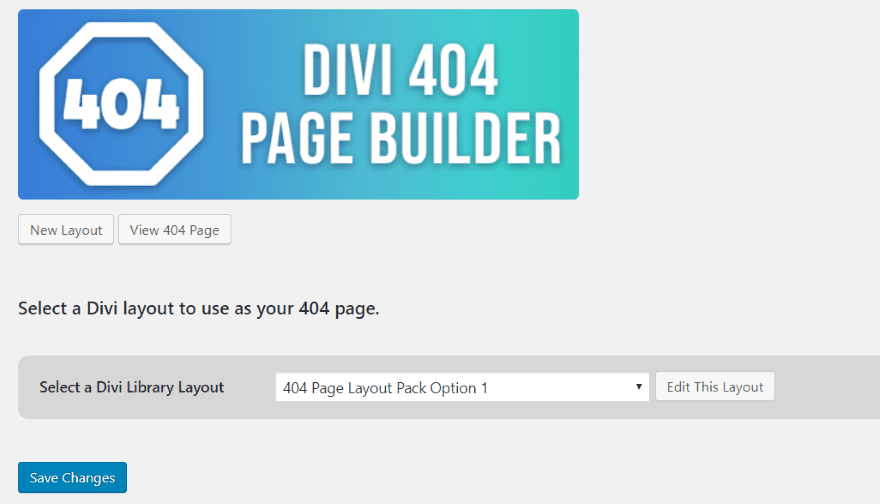
Looking back at the settings screen, we can see that this layout has now been made the default. You can edit, preview, or create a new layout from it here just like the first method.
Using the Visual Builder
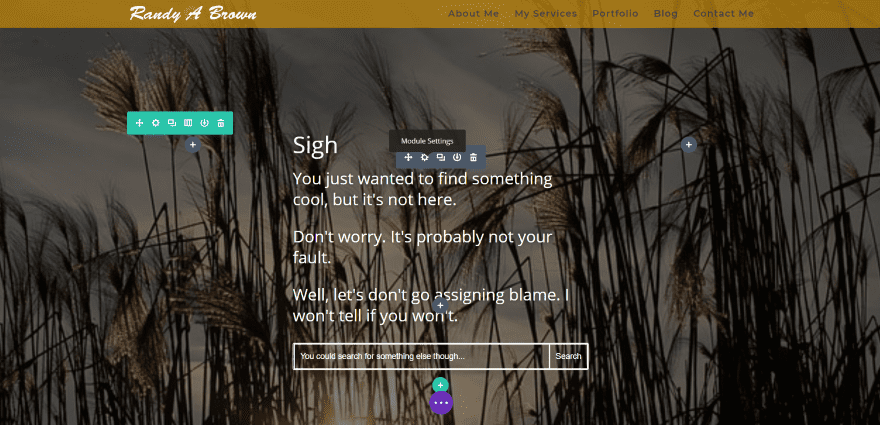
Here’s my new 404 page that I made with just a background image in the section, and text and search modules. I’ve changed the image, centered the text, and made the text larger. Since the plugin uses any layout made with the Divi Builder you can build them using the Visual Builder.
Using Divi 404 Page Builder with Extra

Divi 404 Page Builder also works with Extra. Here I’m using Option 2 from the 404 layout pack. It works exactly the same as with Divi. As expected, it does not use Category layouts.
Purchase Information, License, and Documentation
Divi 404 Page Builder has two purchase options:
- Single site – $4.99
- Unlimited sites – $12.49
Instructions are included on the sales page. There’s also a link to this in the plugin’s dashboard menu.
Ending Thoughts
404 pages are often overlooked when designing a website. However, they are important. Providing your readers with an alternative to what they were looking for, maybe even something a little entertaining, or at the very least some useful information, can help determine how much more time they will spend on your website. If all they see is a blank screen or just some text with no explanation as to why they’re not seeing what they expected they’ll probably just leave. In other words, good UX includes a good 404 page.
Having an easy way to create them using the Divi Builder and assign them with a single button click is a 404 page designers dream (or at the very least a strong desire). Divi 404 Page Builder is an excellent solution. I found it easy to use. The only issue I had was with a multi-site that uses this format: mainsite.com/secondarysite. This structure isn’t suited for 404 pages on the secondary site. Everything else worked perfectly and intuitively.
If you’re interested in building your 404 pages with the Divi Builder, the Divi 404 Page Builder plugin is worth a look.
We want to hear from you. Have you tried Divi 404 Page Builder? Let us know about your experience in the comments below.
Featured Image via SaimonSailent / shutterstock.com
The post Divi Plugin Highlight: Divi 404 Page Builder appeared first on Elegant Themes Blog.
