Mega menus are a popular design element that can give your website an elegant boost while providing visitors with an extra layer of navigation. There are several ways to add mega menus to Divi. One of the easiest methods that I’ve used is from a third-party plugin called Divi Mega Pro.
Divi Mega Pro makes it easy to build mega menus using the Divi Builder. Each menu can be added to any element using a CSS class. This means that you can add a Divi layout to any link in the menu, but you can go even further and add them to any element within any Divi layout simply by adding a CSS class. This is great for creating menus and popups with shop modules, images, sliders, portfolios, icons, blurbs, video, blogs, etc. It also works with Extra.
Creating a Divi Mega Pro Mega Menu
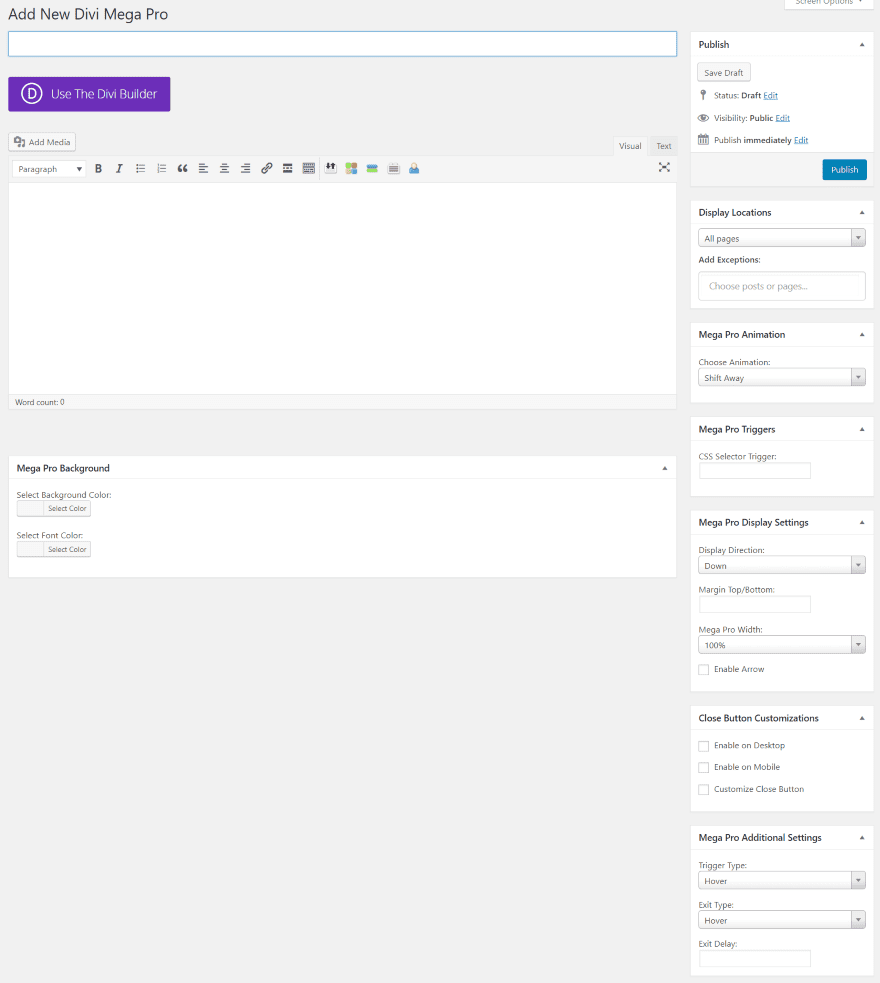
The Divi Mega Pro menu is added to the dashboard menu. Here, you can enter your license key, see the menus you’ve created, and create a new menu. When you click to add a new menu, you’ll see an editor for the menu post type. The screen is simple, but there’s actually a lot going on here.
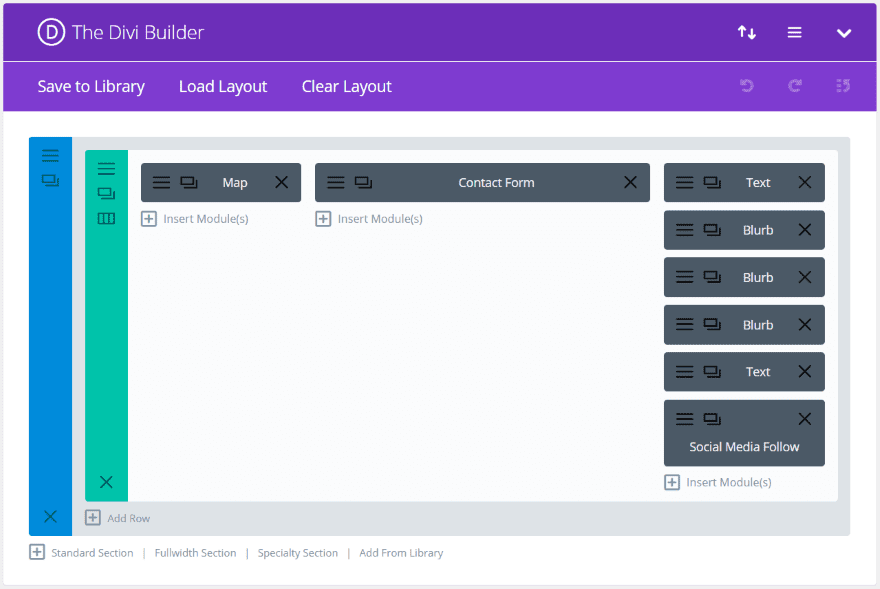
Editor – you can create the mega menu or tooltip using the Divi Builder.
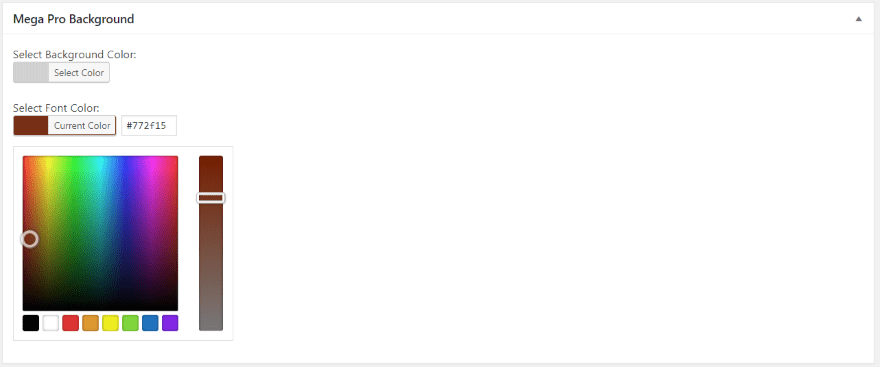
Mega Pro Background – you can select the background and font colors.

Display locations – choose all pages or name specific pages, and then enter exceptions.
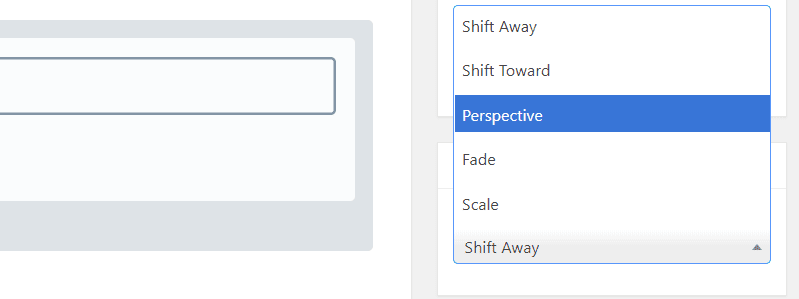
Mega Pro Animation – select an animation. Choose from shift away, shift forward, perspective, fade, or scale.

Mega Pro Triggers – add a CSS selector trigger. Once you save it you’ll see the CSS class that you’ll paste into the CSS class field of a menu item, module, row, or section. This is what gets clicked or hovered over in order to display the menu. Anything can be used as the trigger- not just menu items. This means you can also use Divi Mega Pro to create popups or tooltips.
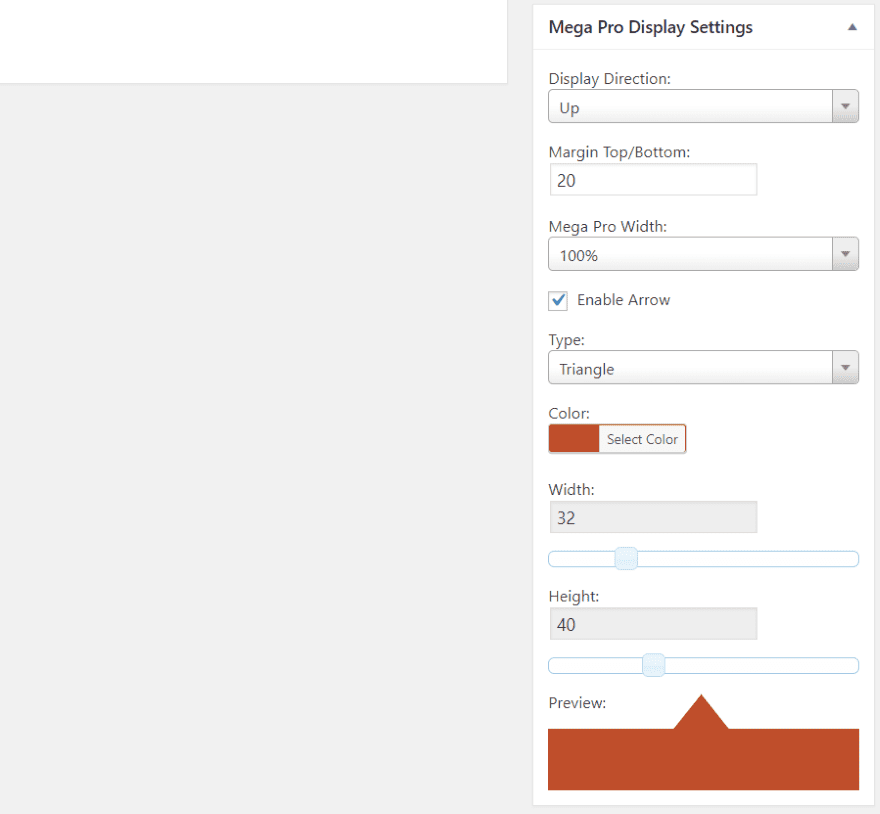
Mega Pro Display Settings – choose the display direction (up or down), enter the top and bottom margin in pixels, choose a width percentage, and enable an arrow. Enabling the arrow reveals more customizations where you can choose the arrow type (triangle or round), choose the color, set the width and height, and see a preview of the arrow.
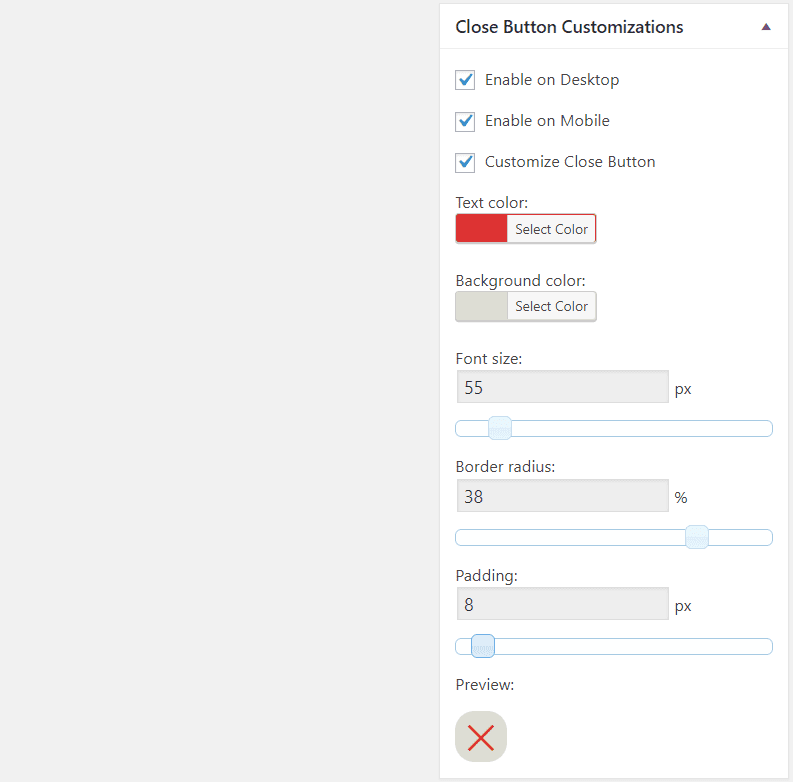
Close Button Customizations – choose to enable the close button on desktop, on mobile, and to customize the close button. Selecting to enable it reveals customizations for the text color, background color, font size, border radius, padding, and shows a preview.
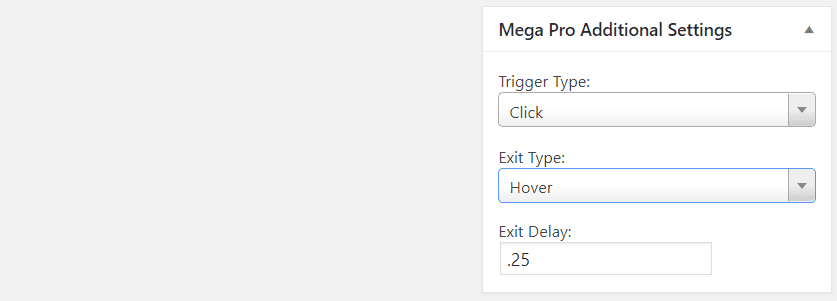
Mega Pro Additional Settings – choose the trigger type (from hover or click), the exit type (from hover or click), and enter the exit delay.
Divi Mega Pro Templates
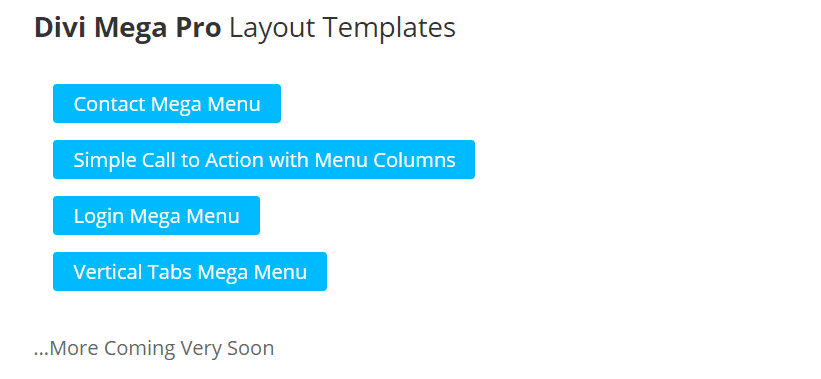
The developer has provided several templates for Divi Mega Pro. When you purchase the plugin these templates will be available in your account in the Plugin Layout Templates tab. These are excellent to help you get started with designing your mega menus. I’ll use a few of these in my examples.
Divi Mega Pro Menu
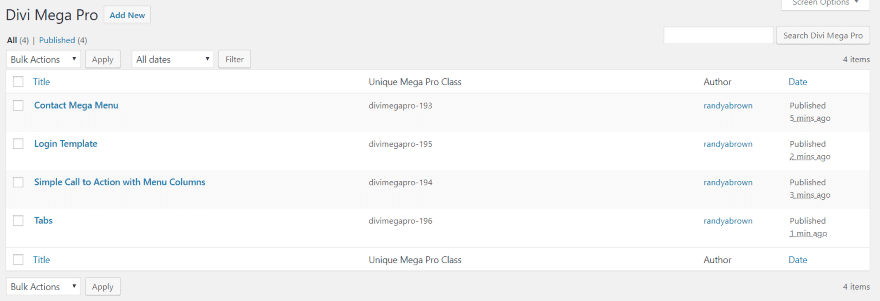
Once you create a mega menu it will appear in the list. Here, you can edit, quick edit, or delete the menus. You can also search, filter by date, view by status, etc. It also provides the Unique Mega Pro Class so you can copy them from here instead of opening each one to get the class.
- When you copy the Class, make sure you paste it without any extra spaces. That will cause all of the mega menus on the page to stop working.
I’m sure it wouldn’t be easy to add, but a feature to copy and edit would be handy. You can save the Divi layouts to your library to reuse, but this doesn’t include the surrounding settings.
Adding a Trigger

In the Mega Pro Triggers field, you’ll see a Unique Mega Pro Class. Copy this and paste it into the CSS Class field of the item you want to be the trigger.

To add the CSS Class field to a menu item, you’ll need to enable CSS Classes. In the menu screen, select Screen Options and enable CSS Classes.
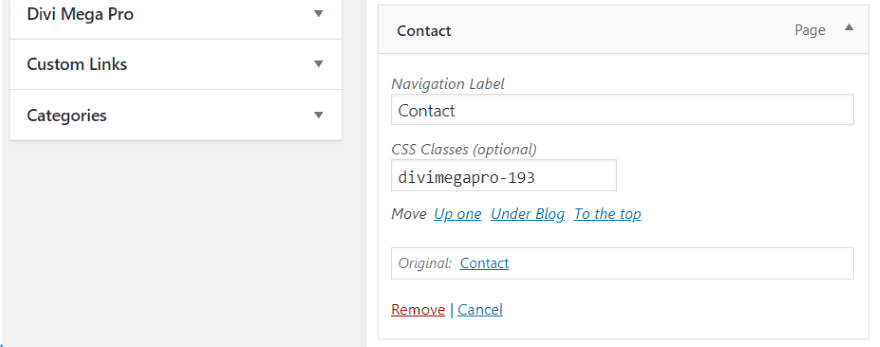
Paste the CSS Class into the menu’s field. Now, this menu item will display the mega menu on hover and it will take you to the page on click.
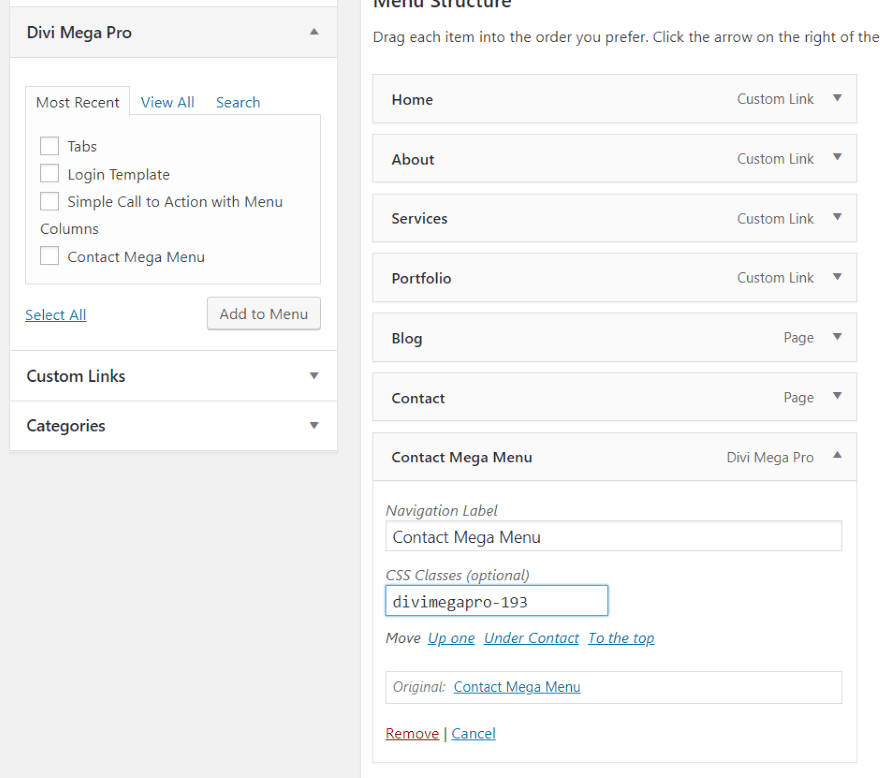
You’ll notice that Divi Mega Pro is also an option in the menu link options. These are great for adding a menu item to the menu that doesn’t actually go anywhere. Add the CSS Class just like any other menu item.
Contact Mega Menu
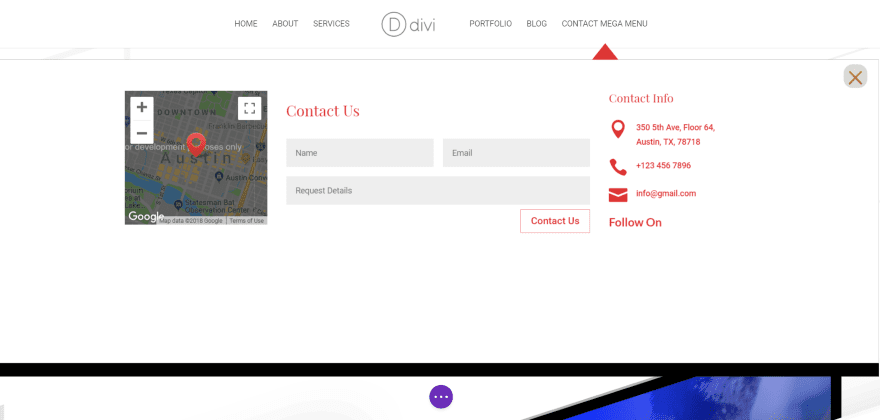
The menu opens on hover. I can still click on the Contact link to open the contact page if I want. If I only wanted the mega menu to display, I could just use the Contact Mega Menu link and rename it (like the example above). In this one, I’ve tweaked the colors a little using the background and display settings rather than the Divi Builder. It adds a bar at the bottom of the menu.
Simple Call to Action with Menu Columns
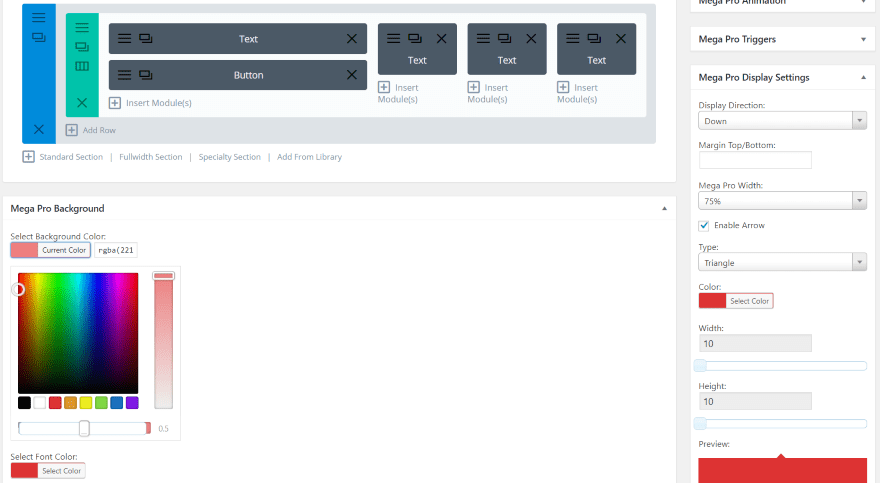
This is one of the templates that add multiple columns. I’m making adjustments to the background and font colors. I also added an arrow and made the width 75%.
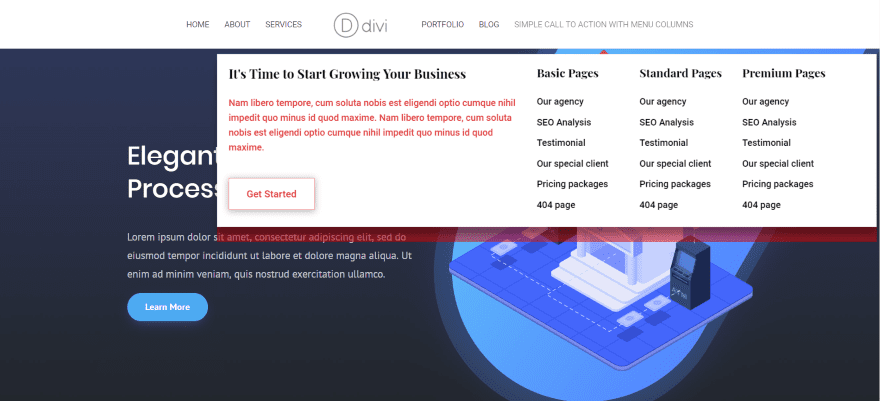
The background and font color options add a little more to it so it stands out. I left the alignment at default, which places the menu on the right of the screen. You can adjust the positioning in the settings.
Tabs
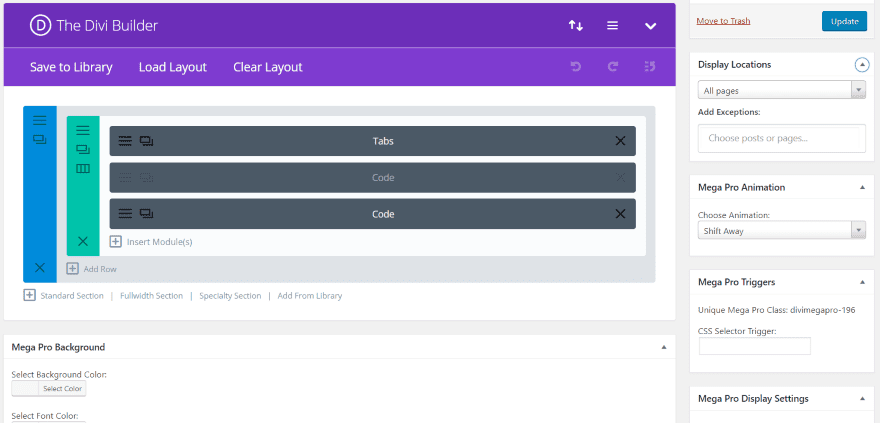
The tabs template includes a code module with jQuery to create the hover effect.
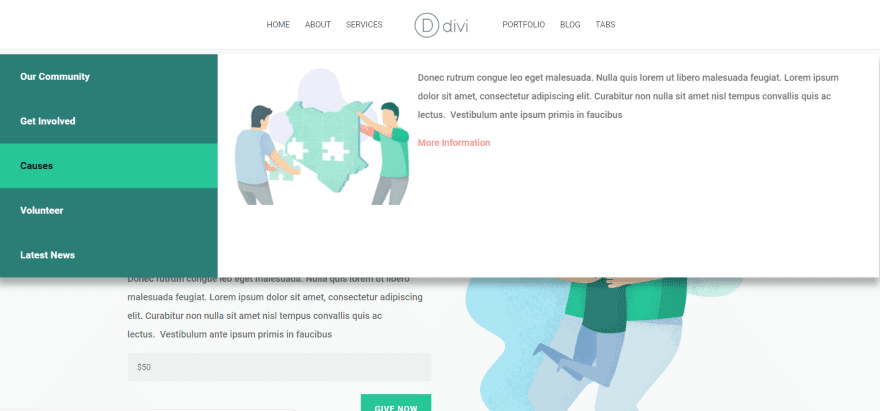
I’ve added content to the tabs and styled them to match the site. Each of the links to the left shows a different tab in the larger part of the menu.
Tool Tips
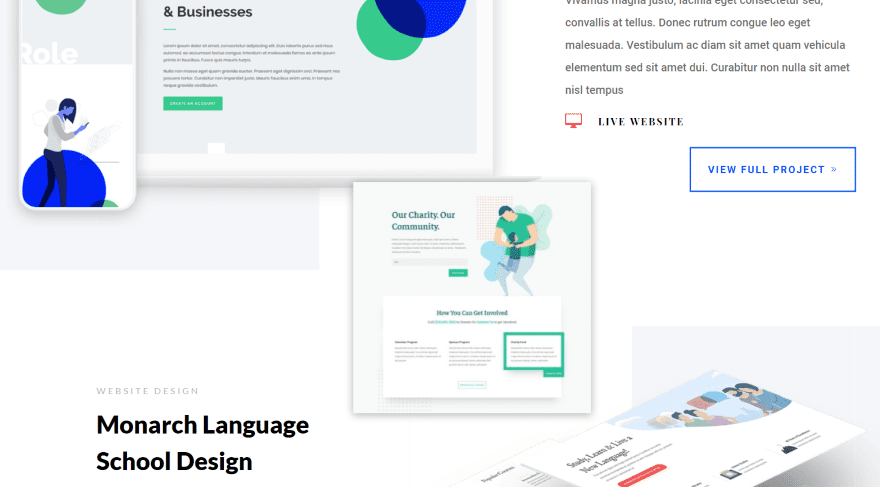
For this one, I added the CSS Class to a blurb so that it opens a small popup on hover. The popup is just an image with a border shadow. In the image above my mouse is hovering over the words LIVE WEBSITE. I haven’t adjusted the positioning yet, but it’s easy to make it appear where you want.
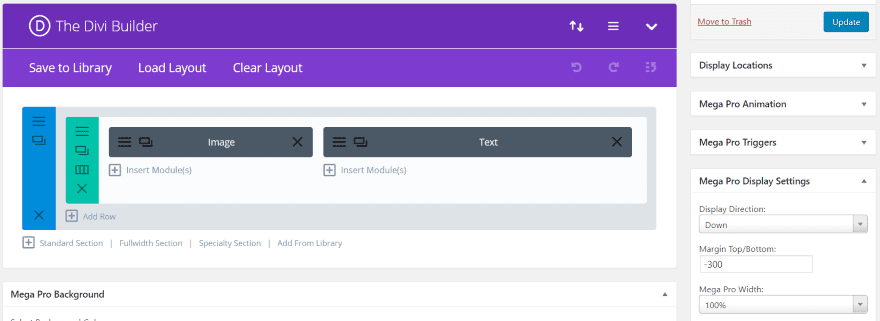
For this one, I created a popup to show an image with text. I set the display direction to Down and, in order to make it appear next to the image I want to add it to, I added a margin of -300.

The popup now appears to the left and at the top of the image as I hover over it. I’ve added a transparent background color, border color, padding, and rounded the border.
License and Documentation
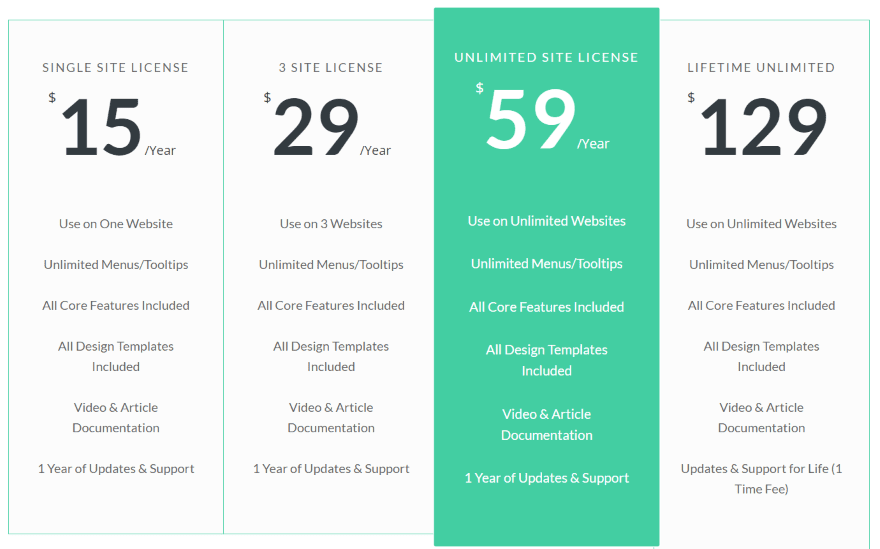
There are four licenses to choose from:
- Single site – $15 per year
- Three sites – $29 per year
- Unlimited sites – $59 per year
- Unlimited lifetime – $129 one time
Documentation is provided by a video demonstration and an article on the site walks you through the features and shows step-by-step how to use the plugin.
You can purchase Divi Mega Pro from the developer’s website.
Ending Thoughts
Using the plugin is easy. I found all the settings to be intuitive. I like that it includes templates. The website does show that there are more templates coming soon. I hope this will include all of the mega menus and popups that are used in the demo page, as there are a lot of well-designed layouts in the demo. Designing a great mega menu is the hard part, and these help you get started with a solid design.
The demonstration is great for showing how to add the CSS classes. This is especially good for those that are not familiar with CSS. It’s not that difficult to figure out if you are familiar with CSS classes, and it doesn’t take many steps to add the CSS, so it doesn’t add much difficulty to using the plugin. It’s a common skill that Divi users should learn anyway.
You can add as many mega menus and tooltips as you want to any page. I like that you can limit them to specific pages. This means you can create custom menus on the page-level. This is excellent for landing pages or sales pages.
I’ve only scratched the surface of the types of mega menus and popup tooltips you can create with Divi Mega Pro. It’s an easy plugin to recommend to any Divi or Extra user that wants the ability to build mega menus or tooltips with the Divi Builder.
We want to hear from you. Have you tried Divi Mega Pro? Let us know what you think about it in the comments.
Featured Image via pulsar011 / shutterstock.com
The post Divi Plugin Highlight: Divi Mega Pro appeared first on Elegant Themes Blog.
