Divi Mega Pro is a third-party plugin for Divi that adds the ability to create mega menus and tooltips with the Divi Builder. Since the mega menus and tooltips are created with the Divi Builder, you can use any modules you want, including third-party modules, shortcodes, and code, and style them with Divi’s tools. In this post, we’ll take a look at Divi Mega Pro to help you decide if Divi Mega Pro is the right product for your needs.
Divi Mega Pro Builder
Rather than adding modules to the Divi Builder, Divi Mega Pro adds a new post type created with Divi layouts that WordPress menus and Divi Modules can display. Create and add as many as you want to any page and menu. A new menu item is added to the WordPress dashboard called Divi Mega Pro. This includes the Divi Mega Pro list, editor, and settings. Here, you can create and manage your mega menus and tooltips. We’ll look at each menu item in reverse order.
Divi Mega Pro Settings
The settings allow you to add a slide transition to the header, content, and footer. You can enable them independently. They’re disabled by default. The transition will change the content within the menu or tooltip while keeping its container visible. This forces the mega menu and tooltips into hover mode. I recommend enabling them unless you need to use the click mode.

Add New
To create a mega menu item or a tooltip, click Add New. This opens an editor where you can create the menu or tooltip. It includes the TinyMCE editor, and you can enable the Divi Builder to create it with Divi Modules. You’ll need to create a new item for every mega menu element you want to display. For example, if you want four different links in your header to show a different mega menu layout, you’ll need to create four different items.
The editor includes lots of tools in the right sidebar and at the bottom including the standard publishing tools and custom fields options. Let’s take a close look at each of the custom tools.
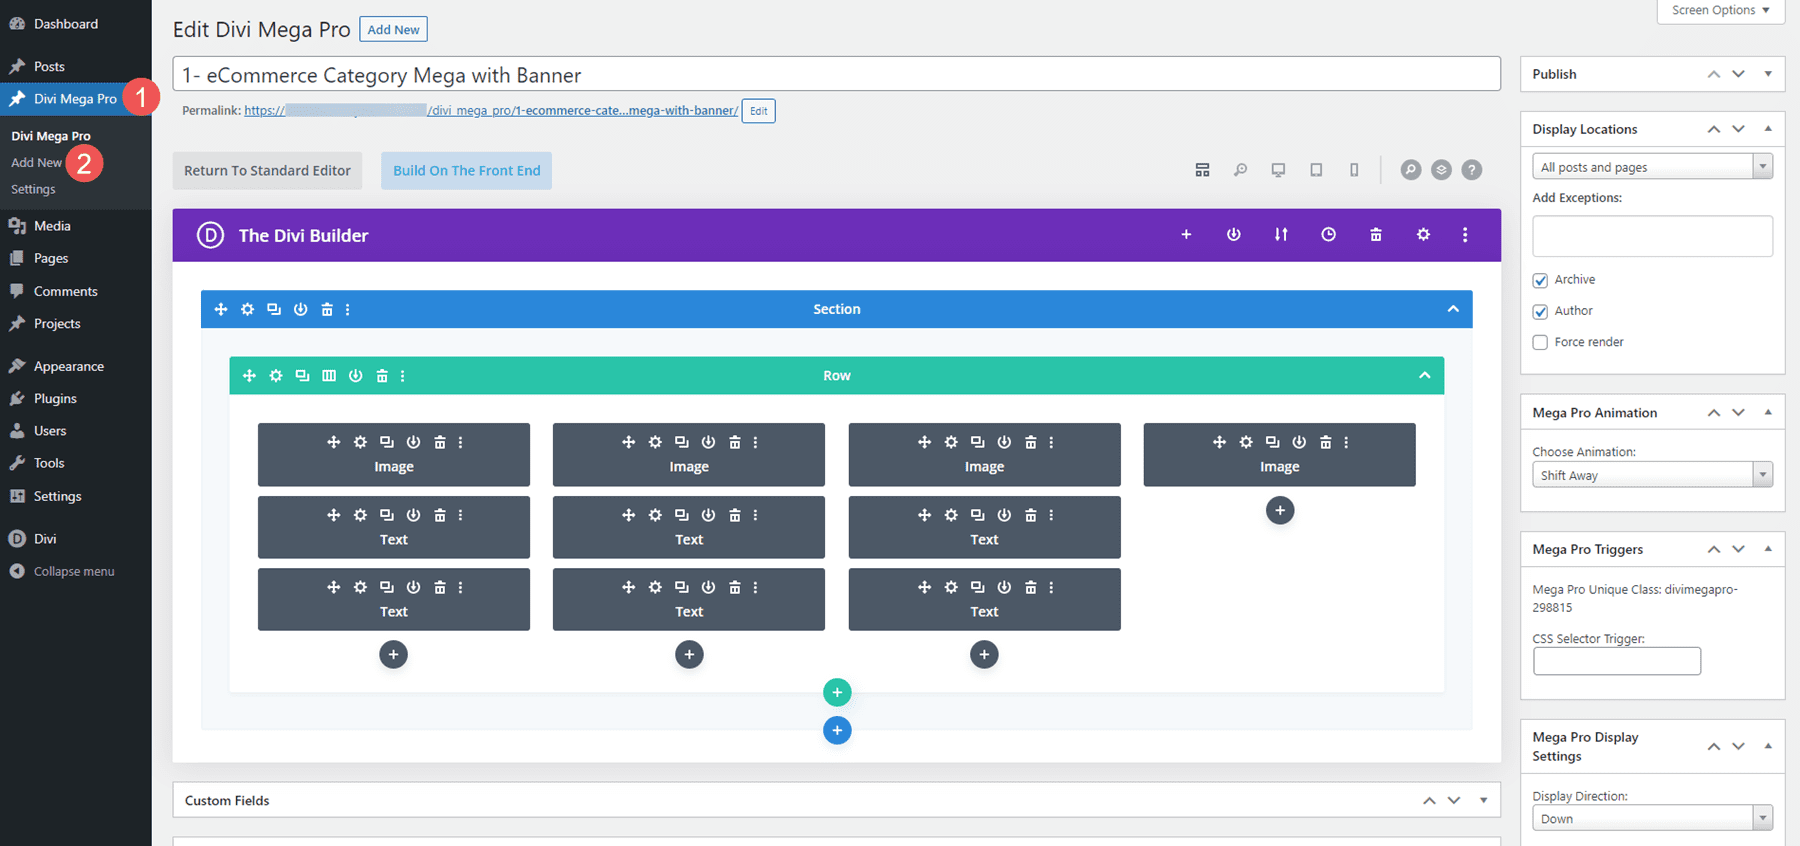
Display Locations
Choose where the mega menu can display. Select between all posts and pages, all posts, all pages, or specific pages. You can add exceptions for all posts or pages to the field. If you choose specific locations, then you can enter them into the field. You can also select to show the menu on author pages and archive pages, and force render.
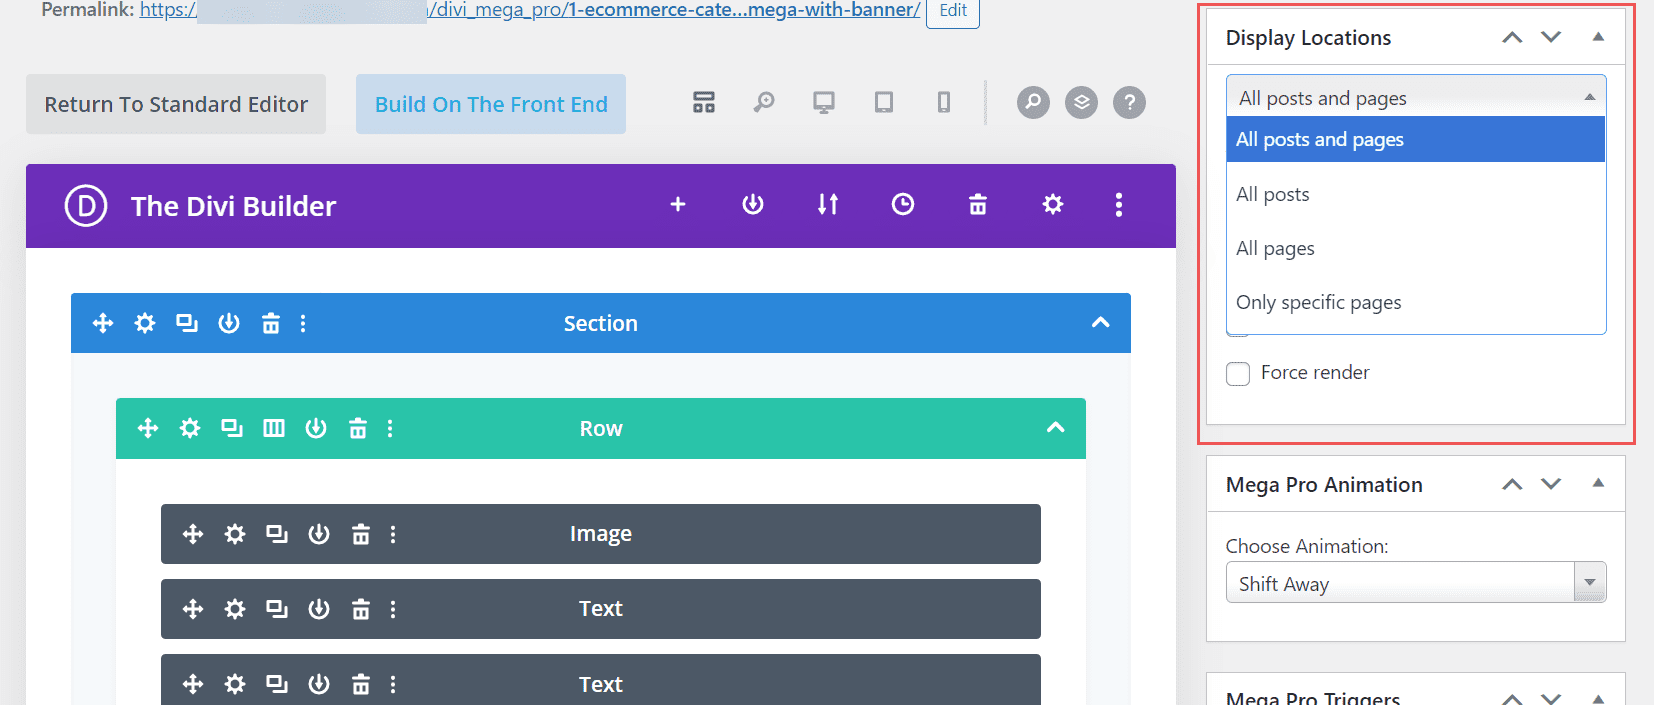
Mega Pro Animation
Choose the animation the menu or tooltip will use when it’s opened. Choose Shift Away, Shift Toward, Perspective, Fade, or Scale. These give the mega menus an elegant look and feel when they’re opening and closing.
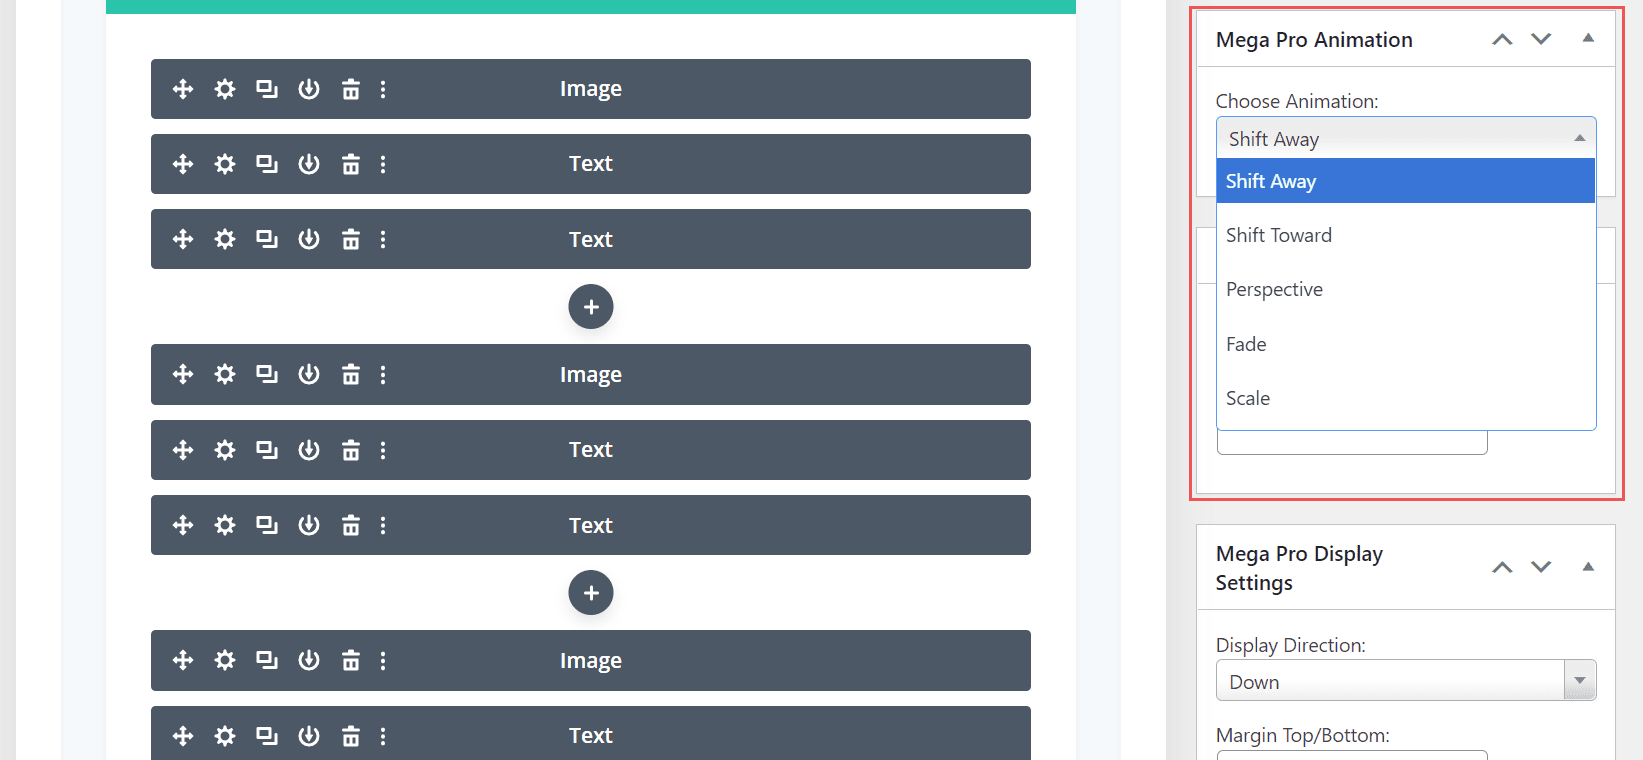
Mega Pro Triggers
Enter the CSS selector trigger into the field. It also shows the Mega Pro Unique Class that you’d enter into the CSS Class fields to display the layouts.
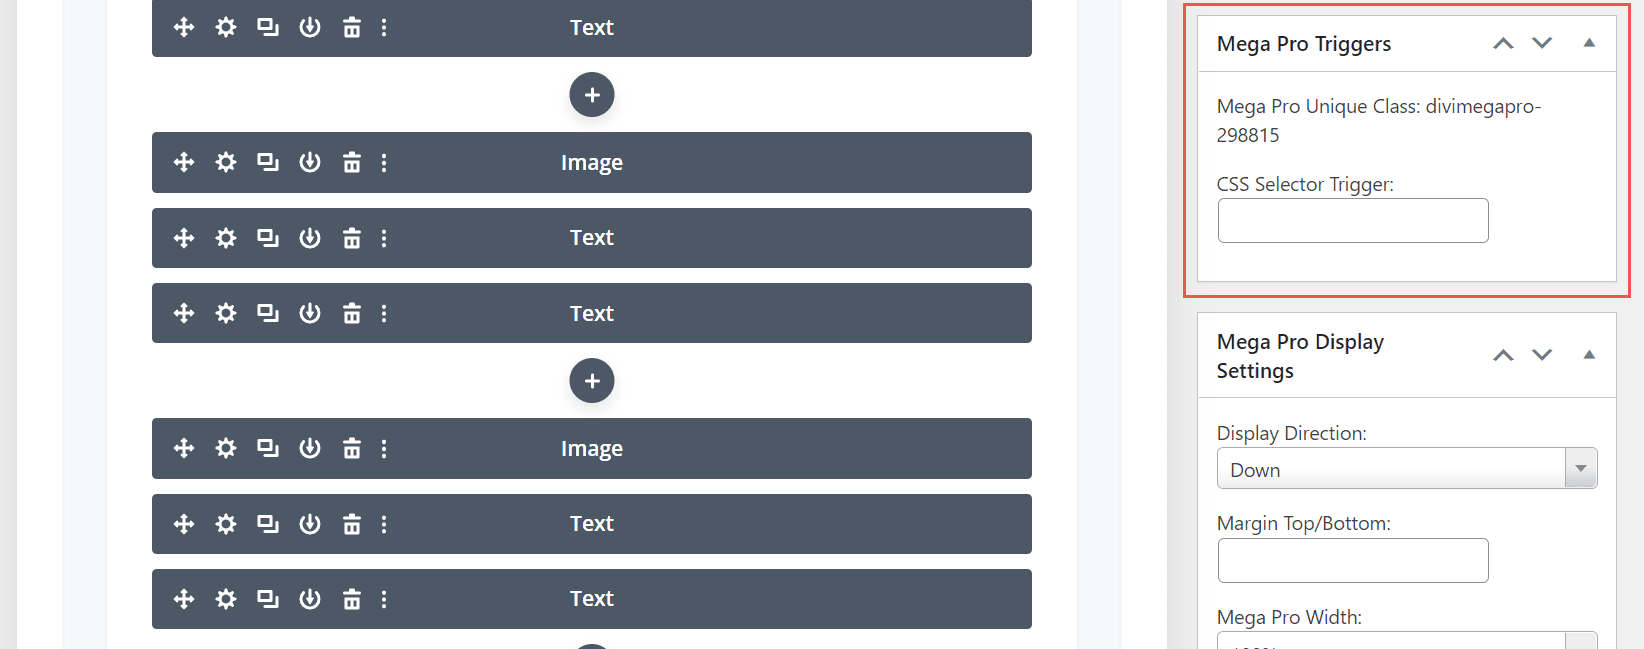
Mega Pro Display Settings
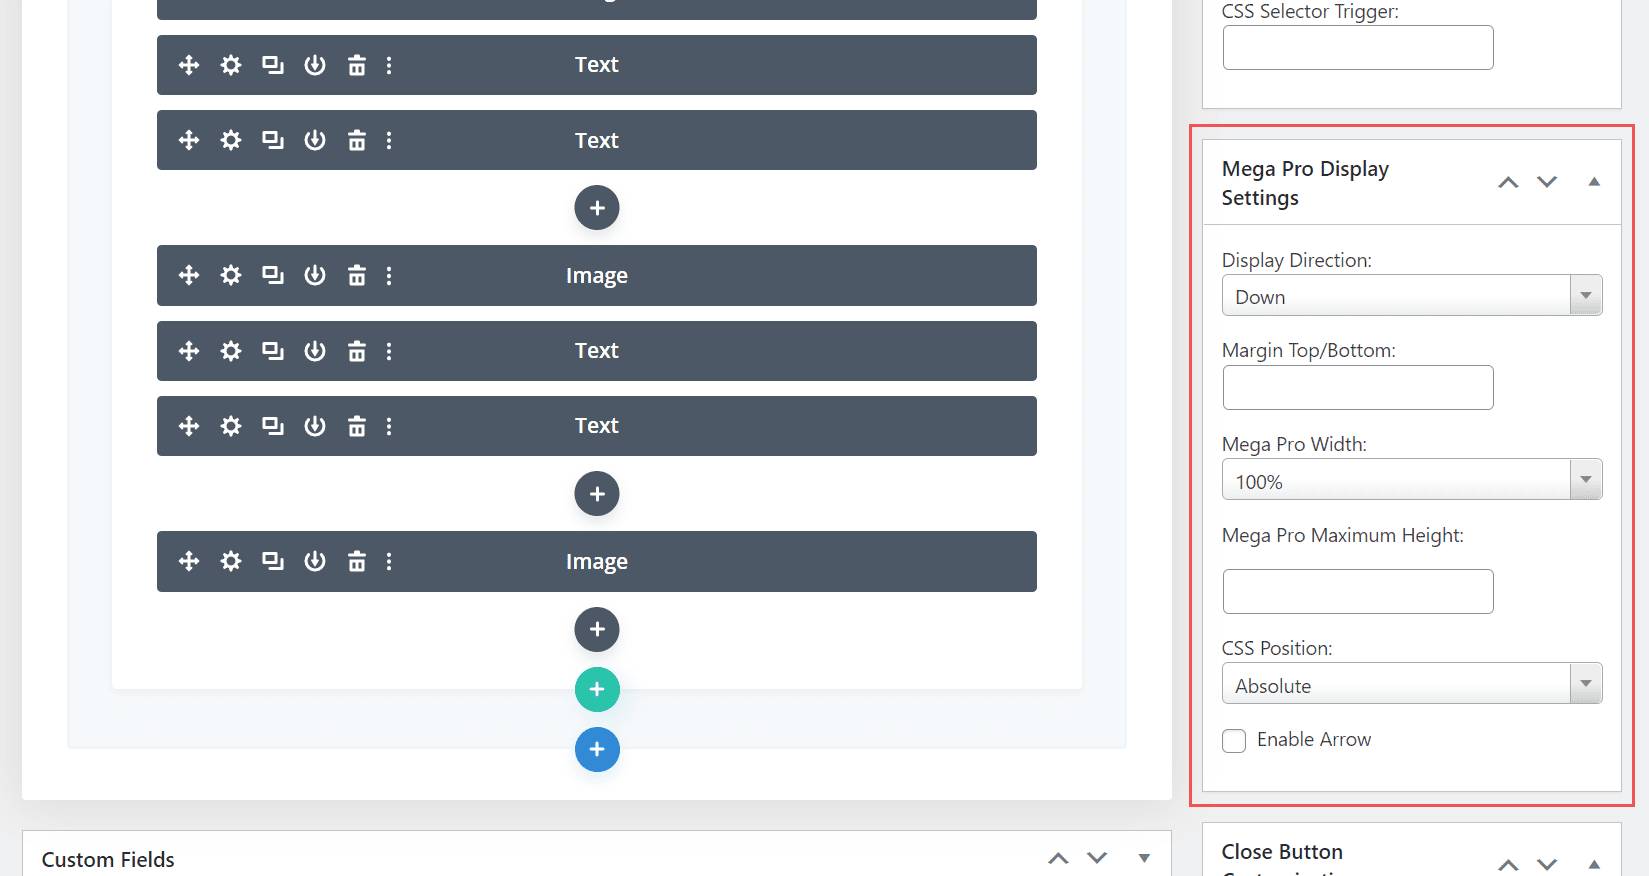
The settings include a lot of options. Choose the display direction, add top and bottom margin, choose the width, enter the maximum height, choose the CSS position from absolute or fixed, and enable an arrow.
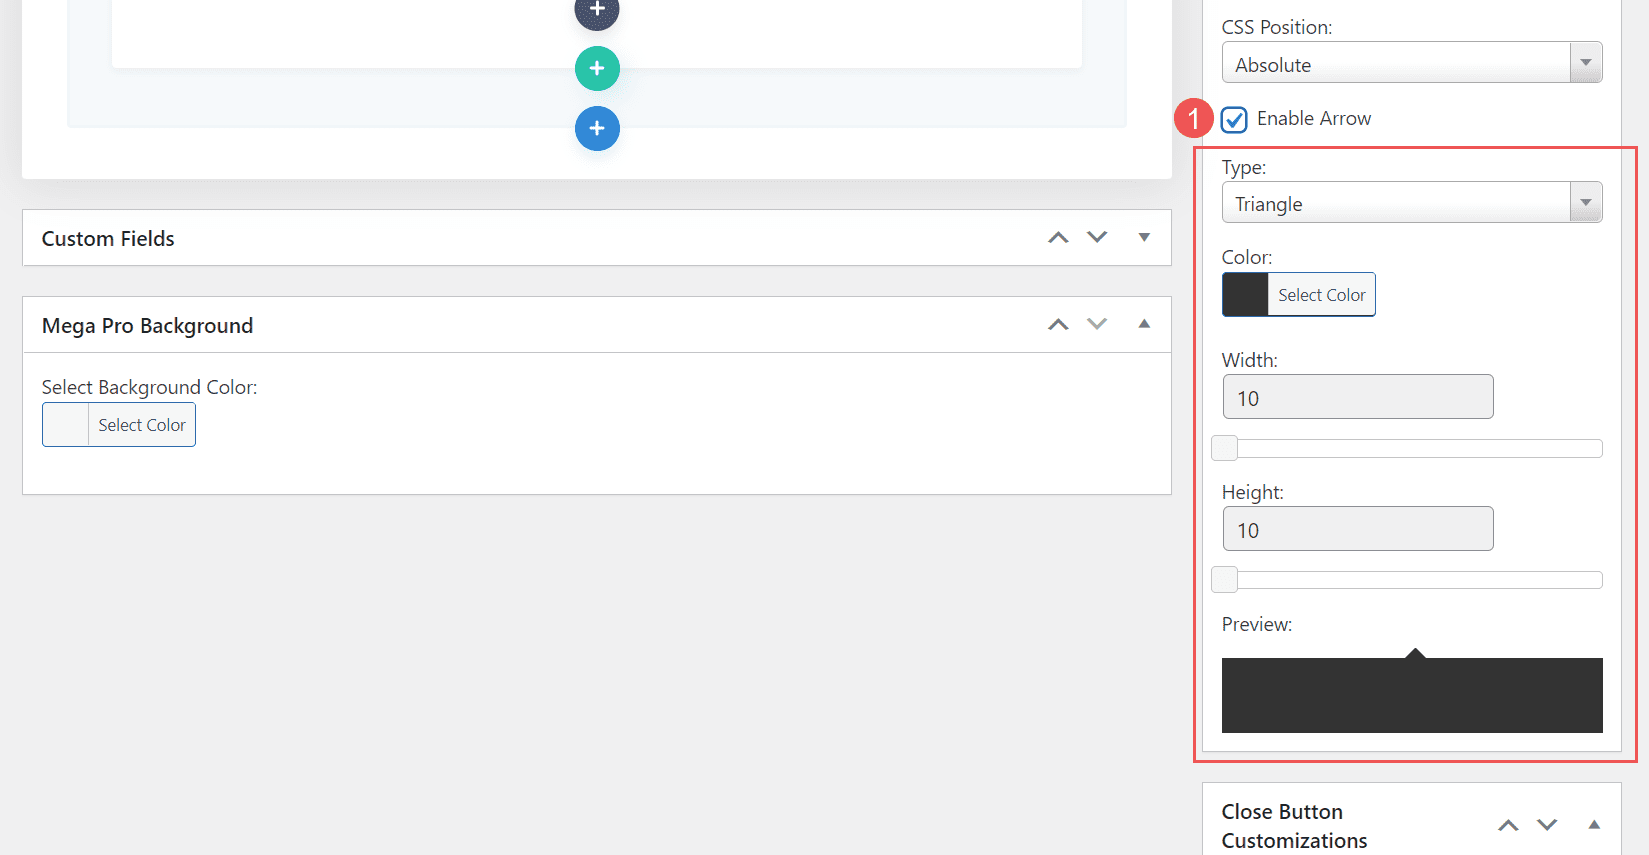
If you enable the arrow, you’ll see some styling tools to choose the type, color, width, and height. It shows a preview, so you’ll know how it looks on the front end.
Custom Close Button Customizations
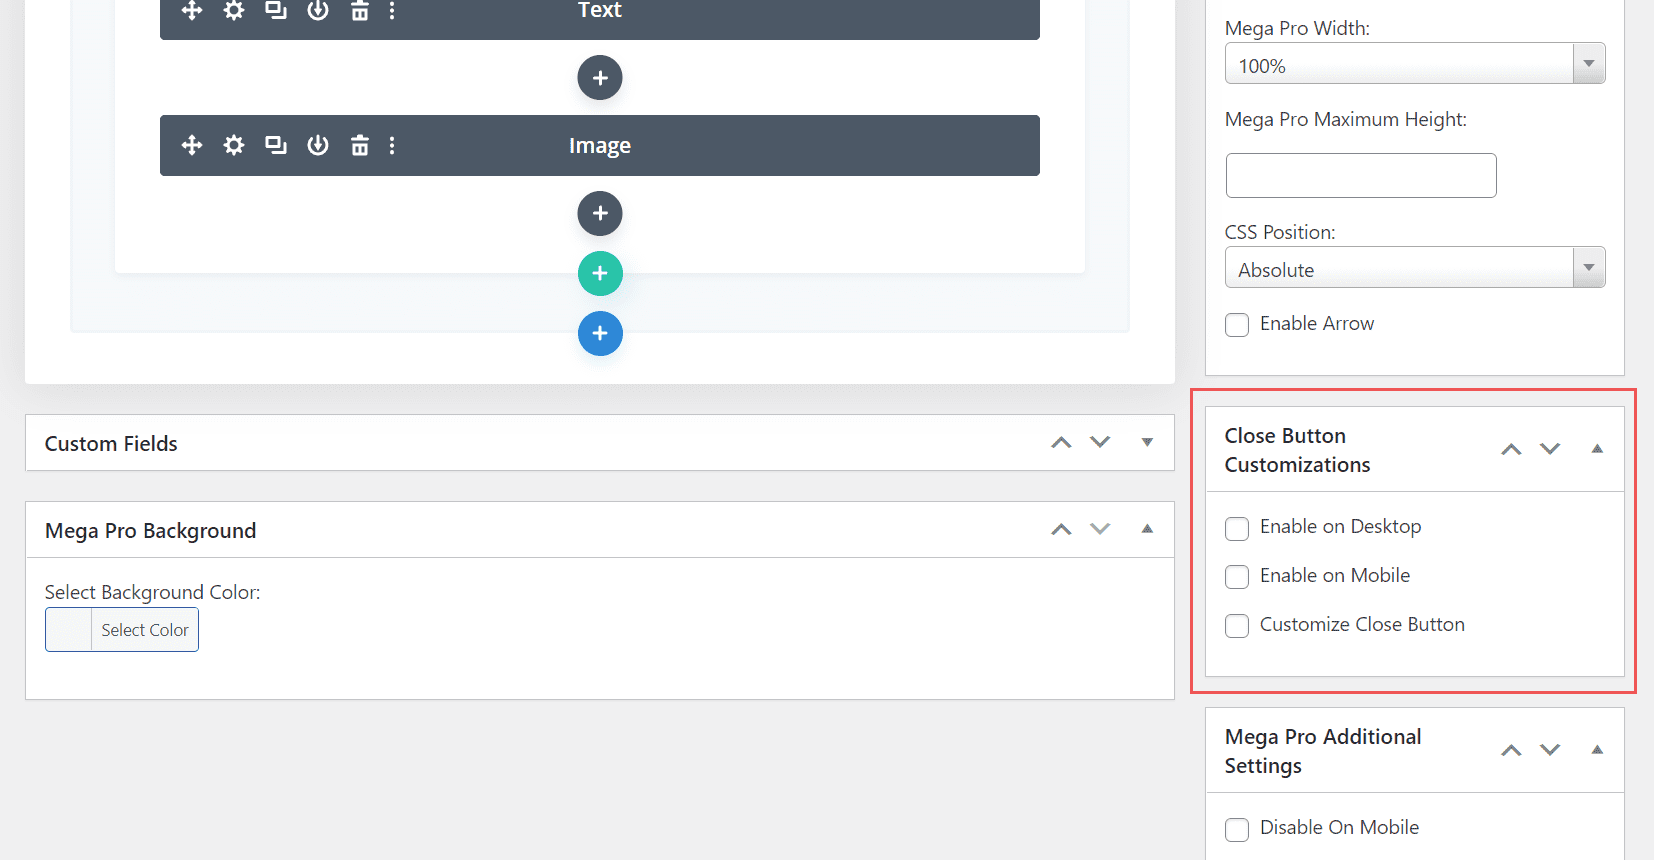
The close button customizations allow you to enable the close button on desktops and phones independently.
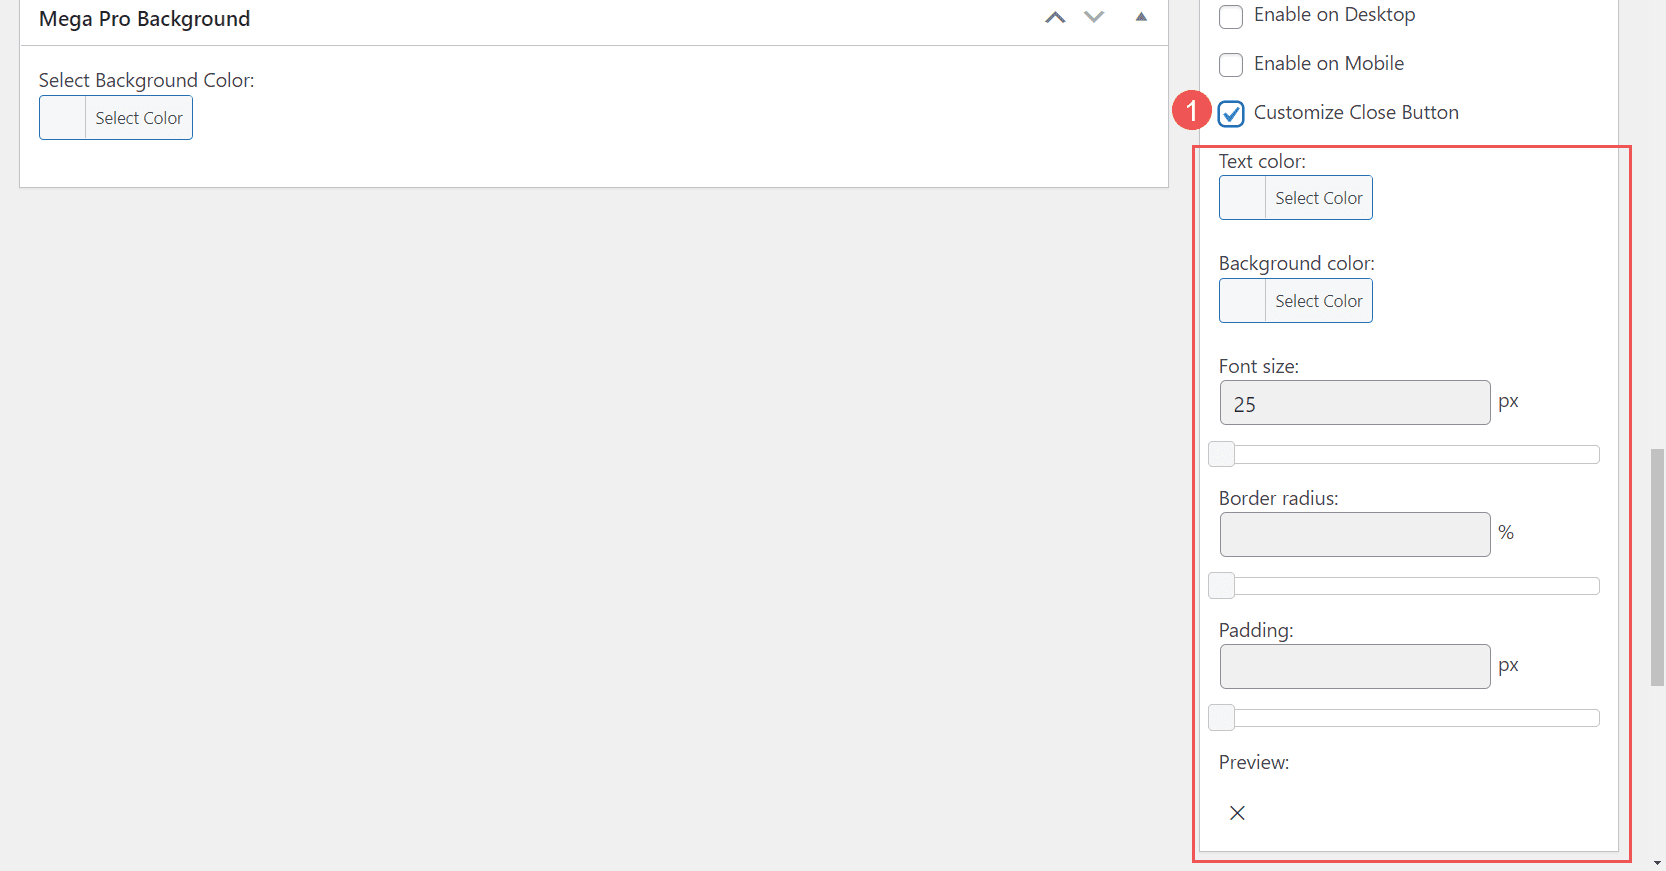
If you choose to customize the close button, you’ll see another set of options to adjust the colors, font size, border radius, and padding. It also includes a preview so you can see how it will look on the front end.
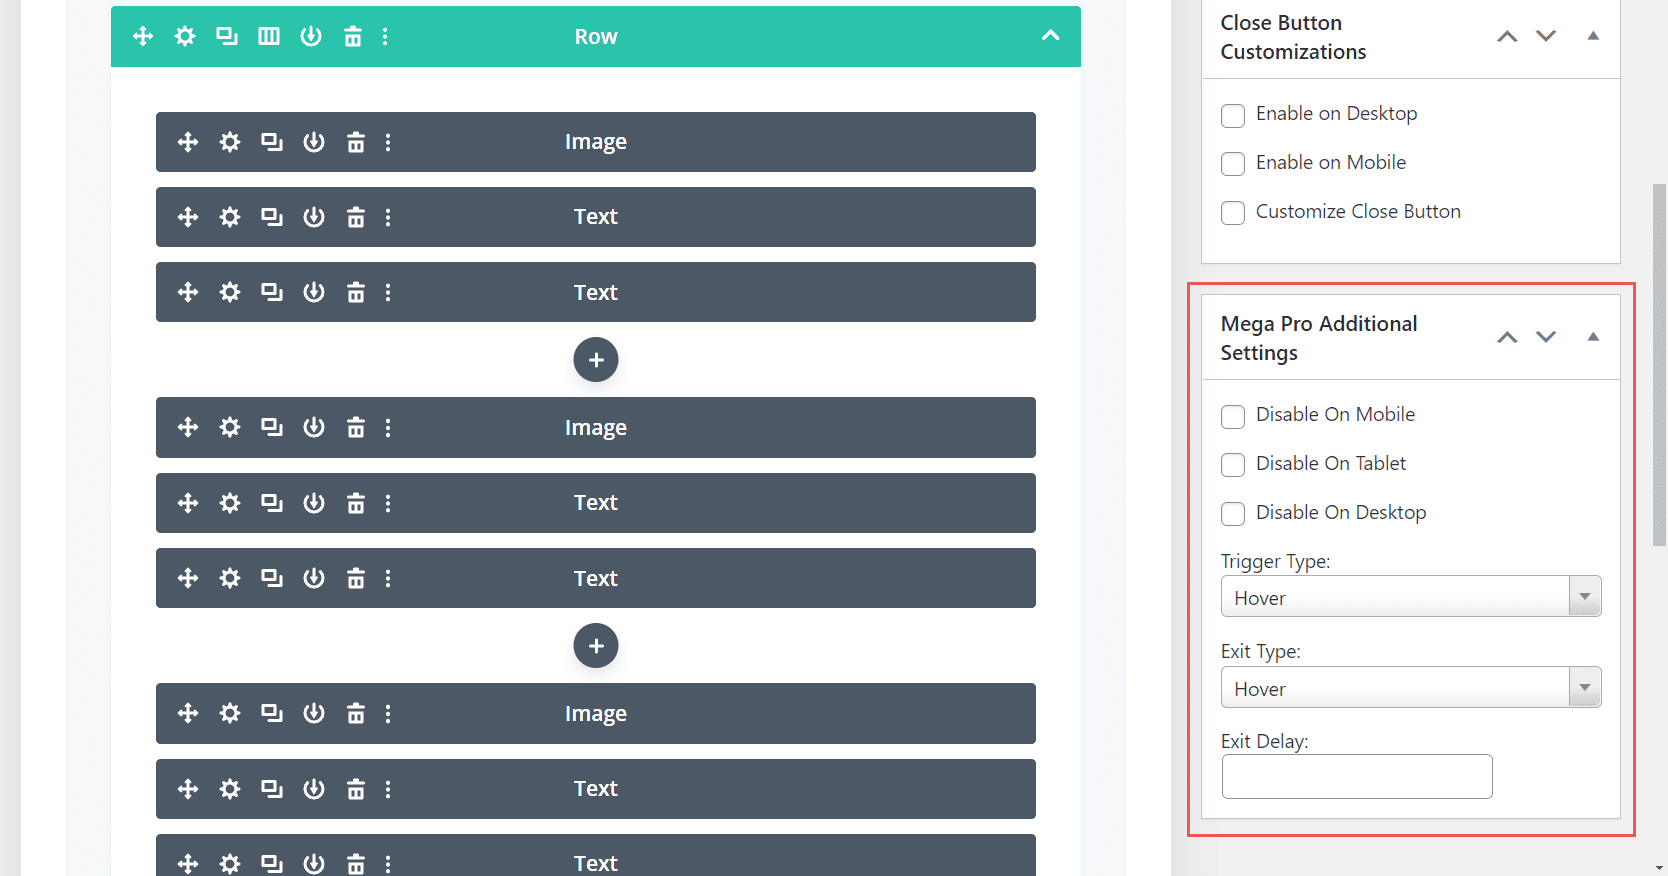
Mega Pro Additional Settings
The additional settings allow you to disable the menu on phones, tablets, and desktops individually. Chose the trigger type between hover and click, the exit type between hover and click, and enter the exit delay in the field.
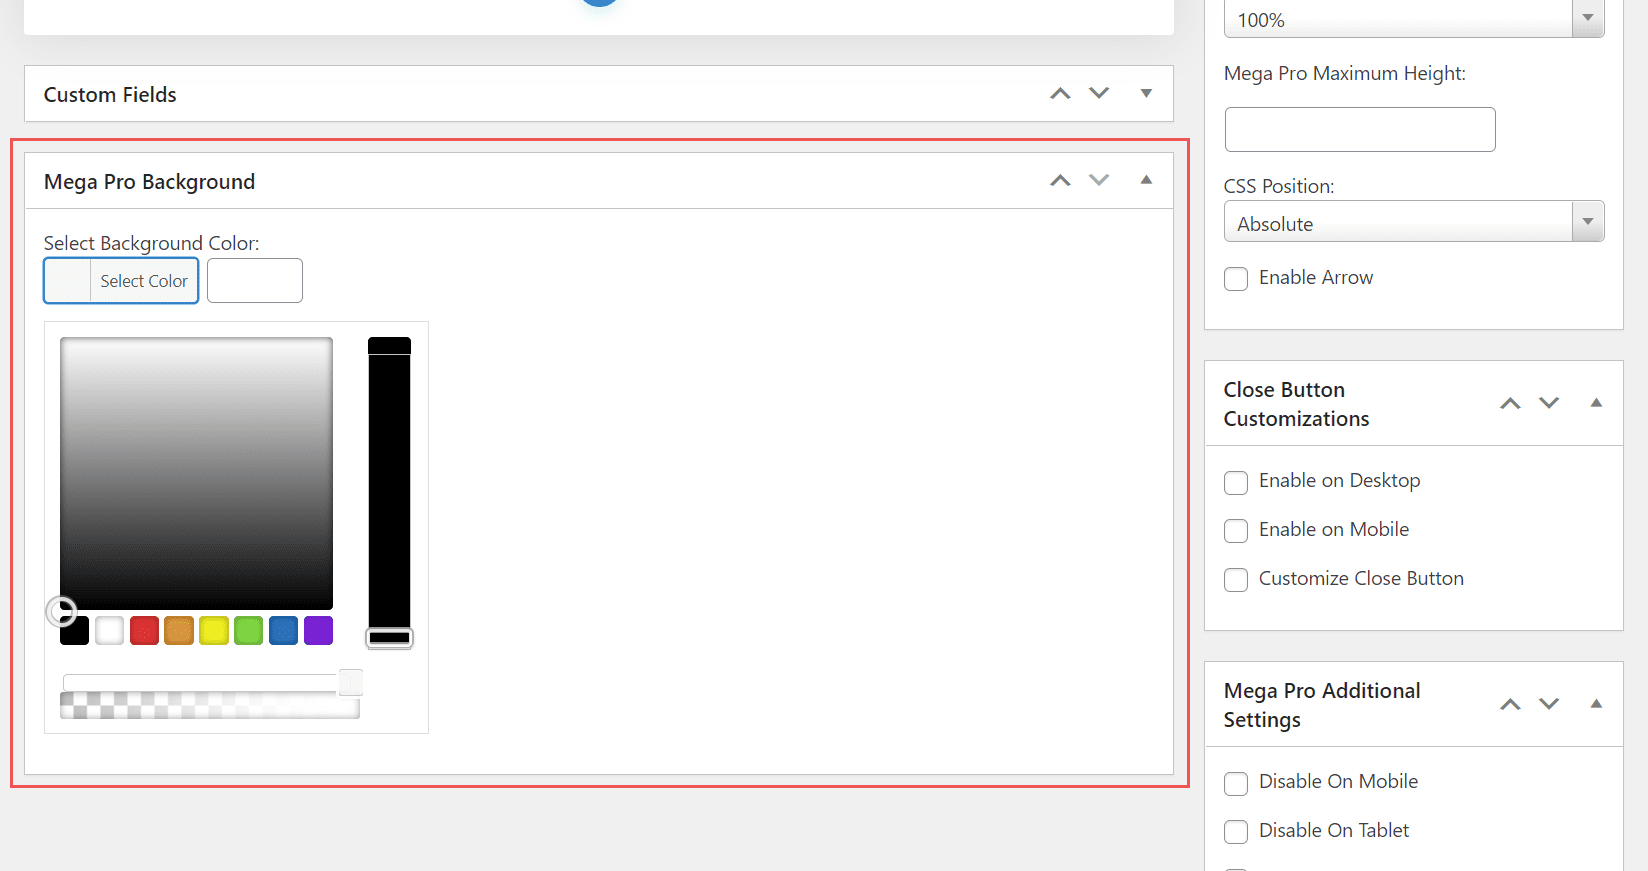
Mega Pro Background
This one is placed under the editor. It has a color picker where you can specify the background color of the menu.
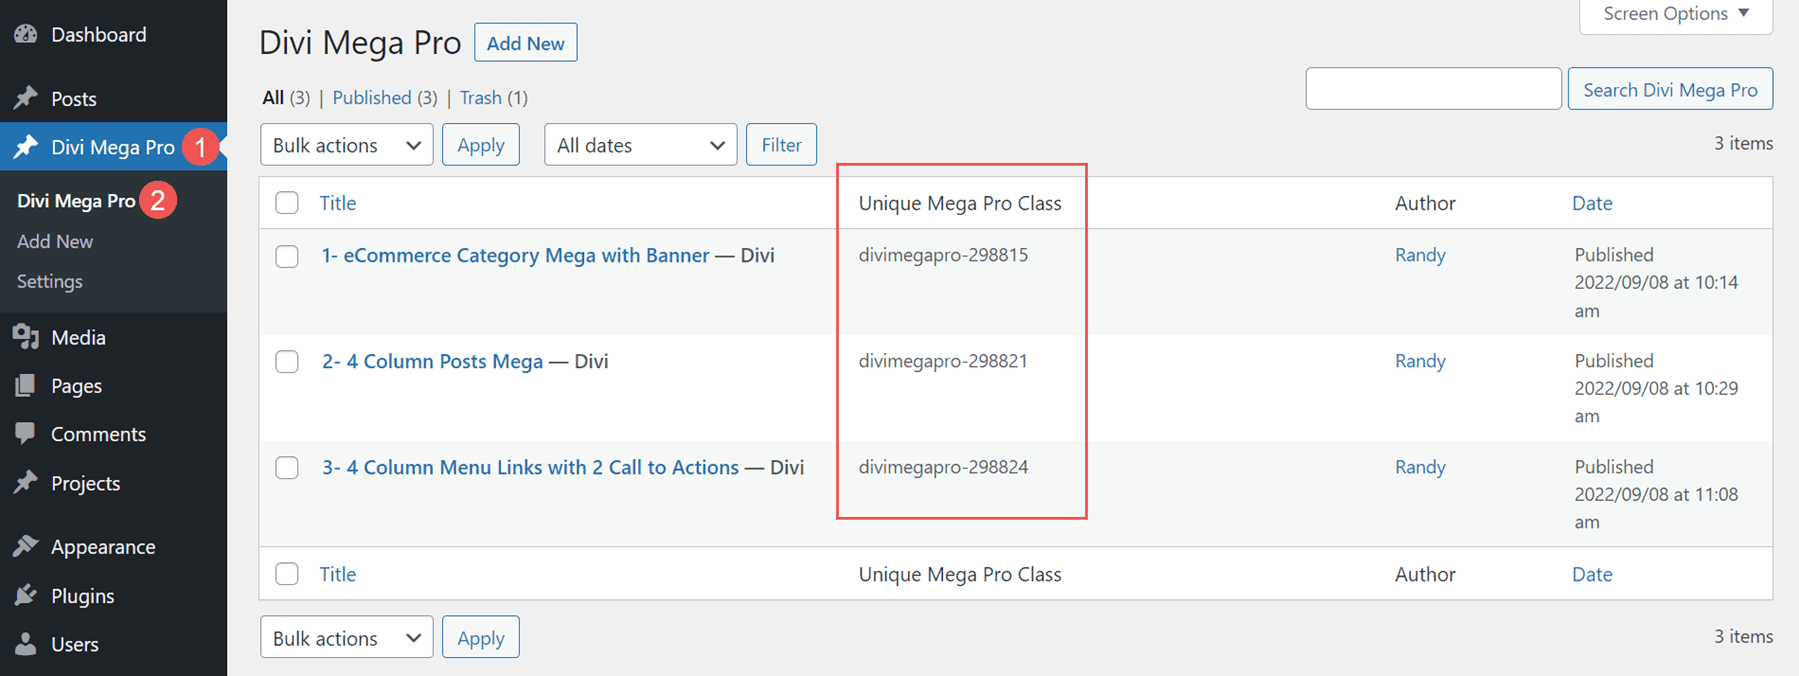
Divi Mega Pro List
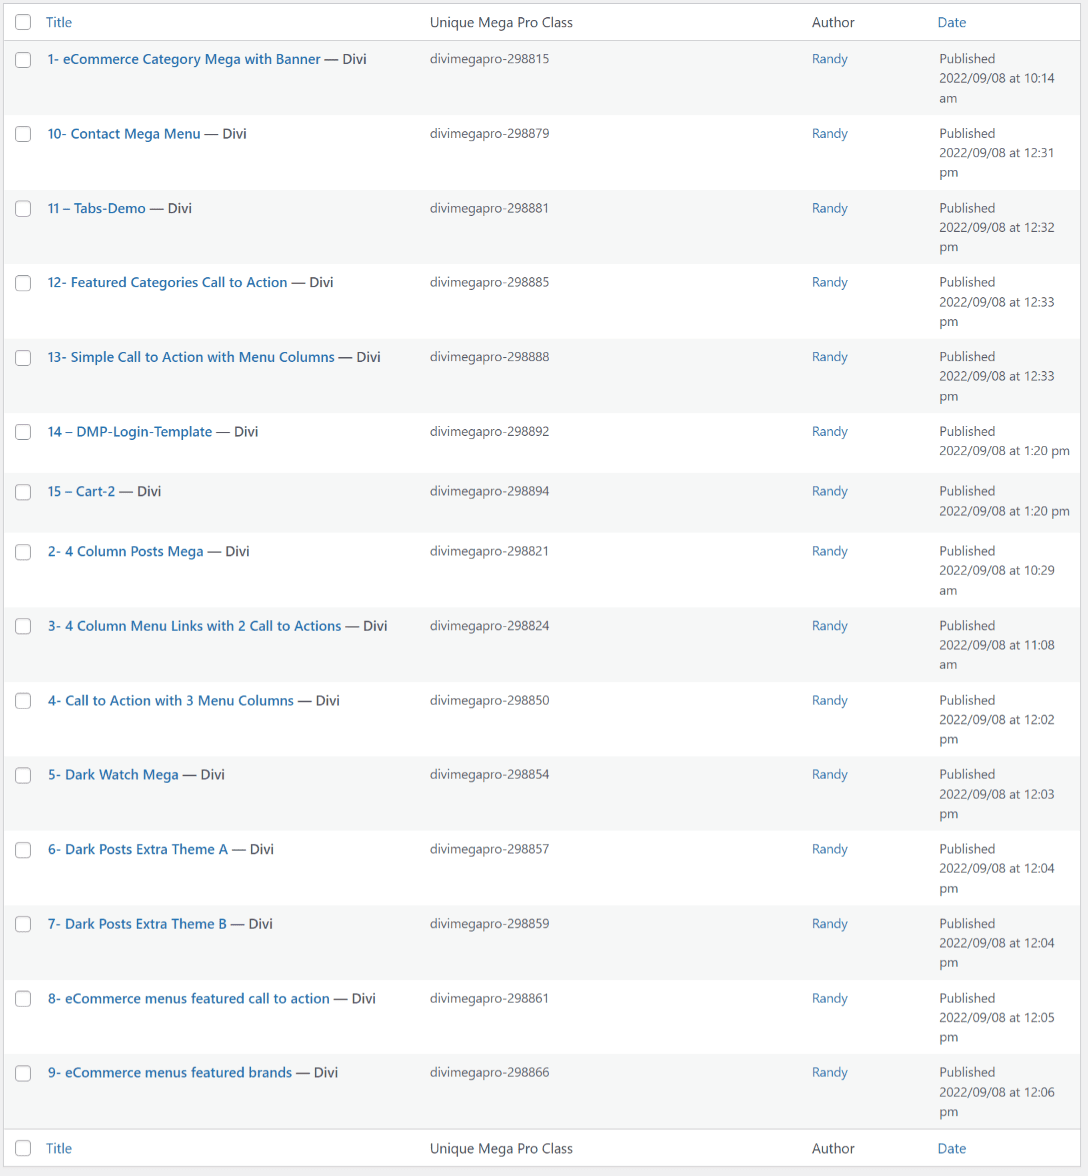
This shows the list of Divi Mega Pro items that you’ve created. Each one includes the Unique Mega Pro Class. This is what you’ll copy to paste where you want the mega menu or tooltip to display. You’ll need to create and copy each menu item individually to build your mega menu.
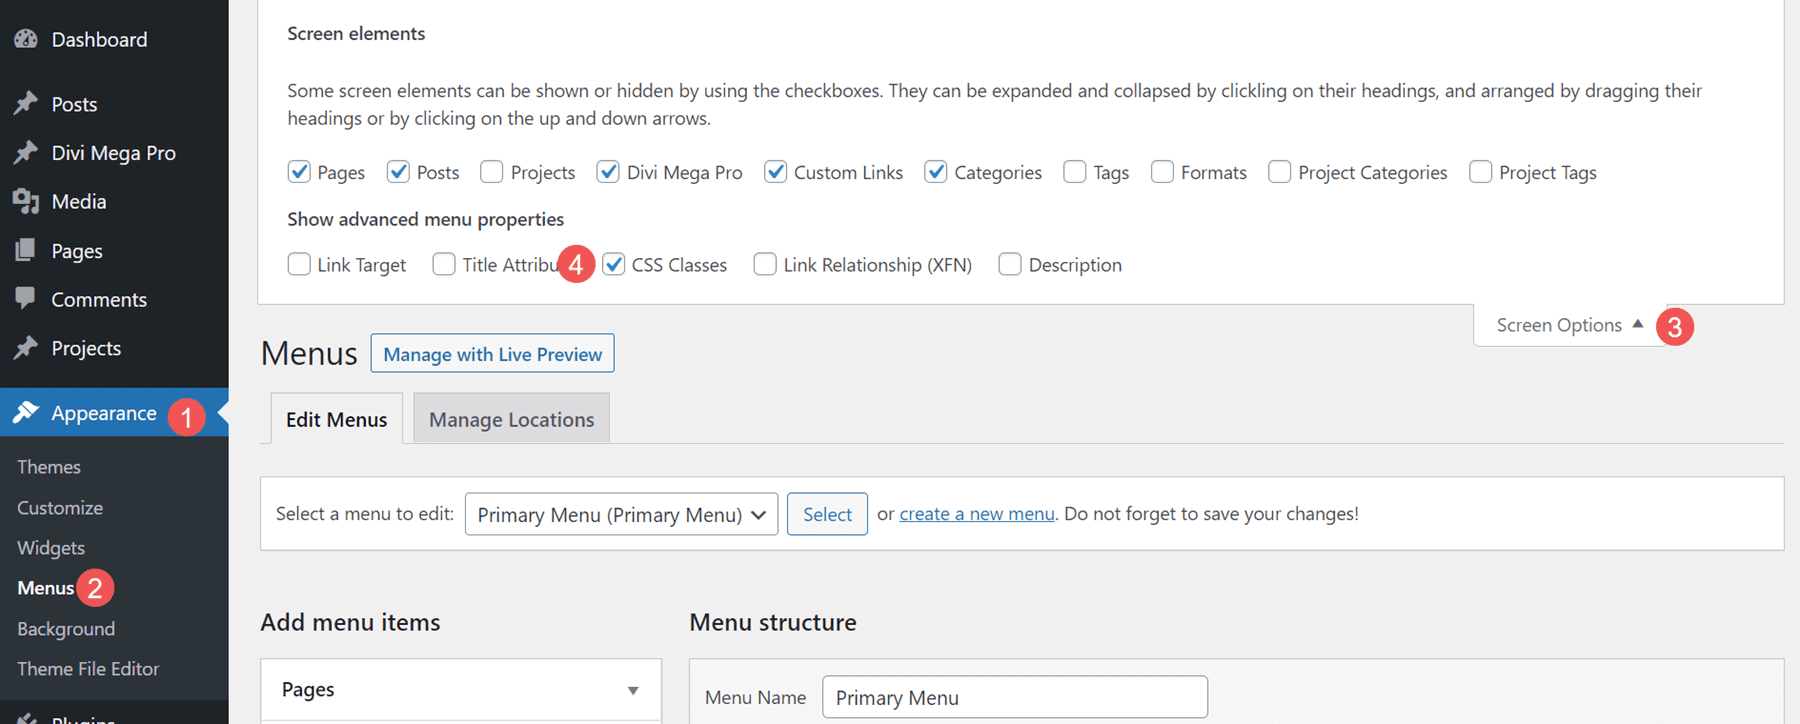
Adding the Mega Menu
To add the mega menu to your WordPress header and footer menus, you’ll need to have CSS Classes enabled. First, go to Appearance > Menus in the WordPress dashboard. Select Screen Options in the upper right corner of the screen and make sure CSS Classes is checked.
Next, open the menu item that you want to display the mega menu item. Paste the Unique Mega Pro Class for the mega menu into the CSS Classes field.
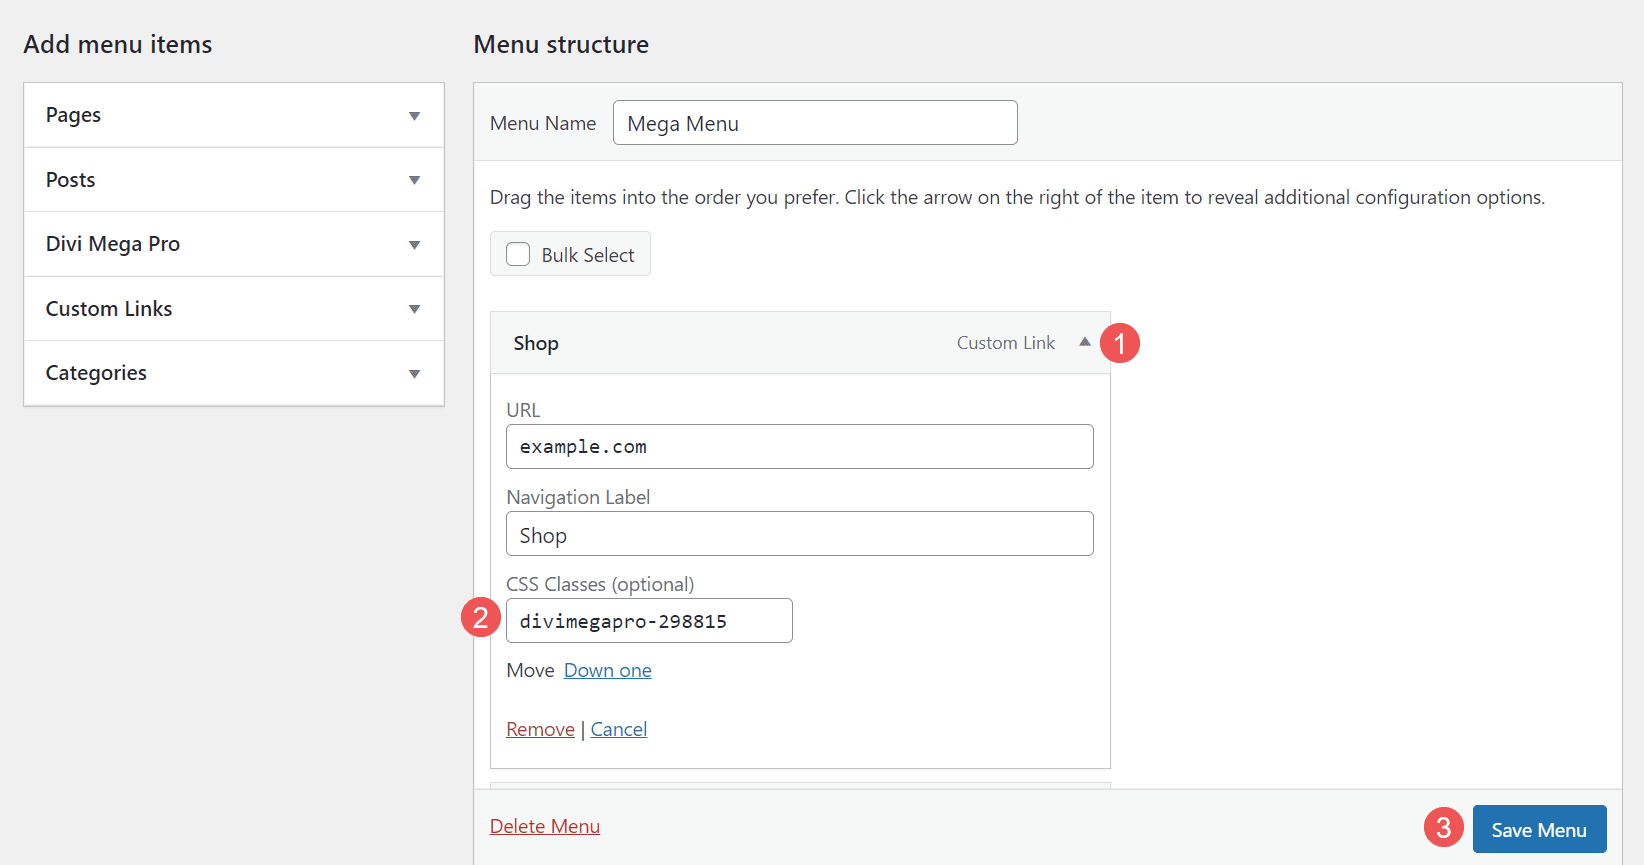
Repeat this process for every mega menu item you want to display.
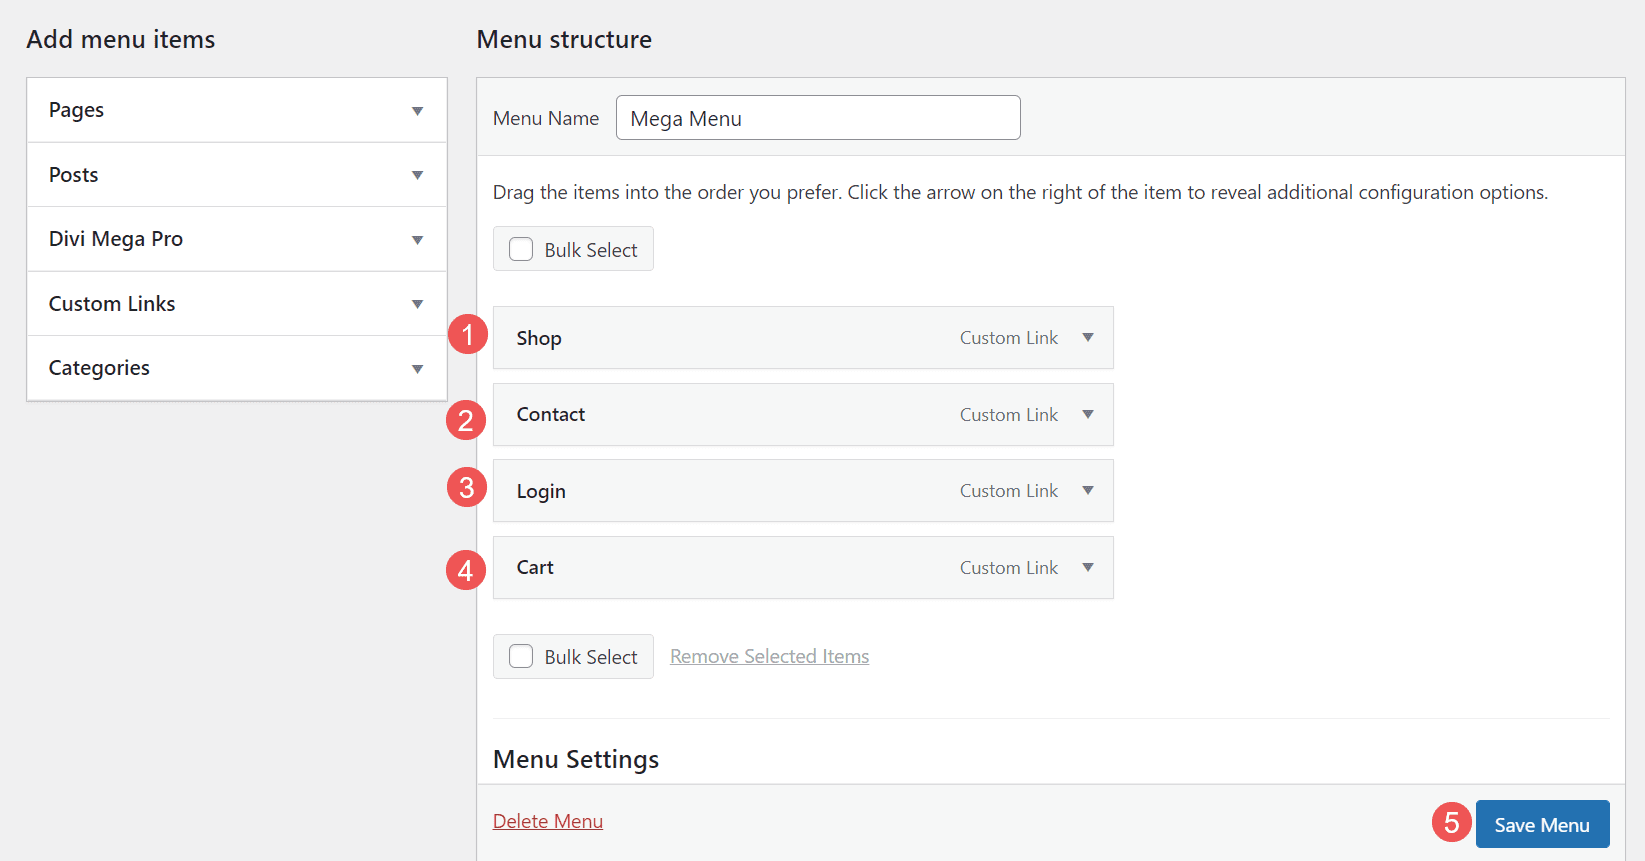
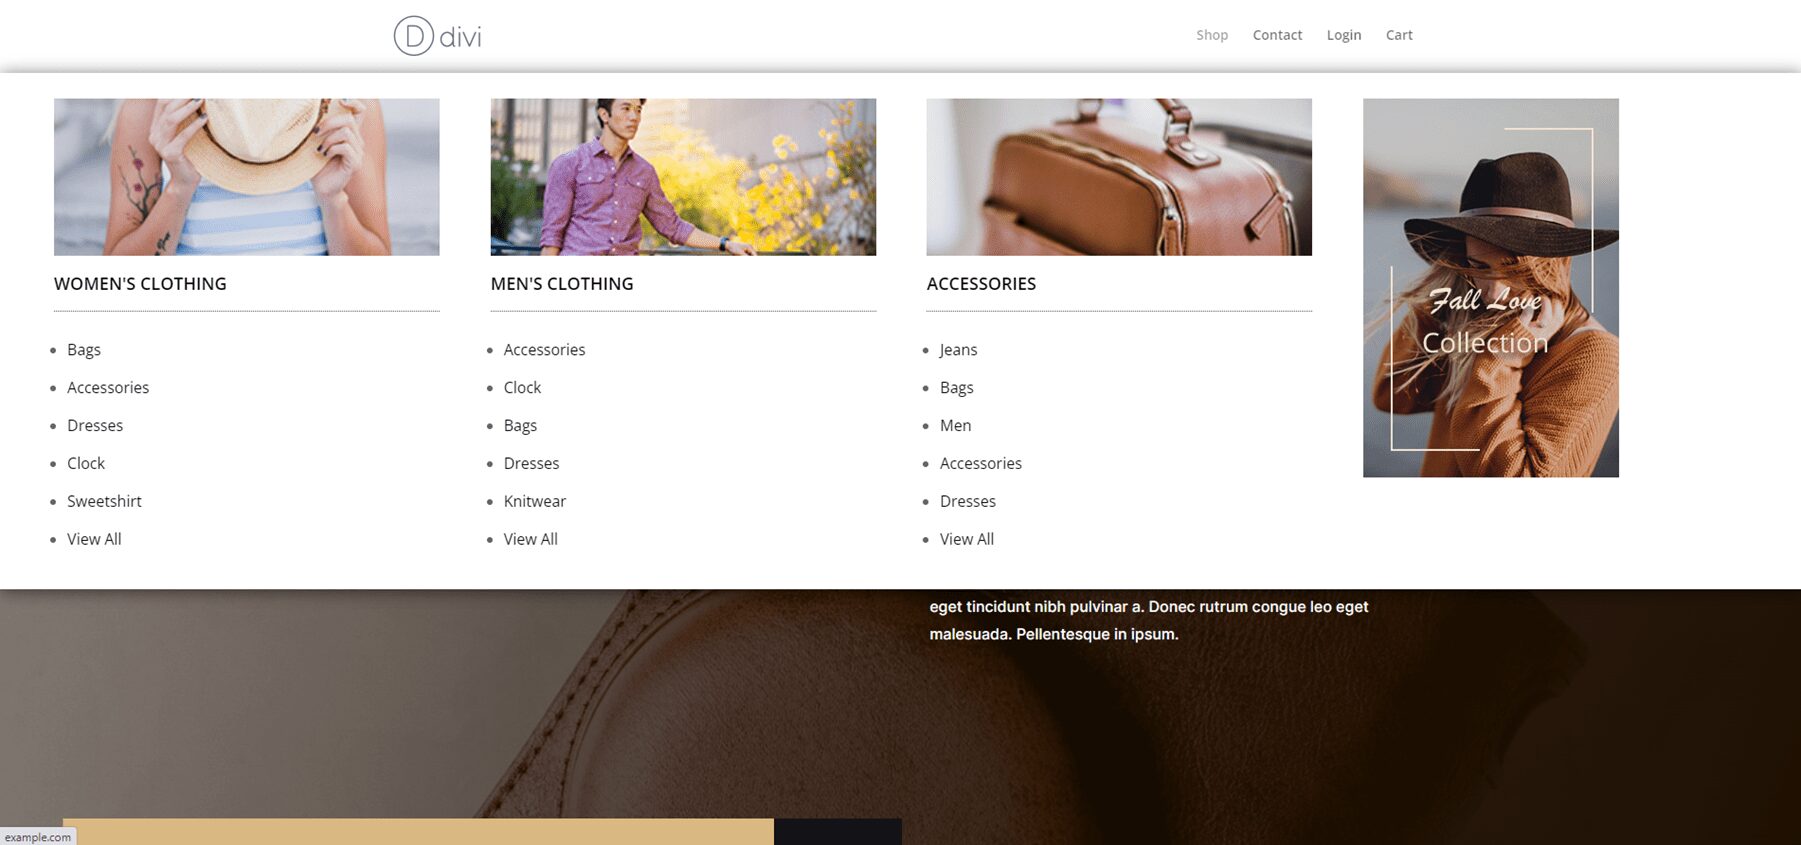
Here’s a look at this mega menu on the front end. I’ve used one of the demos that’s included, as we’ll see later.
Adding Tooltips
You can also use Divi Mega Pro to create mega tooltips. Simply add the CSS class to the element you want to show the tooltip. You can set the tooltip to open on hover or click. Any Divi Module can show a tooltip. Style the module as normal with the Divi tools.
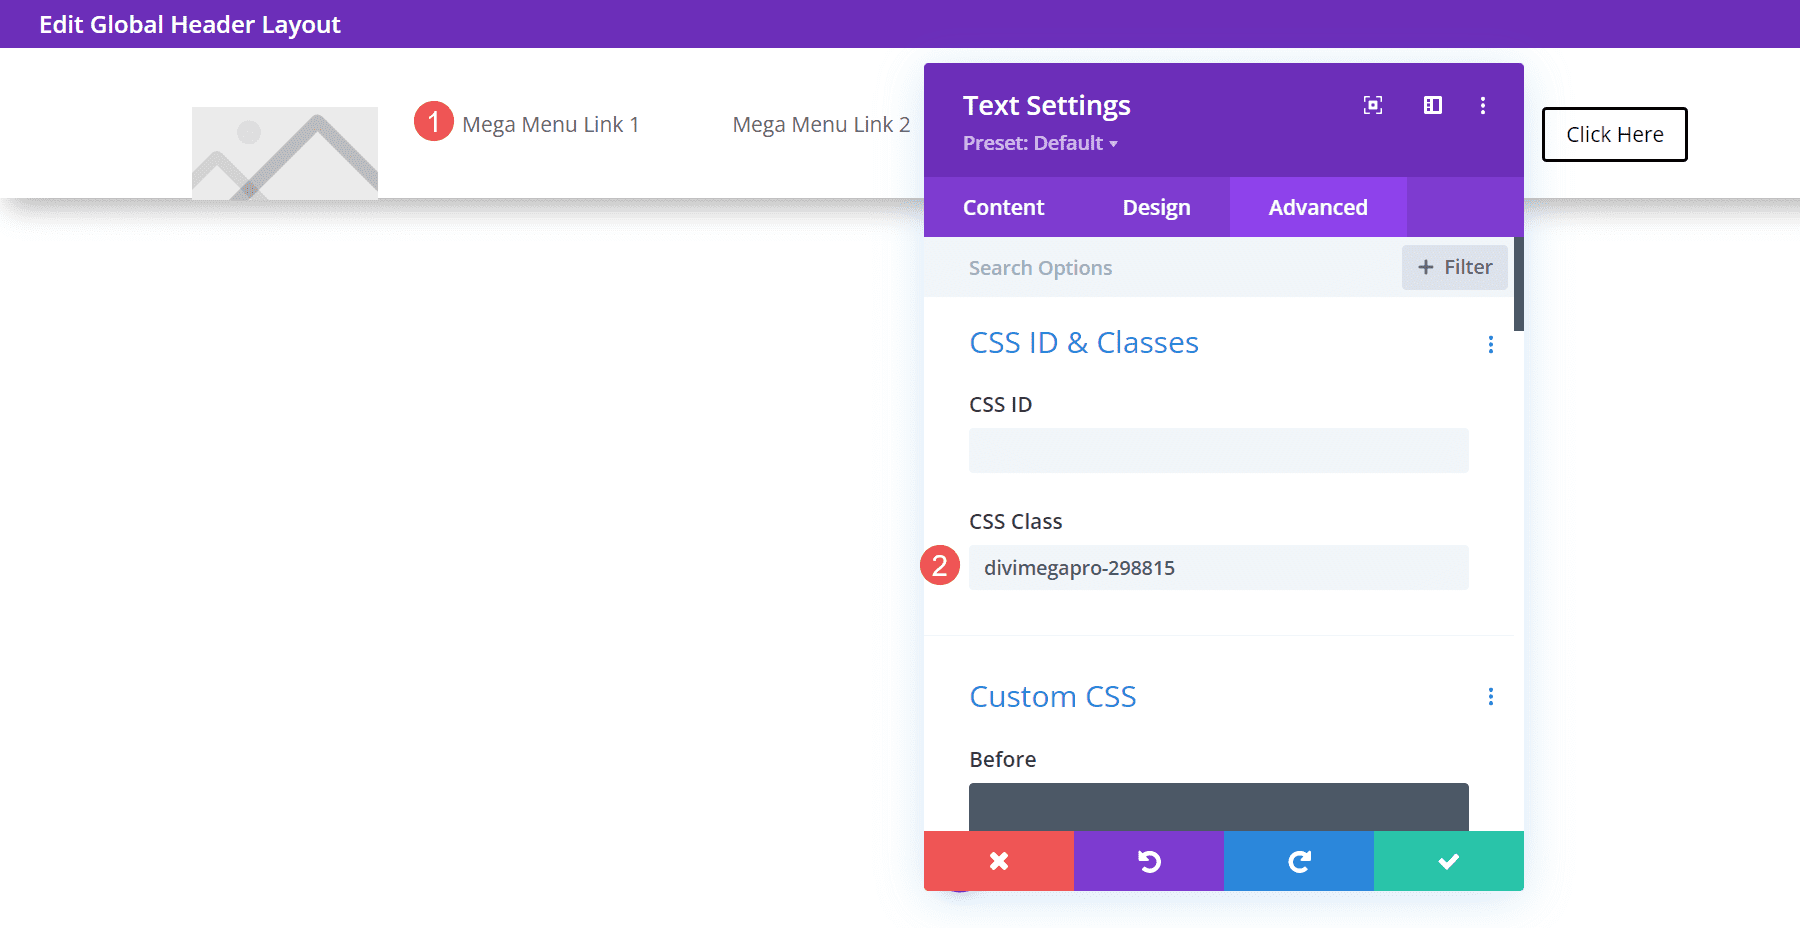
To add the tooltip, open the Divi Module you want to show the tooltip. Go to the Advanced tab and paste the Unique Mega Pro Class into the CSS Class field. Save your settings and you’re ready to display tooltips.
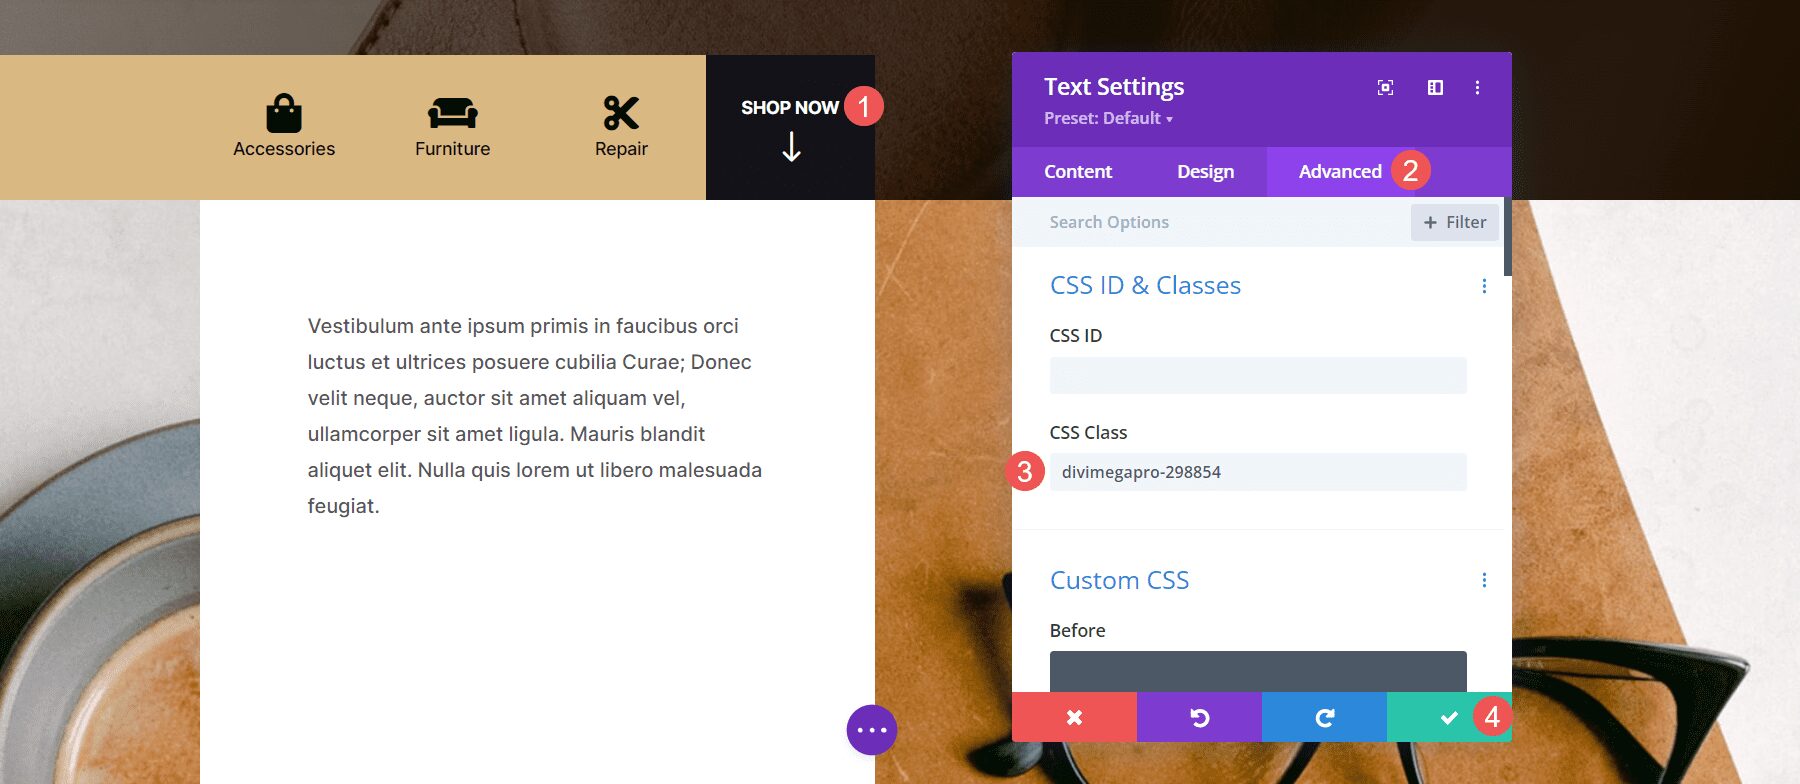
Now when someone hovers over the element you’ve added the class to, the tooltip appears.
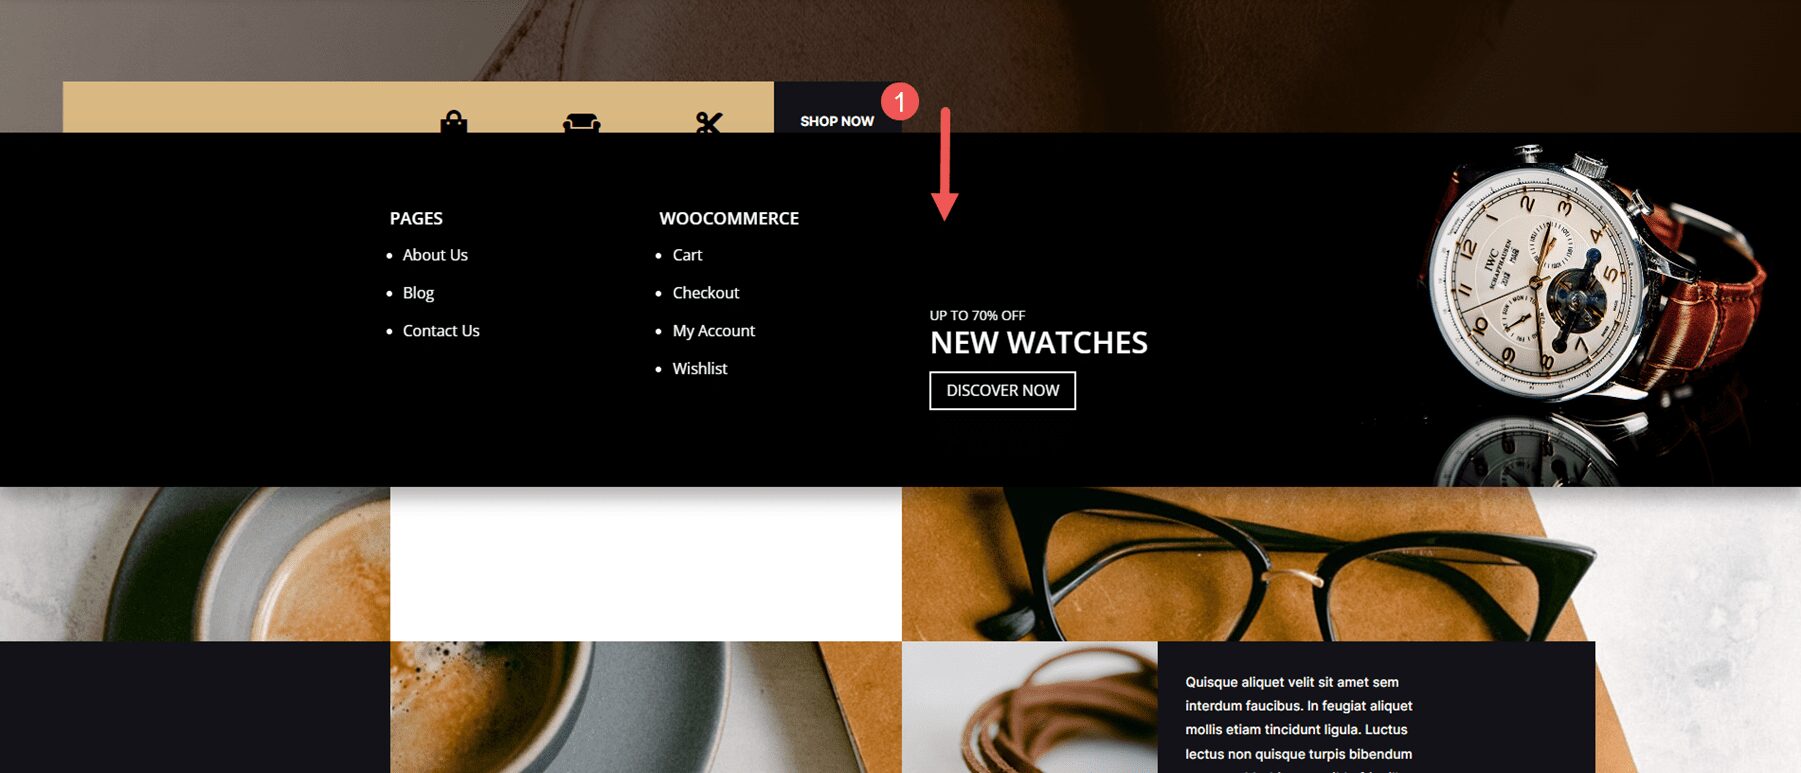
The tooltips also work to create mega menus for headers in the Divi Theme Builder. Create the menu items with Divi Modules such as Text Modules, Button Modules, Image Modules, etc. I only recommend using Menu Modules to display standard menus as each link will either open a submenu or the page the menu points to.
Add the Unique Mega Pro Class to the CSS Class field in each element you want to have a mega menu item. You can use this method to create custom headers and footers. In the example below, I’ve created a menu using standard Text Modules as the menu links. I’ll add a mega menu layout to each one.
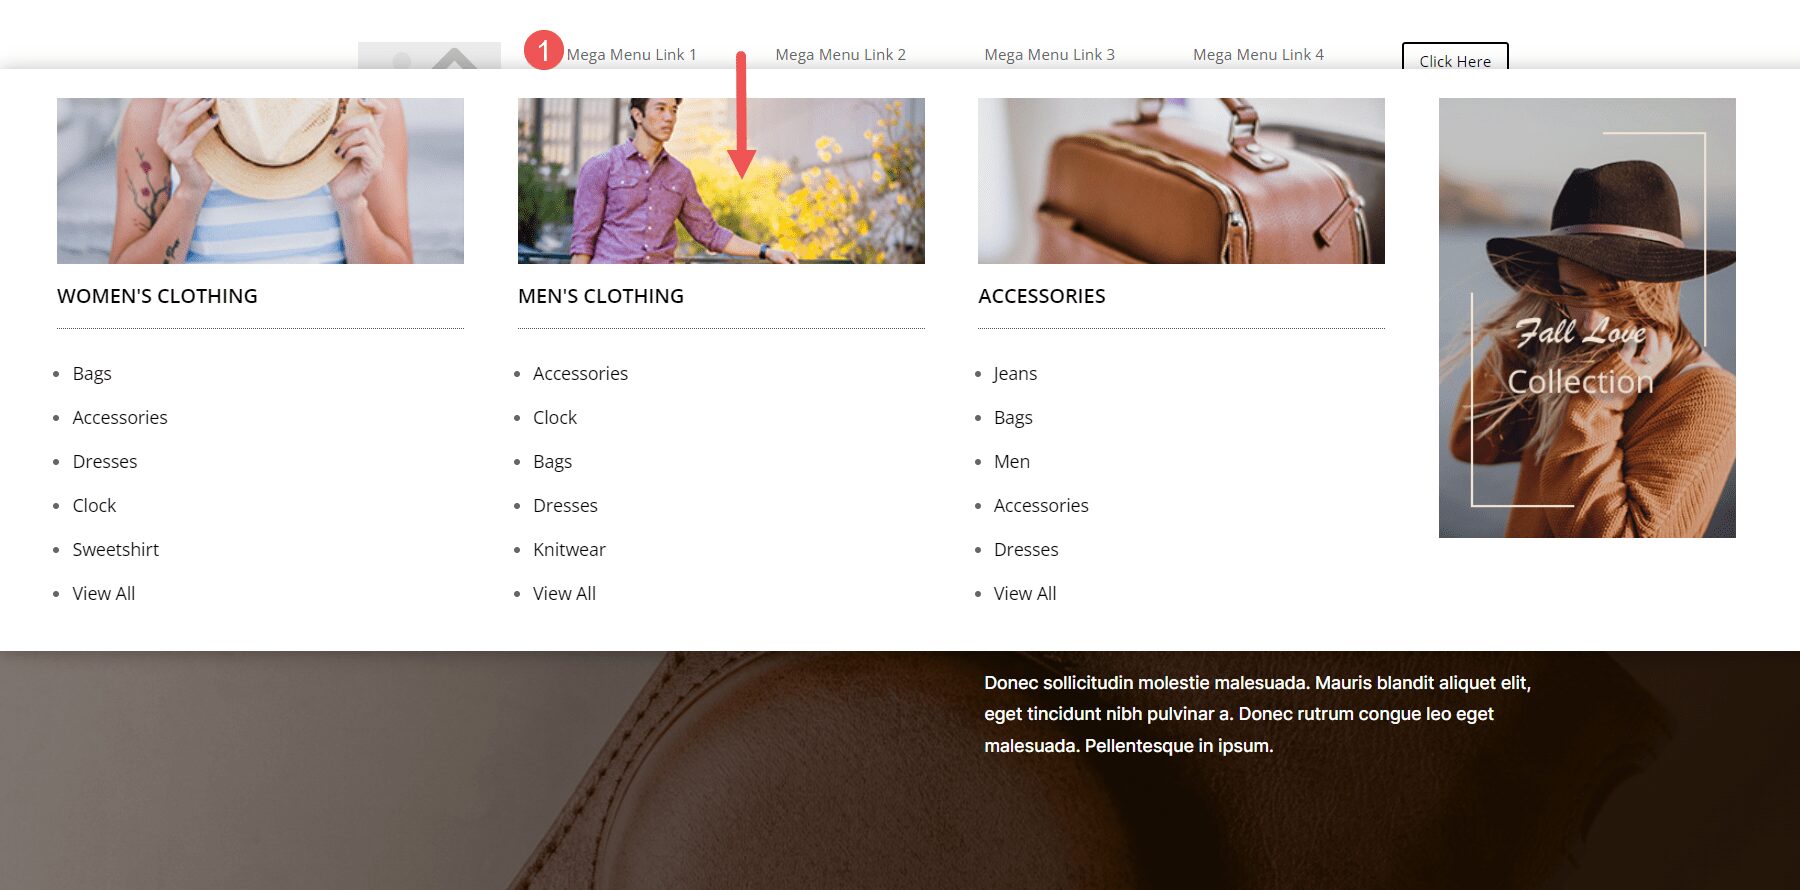
The menu items will work as a normal menu and display the mega menu items on hover or click, depending on your settings. In the example below, I’ve hovered over the first menu link and the mega menu for that Text Module has opened.
Divi Mega Pro Templates
Divi Mega Pro includes 15 templates to get you started. They’re provided as JSON files. Upload them to your Divi Mega Pro editor and use them to create your Divi Mega Pro layouts. They include eCommerce banners, tabs, CTA’s, contact information, a login form, blog posts, and lots more. The layouts are well-designed and work great with any style of the website.
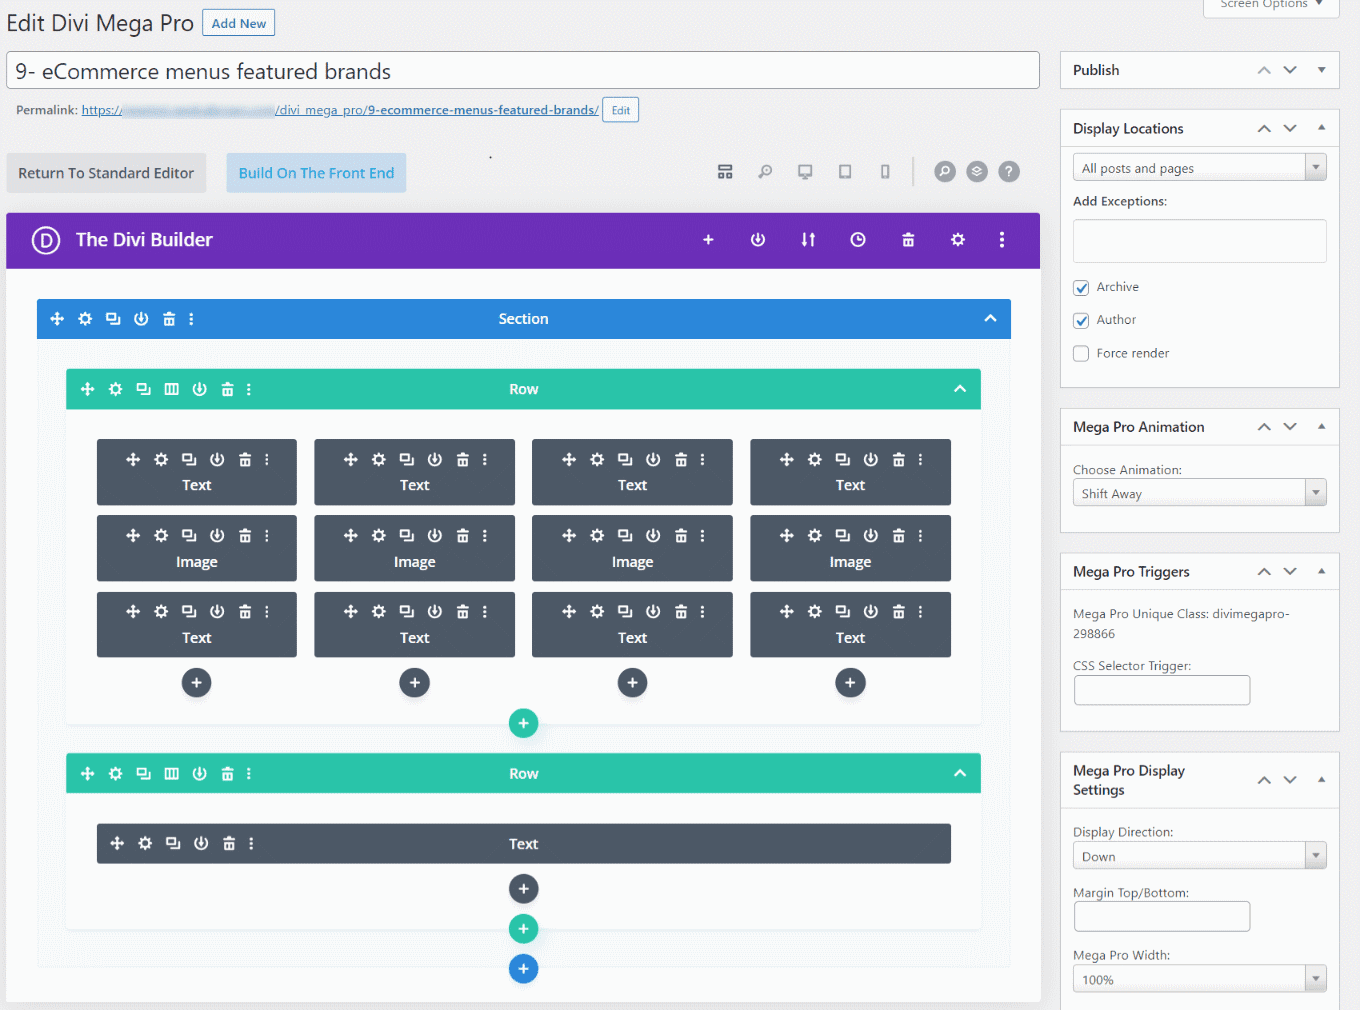
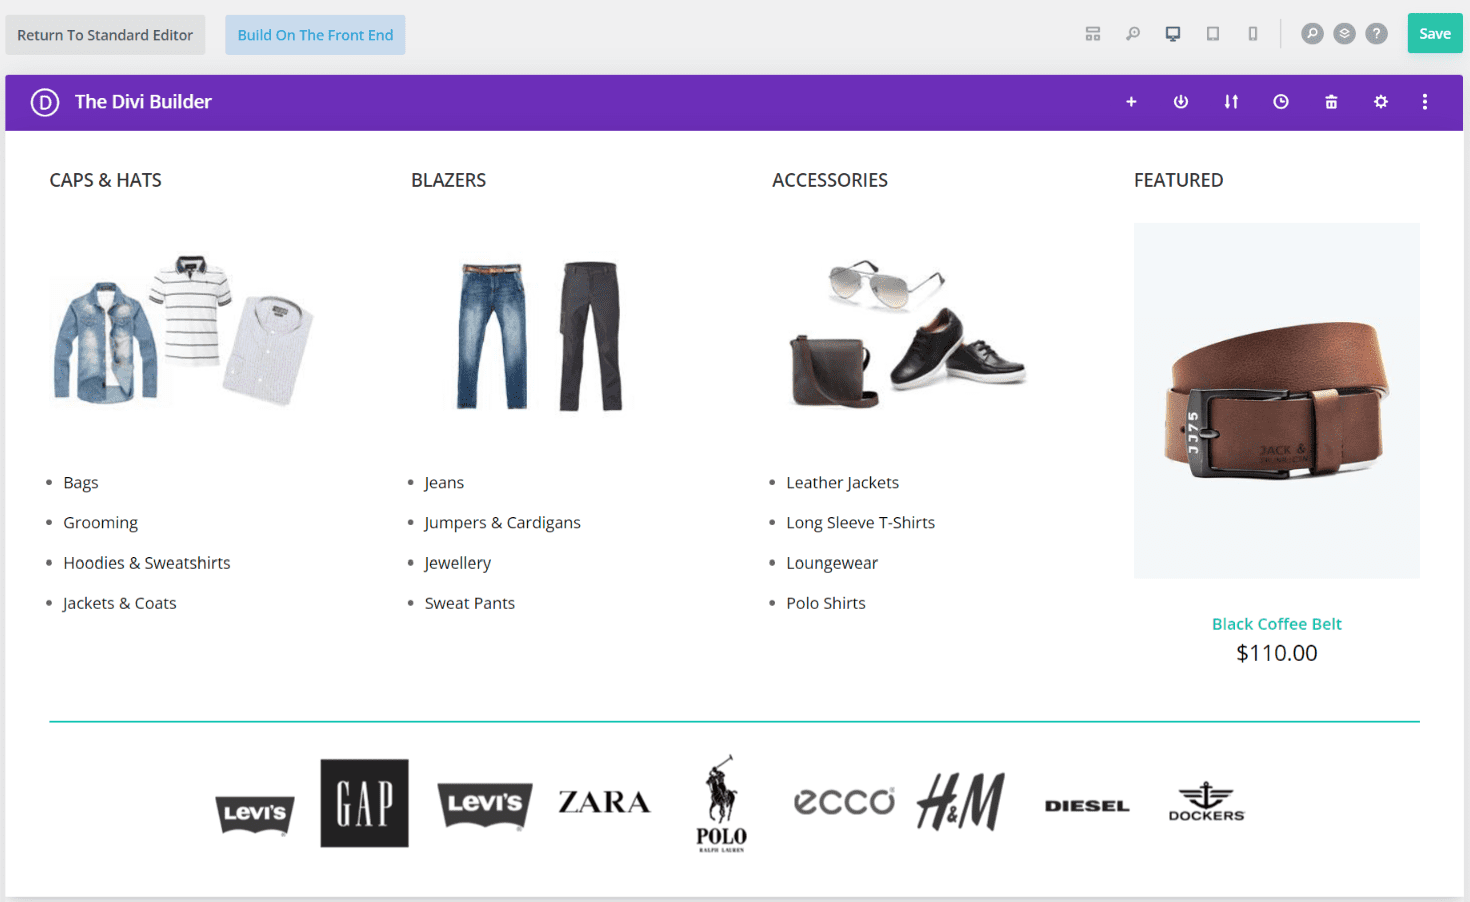
The templates are fully customizable, so you can adjust them to include your branded fonts and colors. This is template number 9, which creates eCommerce menus for featured brands. This shows the wireframe view within the back-end editor. You can also view the layouts on the front end. Mine displayed the layout with the sidebar by default, although I’m sure that can easily be disabled to show the layout in full width.
Here’s how it would look on the front end. This is the back-end editor showing the desktop view.
Where to Purchase Divi Mega Pro
Divi Mega Pro is available in the Divi Marketplace for $79. It includes unlimited website usage, one year of support and updates, and a 30-day money-back guarantee.
Ending Thoughts
That’s our look at Divi Mega Pro. I found creating and using the mega menus to be intuitive. Since it uses any Divi Builder module, creating the menus and tooltips works the same as building any Divi layout. The extra features, such as animations, buttons, etc., provide even more control over the design and specify how the menus and tooltips work. It works well with pages, posts, WooCommerce products, and more. The added templates are a great way to get started. If you’re interested in creating mega menus and tooltips for your Divi websites, Divi Mega Pro is worth a look.
We want to hear from you. Have you tried Divi Mega Pro? Let us know what you think about it in the comments.
The post Divi Plugin Highlight: Divi Mega Pro appeared first on Elegant Themes Blog.
