LifterLMS is one of the best and most popular learning management systems available for WordPress. It’s great for creating courses and membership sites using its own custom post types. One issue though is the Divi Builder isn’t normally available on custom post types, which greatly reduces your design options. What if you wanted to use the Divi Builder on LifterLMS pages? This is easily done using an extension called LifterLMS Labs and Lifti.
Lifti is part of the free LifterLMS Labs extension made for LifterLMS that adds the Divi Builder to LifterLMS post types. Lifti adds the Divi Builder to courses, lessons, and memberships, allowing you to use pre-made layouts or create your own. In this plugin highlight we’ll take a look at Lifti and see the advantage of using the Divi Builder for your LifterLMS post types.
Installing LifterLMS Labs and Lifti
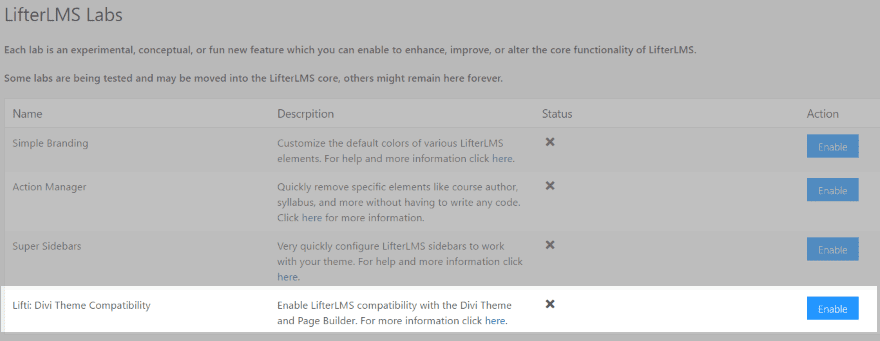
Install and activate LifterLMS Labs as normal. Once you install and activate the LifterLMS Labs you’ll need to enable Lifti and then enable to post types you wish to use the Divi Builder on. In the dashboard navigate to LifterLMS and select Labs. Enable Lifit: Divi Theme Compatibility.
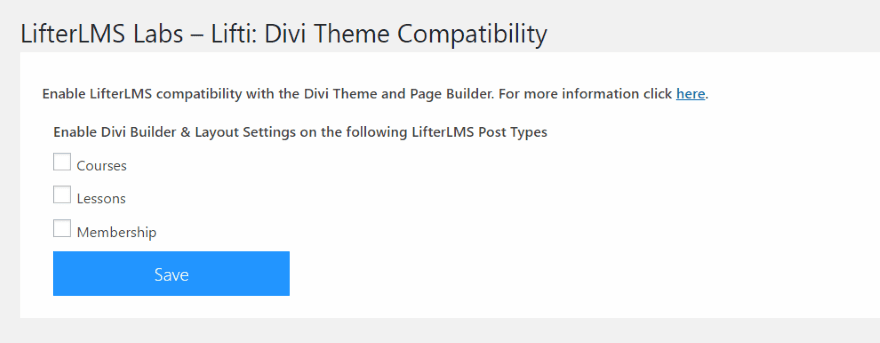
Once you’ve enabled Lifti you’ll see the screen for Divi theme compatibility. Enable the Divi Builder and Layout settings for LifterLMS post types. The Divi Builder will now be available on those post types.
Enrolled vs Non-enrolled Students
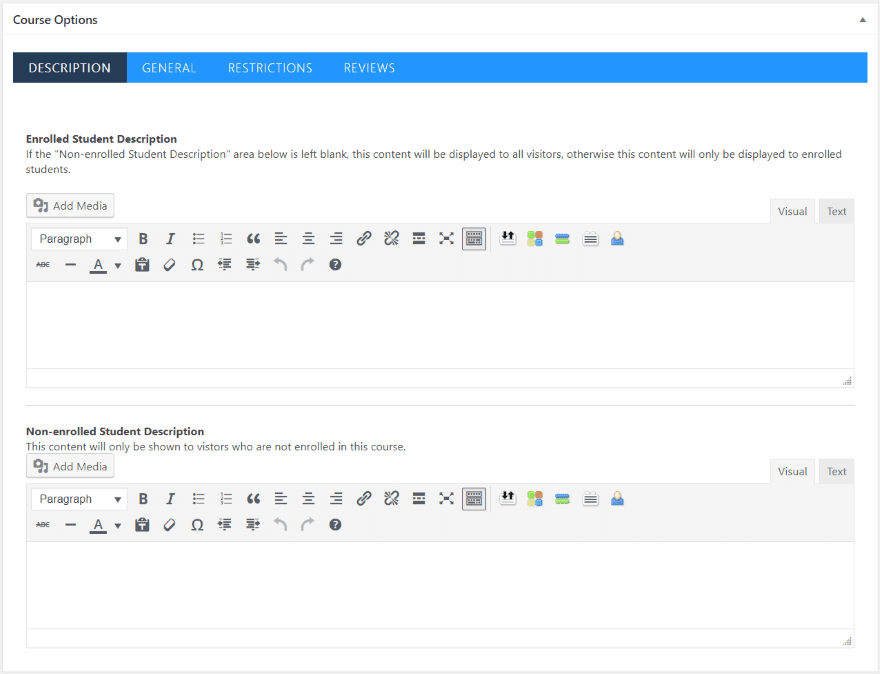
LifterLMS allows you to create two versions of a page and show one version based on whether or not the student is enrolled. This editor is disabled when using the Divi Builder.
Using the Divi Builder you can create the two versions of the course or membership page by using two different sections. One is the sales page with course description and CTA. The other is the page you design as their dashboard or whatever you want them to see after logging in. This is done using CSS classes for each section.
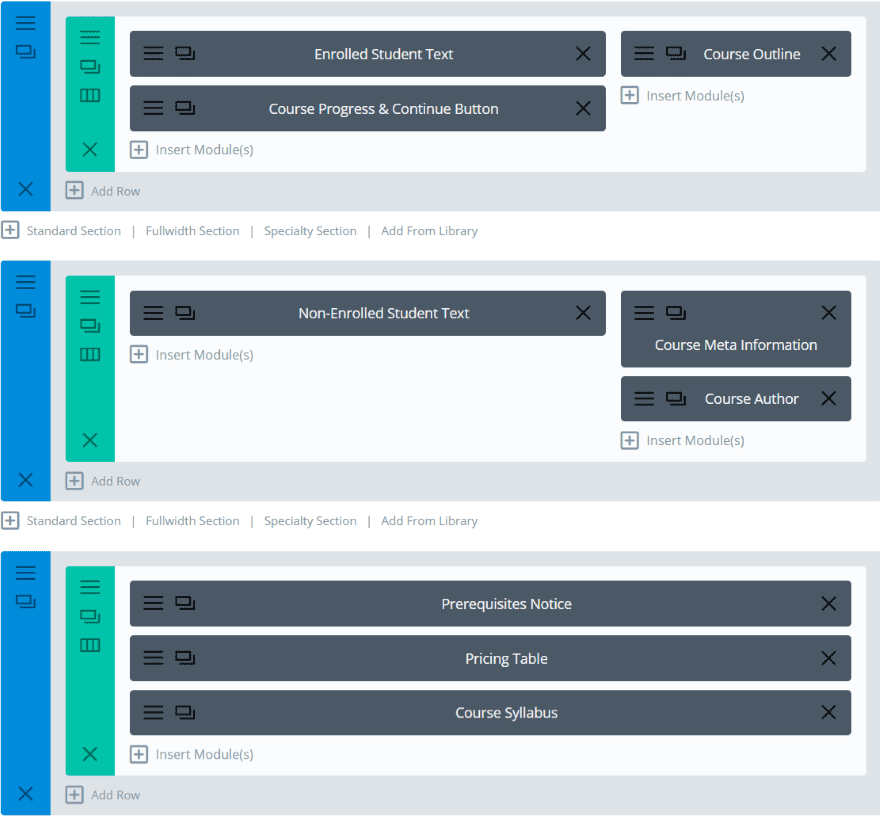
This is the pre-made layout that comes with Lifti. It has three different sections. The top section includes the CSS class to display for enrolled students. The second section includes the CSS class for non-enrolled students, so only one of the two sections will display. The bottom section doesn’t include a CSS class and will display regardless of whether or not the student is enrolled.
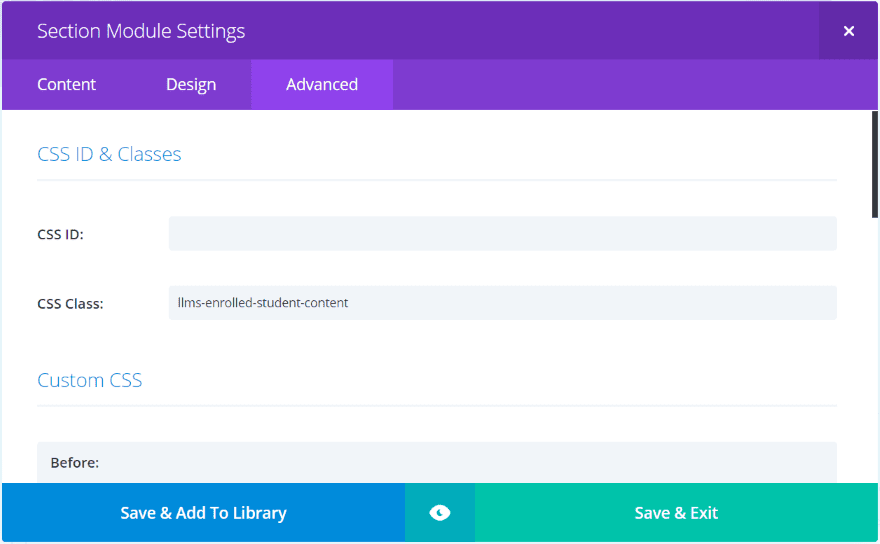
The CSS class is placed within the Advanced tab. You can copy and paste the CSS classes from the LifterLMS website.
Course Page Using Lifti
Lifti includes a pre-made course layout to get you started. The modules include dummy text and shortcodes.
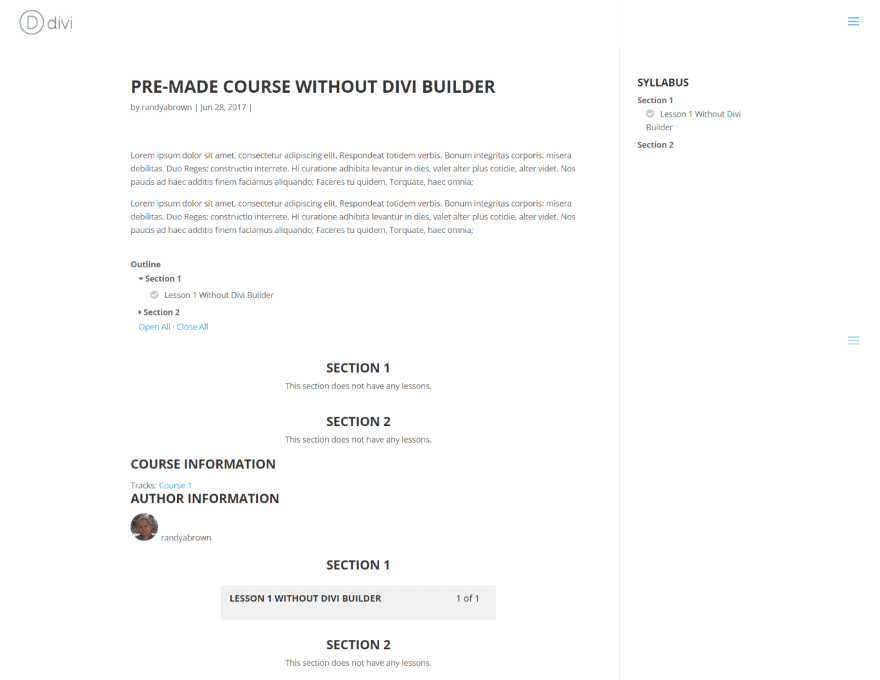
Here’s a look at the course page without the Divi Builder. I’ve added the shortcodes under the text for the course button and the teacher. It also uses a sidebar. Without using Lifti the Divi controls for the sidebar are not an option, so you don’t have full-screen course pages or the ability to move the sidebar to the left.

This example uses the Divi Builder in full width. I’ve added a fullwidth header with a background gradient and a button. The layout is much nicer and of course using the Divi Builder you’ve got complete control over the design.
We’ll take care of the components at the bottom (which are added by LifterLMS) as we dig deeper into LifterLMS Labs.
Lessons Page Using Lifti
Lessons do not come with a pre-made page. I’ve designed a quick lesson layout for this example. First, the layout using the regular WordPress visual editor.

I’ve added the shortcodes for the course outline and placed the two sidebar widgets for the course syllabus and lesson progress.
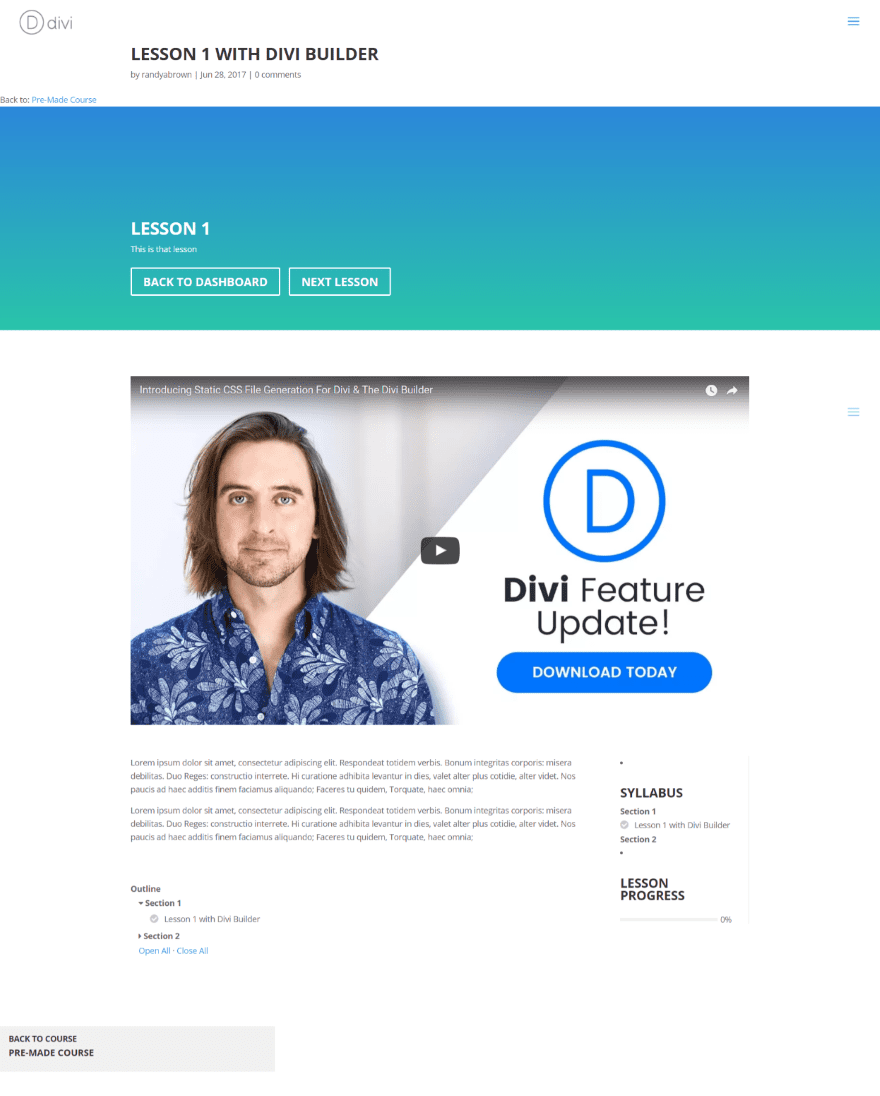
This is the same page using the Divi Builder. I’ve added a fullwidth header with buttons and placed the text over the shortcodes and a sidebar module within a double-column section. The LifterLMS sidebars provide some useful information and being able to add them anywhere in the Divi Builder is a major benefit to the page design.
Membership Page Using Lifti
LifterLMS can also build a membership site. You can create unlimited membership levels, each one built with the Divi Builder.
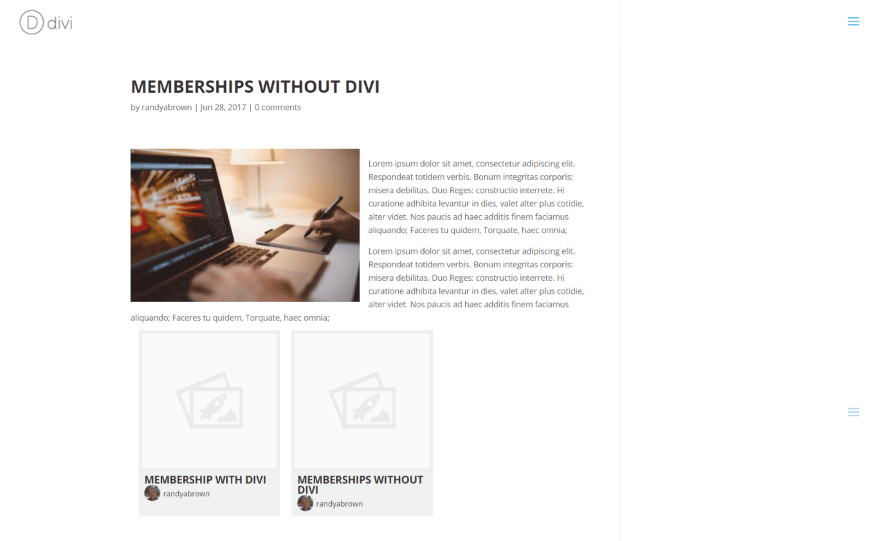
This is the membership page I created using the WordPress visual editor. I’ve added a shortcode to display membership categories. It uses a sidebar, but I haven’t added widgets in this example.
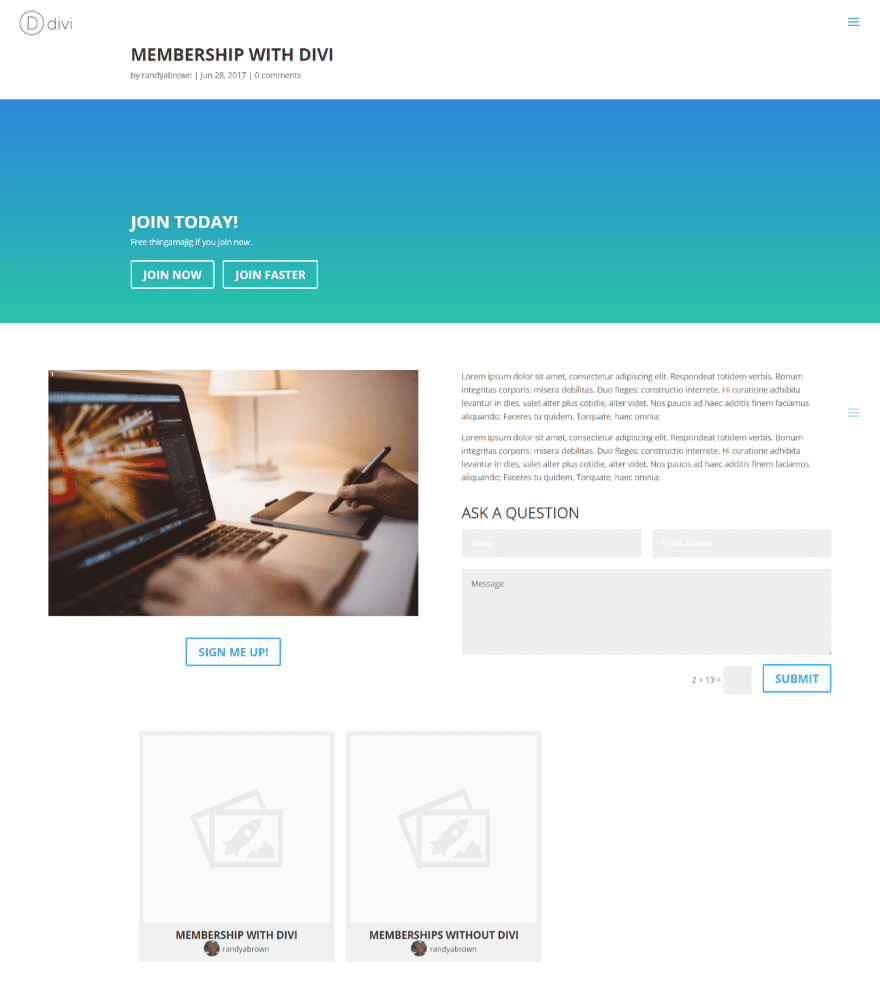
This is the same page using the Divi Builder. I’ve taken advantage of the Divi Builder’s modules by adding a fullwidth header, image, text, button, contact form, and a text module that includes the category shortcode.
LifterLMS Labs Action Manager
The Action Manager lets you hide or display LifterLMS components. These components are automatically added to the page. Hiding them provides the opportunity to display them using the Divi Builder.
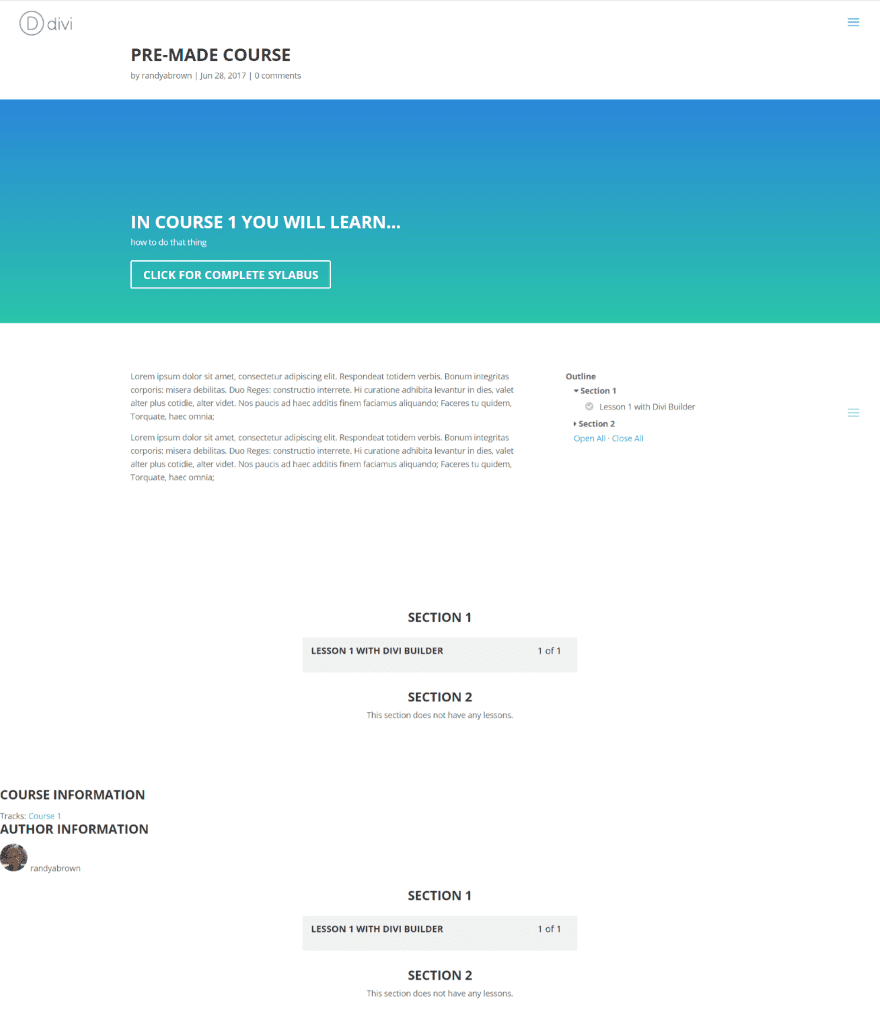
Looking back at our original Divi Course page you can see a lot of things added to the bottom of the page. It’s showing the course outline and course meta for course information and author. It’s showing Section information twice (pre-requisites, pricing table, and course syllabus) – once within the Divi layout and once within the course information that’s added to the bottom of the page. They were added by LifterLMS.

In order to keep the information from showing outside the Divi Builder you can enable the Action Manager Lab in the Labs menu (the same way we enabled Lifti). Here you can choose which items to disable in the default view.

I checked all of the meta items and then placed them within shortcodes in the sidebar. Now there is no duplicated information and I can place them within my page-design.
Final Thoughts
LifterLMS Labs’ Lifti opens up a lot of design possibilities for your LifterLMS courses, lessons, and membership pages by placing the Divi Builder on those post types. The Action Manager adds even more possibilities by allowing you to disable the standard LifterLMS meta and other information so you can show them within your Divi Layouts.
It does take an extra step of adding a CSS class to a section to make it only display to your intended audience, but this is easy to do and the documentation steps you through it. If you use LifterLMS it makes sense to install LifterLMS Labs and enable both Lifti and Action Manager. It’s free and a welcome addition to the LifterLMS platform.
We’d like to hear from you! Have you used Lifti? Let us know about your experience in the comments below.
Featured Image via Vector Goddess / shutterstock.com
The post Divi Plugin Highlight: LifterLMS Labs and Lifti appeared first on Elegant Themes Blog.
