The WordPress taxonomy gets a bad rap. It’s often misunderstood and misused (and that’s if the feature is used at all). But being able to set up custom WordPress taxonomies is your new secret weapon. Using them, you can provide a fantastic user experience for your readers, for Google’s SEO crawlers, and for your writers on the backend. You don’t have to be scared of taxonomies anymore. We’re going to walk you through how to create your own WordPress taxonomy. And you’ll understand why it’s one of the best things you can do for your website.
What is a WordPress Taxonomy?
Well, in short, it’s a way to organize your content. By default, WordPress comes with two taxonomies that you already use each and every day. Categories and Tags. Taxonomies are distinct, sortable, and filterable segments of your website. They can be hierarchical or flat. Categories are hierarchical with parent/child relationships. Tags are flat. Within each one, you can set various ways that your users can find specific information. Whether it’s on a broad, parent/child way via Categories or a specific subject through Tags.
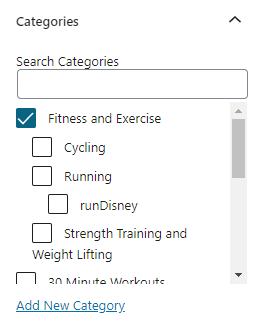
For example, take the Categories taxonomy. You choose a specific area that makes up a major part of your overall topic. On a general health and wellness blog, you might see categories such as Exercise or Workouts, with child categories such as Cycling, Running, or Strength Training. This is an example of a taxonomy at work. Users can sort and filter the information to find exactly what they need.
Tags are similar, only they are used for specific subjects on your site. This WordPress taxonomy is useful for finding specific posts about particular topics that might span multiple categories.
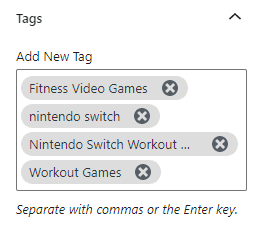 The tag Fitness Video Games in the image above might cover posts in both Running and Cycling categories. So tags are a taxonomy that’s useful for sorting in a different way.
What is a Custom WordPress Taxonomy?
Custom Taxonomies in WordPress are exactly the same. They can be hierarchical or flat. And you can use them to specifically target content for your readership and niche. You might run a news site that covers both local and global news. You could create a custom WordPress taxonomy for Local News and one for Global News. Under each, you could place specific categories that pertain only to that taxonomy so that readers looking for news local to Huntsville, Alabama wouldn’t get overwhelmed by news from Hong Kong or Tokyo.
While you could use parent/child categories for this, SEO best practices would prefer the simpler structure that a custom taxonomy provides. It basically removes one level from your site structure, separating your data into more easily readable and searchable segments. Additionally, custom post types go hand in hand with WordPress taxonomies. You then have the ability to have Breaking News and Investigative Reporting listed separately under the WP dashboard and within their respective Local/Global taxonomies. Instead of everything you write being listed simply under Posts.
How to Create a Custom WordPress Taxonomy
Like most things in WordPress, you can either create a taxonomy manually. This time, you do so by editing your functions.php file. Or you can use a plugin to do all of the heavy lifting. We are going to show you how to use a plugin to do it, as well as provide sample code and a link to references for adding your own custom WordPress taxonomy by editing your PHP files. While it’s generally more future-proof to edit the WordPress PHP files manually to add new features and options, adding these via plugin is much more accessible to everyday WordPress users.
Using the Custom Post Type UI Plugin
To begin, download and install the Custom Post Type UI plugin on the WP.org repository.
After that, you will have a new menu item called CPT UI in your sidebar. Under it, you want to go into Add/Edit Taxonomies. To actually create the new taxonomy, all you have to do is give it a slug (example.com/taxonomy-slug) and what you and readers will see for both the plural and singular form, like post and posts.
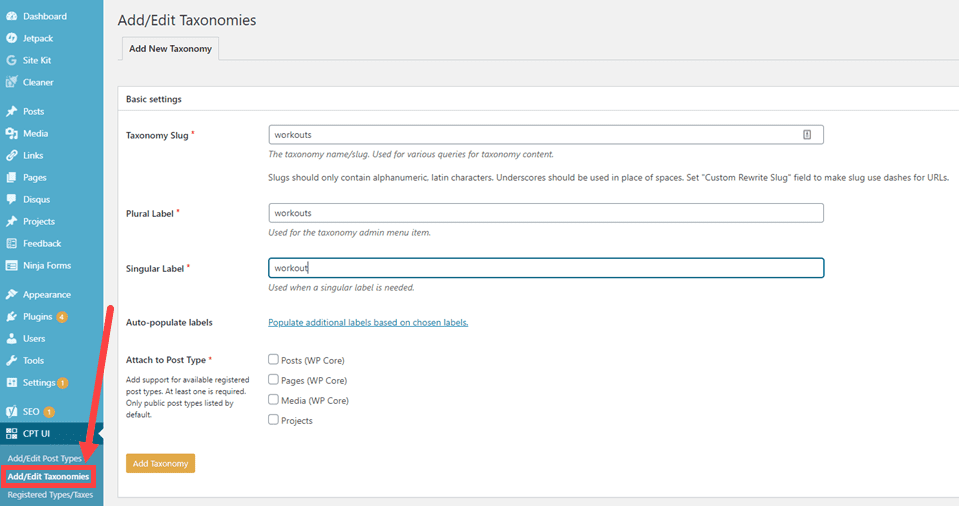
Click on Add Taxonomy, and you’ve created your first custom WordPress taxonomy. Congratulations! You still have a bit more to do, though. You need to tell WordPress what to display for the new taxonomy. At this point, you will set things like Edit Workouts and Add New Workout and so on.
Next up is the Settings pane. This is where you decide whether this is a public-facing taxonomy, where your users can filter and search the content or private for your staff members. You will determine if it’s hierarchical or not, meaning if it uses a parent/child relationship like Categories or simply a flat list like Tags.
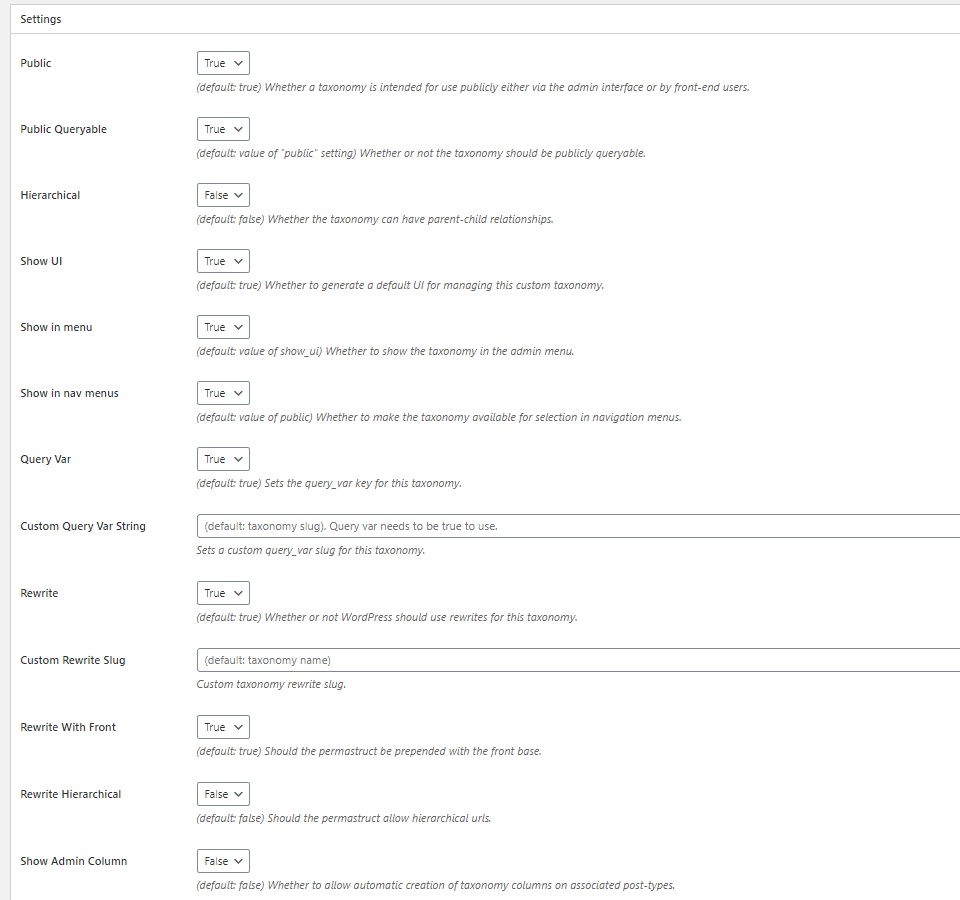
Depending on what options you choose, the taxonomy will appear looking something like this. It will on your posts or pages or wherever you attached it in the creation process above.
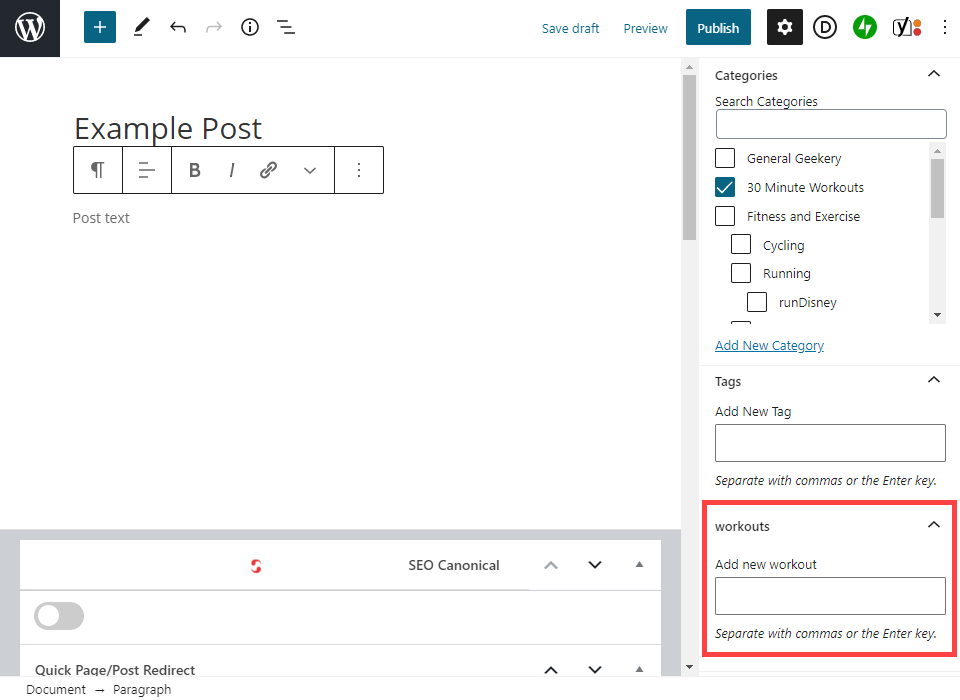
We attached this one to posts, so as you can see, it appears under Categories and Tags in the block editor.
Because the adding and editing of new taxonomies and post types is incredibly long and dependent on your options and settings choices, we suggest taking a look at the full list on the plugin’s repository page.
Adding Taxonomies with Code
For those of you who want to do it the old-fashioned way, go into your WP installations files, either by FTP, cPanel, or other means of accessing them. Find the /wp-content/themes/theme-name folder, and open the functions.php file in your favorite code editor.
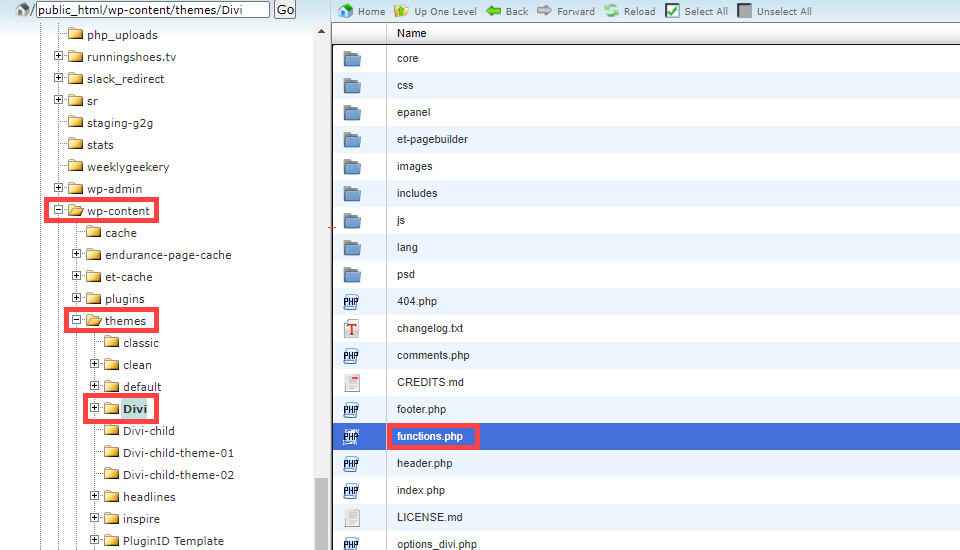
After that, you will take this code and adjust it based on the taxonomy you want to create.
/**
 * Create two taxonomies, genres and writers for the post type "book".
 *
 * @see register_post_type() for registering custom post types.
 */
function wpdocs_create_book_taxonomies() {
    // Add new taxonomy, make it hierarchical (like categories)
    $labels = array(
        'name'              => _x( 'Genres', 'taxonomy general name', 'textdomain' ),
        'singular_name'     => _x( 'Genre', 'taxonomy singular name', 'textdomain' ),
        'search_items'      => __( 'Search Genres', 'textdomain' ),
        'all_items'         => __( 'All Genres', 'textdomain' ),
        'parent_item'       => __( 'Parent Genre', 'textdomain' ),
        'parent_item_colon' => __( 'Parent Genre:', 'textdomain' ),
        'edit_item'         => __( 'Edit Genre', 'textdomain' ),
        'update_item'       => __( 'Update Genre', 'textdomain' ),
        'add_new_item'      => __( 'Add New Genre', 'textdomain' ),
        'new_item_name'     => __( 'New Genre Name', 'textdomain' ),
        'menu_name'         => __( 'Genre', 'textdomain' ),
    );

    $args = array(
        'hierarchical'      => true,
        'labels'            => $labels,
        'show_ui'           => true,
        'show_admin_column' => true,
        'query_var'         => true,
        'rewrite'           => array( 'slug' => 'genre' ),
    );

    register_taxonomy( 'genre', array( 'book' ), $args );

    unset( $args );
    unset( $labels );

    // Add new taxonomy, NOT hierarchical (like tags)
    $labels = array(
        'name'                       => _x( 'Writers', 'taxonomy general name', 'textdomain' ),
        'singular_name'              => _x( 'Writer', 'taxonomy singular name', 'textdomain' ),
        'search_items'               => __( 'Search Writers', 'textdomain' ),
        'popular_items'              => __( 'Popular Writers', 'textdomain' ),
        'all_items'                  => __( 'All Writers', 'textdomain' ),
        'parent_item'                => null,
        'parent_item_colon'          => null,
        'edit_item'                  => __( 'Edit Writer', 'textdomain' ),
        'update_item'                => __( 'Update Writer', 'textdomain' ),
        'add_new_item'               => __( 'Add New Writer', 'textdomain' ),
        'new_item_name'              => __( 'New Writer Name', 'textdomain' ),
        'separate_items_with_commas' => __( 'Separate writers with commas', 'textdomain' ),
        'add_or_remove_items'        => __( 'Add or remove writers', 'textdomain' ),
        'choose_from_most_used'      => __( 'Choose from the most used writers', 'textdomain' ),
        'not_found'                  => __( 'No writers found.', 'textdomain' ),
        'menu_name'                  => __( 'Writers', 'textdomain' ),
    );

    $args = array(
        'hierarchical'          => false,
        'labels'                => $labels,
        'show_ui'               => true,
        'show_admin_column'     => true,
        'update_count_callback' => '_update_post_term_count',
        'query_var'             => true,
        'rewrite'               => array( 'slug' => 'writer' ),
    );

    register_taxonomy( 'writer', 'book', $args );
}
// hook into the init action and call create_book_taxonomies when it fires
add_action( 'init', 'wpdocs_create_book_taxonomies', 0 );
This code actually creates two taxonomies in the dashboard, one hierarchical with parent/child capabilities and one without. So basically a secondary set of Categories and Tags. The code itself was posted on the official taxonomy page by the WordPress Codex team, and it registers Books as a taxonomy with various Genres and Writers to relate. All you need to do is go through and replace the book-related keywords with your own. And you’re good to go.
Wrapping Up
Using WordPress taxonomies seems complicated at first. But when you dig in on the feature, hopefully you can see how simple it really is. If you relate it to the Categories and Tags that you already use, then understanding custom taxonomies is simple. When you combine them with custom post types, you can organize your site in an infinite number of ways to find the best way to suit your niche and audience perfectly.
Do you use a special WordPress taxonomy on your website? Let us know how it’s set up in the comments!
Article featured image by Farhads / shutterstock.com
The post Everything You Need to Know About WordPress Taxonomies appeared first on Elegant Themes Blog.

