Founded by Alexander Adam, Gravit Designer is an HTML-based application for designing high-quality vector graphics. Corel acquired Gravit Designer in mid-2018, adding it to their portfolio of applications for digital media. You can create an assortment of projects with Gravit Designer, including app designs, icons, illustrations, presentations, print designs and screen designs.
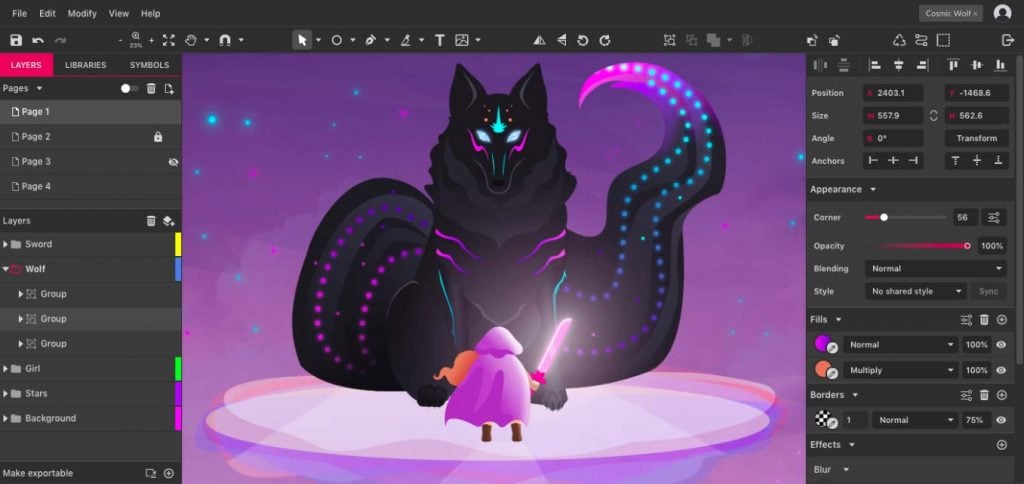
Gravit Designer can be downloaded or used as a browser-based tool, and it’s compatible with a variety of operating systems, including Chrome, Linux, Mac and Windows. (The browser version is usually the most up-to-date, and it may also perform better for you.) The screenshots and directions in this article are from the browser version, which I accessed using a Mac.
Who is Gravit Designer For?
You have to have some familiarity with tools like this – it’s not very intuitive (beginner-wise) and there’s no wizard to help you through your first design. Gravit Designer is for the graphic, product or web designer – professionals who know what they’re doing and need something beyond a tool for beginners. Gravit Designer has a lot of options, too, so you may want to check out the documentation to familiarize yourself with everything, especially if you plan on paying for it. Also, check out their tutorials on their YouTube channel.
Gravit Designer Features
As a full-scale design tool, Gravit Designer has a number of features:
- Anchors
- Auto-layouts
- Bleed
- Blending
- Booleans
- Effects (shadows, overlays, mirror, etc.)
- Fills
- Frame text tool
- Google Fonts
- Grids
- Knife tool
- Layers
- Path graphs
- Pen shapes
- Presentation/slides view
- SVG editing tool
- Symbols
- Templates
- Text editing
- Text engine
Here are a few more features that are particularly notable:
- The bezigon tool will create smooth curves around the points of a shape.
- You can close an incomplete path or open one to add more points.
- Create a text path along any path or shape, then set the text along the inside or outside of the path.
- Add as many borders and fills to a shape as you want – each border or fill will function like a separate layer.
- Add as many effects per layer as you want, too.
- Create styles that set border, fill, effects and text settings. Apply the style to multiple objects, then make changes to the style once and apply changes to all objects.
- Type “lorem” into a text field and then press space to automatically create a “Lorem ipsum” paragraph.
Save designs to the Gravit Cloud or locally. Saving it to the cloud makes it easier to start working on one platform, like the app, and then continue working on your design via your browser.
Using Gravit Designer
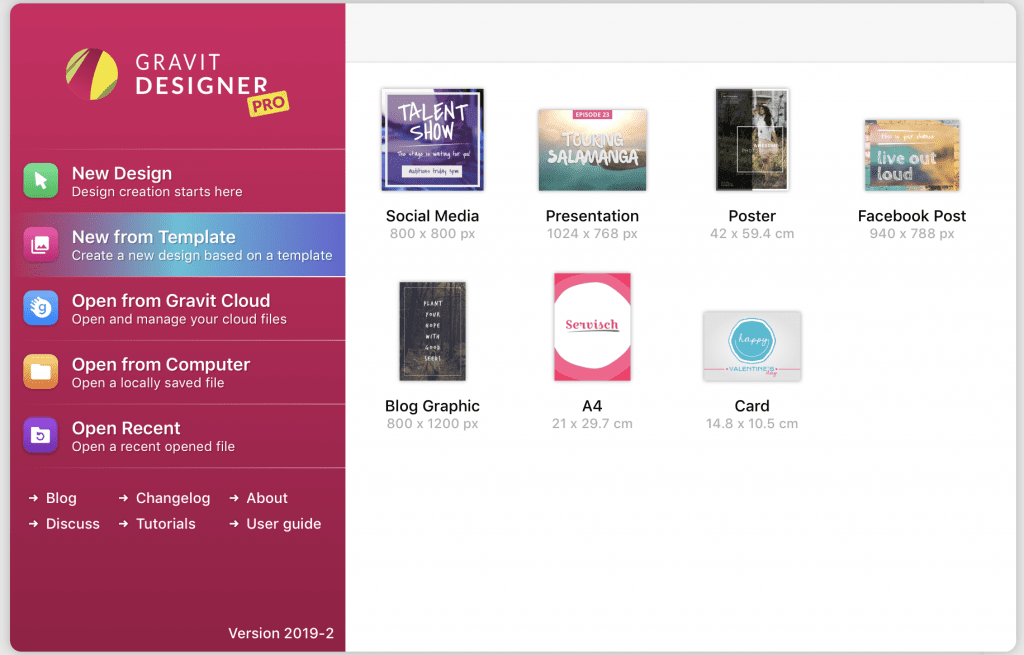
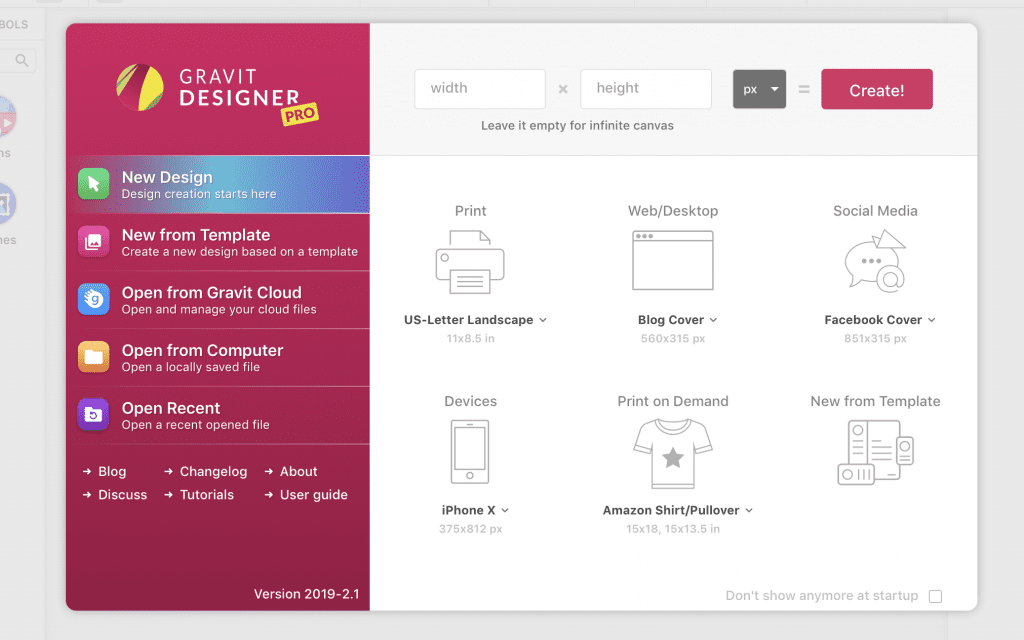
You can sign up for Gravit Designer here. After signing up, you’ll create a new design from scratch or choose a template. When creating a new design, you can choose preset sizes or set your own. If you don’t want to set a size, you’ll use an infinite canvas.
The Gravit Designer Dashboard
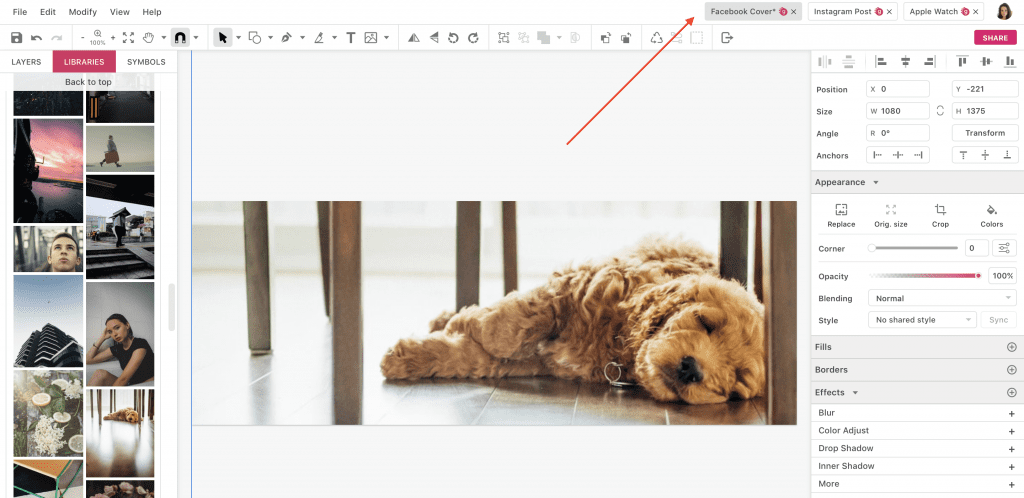
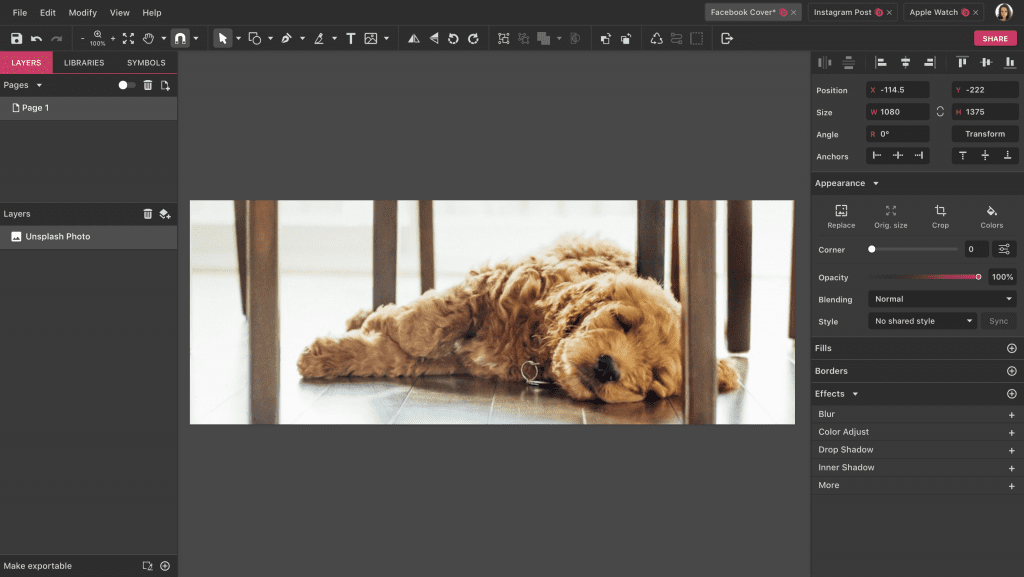
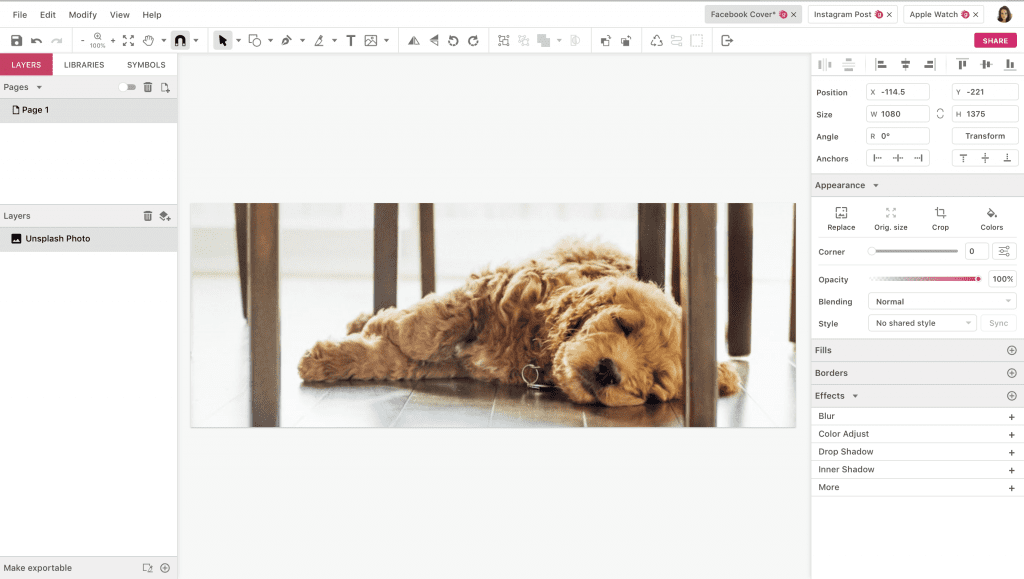
At first, the dashboard looks like it has a lot going on, but it’s organized and easy to navigate. I like that you can switch between projects with the tabs along the top. You can also switch to dark view by going to Edit, Settings and choosing Dark Theme from the dropdown menu.
Adding and Editing Elements
Along the top of the dashboard, you’ll see a toolbar similar to Sketch. it has everything you’d expect to find:
- Canvas snapping
- Multi-shape tools
- Path and text tools
- Flipping and rotating
- Stacking order
The column on the left side of the screen has three options:
- Layers is where you’ll find all of your pages and layers for the selected project.
- Libraries has all of your drag and drop tools.
- Symbols is where you can store the design elements you want to reuse.
I added a photo, which created the first layer. I then centered the image by right-clicking the image and selecting Align and Align Center.
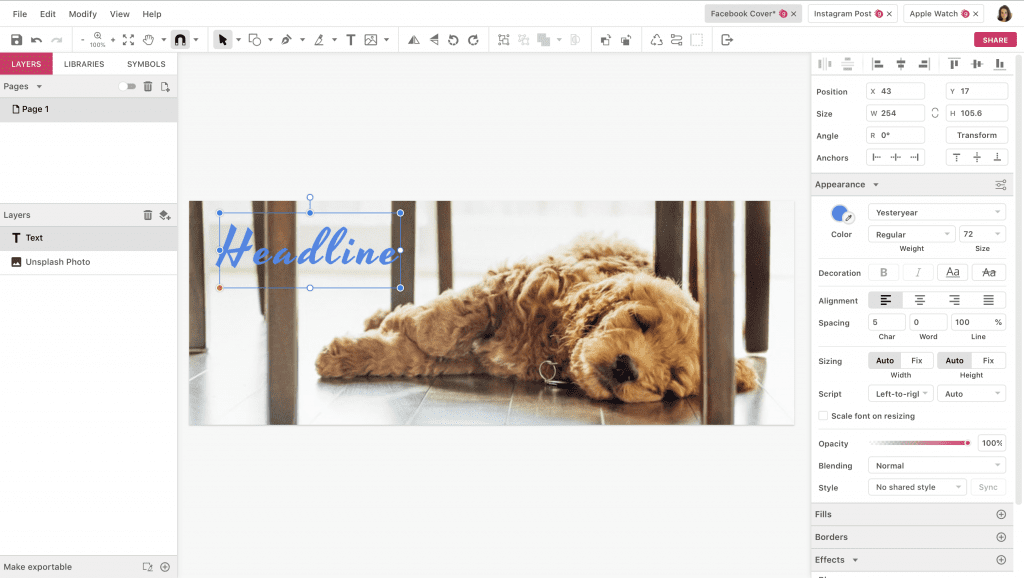
On the right, there are design settings that are specific to the object you have selected. In this example, I have the text selected, so the settings on the right are all text-related:
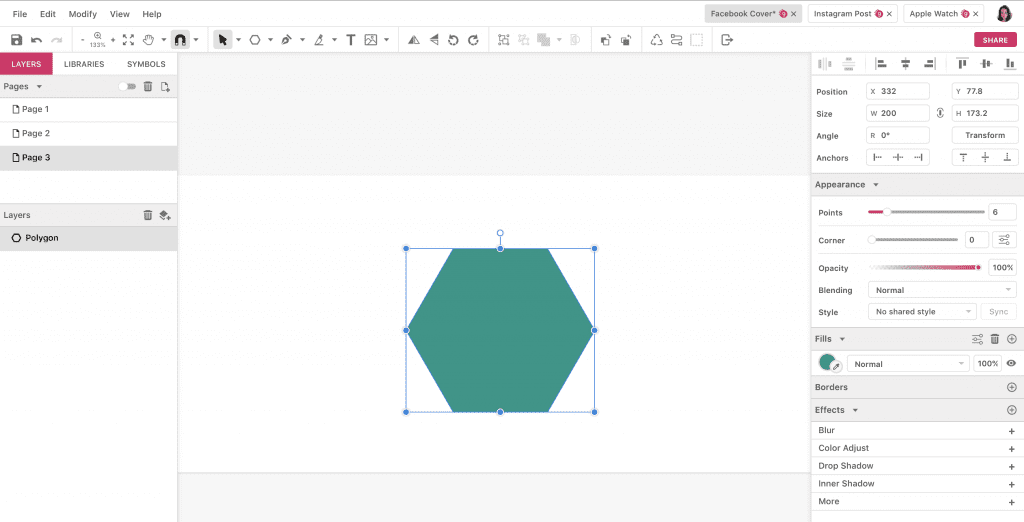
Here are the shape settings for a polygon, just as an example of other types of controls:
What are Pages in Gravit Designer?
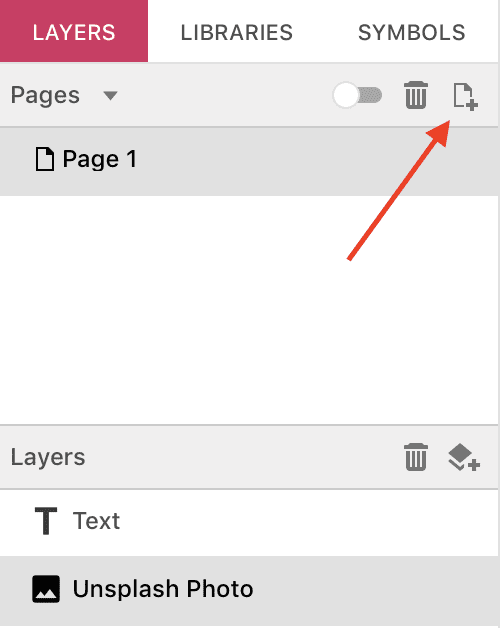
In Gravit Designer, pages function a little differently from other design tools – they’re sort of a cross between the artboards and pages you may be more familiar with. A page is its own document with its own canvas settings (color, dimensions, margins, etc.). By default, each project starts with one page. You can add more pages by clicking the icon on the top-right of the pages window:
You can view all of your pages at once by turning on the pink toggle in the pages window. In multi-page view, you can still select, move and resize the individual pages, and you can duplicate them as well.
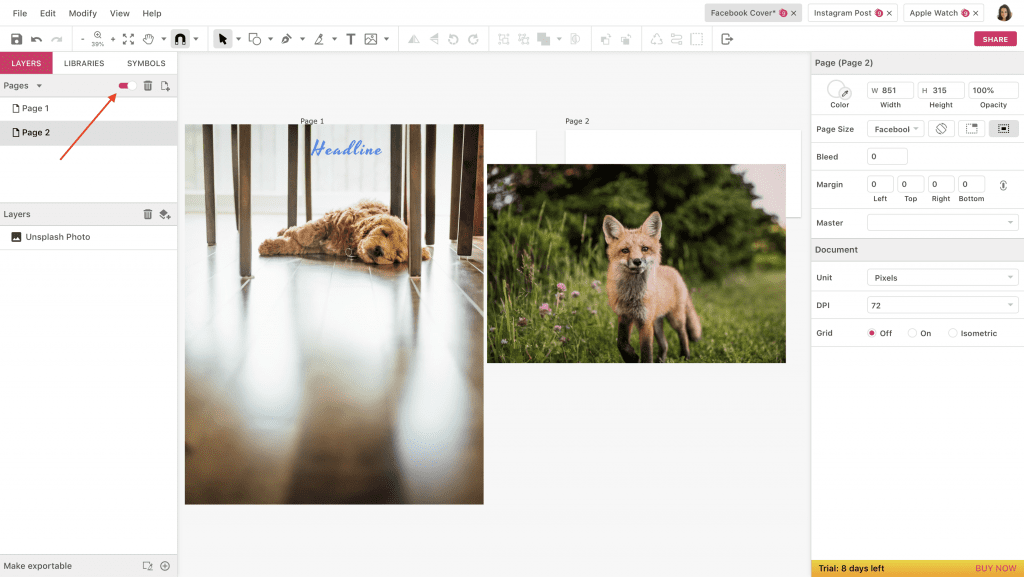
Another cool pages feature is that you can set Master Pages in order to reuse elements you’ve already created. Every page you create after setting your Master Page will share the same elements. Plus, as you update your Master Page, your other pages will automatically update.
Gravit Designer Pricing
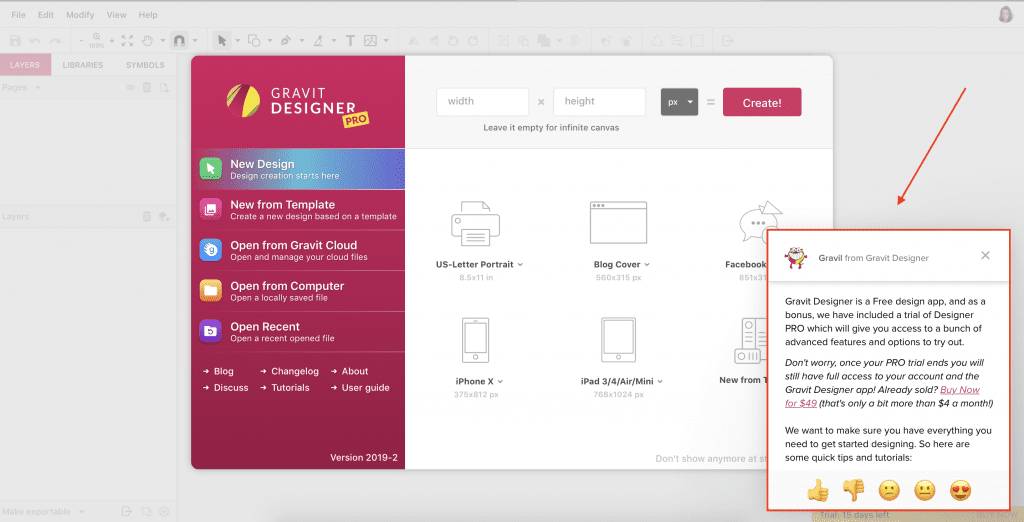
When you sign up for a free Gravit Designer account, you’ll get a 15-day free trial of Gravit Designer PRO. When the trial period ends, you can use the free version or you can upgrade to PRO for $49 per year. The free version of Gravit Designer is truly free, meaning it’s not “free, but you’re bombarded with advertising” or “free, but you’re constantly asked for your money.” There’s an unobtrusive reminder that you can upgrade, and that’s it. No credit card is necessary to start with a free account. If you want to upgrade right away, a little pop-up box on the bottom right includes a link for that. That pop-up has other useful information, like popular tutorials, their user guide, FAQ and customer support.
Gravit Designer Free vs. Gravit Designer PRO
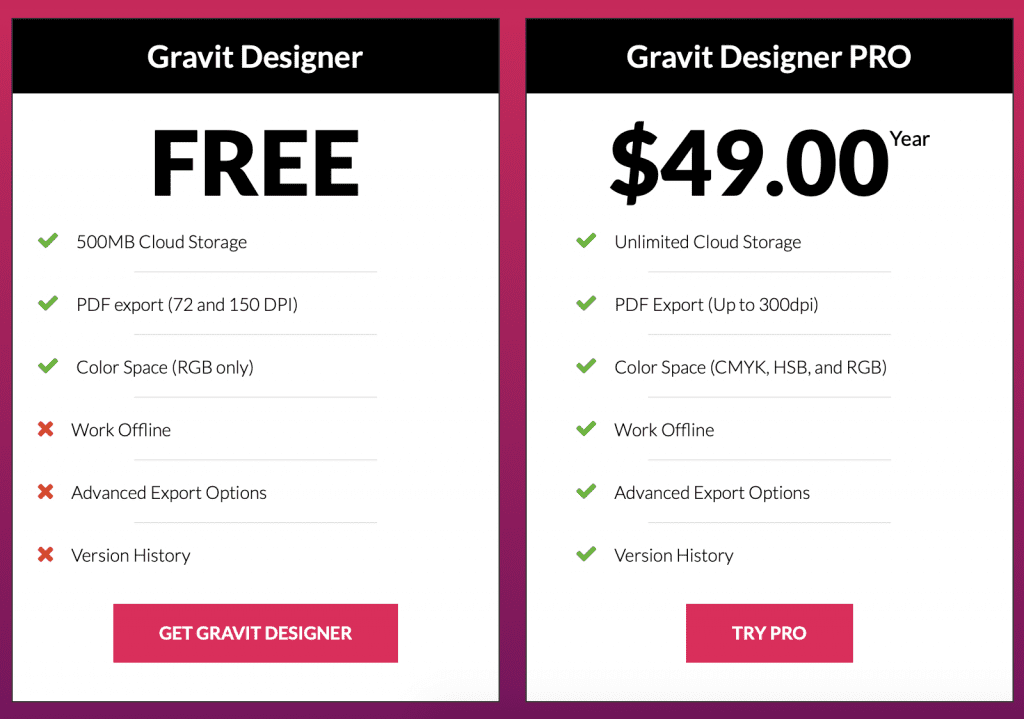
Many of the features I discussed above are for PRO accounts only. Here are the main differences between free Gravit Designer and Gravit Designer PRO. A full list of differences can be found here.
- CMYK, HSB and RGB color spaces in PRO; free only has RGB.
- Free is limited when it comes to reusing existing elements.
- More fonts are available with PRO.
- Free includes 500 MP of cloud storage; PRO is unlimited.
- Higher-quality PDF exports are available in PRO.
Here are the features that you can only use with a PRO account:
- Advanced path tools
- Advanced type support
- Color swatches
- Master Pages
- Version history
- Work offline via the desktop app
Gravit Designer PRO is great for professionals or if you’ve simply outgrown the free version. You may notice that some previously-free features are now only available with PRO, such as CMYK support and offline mode. For those of you who have had a Gravit Designer account since before mid-October 2018, you should still have access to many of these features even with your free account.
Wrapping Up
If you’re a beginner, skip the template (other than to get a design idea) and create your design from scratch. The preset sizes are useful for newbies who know what they want to design and want to work within certain parameters, like designing for an iPhone screen or a Facebook cover. If you’ve never used a lot of these tools before, you’ll want to check out some tutorials. If you have, though, you may be impressed with what’s available for no or low cost, especially the more unique features that make Gravit Designer a standout.
Have you tried Gravit Designer? I wanna know what you love and what you don’t love about it.
Featured Image via VectorKnight / shutterstock.com
The post Gravit Designer: An Overview and Review appeared first on Elegant Themes Blog.
