Helping you get a website up and running without a lot of effort is the main goal of our Layout Pack Use Cases initiative. And this time, we’re helping you set up a copywriter website with the free Copywriter Layout Pack for Divi. Although this layout pack already has most of the elements your copywriter website needs, in this use case tutorial, we’re going to help you take it a step further by showing you how to add resume downloads and typing effects. These two additions will not only enhance the appearance of your website but will also help you discover your visitors’ needs.
Use Case Sneak Peek
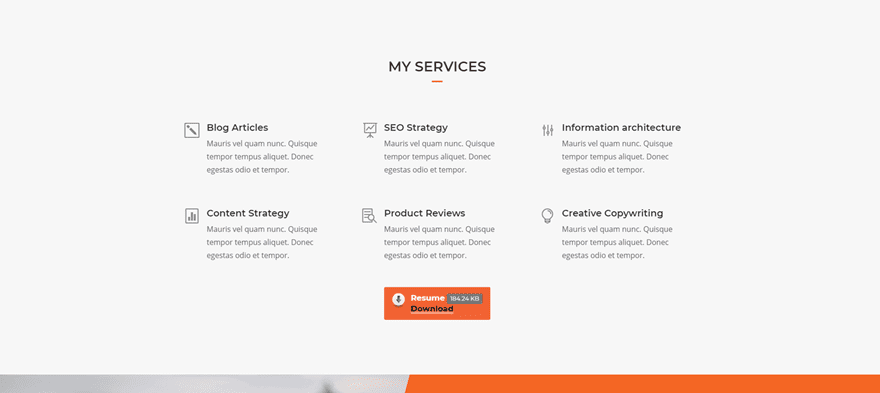
Before diving into the tutorial, let’s take a look at the result.
Resume Download
For the resume download, we’re going to replace one of the buttons on the homepage into a download button that contains the resume file.
Typing Effect
You can use the typing effect practically anywhere on your website. We’re going to give you a headstart by showing you how to use it in the hero section of the homepage.

The Setup
1. Install and activate the Divi Theme
2. Install Plugins
3. Download the Layout Pack and Import the Copywriter_All.json file to your Divi Theme Library.
4. Create new pages for each layout.
5. Create your primary menu.
If you are confused by the setup listed above, you can find more detailed instructions on how to setup your layout properly by checking out these 10 steps for using a layout pack for your new project.
Part 1: Download & Install Download Manager Plugin
Step 1: Download Plugin
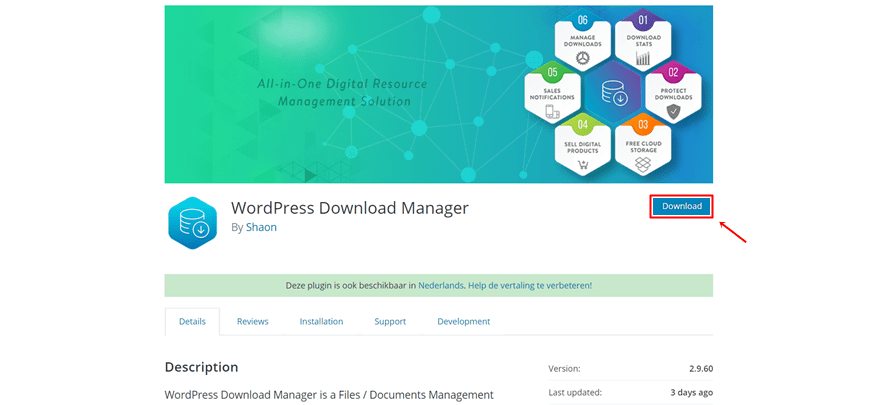
Start off by downloading the WordPress Download Manager plugin by going to the following page and clicking on the download button.
Step 2: Install Plugin
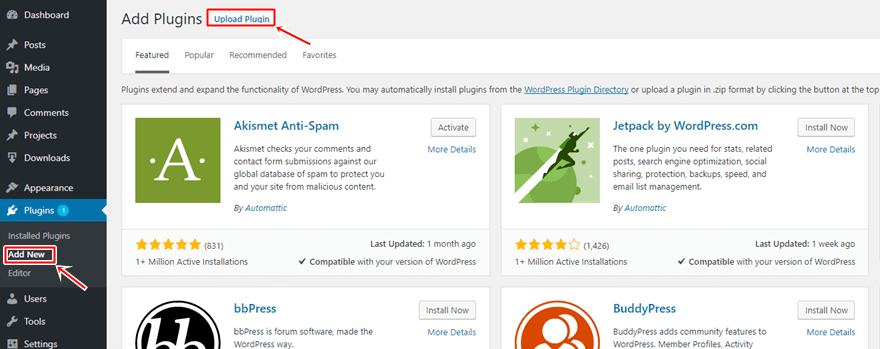
Then, go to your WordPress website and upload the plugin by going to Plugins > Add New. Once you’ve uploaded the plugin, make sure you activate it as well.
Part 2: Add Resume as Download File
Step 1: Create Resume with Canva or Upload Existing Resume
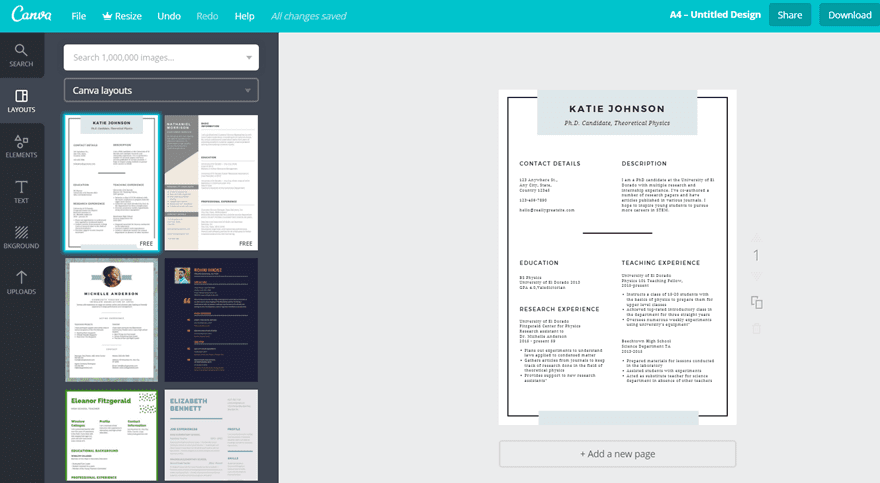
The next thing you will need is your resume file. If you don’t have one yet, you can easily create one without having any Photoshop experience by using Canva. Canva offers a ton of free pre-made designs for all kinds of purposes, resumes included.
Step 2: Add New Download File to Download Manager
Once you’ve located your resume or created one, it’s time to add it to your Download Manager plugin. To do that, go to Downloads > All Files > Add New.
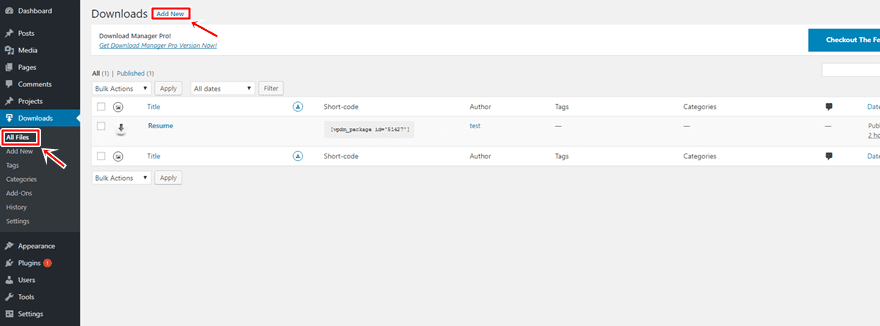
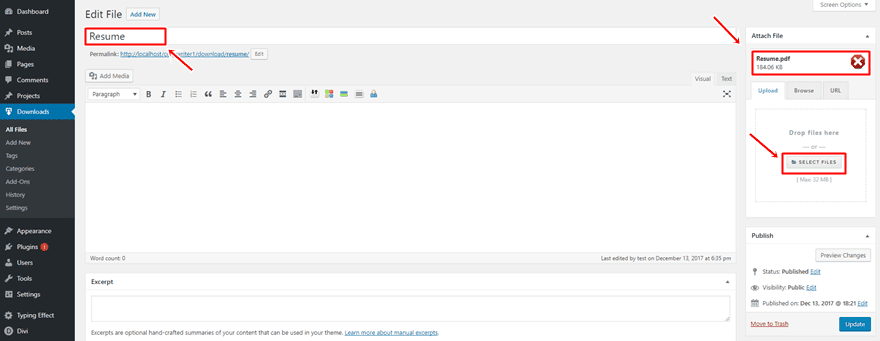
Step 3: Add File, Title & Choose Icon
Then, add a title to your file and upload your resume.
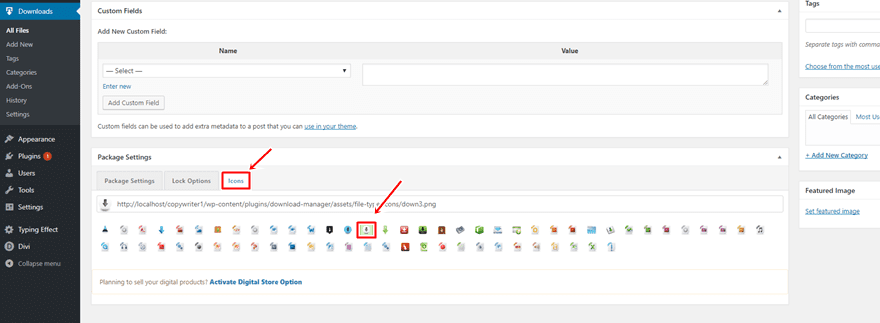
Moving on, scroll down the page and choose a matching icon. For this example, we’ve selected the following one:
Part 3: Add Download Shortcode to Copywriter Layouts
Step 1: Open Homepage with Divi Builder
Once you’ve added your resume as a downloadable file, you can add it to your website. Start by enabling the Visual Builder on your homepage.

Step 2: Delete Button Module & Add Text Module Instead
Then, scroll down until you come across the services section and remove the Button Module that’s located at the bottom of it. Instead of using a Button Module, we’re going to use a Text Module that contains our download shortcode.
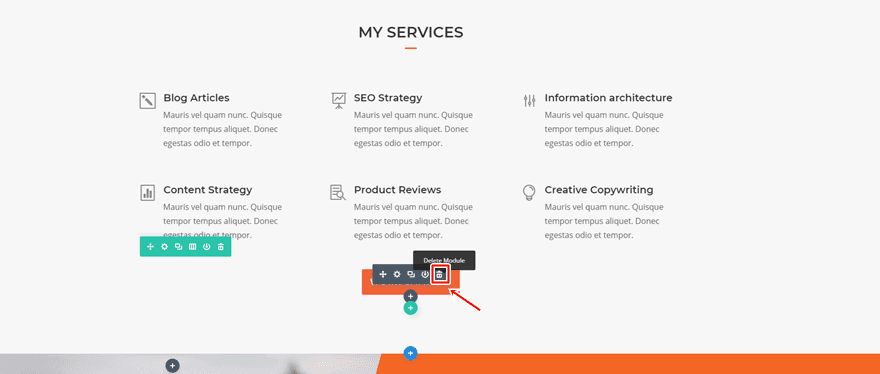
Step 3: Add Download Shortcode
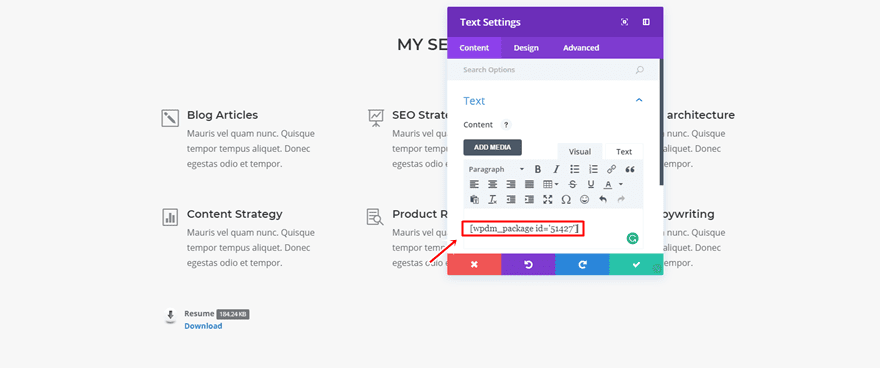
Go ahead and add the shortcode to the Content Box within the Content tab.
Step 4: Add Background Color to Text Module
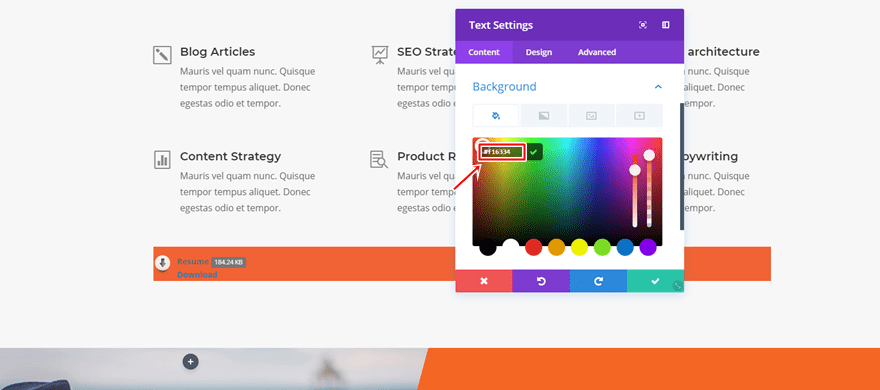
Scroll down the Content tab, open the Background subcategory and add ‘#f16334’ as the background color.
Step 5: Change Sizing Subcategory
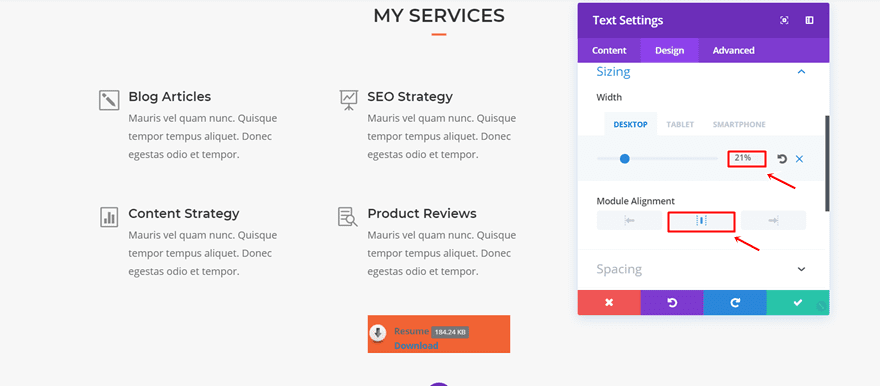
Then, move on to the Design tab and make the following changes to the Sizing subcategory:
- Width: 21% (Desktop), 35%(Tablet), 56%(Phone)
- Module Alignment: Center
Step 6: Add Padding to Text Module
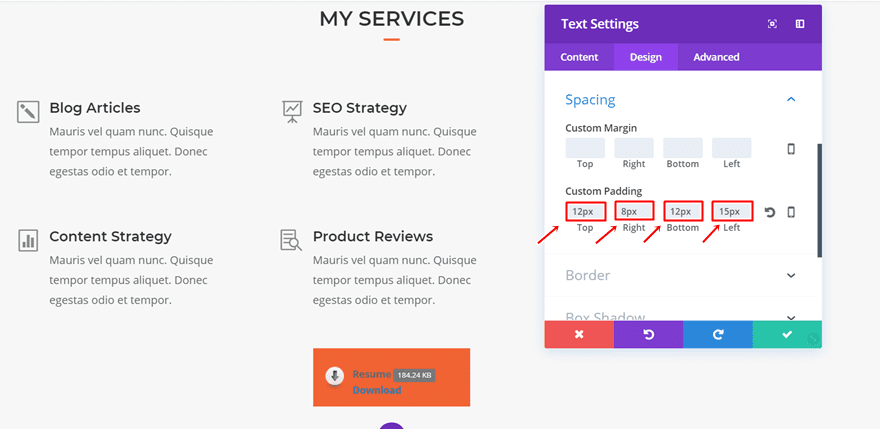
Next, open the Spacing subcategory and add the following padding to your Text Module:
- Top: 12px
- Right: 8px
- Bottom: 12px
- Left: 15px
Step 7: Add Rounded Corners to Button Subcategory
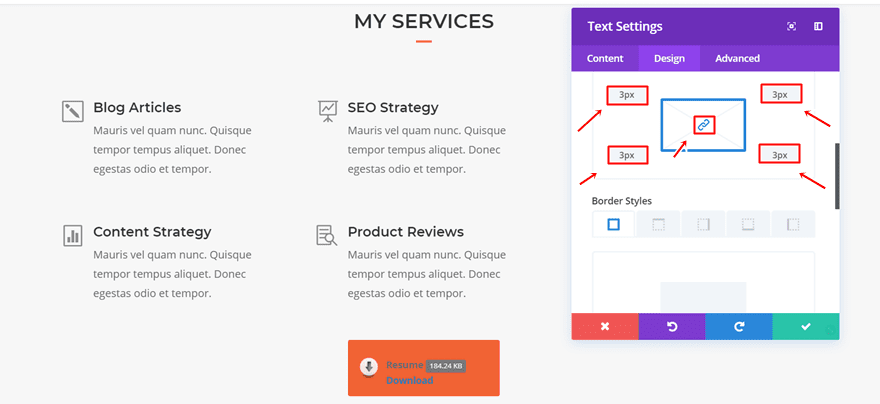
The Text Module needs some rounded corners as well. Open the Border subcategory and add ‘3px’ to all of the corners.
Step 8: Change Text Subcategory
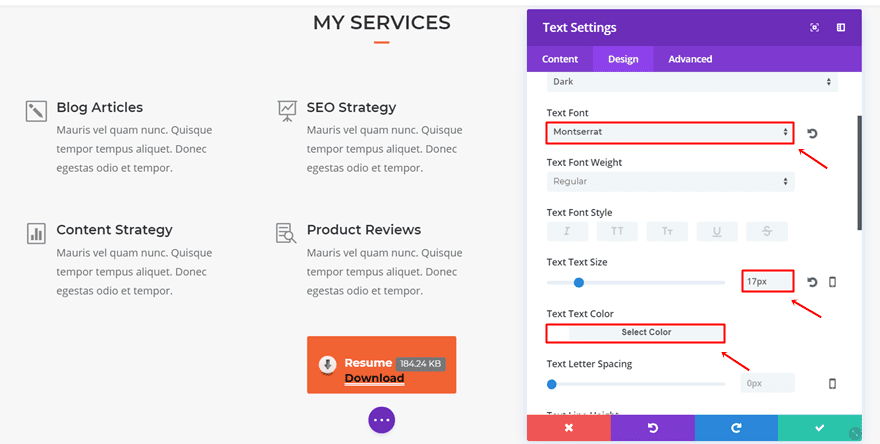
Then, open the Text subcategory and make the following changes to it:
- Text Font: Montserrat
- Text Size: 17px
- Text Color: #FFFFFF
Step 9: Change Link Text Settings
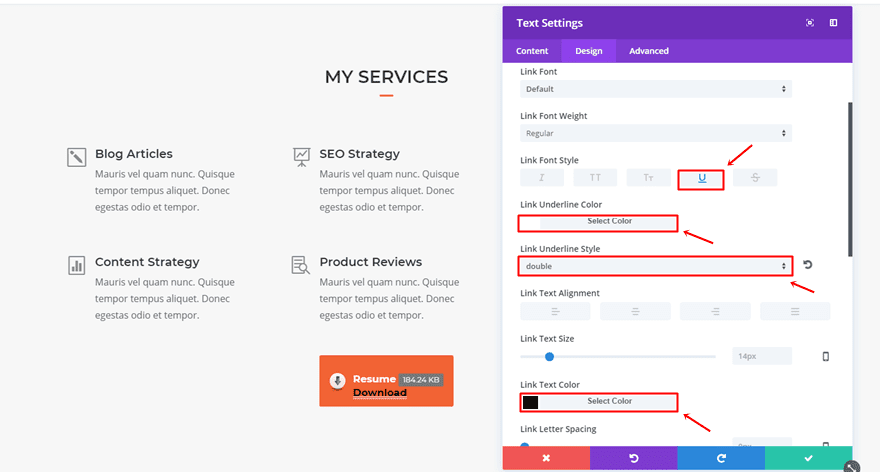
Lastly, use the following settings for the link option:
- Link Font Style: Underline
- Link Underline Color: #FFFFFF
- Link Underline Style: Double
- Link Text Color: #000000
Result
Once you save your modified page and exit the visual builder, you will see the following result show up on your screen:

Part 4: Download & Install Typing Effect Plugin
Step 1: Download Plugin
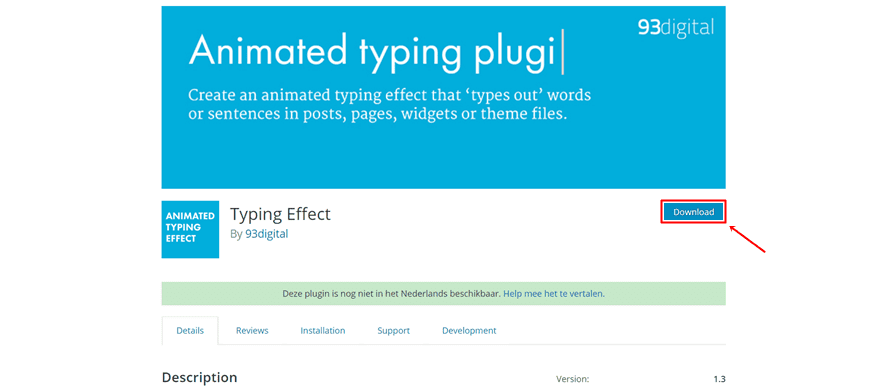
Once you’ve added the resume download to your copywriter website, you can move on to the typing plugin. To download the free plugin, go to the following page and click on the download button.
Step 2: Install Plugin
Then, install the plugin by going to Plugins > Add New > Uploading the plugin. Make sure you activate the plugin as well.

Part 5: Generate Shortcode & Add Shortcode to Copywriter Layouts
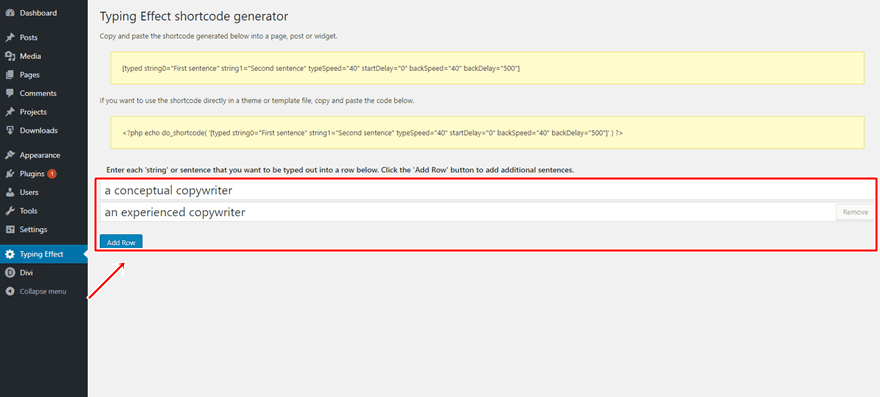
Step 1: Add as Many Sentences as You Want
Once you’ve installed the plugin, you can start using the typing effect for any sentence you want. You can use it for one sentence in particular or add as many sentences that follow up on each other. Using multiple phrases allows you to share more content while people read the typing effect.
Step 2: Change Settings
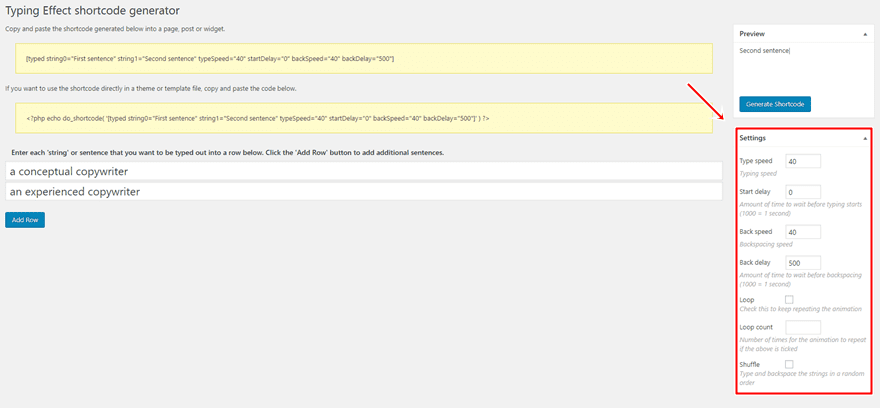
Another thing you can do with this plugin is changing the speed and delay. You can also enable the ‘loop’ options which will keep the interaction going on your page.
Step 3: Generate Shortcode
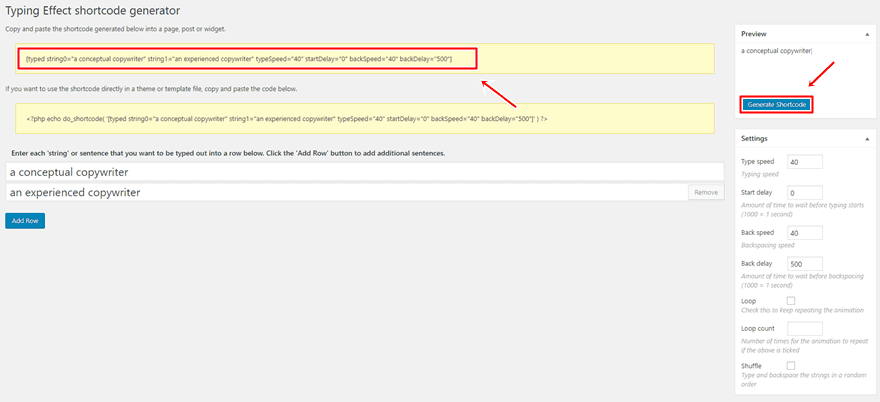
Once you have chosen all of your sentences and modified the settings, you can click on ‘Generate Shortcode’ which will share a custom shortcode that you can add to your homepage. Make sure you copy it beforehand.
Step 4: Replace Text in Text Module with Shortcode
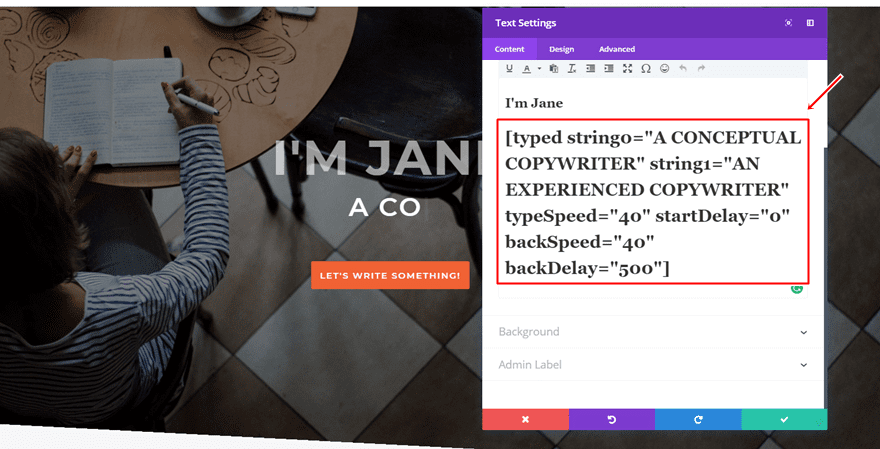
Then, open the homepage with the Visual Builder and replace the second sentence within your hero section Text Module with the shortcode. Make sure that you are replacing the text (instead of removing it) so the appearance of your text remains the same as it was before.
Result
Lastly, make sure that you save your page and exit the visual builder. Your homepage will, now, have the typing effect included which looks like this:

Final Thoughts
In this post, we’ve shown you how you can take your copywriter to the next level with two things; resume downloads and typing effects. This use case goes perfectly with the free Copywriter Layout Pack for Divi and is part of our ongoing Divi initiative where we try to put something extra into your design toolbox each and every week. If you have any questions or suggestions; make sure you leave a comment in the comment section below!
Featured Image by 32 pixels / shutterstock.com
The post How to Add Resume Downloads & Typing Effects to Divi’s Copywriter Layout Pack appeared first on Elegant Themes Blog.
