In case you haven’t noticed already, people like sharing their opinions on the Internet. One natural way to encourage that on your WordPress site is through your blog comments section. But another neat way, and what I’ll be focusing on today, is to create engaging and fun polls for your readers to answer.
Polls allow your readers to quickly respond with their opinion just by clicking a few buttons, rather than needing to type out a full comment from scratch. By making things easier, you lessen the barriers your visitors need to jump over to interact with your site.
In this post, I’ll show you how to use a free plugin to create your very own fun polls. By the end of this post, you’ll be able to create polls like the example below for both your regular WordPress posts, as well as any content that you create with the Divi Builder:

Our Free Tool for the Job: Democracy Poll
If you read our previous post on WordPress poll plugins, you might remember that we featured Democracy Poll as an interesting newcomer back in 2015. Since then, Democracy Poll has made itself onto the active install list of over 5,000 WordPress sites while maintaining an impressive 5-star rating.
Beyond its rating, the plugin is still regularly updated and features an intuitive backend, which is why I recommend it as the best free solution to create fun polls for your WordPress site.
Best of all, it also includes other helpful features that you can turn on or off like:
- Letting users add their own answers (this is the democracy part of the name)
- Allowing users to answer multiple times
- Giving users a chance to change their mind by re-voting
- Only permitting registered users to vote
- Automatically closing the poll on a certain date
All in all, it’s an easy-to-manage, flexible poll plugin for WordPress.
Here’s how to use it to create polls for your site…
Step 1: Install and Activate Democracy Poll
Democracy Poll is free and listed at WordPress.org, so you can install it directly from your WordPress dashboard by going to Plugins → Add New and searching for “Democracy Poll.”
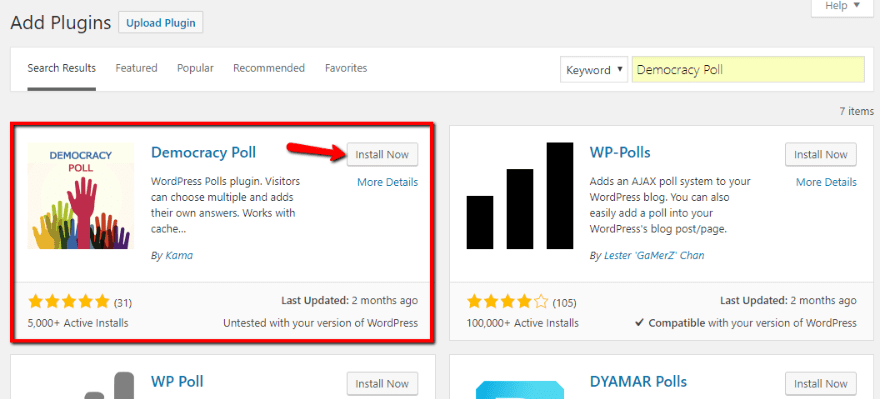
Make sure to activate the plugin. Then, you’re ready to move on.
Step 2: Configure How Democracy Polls Looks
Once you’ve installed and activated the plugin, go to Settings → Democracy Poll to access the plugin’s settings. Then, click on Theme Settings to configure the style for your soon-to-be fun polls.
At the top, you’ll see a preview of how your polls will look on the front-end of your site.
Below that, you can choose a theme and select a background color for your polls:
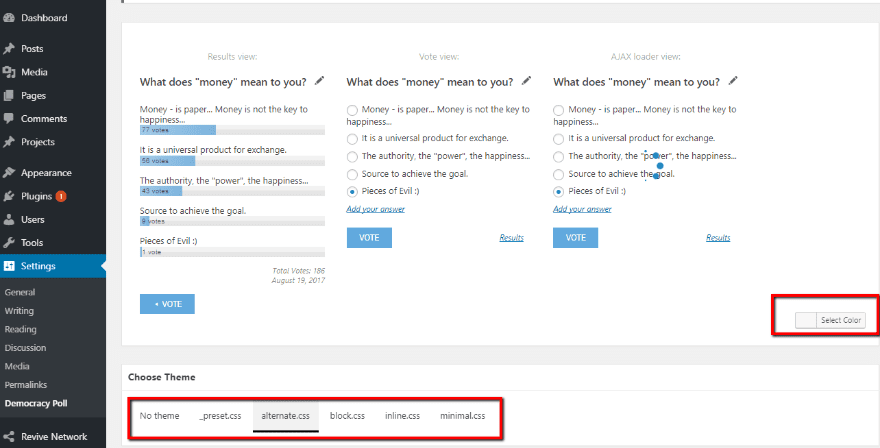
The themes load different CSS style sheets. To select one, all you need to do is click on it. Just be aware, the preview won’t update until you hit the Save All Changes button.
As you scroll further down the page, you can configure other settings like:
- Dimensions
- Animation speed
- Progress line
- Button styles
- AJAX loader styles
- Custom CSS
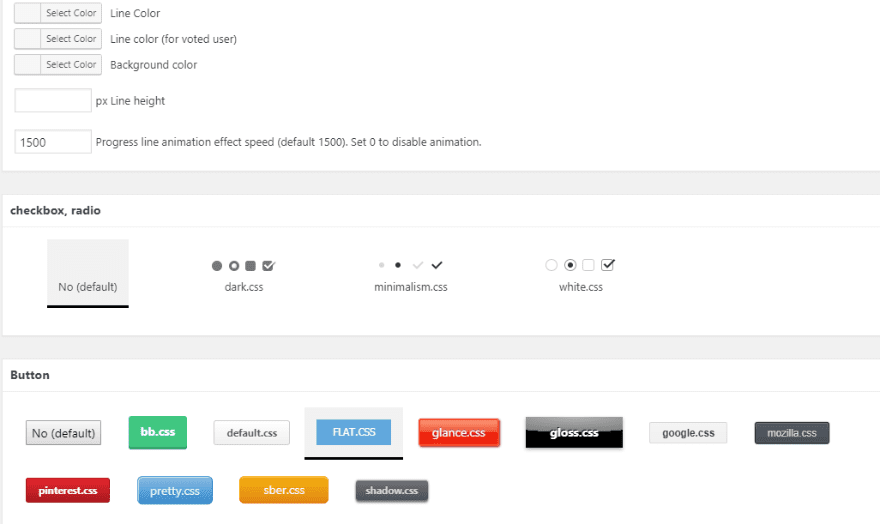
All in all, you have a good deal of flexibility over how your polls look, down to the specific colors and styles used for buttons.
The plugin also makes it super easy to add custom CSS by letting you add your snippets directly from the plugin’s interface.
Step 3: Set Up Global Settings
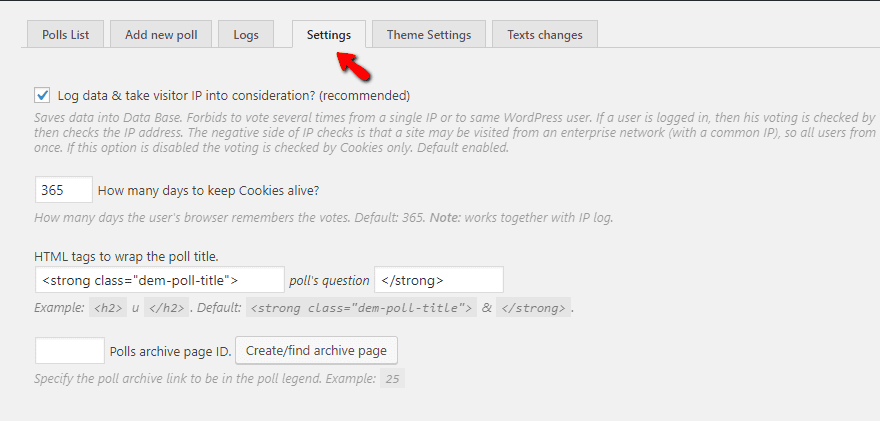
Once you finish styling your polls, your next step is to jump over to the Settings tab to configure the global settings for your polls, as well as some other settings and smaller performance tweaks.
While you can configure most these settings differently for individual polls, you’re basically setting up the “default” functionality that you want to apply to most of your polls.
Before you get to the global settings, though, you can configure a few important details at the top of the Settings page:
- Log data & take visitor IP into consideration – the plugin uses this to restrict poll voting by IP address. If you disable this setting, the plugin will only restrict voting by cookie. That means people can cast multiple votes by doing something as simple as opening a new incognito tab. If you want to ensure accurate polls, you should leave this checked.
- How many days to keep cookies alive? – how long should the plugin track a user by cookie before allowing them to vote on the same poll again.
- Polls archive Page ID – if you want to create an archive page that lists all of your past polls, you can specify that page here to have the plugin create the archive for you.
Scrolling down the page, you can set your default poll functionality in the Global Polls options area. Each option is fairly self-explanatory:
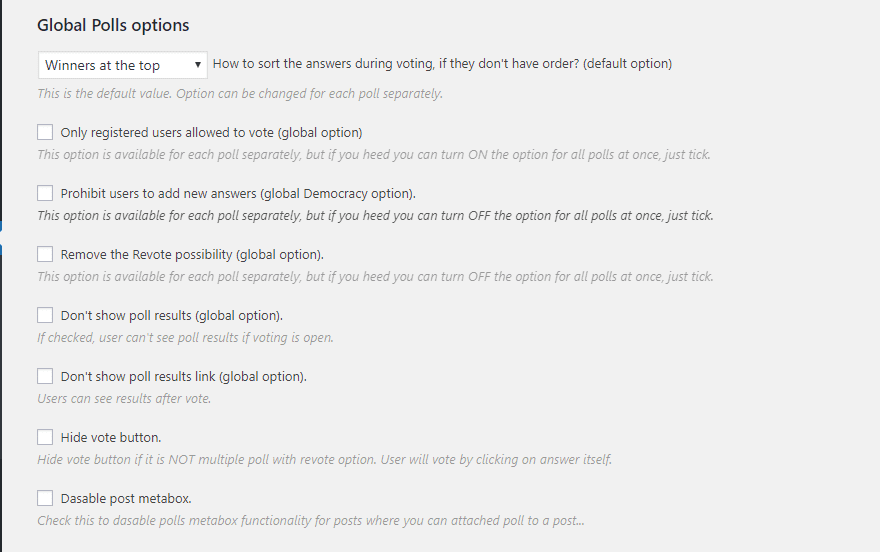
Remember – you’re able to change these settings for individual polls. This just gives you the option to force global changes.
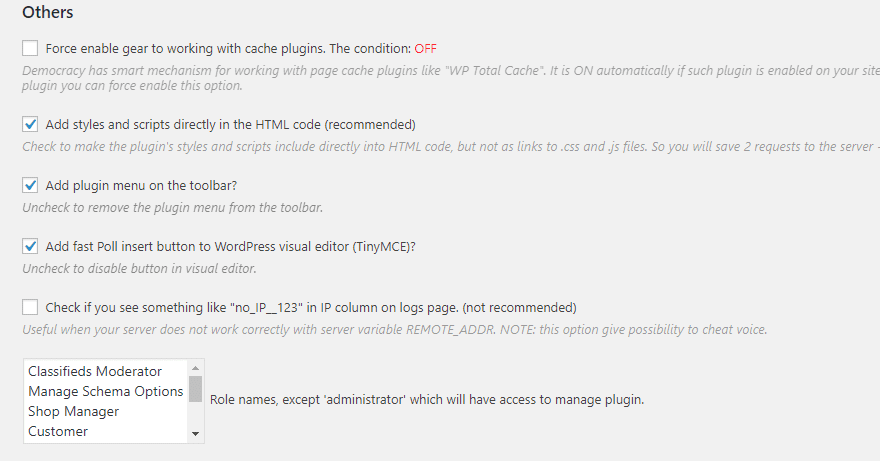
Further down, in Others, you can configure some tiny nitty-gritty details. Honestly, you can probably leave all of these as the default settings unless you’re trying to debug something like a caching issue.
Optional: Change The Text Used by The Plugin
This step is completely optional.
If you want to change the default text used by the plugin, either to edit the English or translate the plugin into a different language, you can do that in the Text changes tab:
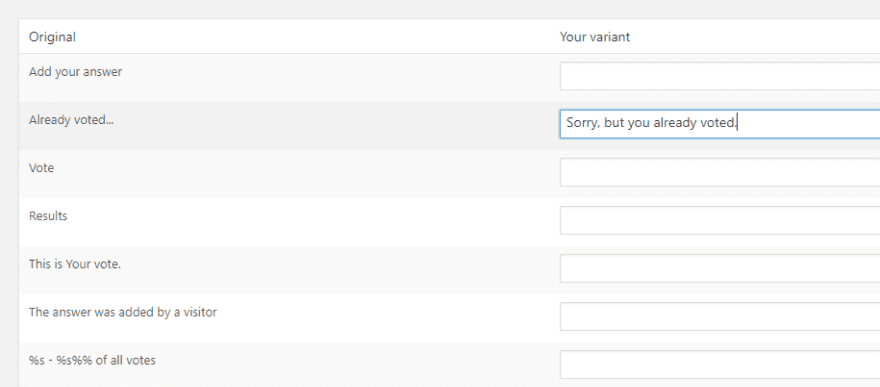
The tab is pretty self-explanatory – just put your edit in the box to the right of each string used by the plugin.
You can translate every single string used by the plugin, which makes Democracy Poll easy to localize.
Step 4: Create Some Fun Polls
Once you’ve got everything configured, you’re ready to start making some fun polls for your readers!
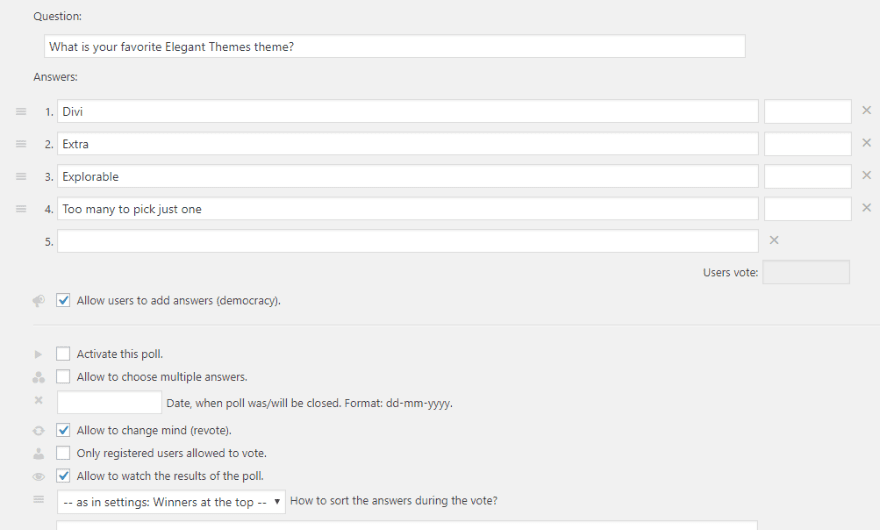
To do that, head to the Add new poll tab and fill in information for the question you want to ask, as well as the default answers you want to let readers select from.
Make sure to also configure the settings at the bottom. Then, click Add Poll:
Step 5: Embed Your Polls On Your Live Site
Once you click Add Poll, the plugin will give you a shortcode that you can use to embed your poll anywhere on your site:
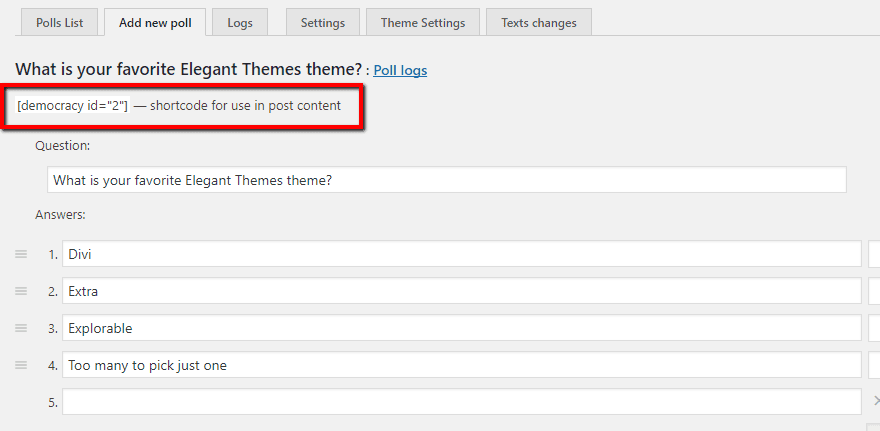
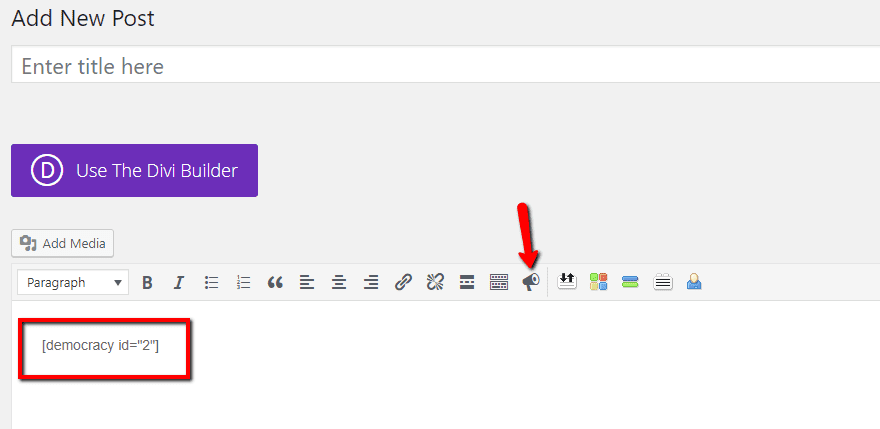
If you want to embed your poll in the regular WordPress Editor, just paste the shortcode anywhere in the WordPress Editor. You can also use the TinyMCE button to insert polls directly:
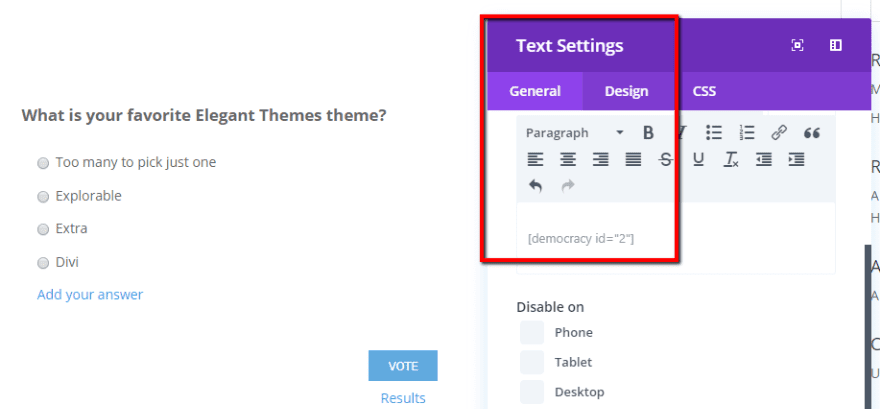
You can also easily embed your polls in content that you create with the Divi Builder. All you need to do is paste the shortcode into a Text or Code module and you should see it rendered right there in the Divi Builder visual interface:
How to Manage Your Polls
Another nice thing about Democracy Poll is that it includes an intuitive poll management interface.
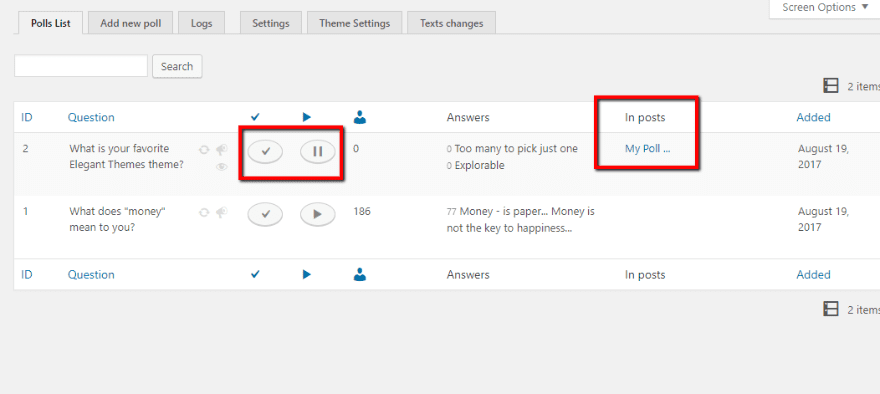
In the Polls List tab, you’ll see a summary of all your polls, as well as buttons that let you quickly Close or Pause any of your polls without leaving the interface.
One of my favorite features here is that you can also see exactly which posts you’ve included the poll in, which makes it quite easy to keep track of all the different polls you have running on your site:
Wrapping Things Up
Fun polls are a great way to engage readers on your WordPress site. Better yet, they’re surprisingly easy to implement thanks to the free Democracy Poll plugin.
With it, you can quickly create polls from a limited set of items or let your readers submit their own answers to hear their true thoughts.
Now over to you – have you ever experimented with polls on your website? If so, did they have a positive impact on engagement with your readers?
Featured Image via jabkitticha / Shutterstock.com
The post How to Create Fun Polls for Your Readers in WordPress appeared first on Elegant Themes Blog.
