Using dynamic content in Divi can be extremely helpful for injected dynamic product data throughout your product page. This allows you to create dynamic product page layouts with ease. Divi’s dynamic content feature also allows us to add inline dynamic content by adding blocks of content before and after the dynamic content element. For example, we can add the label “Price:” before the Product Price dyamic content element or even customize a contact form title to include the Product Title for a more targeted call to action.
In this tutorial, we will show you how to add inline dynamic content to your Divi product page in a few creative ways.
Let’s get started.
How to use the Before and After Inputs for Dynamic Content
Dynamic Content can be added to any content within Divi Modules. To add dynamic content to a Divi module, open the module settings, hover over the content input field, and select the dynamic content icon that appears.
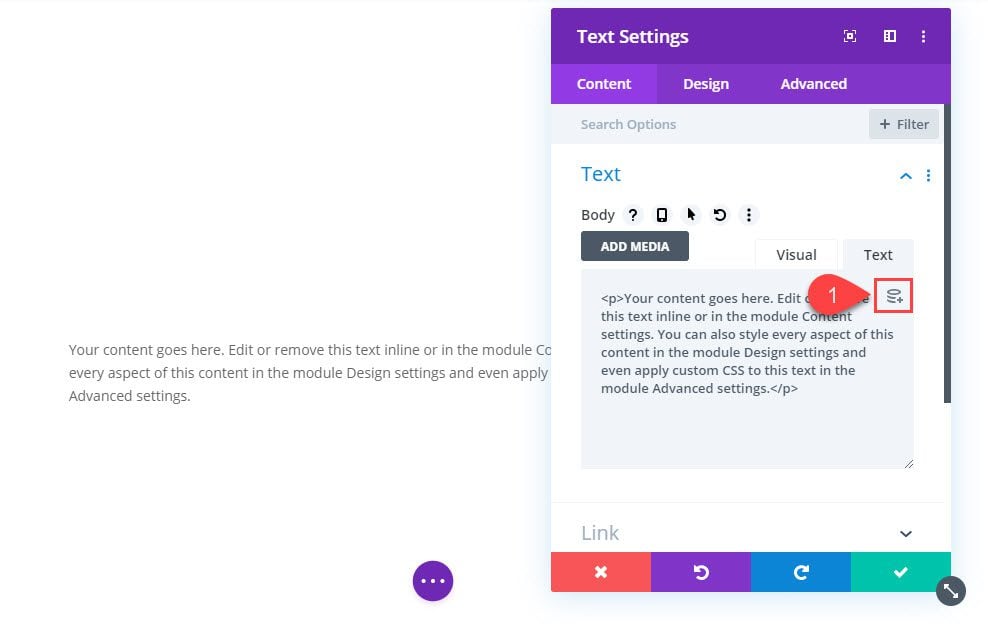
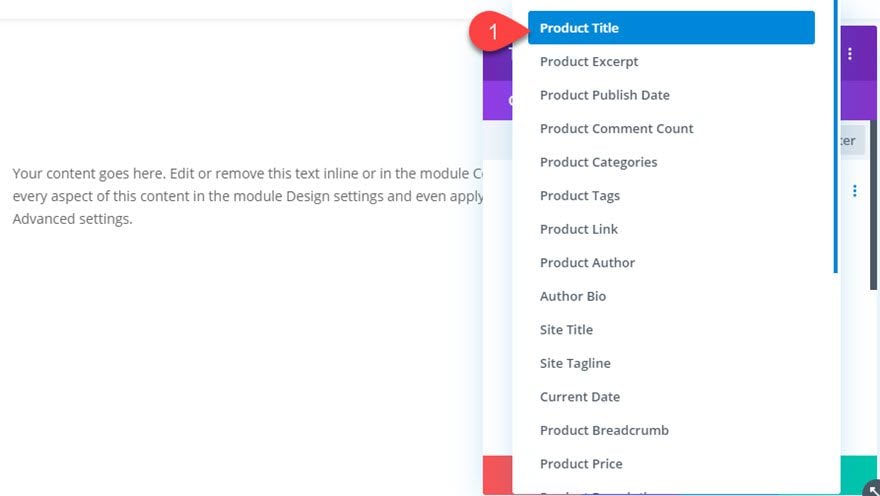
Then select the dynamic content element from the dropdown list. For this illustration, the product title is being added to the body content of a text module on a product page.
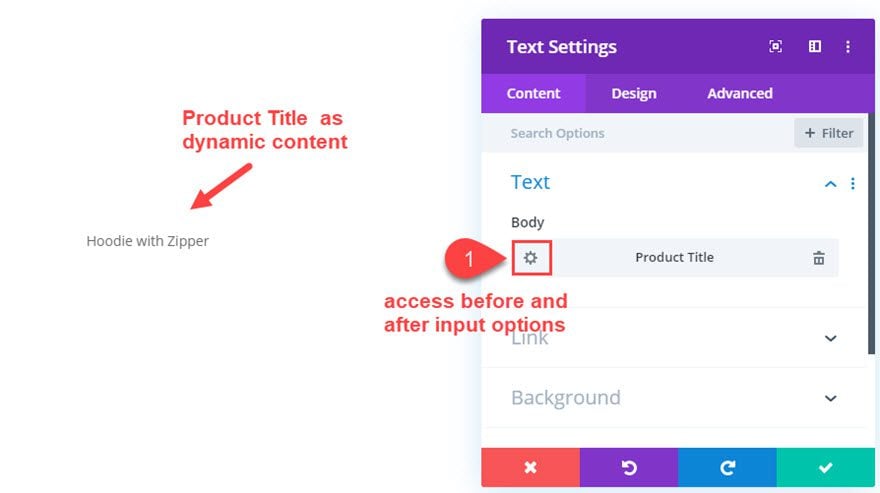
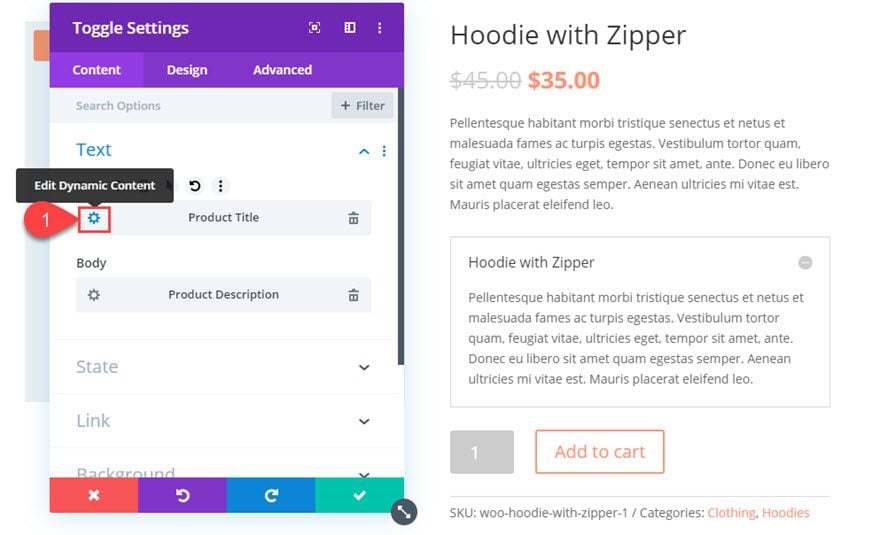
Now the product title will show dynamically as the text module content. To access the before and after input options, click the gear icon on the dynamic content product title element.
There we have the option to add content before and/or after the dynamic content (which in this case is the product title). For this illustration, text is added before and after the product title to create a sentence.
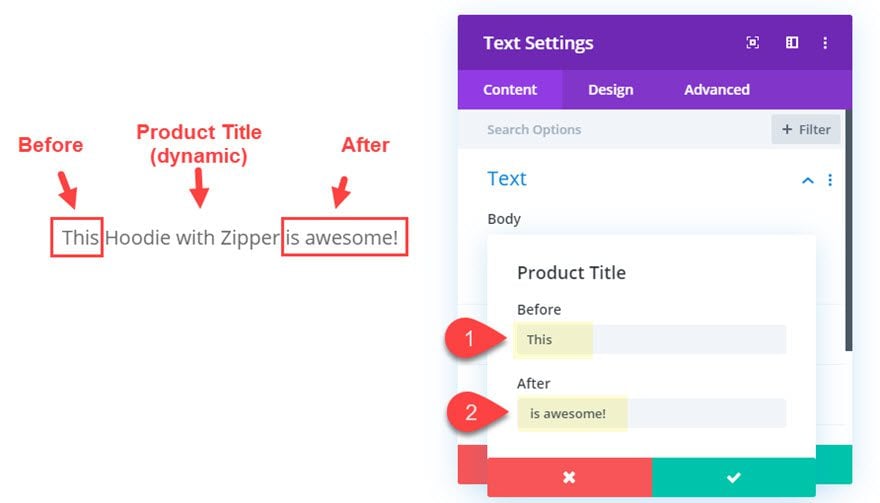
The sentence now contains a piece of inline dynamic content that will change whenever the product (or product title) changes in the backend. And if you are using this technique to create a product page layout to be used on other products, the module will work seamlessly to incorporate the new product title within the sentence.
Now that you understand the basic idea, let’s go over a few specific examples of how you can customize your product page with inline dynamic content.
Creating a Toggle Title with the Product Title as Inline Dynamic Content
For this first example, we are going to create a custom toggle module with inline dynamic content for the title. We will be adding it to a product page in order to include the product description as the toggle content.
Here’s how to do it.
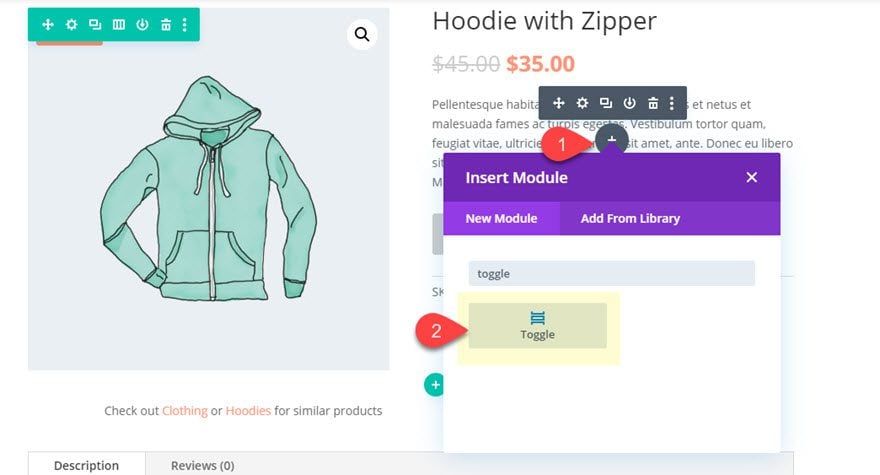
Deploy the Divi Builder on the front end of the WooCommerce product page for a product you created. Then add a Toggle module under the default Woo Description module.
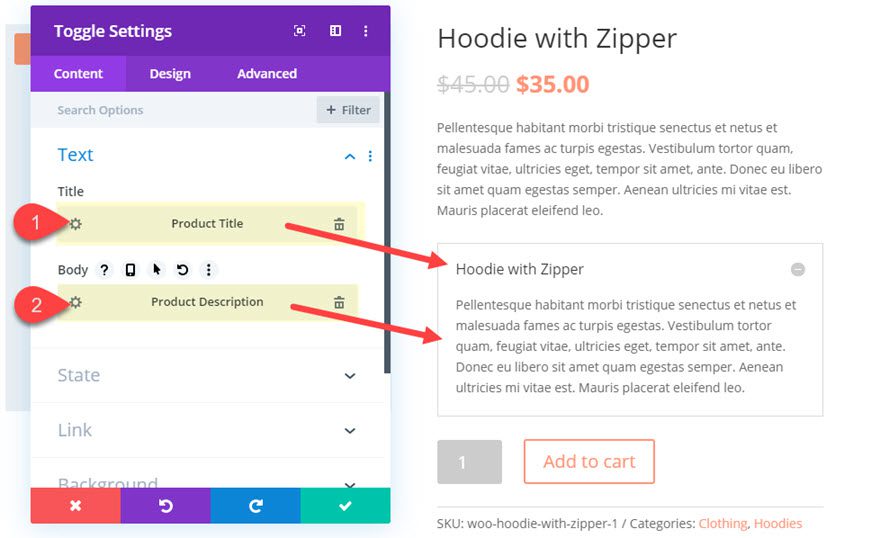
In the Toggle Settings popup, add the Product Title as dynamic content for the Title. And add the Product Description as dynamic content for the Body.
Then click to edit the Product Title dynamic content.
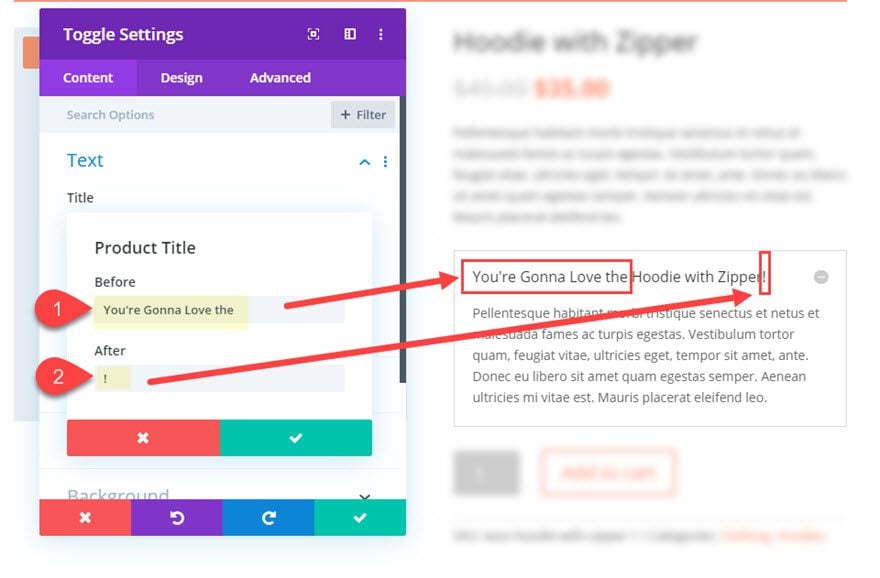
Then update the before and after content as follows:
Before: “You’re Gonna Love the ”
After: “!”
Make sure you add a space at the end of the content in the Before input so that there is a space before the inline Product title.
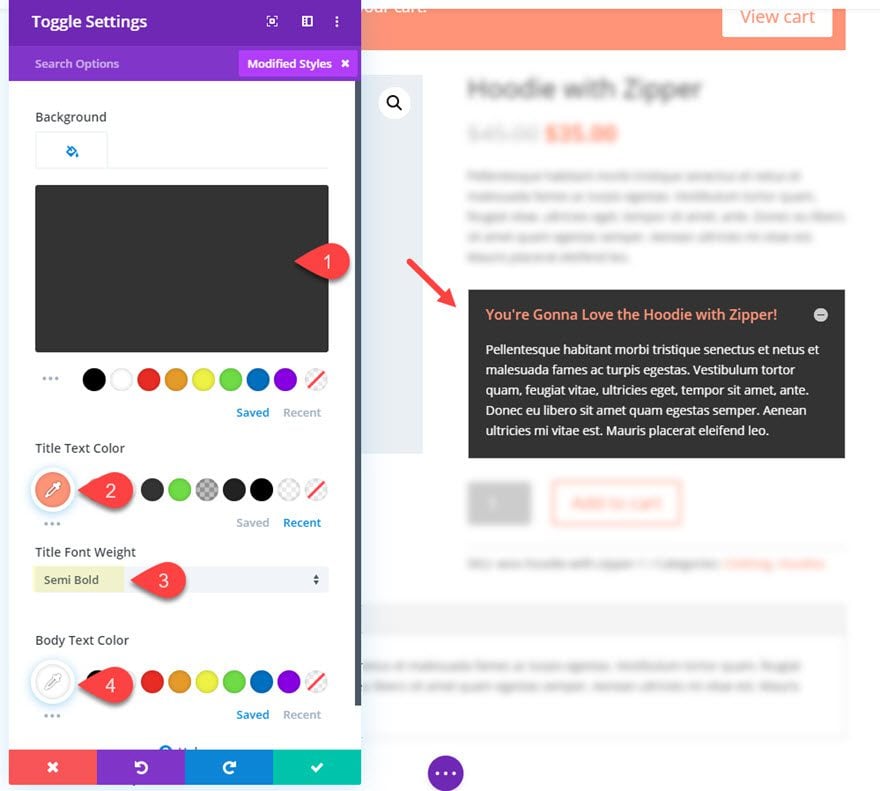
And don’t forget! You can style this entire title using the built in Divi design options. For this example, let’s just give it a dark background and customize the text a little. Update the following settings for the toggle module:
Background Color: #333333
Title Text color: #ff9375
Title Font Weight: Semi bold
Body Text Color: #ffffff
Then delete the default Woo Description module above the Toggle you just created since the description is now inside the Toggle.
Now you have a toggle that has a custom title with inline dynamic content pulling in the product title.

Part 2: Contact Form with Inline Dynamic Content
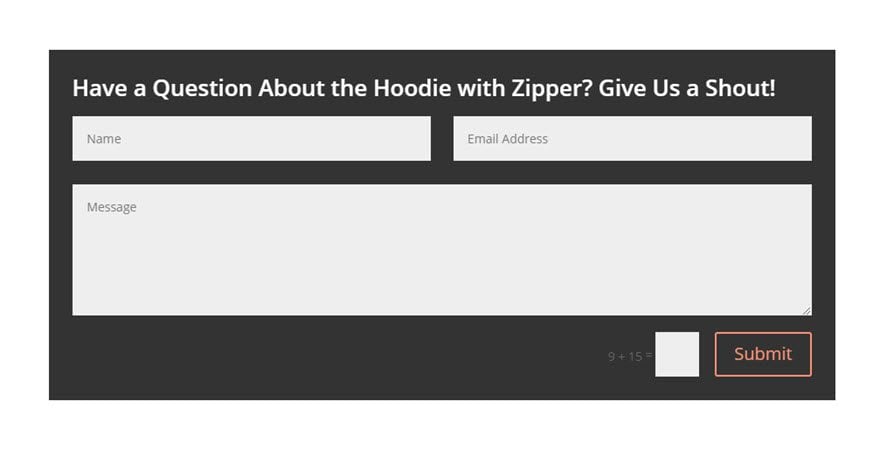
For this next example, we can use the very same process to customize the title of a contact form to include the product title as inline dynamic content for an enticing call to action.
Add a contact form to the product page. Then add the Product Title as dynamic content for the Title of the Contact Form.
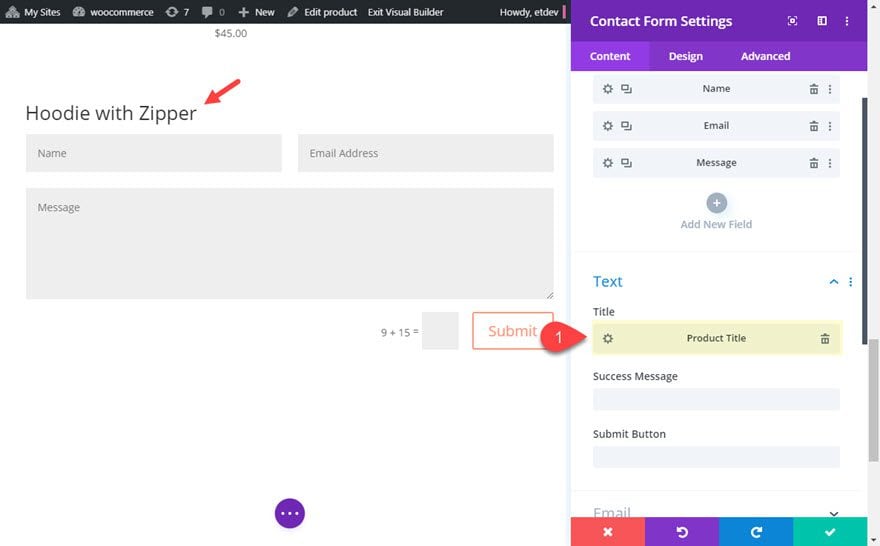
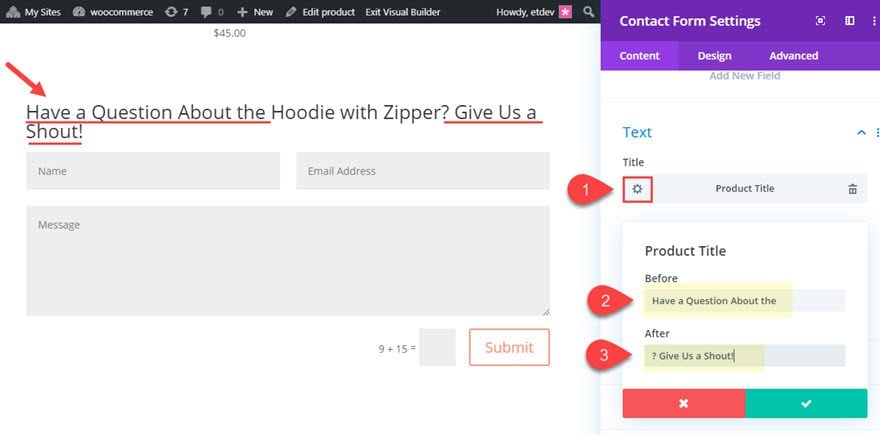
Click the gear icon to edit the Product Title Dynamic Content and update the before and after content as follows:
Before: “Have a Question About the ”
After: “? Give Us a Shout!”
Then we can customize the contact form and title text as follows:
Background Color: #333333
Title Font Weight: Semi Bold
Title Text Color: #ffffff
Title Line Height: 1.3em
Padding: 3% top, 3% bottom, 3% left, 3% right
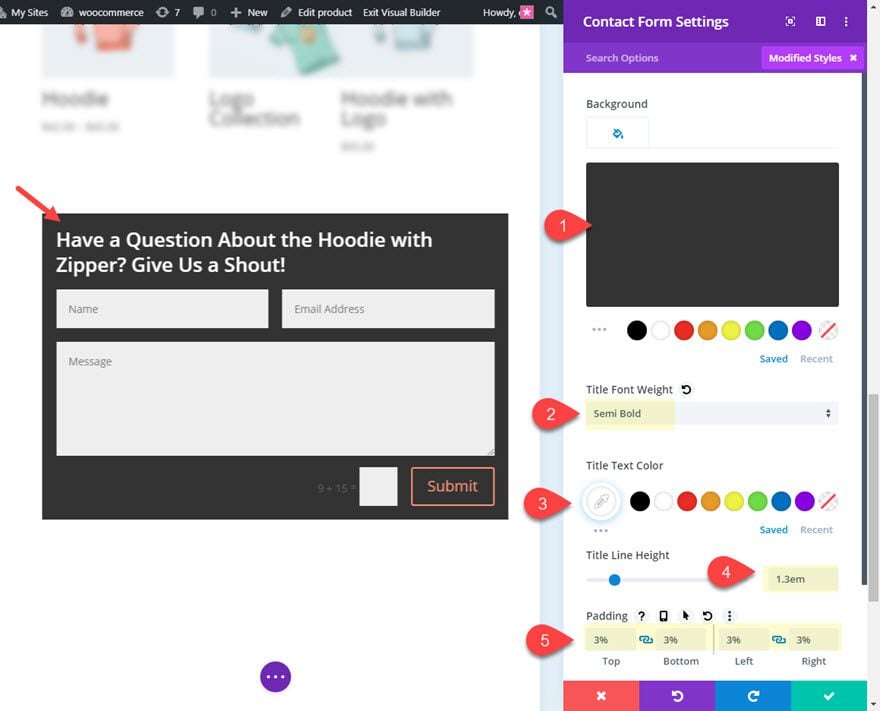
Now you have a contact form with a custom title with inline dynamic content that improves the call to action by adding the product title within the title.
Customizing the Product Price with Inline Dynamic Content
In this last example, we are going to add some inline dynamic content to the product price element for the product page.
Under the default product price module, add a text module with the Product Price as dynamic content for the body content.
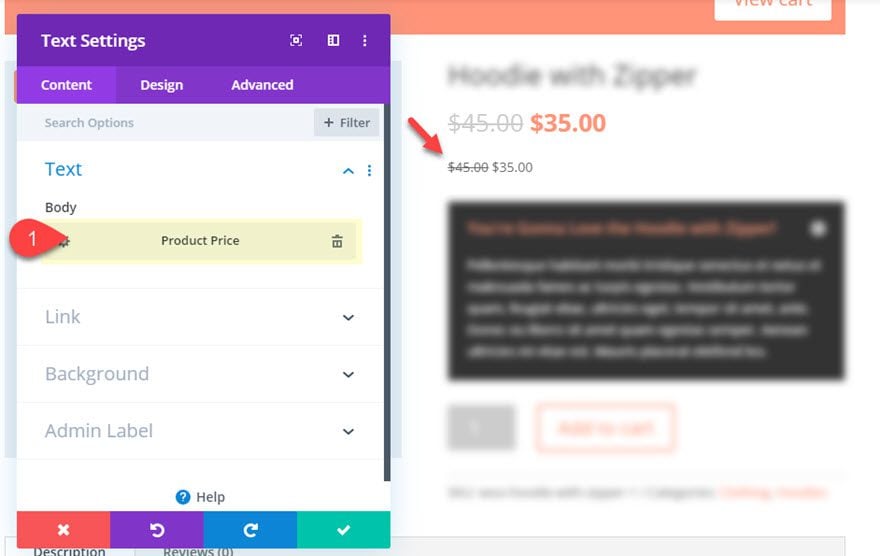
Then update the before and after content as follows:
Before: “Price: ”
After: ” (plus FREE shipping)”
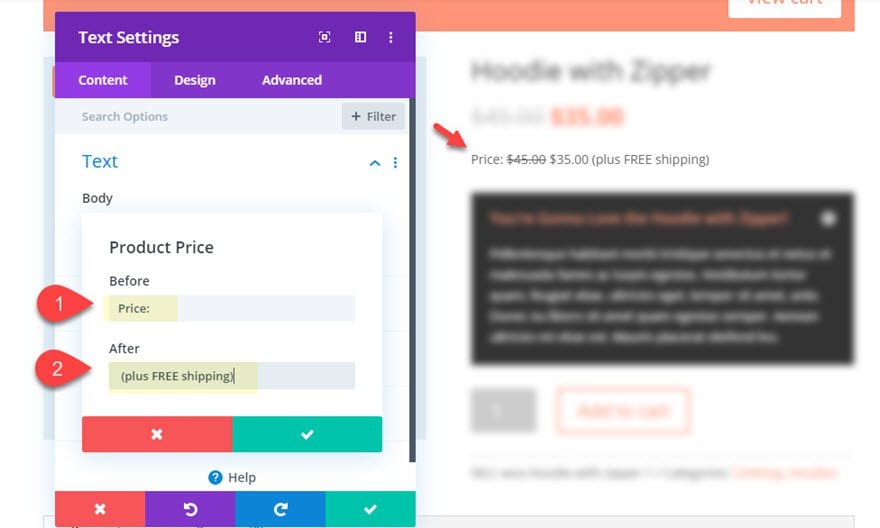
Now you have a custom Product price with inline dynamic content.
Enabling Raw HTML for inline dynamic content
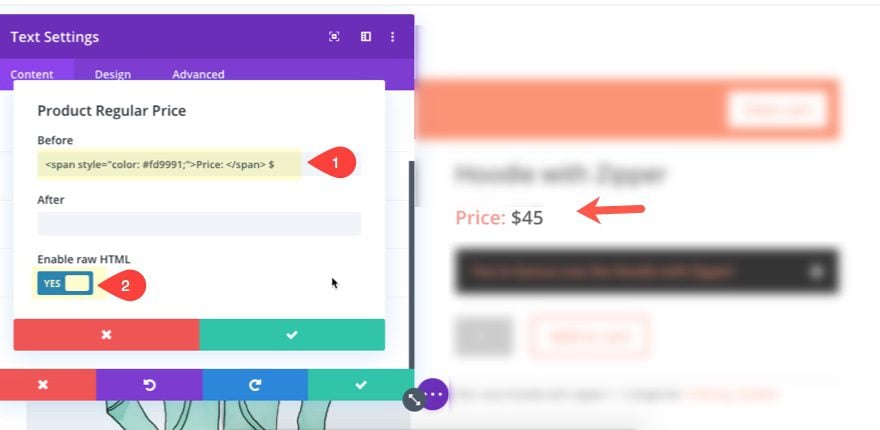
Some dynamic elements (like new product price and old product price), will have the option to enable raw html. This will all you to add HTML code to the before and after inputs.
For example, we could add the New Product Price dynamic content element to a text module. Then we can add the label “Price:” to the before element and wrap it in a tag with inline styling to make the labe a different color than the price.
Final Thoughts
If you aren’t familiar with Divi’s built-in dynamic content capabilities, hopefully this article will inspire you to explore adding some unique inline dynamic content to improve your product pages.
I look forward to hearing from you in the comments.
Cheers!
.inline-code{padding: 0px 4px; color: crimson; font-family: Monaco,consolas,bitstream vera sans mono,courier new,Courier,monospace!important}
The post How to Customize a Divi Product Page with Inline Dynamic Content appeared first on Elegant Themes Blog.

