There are a number of times when you may want to change the author of a WordPress post. For example, if you have a ghostwriter (or several), the original author won’t be the person who you want a post published under. If you have a content hub with a lot of writers, the content is (probably) owned by the publication, not the individual authors, which gives the publication free rein to publish a piece under any author they wish. Or, you may want to change the author of a piece if the writer leaves the publication, changes their name or decides to publish under a pen name.
You may even want pieces to have no author, which gives the impression of a cohesive site where the content, not the author, is front-and-center. Minimalist websites remove any and all clutter, including the author’s name. (All of these situations are acceptable and normal, by the way, and quality publications will explain authorship to writers when they start working together.)
It’s simpler than simple to change a WordPress author – this may be the easiest WordPress tutorial you’ll ever read. But even though the process is easy, WordPress doesn’t make it obvious – it’s not the kind of thing a lot of WordPress users quickly find or figure out on their own.
There are a few methods for changing the author of a WordPress post. We’ll go through all of them. First, though, let’s quickly cover how to add a new author to WordPress and get their account up-to-speed.
Adding a New Author to WordPress
You can only change the WordPress author of an article if that user has already been added to your WordPress account. Note that in order to add a new user, you have to have Administrator access. Here’s how to add a user:
- Login to WordPress
- Click “Users” in the left sidebar
- Click “Add New” on the “Users” page
- Fill in the required info and click “Add New User”
Once you have all of your authors added to WordPress, you can easily set authorship per post.
Editing User Settings
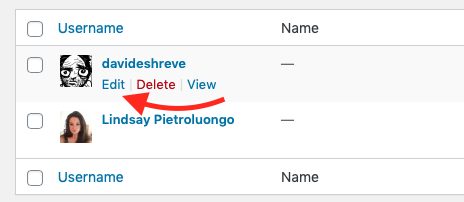
Your authors are a reflection of your website and content, and you may want to flex a little bit of control over how they’re displayed and portrayed. To edit a user in WordPress, click “Users” in the left sidebar, then hover over the user and click “Edit” underneath.
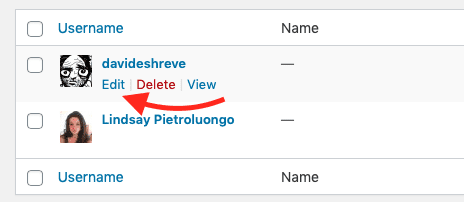
You have a lot of options here:
- Generate a new password for the user
- Disable the visual editor so that the author can only write in the text editor
- Change the headers and descriptions on author and archive pages, and enable/disable the author box in their archive and on posts
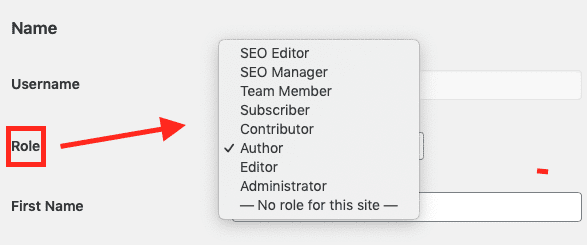
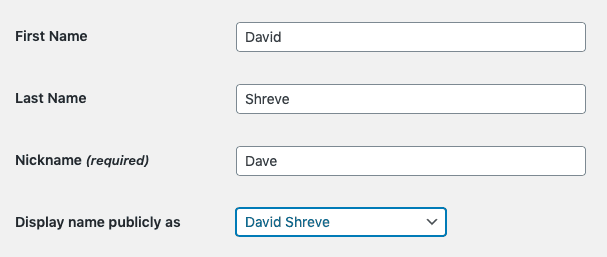
- Update the user’s role, first and last names, nickname and display name
Insider Tip: If you don’t see any author attribution on live posts, go back to the user settings page and make sure you’ve checked both “Author Box” options. (P.S. This is only an insider tip because I made this mistake myself.)

Updating the Author’s Display Name
I briefly went over this in the list above, but let’s flesh it out. There are many circumstances when you’ll want to update an author’s display name. Maybe you want their full name displayed instead of their username, or they’ve legally changed their name and now want that shown on their posts. An author may also want to use a pen name or for their name to be written in the exact same way as on other sites where they’re published.
Changing the display name is super easy, and changes are made in user settings, not on posts (you’ll need to be an Administrator to do this). Go to Users in the left sidebar, then click “Edit” under the user’s name. Scroll down to the “Name” section and make your changes. Then, click the “Display name publicly as” dropdown and make your choice:
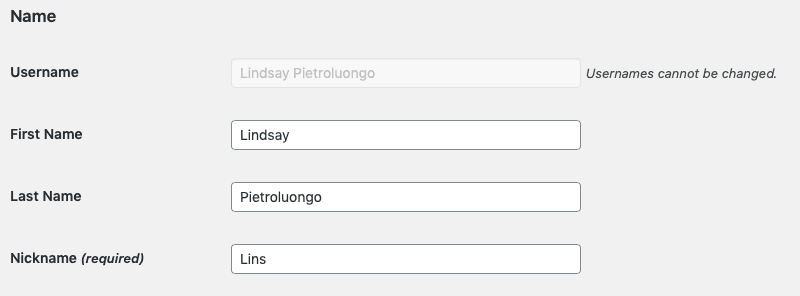
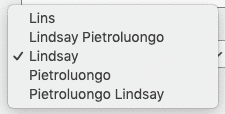
When you’re finished, click “Update Profile” on the bottom of the page. All posts will be changed to reflect the new display name.
Updating the Author’s Slug
When you go to an author’s archive page, the “slug” is the name given to the author that shows up in the URL. My WordPress username is Lindsay Pietroluongo, so the slug comes out like lindsay-pietroluongo:
![]()
If you want to change the WordPress author slug, you don’t have to change your username. Instead, use the Edit Author Slug plugin.
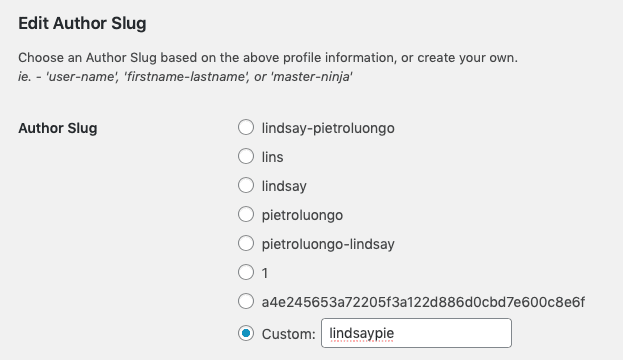
After installing and activating the plugin, go to your user settings. Scroll down until you see the “Edit Author Slug” section. You have a few options, including creating a custom slug, which is what I used below.
![]()
Anytime you change permalink structure, you should set up redirects. We have an article about how to do that.
Changing Your Username
Even though this article is about changing or removing the author of WordPress posts, I want to quickly touch on what it takes to change your actual WordPress username, which is “unchangeable,” at least in native WordPress. There are a couple of convoluted ways to do it, like editing your website’s database or creating a new account, transferring ownership and then deleting your old account. However, the simplest way to change your username is to use a plugin like Easy Username Updater (or something similar).
Changing the Author to Another User in Block Editor
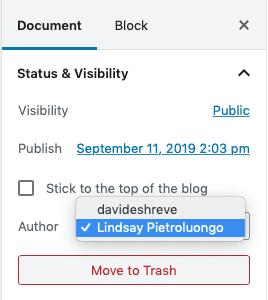
Now that you have your authors added, here’s how to change the author to another user in the block editor:
- Click “Posts” and then “All Posts”
- Choose the post you want to change the author of and click “Edit”
- Click “Document” in the right sidebar
- Find “Author” under “Status and Visibility”
- Open the dropdown menu to change the author
- Click “Update” to confirm the change
Changing the Author to Another User in Classic Editor
Here’s how to change the author to another user in the classic editor:
- Click the “Screen Options” button on the top-right of the page
- Check the “Author” checkbox
- Scroll down – you’ll see the “Author” dropdown box below the post
- Change the author and click “Update”


Changing the Author Using Quick Edit
Whether you’re using the block editor or the classic editor, you can also change the author using “Quick Edit.”
- Click “Posts” in the left sidebar
- Hover over the article you want to update
- Choose “Quick Edit” under the title
- Change the author in the “Author” dropdown menu


Changing the Author for Posts in Bulk
If you have to change the author of multiple posts, like if a contributor leaves your site and you want to reassign the articles to another author, you can make the change in bulk instead of going into the individual posts.
- Click “Posts” and then “All Posts”
- Select the posts you want to change (or hit “Title” to select them all)
- Click the “Bulk Actions” dropdown menu and select “Edit,” then hit “Apply”
- A window will open with several options, including the author dropdown
- Click “Update” on the bottom-right of the window when you’re finished
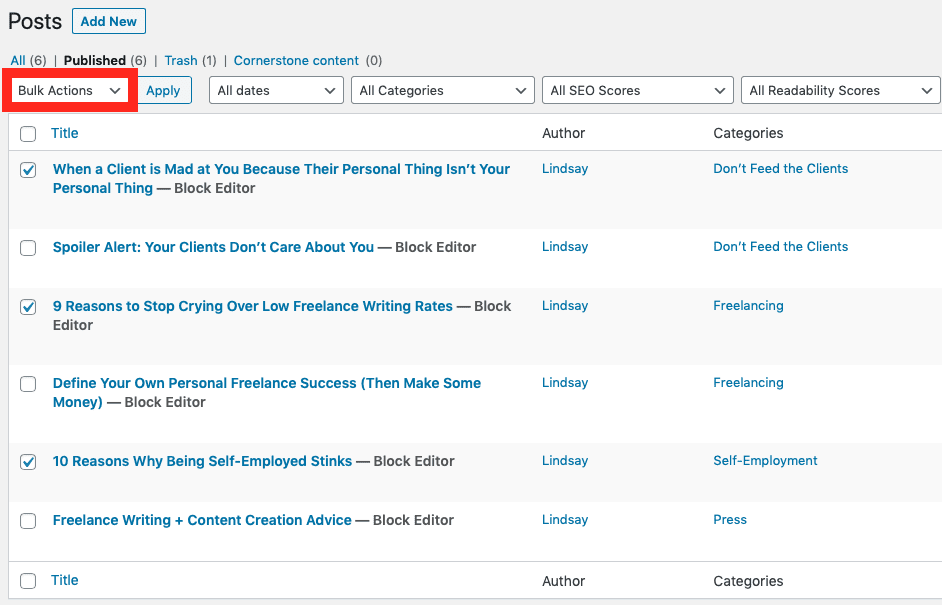

You can only assign one new author to the articles you’re editing, so if you need to change several posts to reflect several different authors, you’ll have to bulk edit a few different times.
Insider Tip: Can’t get that editing window to show up? I had a very difficult time with this at first, because I couldn’t get the editing window with the author dropdown to show. Apparently, some plugins will accidentally deactivate the bulk edit options. I deactivated my plugins one at a time until I found the culprit (it was the Genesis Title Toggle plugin). Deactivate the plugin, make your changes in the bulk editor, then reactivate the plugin. The bulk changes won’t revert once you reactivate it.
Hiding Authors on WordPress Posts
There are a few reasons why you may want to leave authors off your WordPress posts – minimalism, a greater focus on the content or to clear clutter if you’re always the one and only author. Here’s how to hide an author from a WordPress post:
Option 1: Disable Each User’s Author Box
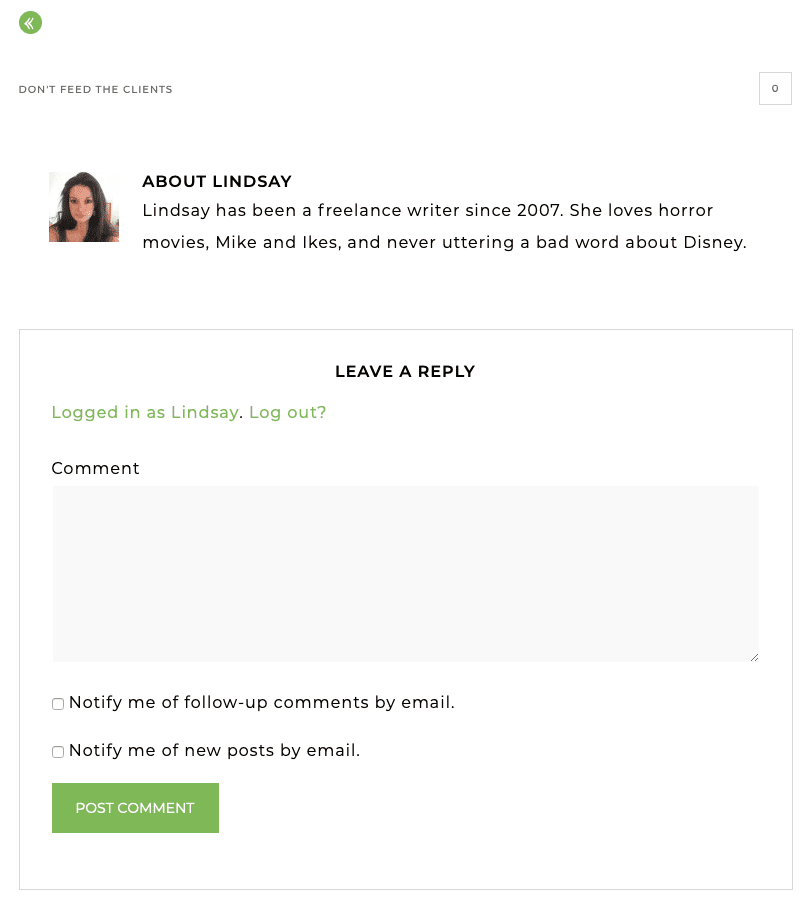
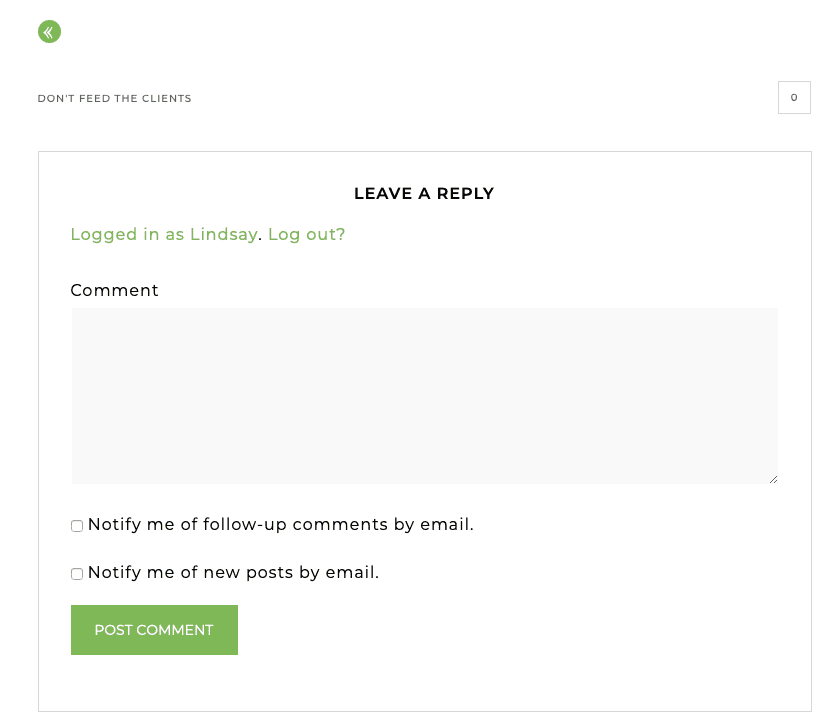
If you don’t have many contributors, the easiest strategy is to go into each user’s settings and uncheck the “Author Box” options. Here’s what a post looks like with and without the author box enabled:
Option 2: Edit the CSS
If you have a ton of users and you don’t want to go into each of their settings, you can hide authors on posts by editing the CSS. The process for this will vary based on your theme, though. We have a video about how to add code to hide authors and, if that doesn’t work, how to find the code that you should remove. If you still can’t get it to work, though, you’ll have to contact the theme creator for more specific directions.
Option 3: Use a Plugin
Messing around with CSS is risky, and if you don’t feel comfortable making advanced changes, you can use a plugin instead. We recommend the WP Meta and Date Remover plugin. Just install and activate it, then decide how to hide metadata.
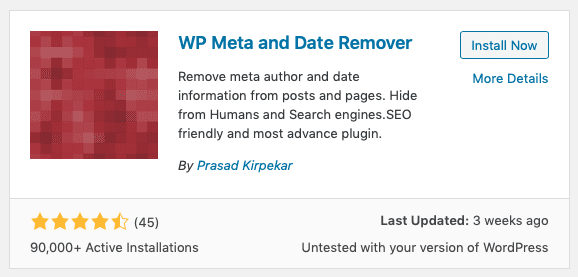

Source: WP Meta and Date Remover Plugin Page
Honorable Mention
The Simple Author Box plugin isn’t exactly for hiding metadata, but I wanted to mention it because it can help you further customize your blog’s appearance. The plugin has a lot of options, like moving the position of the author box, deciding what to link the author’s name to (if anything) and personalizing social icons.

Source: Simple Author Box Plugin Page
Wrapping Up
Think about the reason why you have to change WordPress authors and determine the scale of the change. Then, figure out the easiest, most efficient way to make those changes. Don’t over-work – if bulk editing will get the job done, don’t bother going through posts individually. If updating a display name is what’s needed, don’t go through the trouble of creating another user. Keeping authors and posts organized is important for running a professional, navigable site, but this shouldn’t eat up any more time than necessary.
Excited to learn even more WordPress tips and tricks? You may want to attend one of these WordPress events in the next few months.
Featured Image via Gungwiyat / shutterstock.com
The post How to Easily Change the Author in WordPress appeared first on Elegant Themes Blog.

