While a mass email service like Gmail is popular, recognizable, and user-friendly, it’s missing one very important thing: your branding. By using SiteGround email along with your domain name, you can have an email address that looks professional and showcases authority. Plus, with clever integration tools, you can still use Gmail (or another email client) to manage your email. Or, you can opt to keep your branded webmail separate from the rest of your email by using SiteGround’s integrated webmail portal.

In this article, we’re going to walk you through how to set up an email address on SiteGround, how to find your webmail, and what to do if you want to connect it to another email client. Spoiler alert: It’s all ridiculously easy.
SiteGround Email and Website Tools
Let’s start by getting into SiteGround and accessing the Site Tools. After going to SiteGround.com, the Login link is on the top-right of the homepage. After logging in, you’ll see a page that looks similar to this:

Navigate to Websites, then click Site Tools to the right of the site you’ll be working with.

Then, you’ll be brought to a page that looks like this:
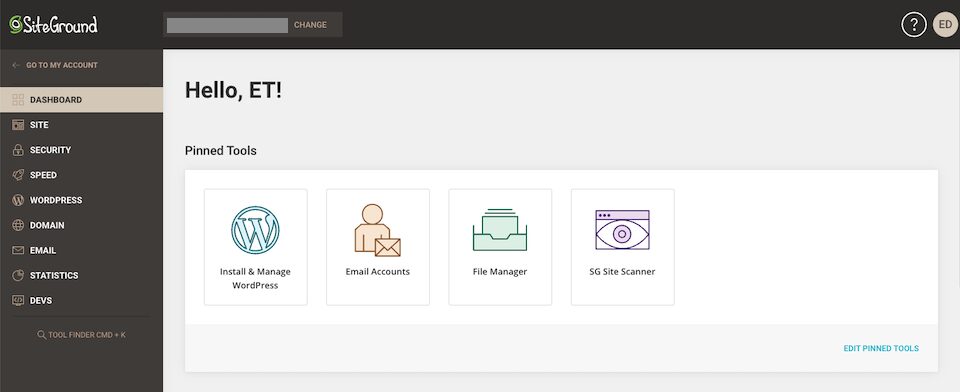
Along the left sidebar, you’ll see the different Site Tools you can access:
- Dashboard: Pin frequently used tools to the top, like WordPress installation or the file manager. See site information and statistics at a glance.
- Site: Access the site’s file manager and other management systems, like FTP and MySQL.
- Security: Access security tools, like your backups and the site scanner.
- Speed: Access your caching services and Cloudflare.
- WordPress: Install and manage a WordPress site, create a staging site, migrate a site, and more.
- Domain: Access and edit your domains.
- Email: Set up and manage accounts, or connect your domain to a professional Gmail account.
- Statistics: See traffic, error, and access logs.
- Devs: Access developer tools, like the PHP manager and the app installer.
For the purposes of this article, we’re going to be working in the Email section.
How to Set Up Email on SiteGround
No matter which SiteGround hosting plan you’re on you can create an unlimited number of free email accounts attached to your domain name. From the SiteGround homepage, go to Websites and select Site Tools next to the one you want to create an email address for (if you’re not there already).

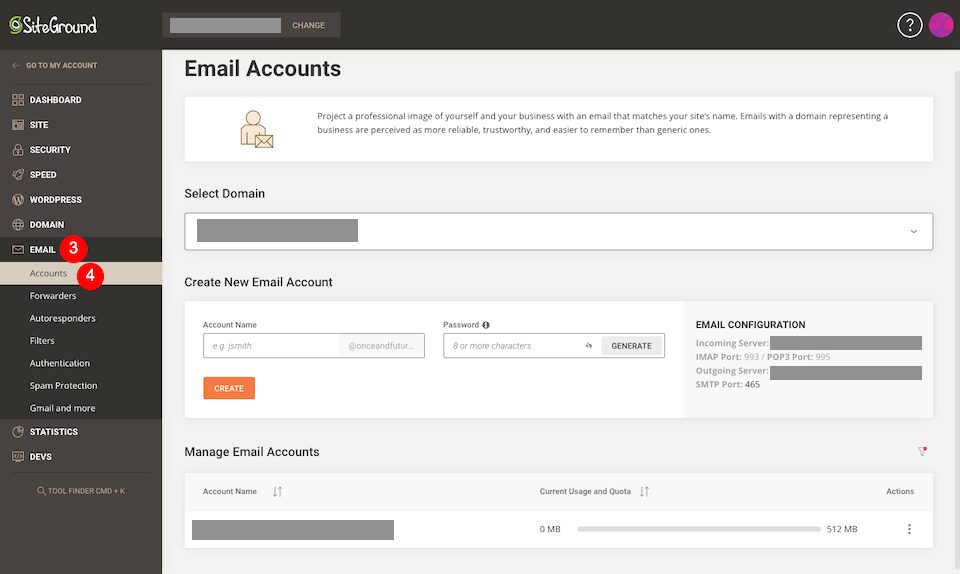
Then, in the lefthand sidebar, select Email and navigate to Accounts.
Create an Email Account
In the Create New Email Account section, under Account Name, type the email address you want to use. Note that it will automatically end with the domain of the website you’re working under. You can do something like yourname@yourdomain.com or help@yourdomain.com.
Next, you will create a password or have the system generate one for you. When you’re done, click Create.

You should get a notification that says your email address was created.

Manage an Email Account
Each SiteGround email account comes with its own settings. Access the settings for your email account by going to Manage Email Accounts and clicking on the Three-Dot icon on the right. That will bring up the settings menu.
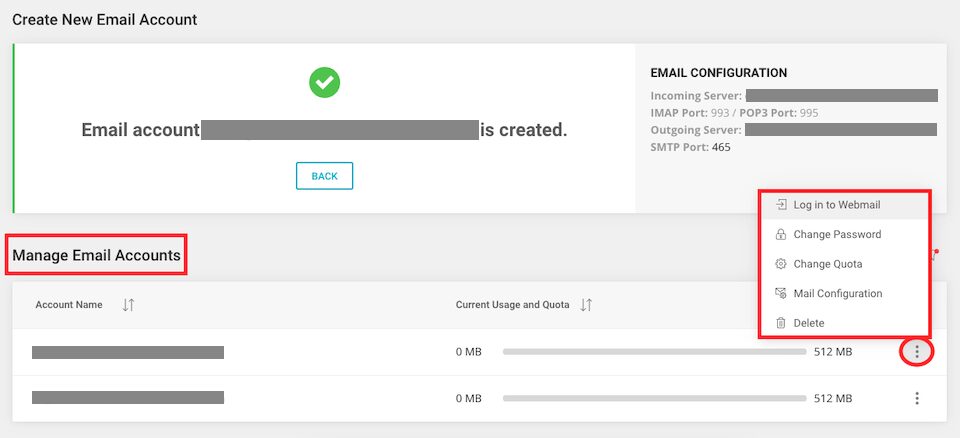
This is where you can log in to webmail and change your password, update your quota, adjust your mail configuration or delete an email address you no longer need.
How to Use SiteGround Email
In this section, we’ll show you how to log in to the webmail portal, how to set up access through another email client, and how to forward your emails to a more convenient address.
How to Log In to SiteGround Webmail
Head back to that Manage Email Accounts section and click the Three-Dot Actions button to the right of the email address. Select Log in to Webmail.

This is where the SiteGround webmail interface can be accessed. As you can see below, it has all of the features you’d expect from an email client:
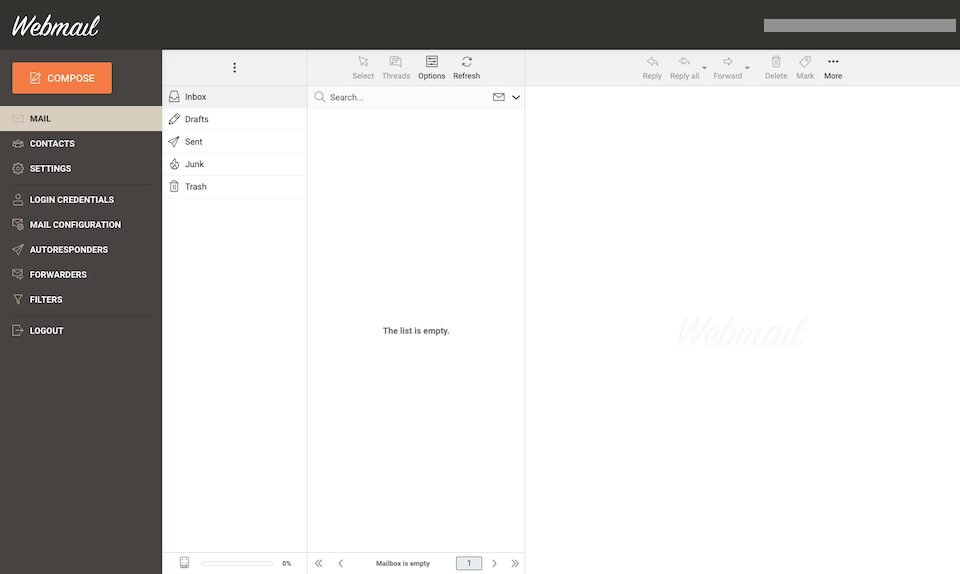
Alternatively, you can log in to webmail by going to your domain and adding /webmail to the end of it (yourdomain.com/webmail). Then, you’ll just enter your email address and password to log in. And remember, this is the password you set for this particular email address, not your primary SiteGround password.
How to Configure a Non-Gmail Email Client
SiteGround lets you automatically or manually configure your email. Just go to Manage Email Accounts > Actions > Mail Configuration.

You’ll see a pop-up that will let you select a mail client to configure, and once you’ve made your selection, click Create.
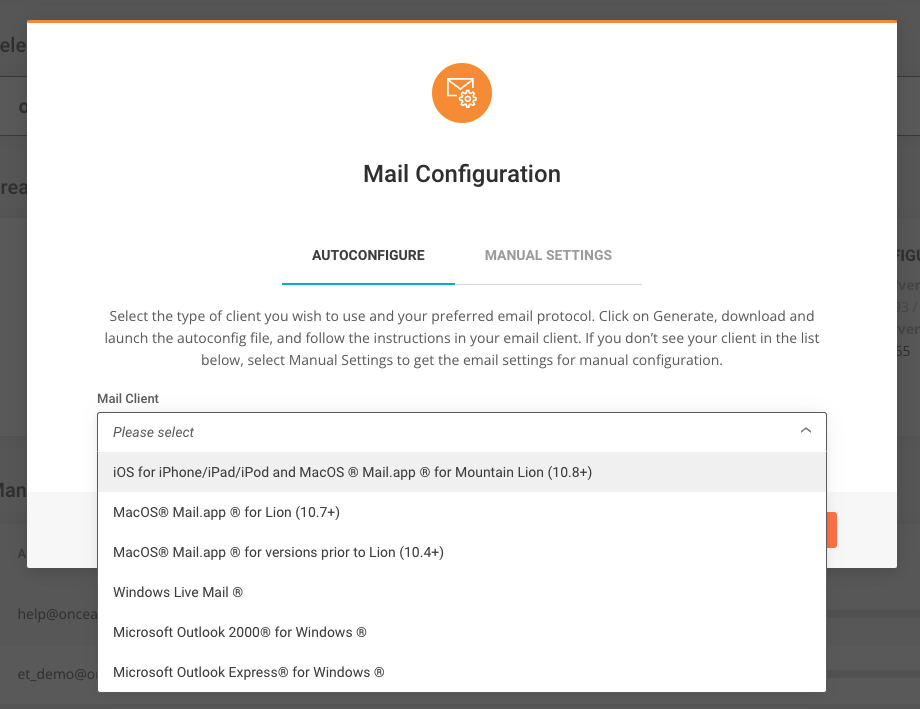
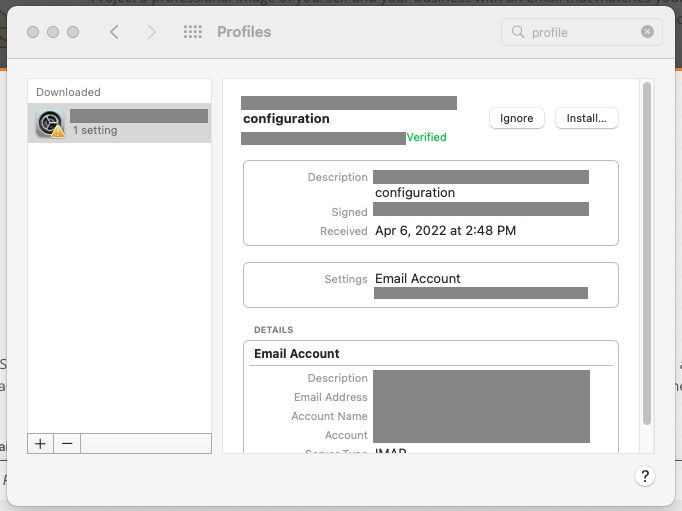
If you’ve chosen a mail client that works with your system, it should be pretty easy to get it set up. For example, when I chose Windows Live Mail, I couldn’t even open the file that was downloaded. But when I selected the iOS/MacOS option, I was able to open the downloaded file, which prompted me to find and approve the Profile in System Preferences, which I could then opt to install, pre-filled out.
How to Configure SiteGround Email Using Gmail
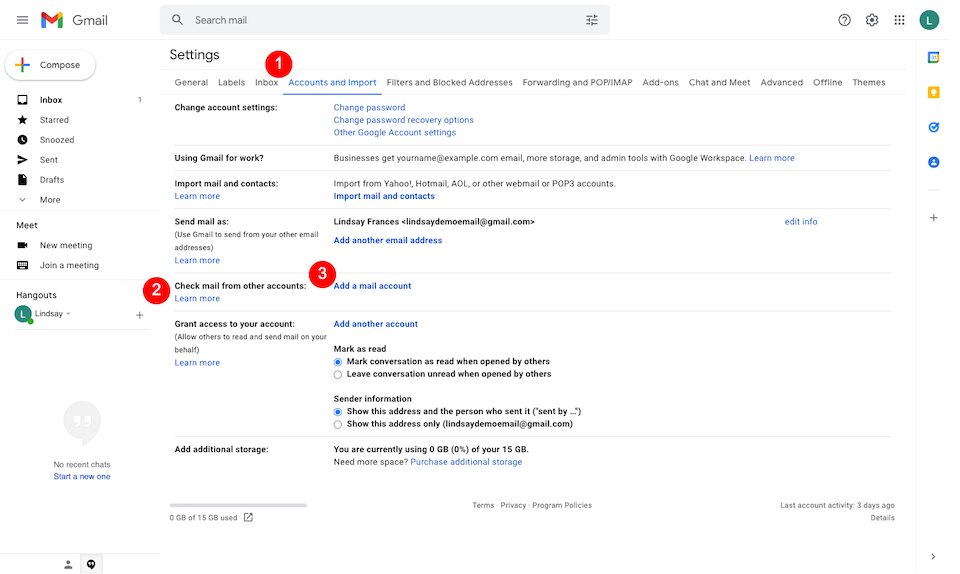
There’s also a way to use your Gmail account to check your SiteGround email, which can help streamline your daily admin. After signing into your Gmail account, hit the Gear icon on the top-right and select See All Settings.

Select the Accounts and Import tab along the top. Under the Check Mail From Other Accounts section, click Add a Mail Account.
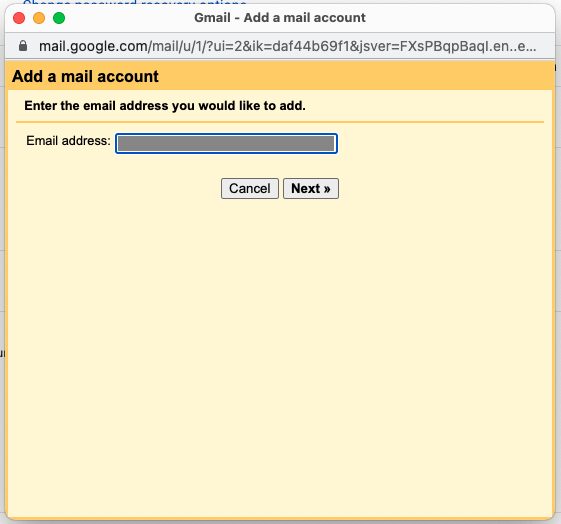
In the yellow pop-up box, enter your SiteGround email address and click Next.
On the next screen, the only option available for SiteGround users is Import Emails From My Other Account (POP3), which should already be selected. Click Next.

On the next screen, enter the following information:
- Username: This is your full email address.
- Password: This is your SiteGround email account password, not your main password to log in to SiteGround. If you can’t remember it, you’ll have to update it by going to Websites > Site Tools > Email > Accounts > Manage Email Accounts > Actions > Change Password. Save this! You may need it again in the next section.
- POP Server: Find yours by going to Websites > Site Tools > Email > Accounts > Manage Email Accounts > Actions > Mail Configuration > Manual Settings. The Incoming Server and Outgoing Server should be the same – use that.
- Port: Change this to 995.
- The Leave a Copy… is optional depending on your preferences.
- Check the box to the left of Always Use a Secure Connection…
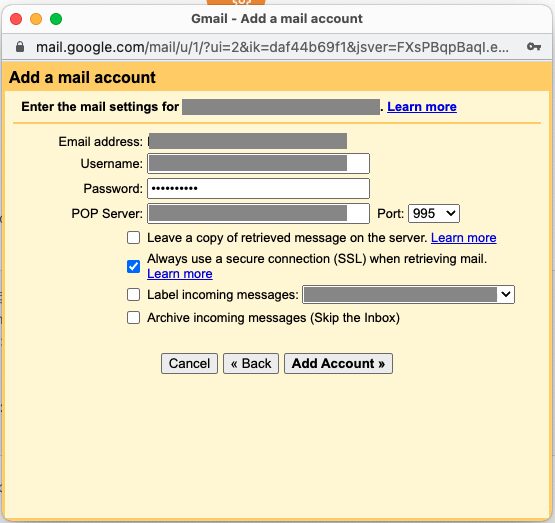
When you’re done, click Add Account. If it was successful, you should see this:
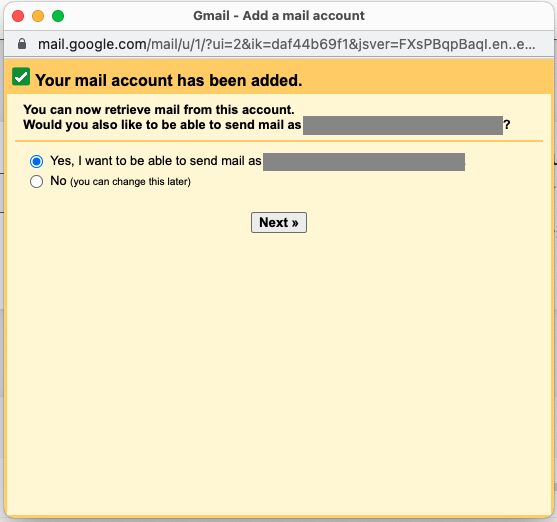
Sending Mail From Gmail As Your SiteGround Address
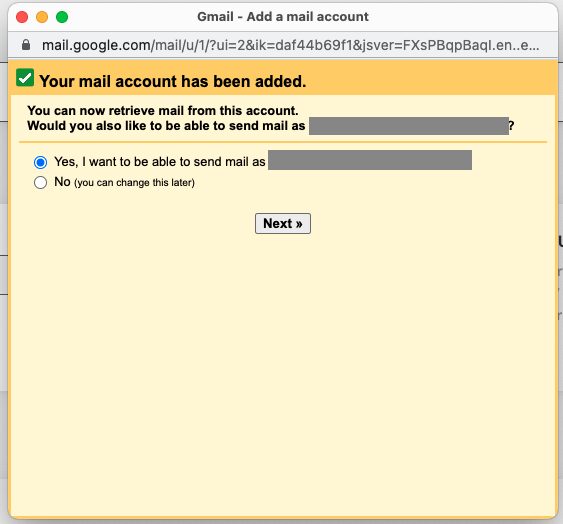
After you’ve configured your SiteGround email with Gmail, you have the option to send mail from your Gmail account as your domain email address. Select the Yes option if you’re interested in that and click Next.
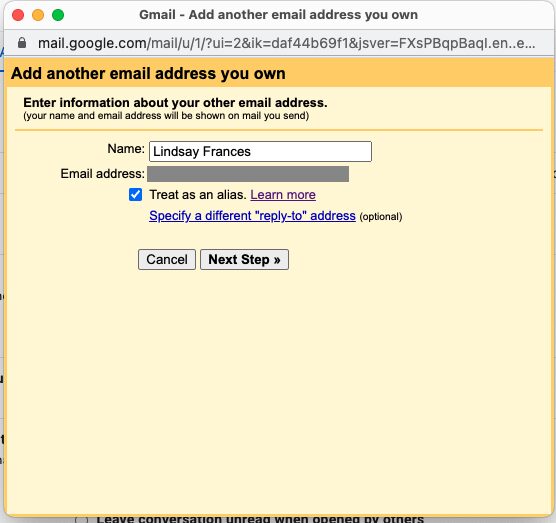
Decide if you want to treat the SiteGround address as an alias — Google has more information about that here. Click Next Step when you’re ready.
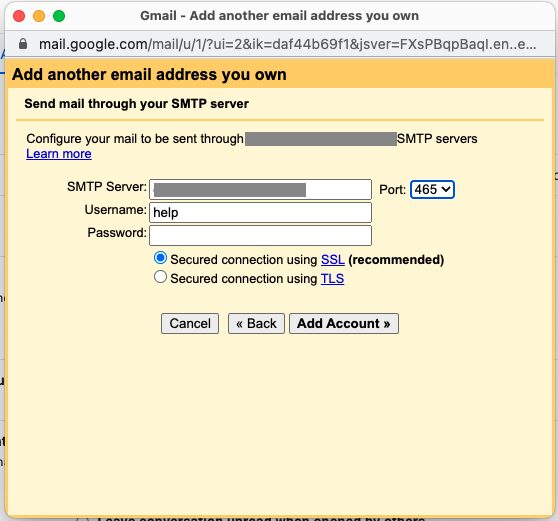
On the next page, enter the following information:
- SMTP Server: This is the same server you used when configuring Gmail. As a reminder, find it by going to Websites > Site Tools > Email > Accounts > Manage Email Accounts > Actions > Mail Configuration > Manual Settings. You want what’s listed in Incoming Server and Outgoing Server.
- Port: Change this to 465.
- Username: This is your full email address.
- Password: Use the email address password you (hopefully) saved.
- Secured Connection Using SSL: Make sure this is selected.
When you’re done, click Add Account. If you’ve set this up correctly, you’ll get a verification email from Gmail to approve.
How to Set Up Email Forwarding
If you want to send emails from a SiteGround address to another email address, you can set that up through the Forwarders menu. Once you’re in Site Tools (Homepage > Websites > Site Tools), select Email > Forwarders from the left sidebar.
Then, under Create New Rule, add the username of the email address (the first part, before the @) in the Forward All Messages Sent To box.
Finally, in the To Email Address box, enter the full email address where you want the mail to go, and then click Create when you’re done.
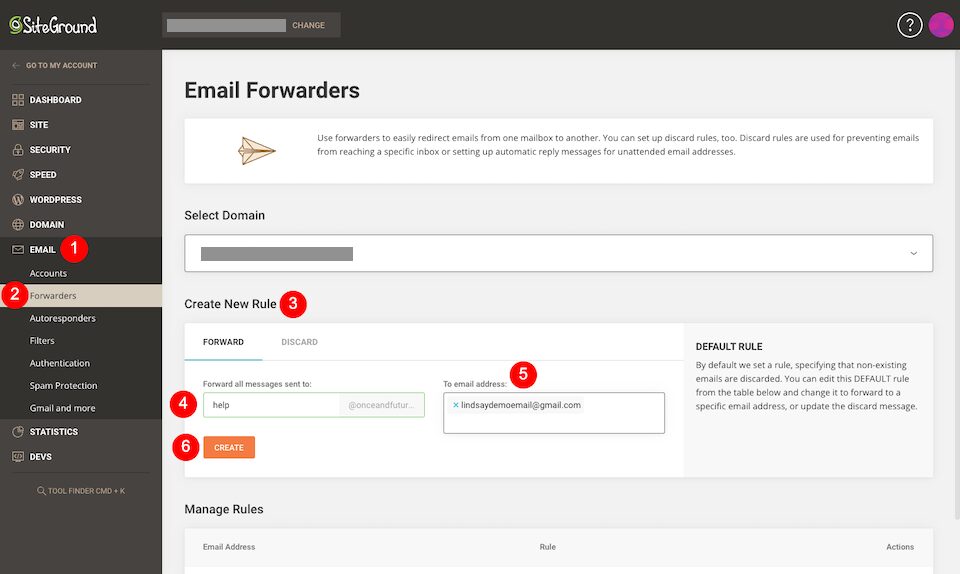
If you set it up correctly, you’ll see something like this:

Wrapping Up Using SiteGround Email
I’ve worked with several webmail portals in the past. Many of them have made it a headache to get set up with another email client. SiteGround rises above those with a wildly user-friendly Site Tools section. You can set up as many email addresses as you want and dictate how they behave. Then you can simply delete them when you no longer need them. Even if you’ve never done anything with webmail and branded emails in the past, you’ll find how to set up email on SiteGround painless.
Have you used SiteGround Email services? We’d love to hear about your experience!
The post How to Set Up, Configure, and Forward SiteGround Email appeared first on Elegant Themes Blog.
