So you’re going to start an online store. People will go to your website, give you money, and then you will send them the goods. Sounds great. But if you’re a brick-and-mortar business who has never set up an online presence before, there’s a lot more that goes into it than just slapping postage on a box and tossing it out the door. We want to discuss how to set up an online store for your typical in-person, brick-and-mortar business that enhances your value to customers.
Things to Consider Before Starting an Online Store
We are going to approach this in a slightly different way than we would setting up an online store for an online-only retailer. Ecommerce is its own monster, but then again, so is selling in-person from your storefront. The point we want to get across for you is that the two are different business models. But they can also compliment each other in ways that boost the experience for your customer–and, at the same time, increase your profits.
Your Inventory Might Differ
The primary difference in running an online store and your brick-and-mortar business is that you probably won’t be selling 100% of the same items. You might have some inventory that just doesn’t work well for online shopping (for example, vintage glass is incredibly fragile and requires extra care to ship).
So when starting an online store, we suggest that you take a full inventory of your brick-and-mortar store. (if you don’t already have a full list.) Then, sit down with it and go through it, item by item. Then, create a second inventory for your online store that only consists of items best suited for online sale.
Make a strategy for pulling, packing, and shipping these items, too. As well as updating your point-of-sale system. You don’t want your online store to say you have something in stock that you might have sold the day before.
And as we mentioned above, you just need to earmark what items your online store can specialize in. Perhaps you are using it as a way for people to be incentivized to come into your store (in that case, consider including some specialty items but label them as in-store only).
But be sure to start slow and within reason. What we mean by that is don’t overwhelm yourself by trying to sell too much online too fast if you’re not used to it. Ecommerce takes extra time for packing and shipping, specifically. As well as backend maintenance, so make sure that you have accounted for that by easing into it with a more-limited inventory of items.
Staffing Considerations
Because of the extra time and effort that ecommerce can take, you will also likely run into the need to either hire new employees to handle the online store and its administrative tasks, or you will need to delegate and split responsibilities among your existing staff. Starting an online store does mean extra work. That’s impossible to get around. But considering that first will considerably ease the transition to going online.
It might only mean a part-time staff member to handle pulling inventory and packing it. You might be able to transition an existing employee into handling online shop responsibilities. The major concern with this is that you don’t spend more on maintaining the online store than it brings in. Initially, that might be the case. It may cost more than it makes. But long-term, you’re looking at the store to bring in more than running it costs.
Which is another reason we suggest starting slow with a limited inventory. If you’re a primarily brick-and-mortar business, then there’s a learning curve for everyone involved that can initially impede revenue. As you and your staff learn the ropes, that will no longer be the case.
Software Options for Online Stores
And then there’s the actual software to use for the store. Depending on your expertise and current online presence, some platforms and services might be a better choice than others.
The way we see it, you have two major options for starting an online store to compliment your brick-and-mortar: Shopify or WooCommerce. There are a lot more options than that. But these have some of the lowest barriers to entry as well as the power and flexibility to run pretty much any kind of shop.
WooCommerce
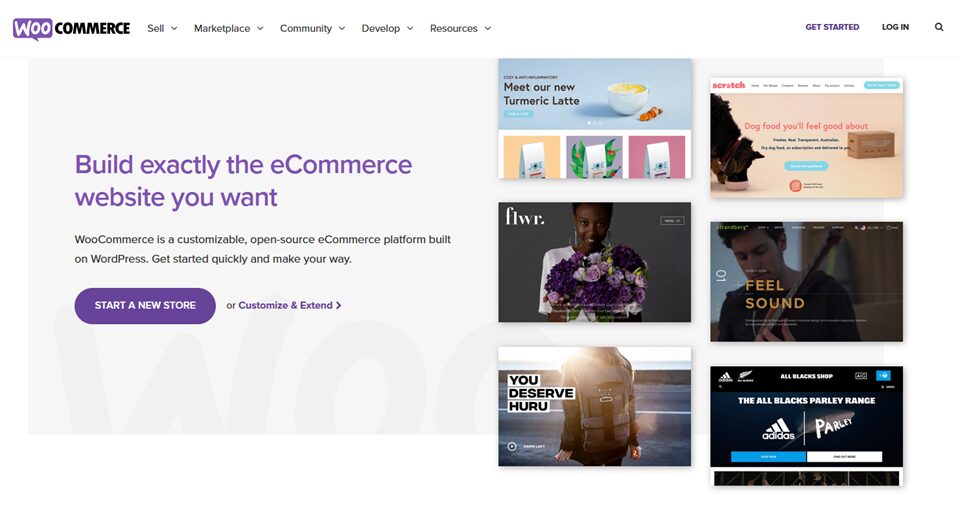
If your budget for expanding into online sales is zero (or near it), then WooCommerce should definitely get a look. WooCommerce is based on WordPress, and because of that, is free to use. The base functionality is robust enough for you to add inventory, host a storefront with pictures and multiple SKUs, accept payments, and ship items. Other, more advance features and additional options for things like payment gateways and invoicing are available via (mostly) through premium extensions. Though free add-ons are abundant, too.
If you already have a WordPress website that people know about, WooCommerce is definitely not a bad option. You likely already have staff who know their way around the backend. So adding inventory and managing products and orders wouldn’t require extra training or (probably) extra hires.
A negative to consider is that you might not already have a web presence. Therefore going with WooCommerce could potentially add extra cost and effort to your move online. Not only would you need to learn how to use both WordPress and WooCommerce, train your staff on them, too, plus getting a designer or developer to help manage any theme work or functionality that you might need.
You can curb those costs with themes such as Divi that let you take control and easily design and manage your own website. Plus, you’re not beholden to anyone but yourself with a WordPress installation. Owning and controlling all of your own content is one of WordPress’s major drawing features. So if you have or want a WordPress presence, WooCommerce is a fantastic option.
Shopify
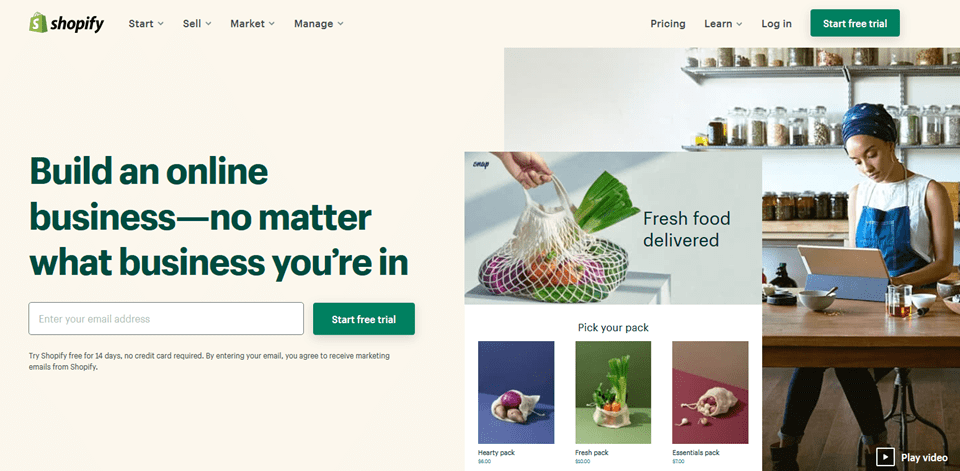
Shopify, in stark contrast to WooCommerce, is a premium, standalone ecommerce platform. While there are Shopify integrations with WordPress and other content management systems, Shopify is entirely independent and managed for you.
Shopify does have a monthly fee (anywhere from $29 per month to $299+) but the benefits that you get from the platform might be worth it as you move online from on-the-ground business.
For starters, nothing is really on you to do except for enter inventory and upload pictures and every feature that you need to run a successful is included upfront. No add-ons or extensions or picking-and-choosing features to stay within budget.
You get dedicated support, too, for both you and your customers. They can reach you via Shopify chat (which you can manage by mobile app). And you get access to Shopify’s support channels and representatives. And if you have no real website already (maybe outside of a Facebook page), Shopify does include a limited blogging platform and matching-themed website to your store.
The service’s premium model is definitely a concern for some. And not possessing full control over your content like WordPress may not be ideal for others. It is a solid choice, however, if you don’t mind giving up some control and have a budget for it.
Setting Up Your Online Store
Once you have decided (in general) how you want to approach moving online, it’s time to actually set things up. We’re going to suggest going with WooCommerce for a couple of reasons. The first being that it’s WordPress-based and fully customizable. As you get more comfortable selling online, you can customize WooCommerce to be whatever you want it to be. The second is that it is free. Outside of a handful of extensions that you might want to get eventually, going live with a WooCommerce online store costs you nothing and you can take it at your own pace without any sort of investment outside of your time.
If you have no website at all yet, you can get up and running in 4 simple steps.
1. Buy a Domain Name
Buying a domain name (yourstorename.com, for example) is actually a very simple process. You can use Google Domains, Namecheap, or one of a gazillion other choices to do this. In most cases, it’s as simple as typing in the web address you want, hitting search, and seeing if it’s available.
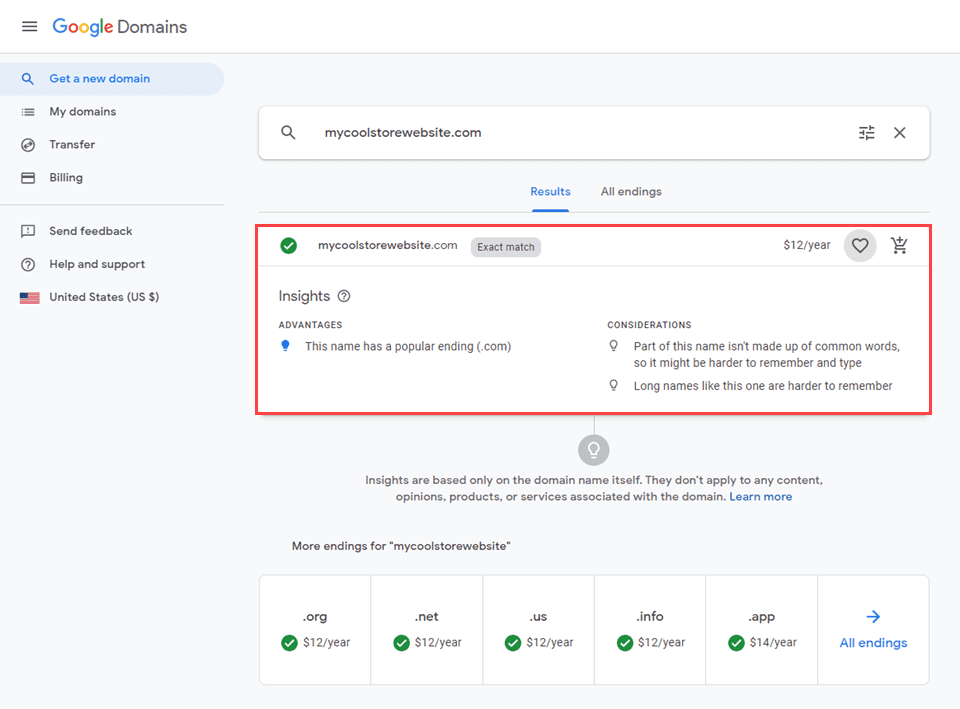
While the registration fee varies across different sites, $10-$15 per year is pretty normal for .com sites. If you go for something more exotic such as a .tv or .fm, you may be paying more for them. But for a standard online store, a .com is your best bet anyway.
2. Set Up Web Hosting
Once you have a domain name, setting up web hosting should be your next step. We have lots of guides on choosing different hosts, too. Whether that’s Pressable, Flywheel, SiteGround, or any of a myriad of other hosting options. (If you happen to choose Divi as your WP theme, take a look at Divi hosting, too.)
Honestly, you can’t make a bad choice here. While there are certainly differences in various hosts, when you’re getting set up for the first time, the most important factor is going to be cost and your comfort level. So choose where you like or is recommended, and you should be okay.
3. Install WordPress
We have a very simple guide to installing WordPress, and you can also very easily find the installation information in your host’s cPanel or dashboard. In general, you’re going to look for an icon for a WordPress installer like this:

You should then be taken to a screen with an Install button somewhere on it.
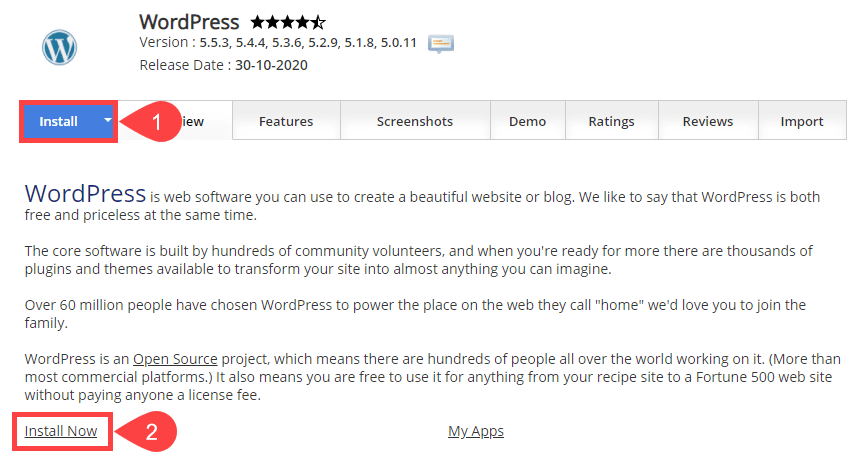
Press it, and you will be prompted to enter your site name and what you want your admin login to be. After a few minutes of spinning up the site, you will be emailed a login URL and it’s time to get into WP itself.
3. Install WooCommerce
Installing the WooCommerce plugin and getting it set up is an absolute breeze. The setup wizard is surprisingly helpful, and we suggest going through it immediately. Head over to the Plugins option in the left side of your screen, and then click Add New. Just search for WooCommerce, and click Install.
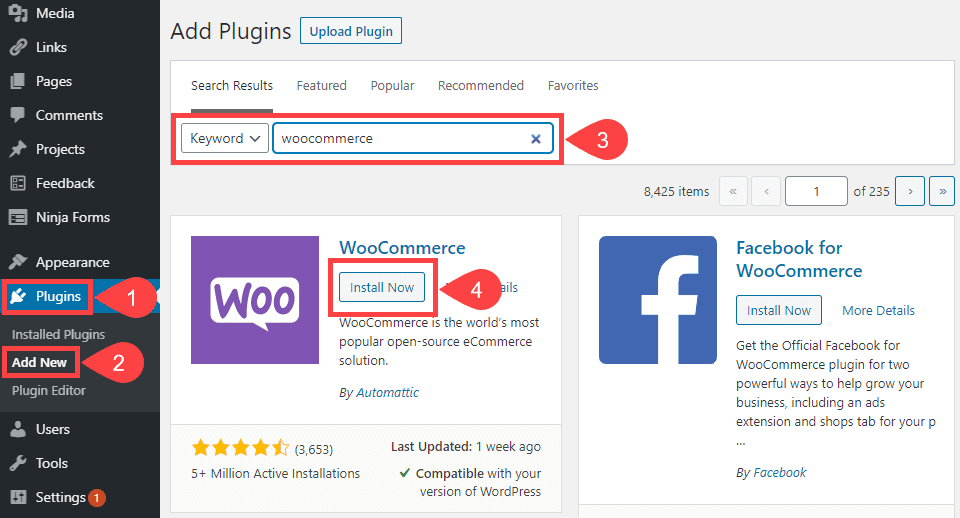
You will be asked to activate it next, and after that, you will be prompted to go through the setup wizard. Do it.

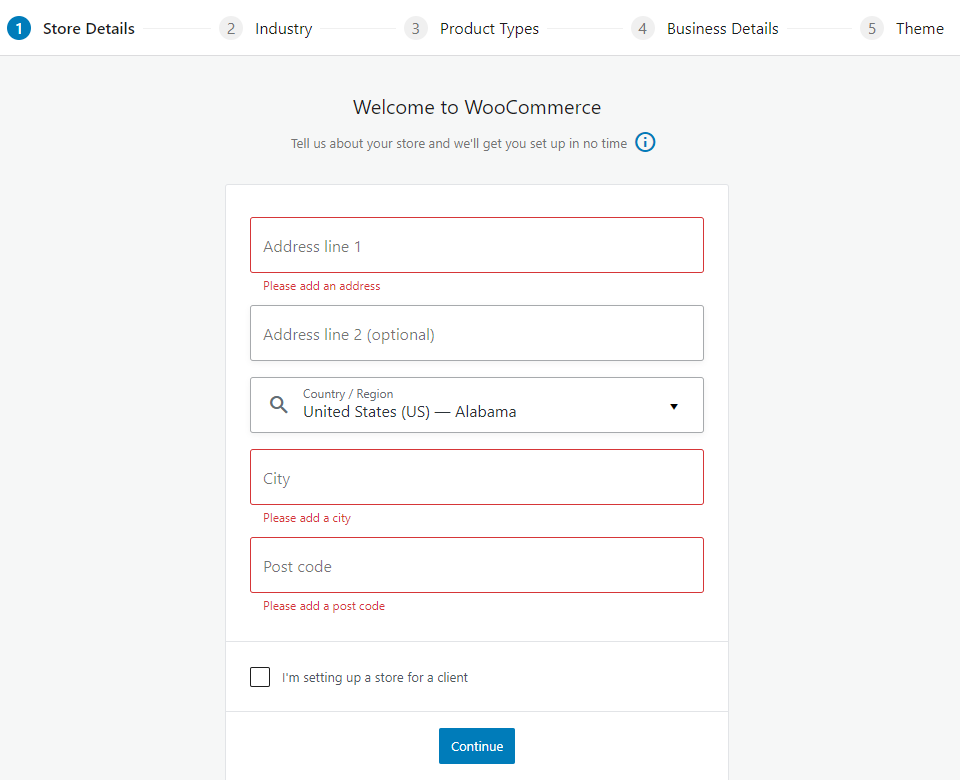
The setup configuration is very straightforward. It asks for the store details such as your address, the industry, what kinds of products you will be selling (digital, physical, subscriptions, etc.), the business details (annual revenue, etc.), and selecting a theme for your site.
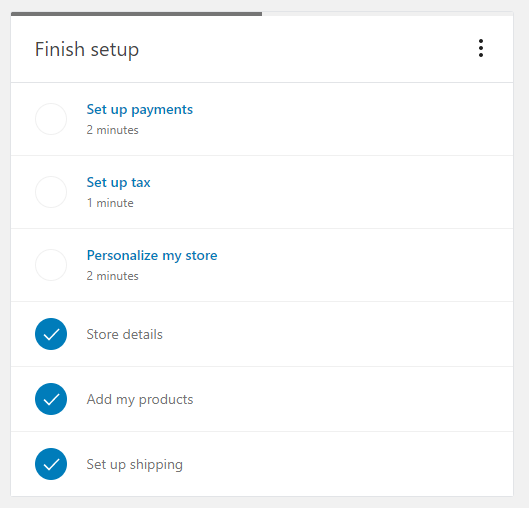
The final step here is to set up your payment gateways and input tax information in. As long as that’s done before you actually push products live, you can do it whenever you want. The WooCommerce dashboard has plenty of reminders and breadcrumbs for you to follow so this is completed. They won’t let you forget.
If you set your mind to it, you can do all of this in half an hour to an hour. And that’s even with minimal technical experience. Now that your new online store is set up, the real fun begins. Adding the products to the store so you can sell them!
How to Add Products to Your New Online Store
As we said above, you might not be moving every single item in your brick-and-mortar to your online store. At least, not at first. So once you’ve taken inventory and know what you’re going to be selling, its relatively painless (and honestly a bit fun) to start your online store. It’s actually pretty fun to populate your new store with various sundries.
WooCommerce adds multiple menu items on the left-side of your screen, WooCommerce, Products, and Marketing.
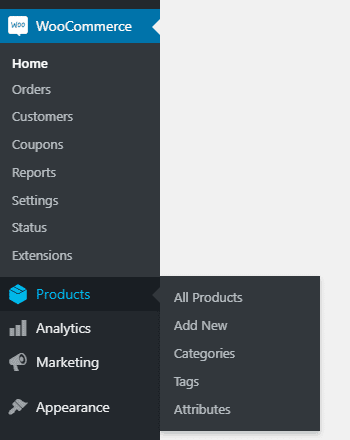
Right now, we’re concerned with Products. Specifically the Add New option. One of the hardest things to wrap your head around can be that the actual WooCommerce menu item isn’t where you’ll be spending most of your time until your store is up and running like the well-oiled machine it will be. You will be mostly under Products. When you click on Add New, an Add New Product page loads, and it’s virtually identical to publishing a blog post.
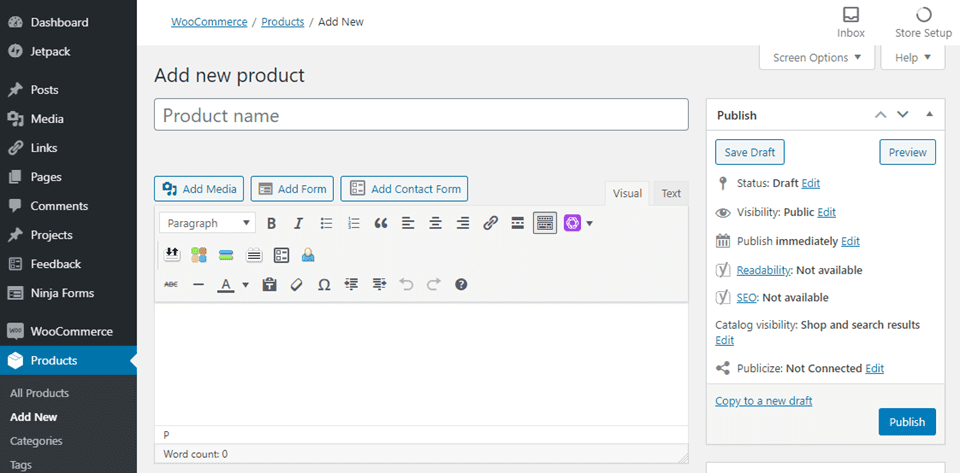
This part should give you no problems. The product name field is whatever will show up to the customer. So the full name rather than a shortened version is preferable. The large text area will be the Description of the item on the product page, which is where the primary information for the customer will be written. Below these, you have individual fields, but anything that you want to highlight to the customer goes in one of these two fields.
As you scroll down the page, you can fill in the specific and individualized Product Data. These include details such as the SKU, quantity, stock, and so on. For the most part, you will be listing Simple Products from the dropdown, which means a single item the user can add to their cart and purchase. The first one you see here under General is pricing. So make sure that you enter the price. The regular price is the everyday price, while if you enter a sale price, you can schedule out that discount as you want. (Even keeping it as the normal price and the other higher to make folks think they are paying less than they really are.)
The Short Description is simply a sentence or two that describes the item in summary, without the long list of product specifics. As you start an online store, keep in mind these are the blurbs most customers will see first.
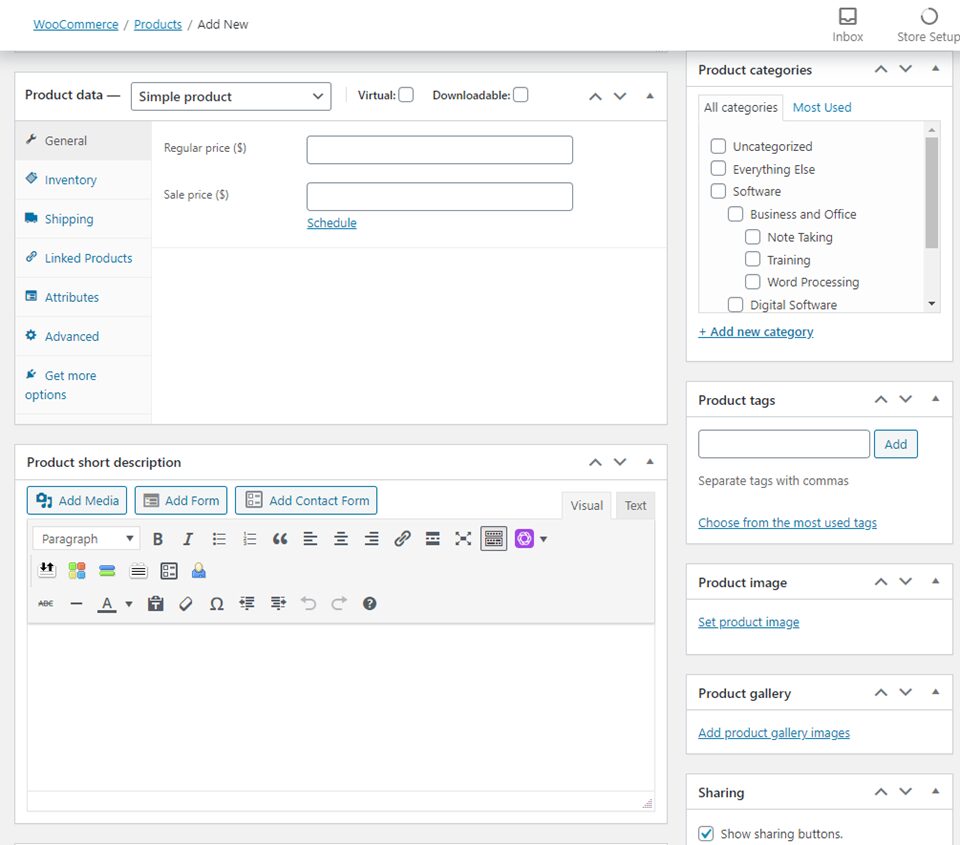
To the right of the screen, you will see boxes for more options. Product Categories is straightforward. However you split your items, do it here. Shirts, Shoes, Accessories, Dresses, Tops, Bottoms, etc. They’re nested, so you can have subcategories, too. Think about them as things like Accessories – Earrings.
Product Tags are more specific sorting terms. Maybe Windows Software or Mac Software. iPhone App, Android App, PlayStation Game, Xbox Game, that sort of thing. Or Holiday Item, Christmas Sale, and so on. You group items this way without having to make a category for a very specific and limited quantity.
Product Image is the main photo or illustration for the item and will be used in any place where a single image gets displayed. While Product Gallery is the whole collection that people can scroll through as they look at the item page itself.
Now, once you have those filled in, you can hit the Publish button, and your product will be live! You have just started an online store!
Only the price is really 100% required. It’s a good idea to fill in as much as possible, but only the price (and name) is necessary. But images and descriptions sell products as much as anything else, so it is in your best interest to take the time to fill all of the fields out as you can.
Additional Product Fields
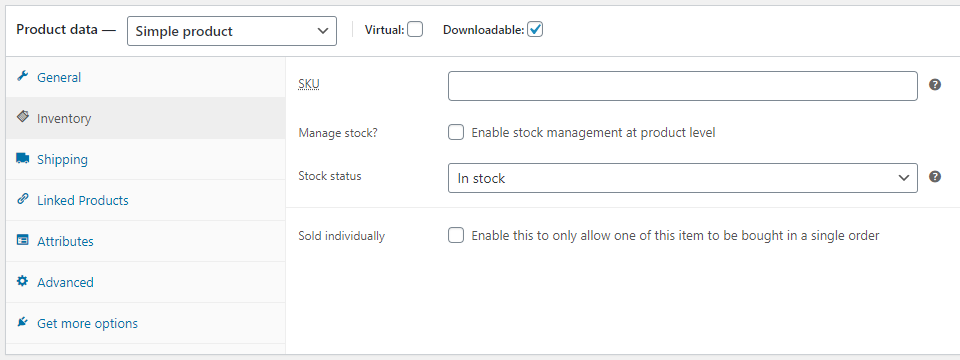
The other tabs to the left of the Product Data box are the detailed information that will make a lot of difference in record keeping and making sure that everything you sell online will be kept orderly. For instance, if the product is a digital release that you’re doing, selecting the Downloadable checkbox will let you upload the file and even place moderate DRM on it to limit the number downloads and when and if the customer’s access to the download link expires.

The Inventory tab is incredibly important, especially as you are moving from an in-person store to an online store. You can set specific SKUs for your items, meaning that you have an ID number for this particular product. You set this, and it is for you. It can be anything that works for you, as long as you know what item or product it represents. You can also show whether it’s in stock or not. (Both description fields that we mentioned before are also good places to mention limited supply). And you can choose to limit the number of purchases someone can make in a single order.
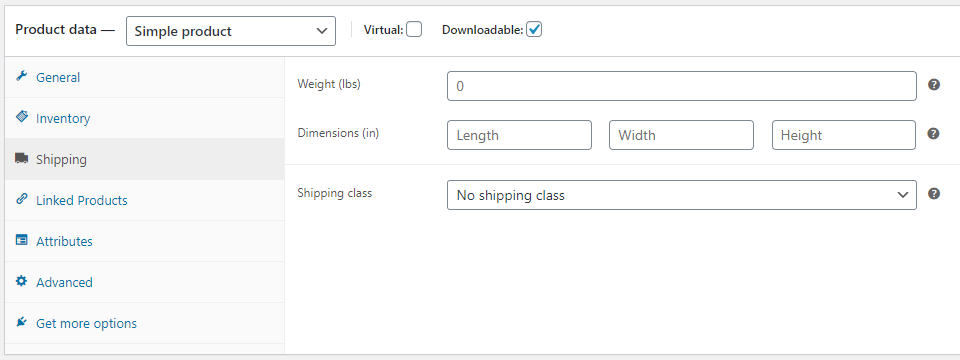
The Shipping tab provides information to calculate automatic shipping costs. The base information where this is calculated comes from the Business Details section of the WooCommerce setup wizard.
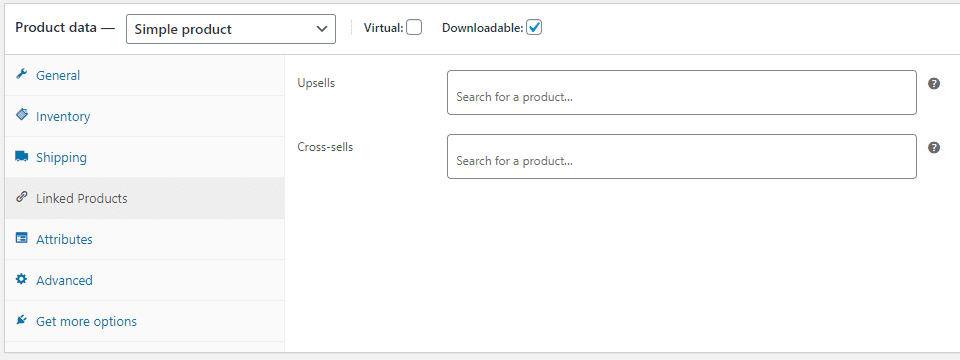
Linked Products is a major selling point. As you start an online store, think about these companion items and upsells as the items sitting on your checkout counter in your physical location. Make sure that someone buys a new makeup brush if they buy cosmetics, or maybe offer a set of dice when the customer purchases a game book. These kinds of upsells work, so please don’t ignore this tab when you’re setting up your new online store. You can search for any other product you’ve entered. However, that means you might have to come back once you have entered your full inventory. Trust us, though, it’s very worth taking the time to do.
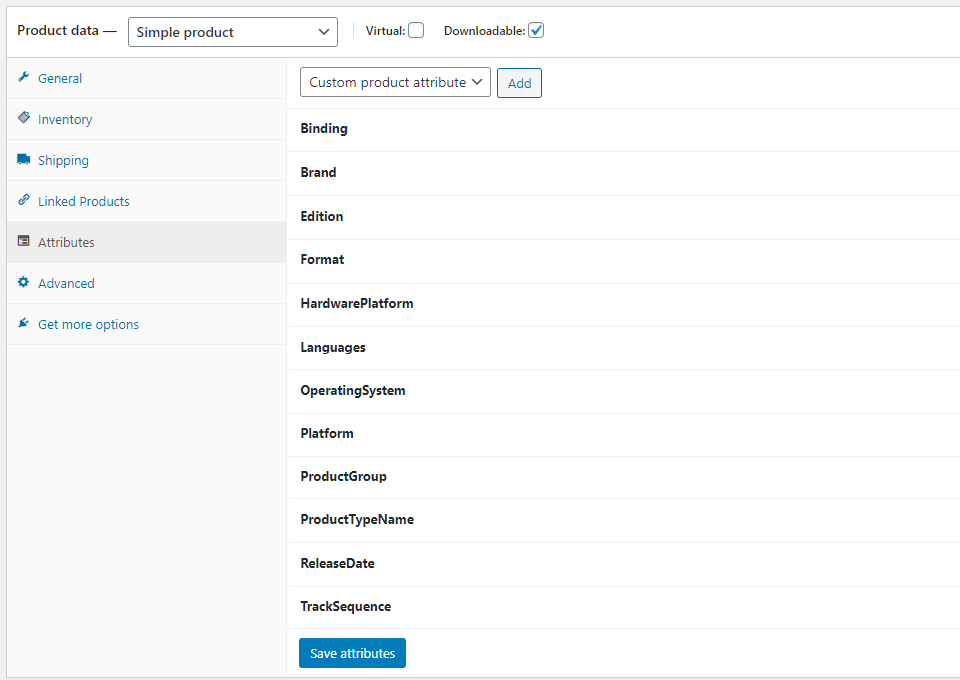
You can set any particular Product Attributes you want. In the screenshot below, we show some attributes for software courses, each of which is sortable and filterable in the shop, letting your customers find exactly what they need.
Finally the Advanced and Get More Options tabs are generally left untouched when you’re beginning. You set the menu order and find other extensions for WooCommerce, but when you’re just starting your online store, the base WooCommerce plugin is hugely functional and can do just about whatever you need it to do.
But once you’ve saved and published the item, you just need to repeat the process. And once you’ve gone back through the options we mentioned above to set up payment and taxes, you can start selling these immediately. And even without that, you can send people to these product pages and indicate in the descriptions they can call to purchase or have them held. Having an online storefront helps in a number of ways, and the actual sale of the item is just one of those.
Plan, Plan, Plan
If you’re moving into online sales from a physical location, it’s best to take it slow. You should consider staffing concerns and who will actually handle the day-to-day details of the shop. Consider the software that you use — would you prefer more control with WooCommerce or an it-just-works platform like Shopify? And what are you going to sell online. Your business is unique, so making a complete inventory of what makes sense to sell online. Then, follow the steps above and get ready for your business to boom.
What has been your experience with starting an online store for your brick-and-mortar?
Article featured image by RoseRodionova / shutterstock.com
The post How to Start an Online Store for your Brick-and-Mortar Business appeared first on Elegant Themes Blog.

