One of the advantages of WordPress is the ability to use different post templates for different categories. However, setting them up can be tricky. Fortunately, this is easy to do with the Divi Theme Builder. In this article, we’ll see how to use different blog post templates for different categories with Divi.
Preview
Before we get started, here’s a look at the different categories on my test website. Each will use a different category.
All Posts
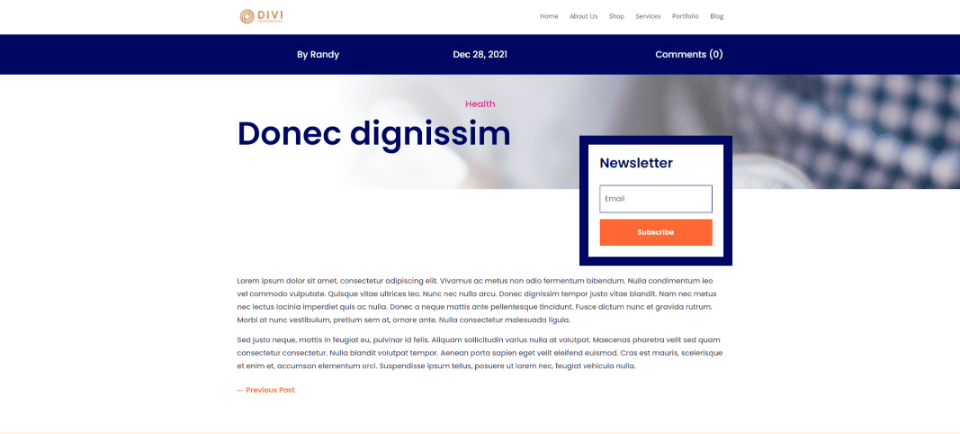
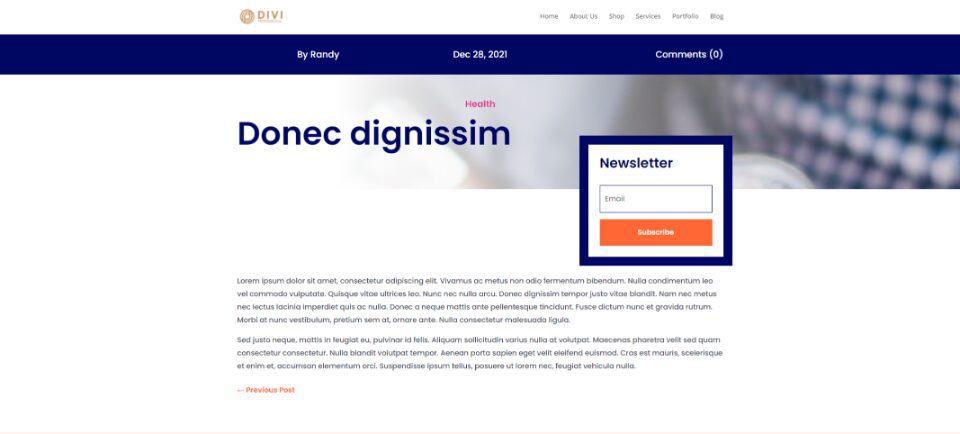
I will use several categories, such as this Health category, that will not be assigned a blog post template to the. They will show the default category.
First Blog Post Category
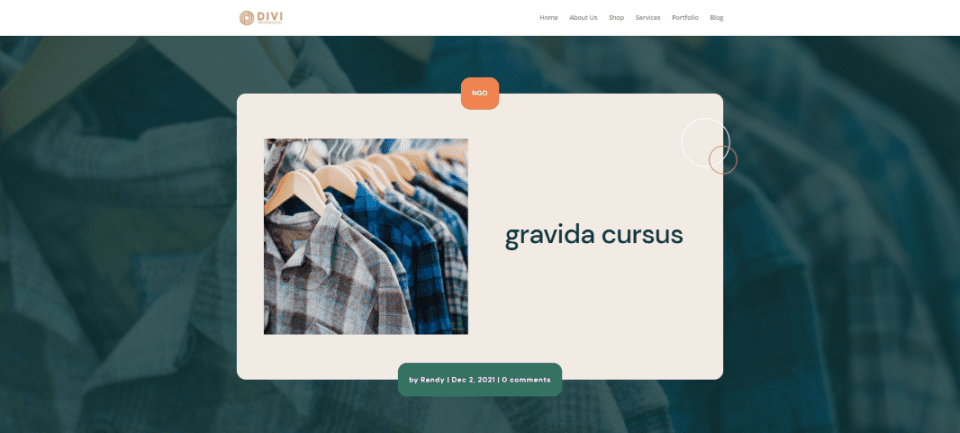
My first category will be assigned to the NGO blog post template. This blog post template will display for every post in the NGO category.
Second Blog Post Category
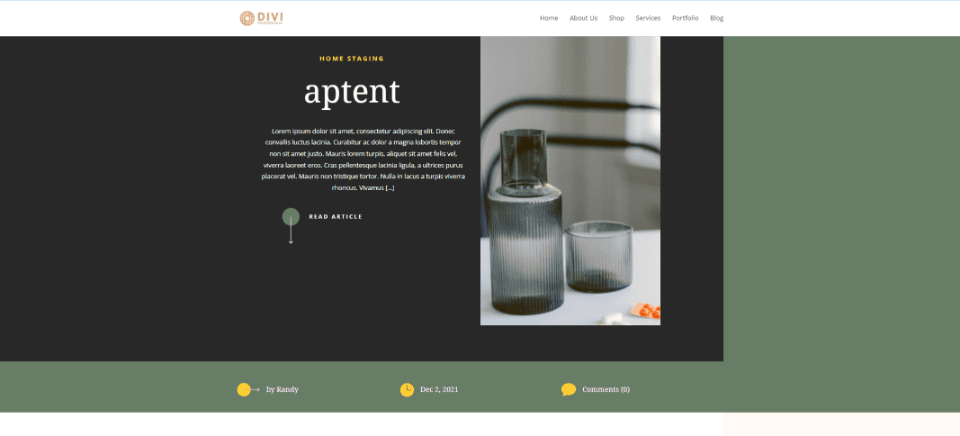
My second blog post category template is assigned to my Home Staging category.
Third Blog Post Category
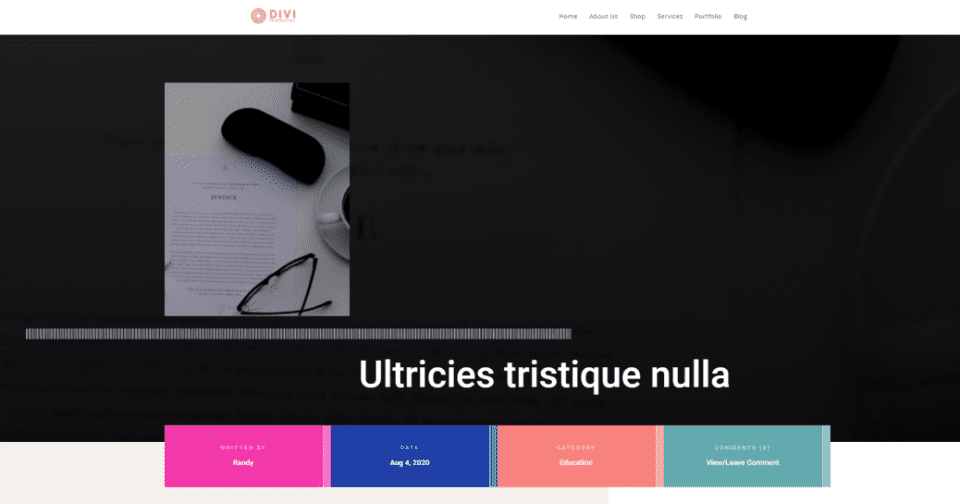
My third category displays the High School blog template.
Fourth Blog Post Category
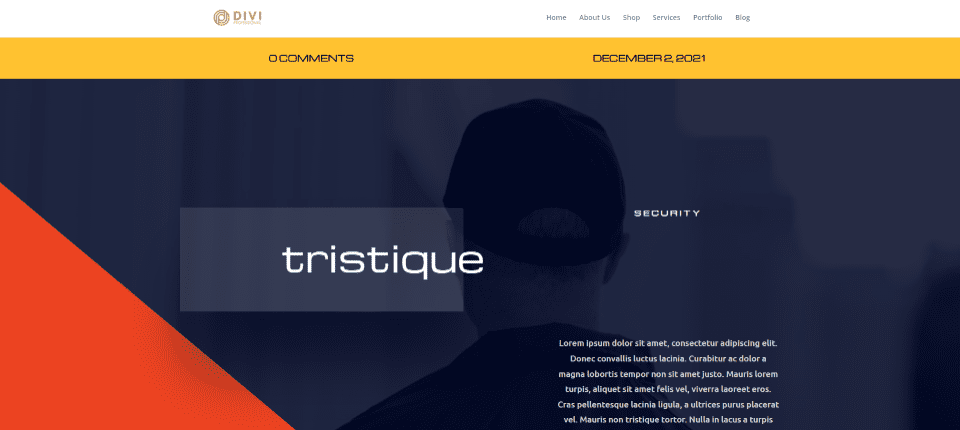
My fourth category displays the Security blog post template.
Why Use Different Blog Templates for Different Categories?
Using different blog templates for different categories gives your website some unique designs so your categories stand apart from one another. Using different fonts, settings, and layout options can help the reader to better understand your content. Even just using a different color can set the mood for the category. You can use different layouts for tutorials, events, and more.
How to Get Blog Post Templates
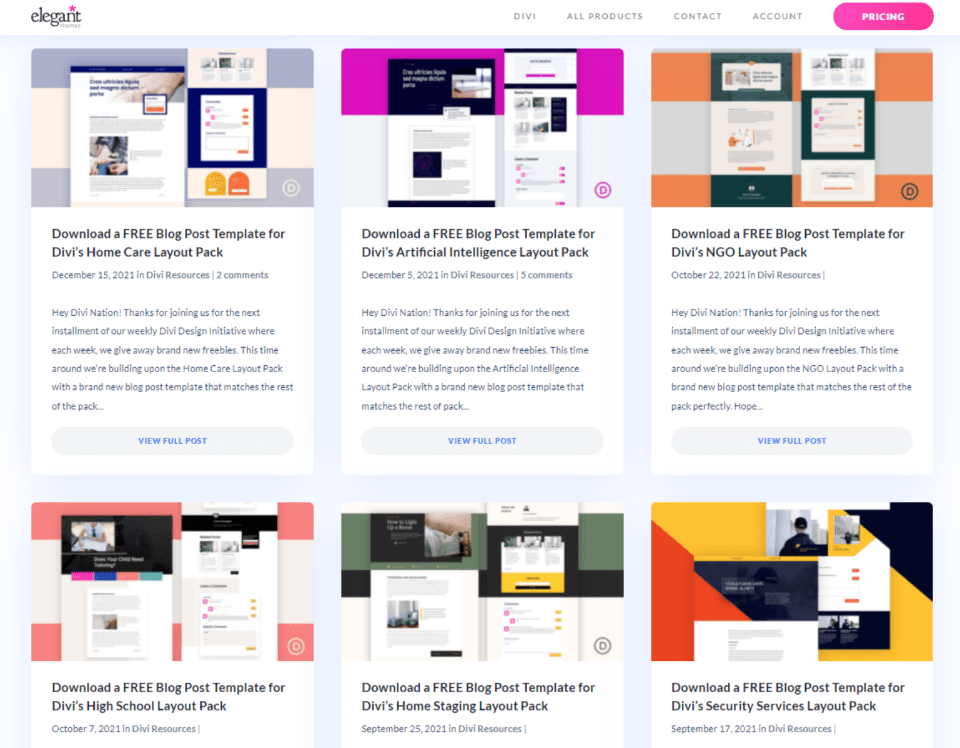
There are lots of free blog post layouts in the Elegant Themes blog that were designed for the free Divi layout packs. To find them, search the https://www.elegantthemes.com/blog/ for “https://www.elegantthemes.com/blog/?s=free+blog+post+template&submit.x=0&submit.y=0” and download them to your computer. Unzip them so you can upload them as JSON files. I’ll use several templates from the first page of search results to set up different categories.
Uploading Blog Post Templates to the Divi Theme Builder
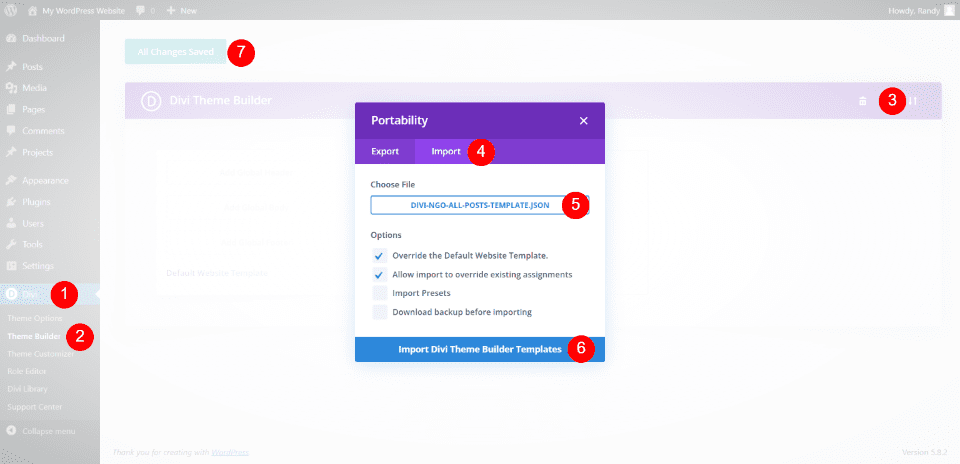
All the files will be uploaded the same way and then we’ll assign them as they’re uploaded. To upload a blog post template:
- Go to Divi > Theme Builder in the WordPress dashboard.
- Select Portability.
- Click Import within the modal that appears.
- Navigate to the JSON file on your computer and select it.
- Click Import Divi Theme Builder Templates.
Two settings are selected by default:
- Override the Default Website Template
- Allow Import to Override Existing Assignments
It’s okay to leave these selected. However, the first one will be set to All Posts, and any post templates you upload after it will override it. You can easily reassign any of the templates to All Posts. We’ll see how to do this as we go.
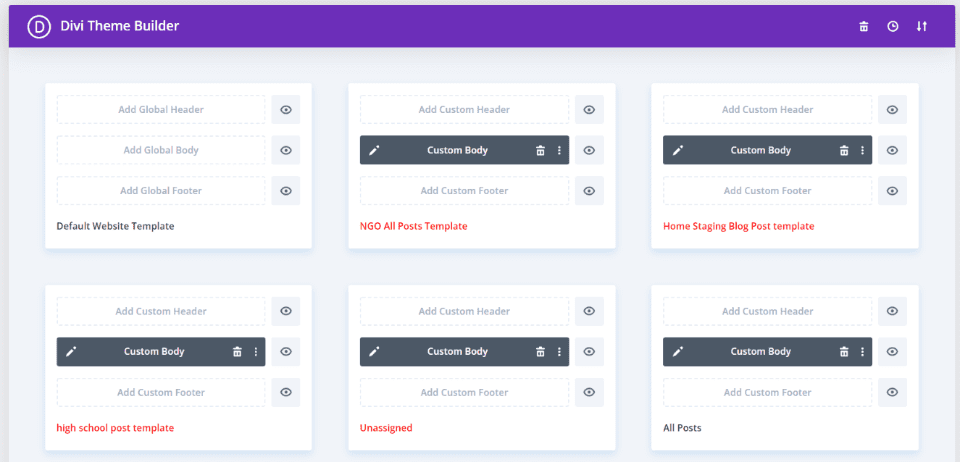
Next, continue the uploading process until you’ve uploaded all your templates. Alternately, you can upload and assign them one at a time. The title for the first one we uploaded is black, indicating that it’s been assigned. The others are in red, indicating that they’re not assigned. The last one I uploaded has been automatically assigned as the default blog post layout.
How to Use Different Blog Post Templates for Different Categories
Once we have the templates uploaded, we can assign them to different categories. I will leave the last one assigned to All Posts so it will be used as the default template and then different templates for different categories.
I’ve created several categories and added dummy posts to each of them. These are just random using images from the various Divi layout packs.
First Blog Post Specific Category

First, hover over the template for your first category and select the gear icon when it appears.
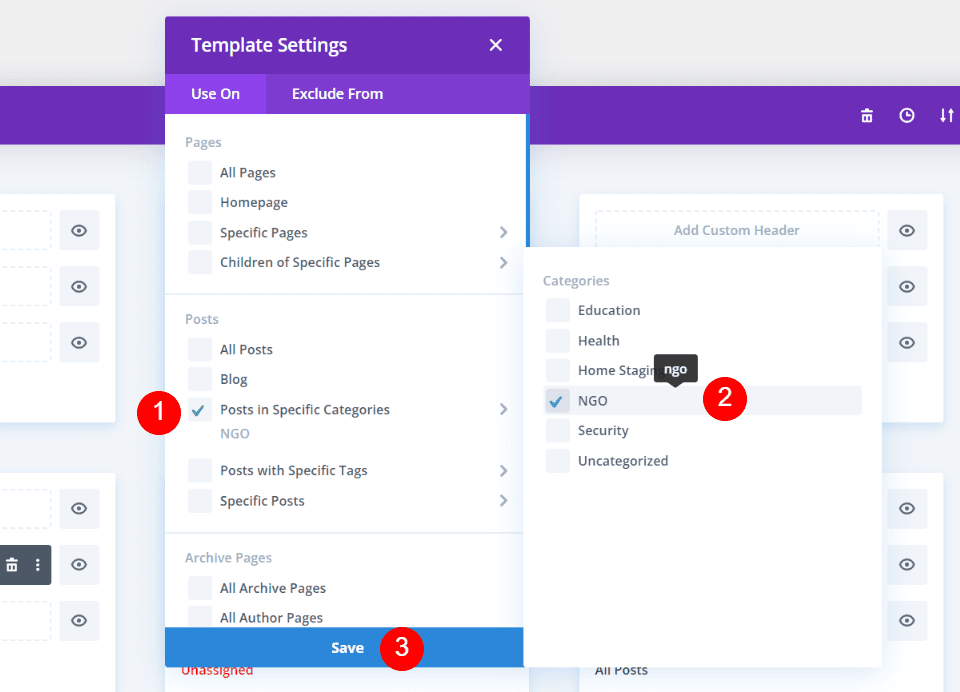
This opens the Template Settings. In the Use On tab (the default tab), under a section called Posts, you’ll see several options include Posts in Specific Categories. Hover over this option and you’ll see a list of your categories. Select the category (or categories) you want to assign this template to and click Save. You’ll see the category assigned when you select it.
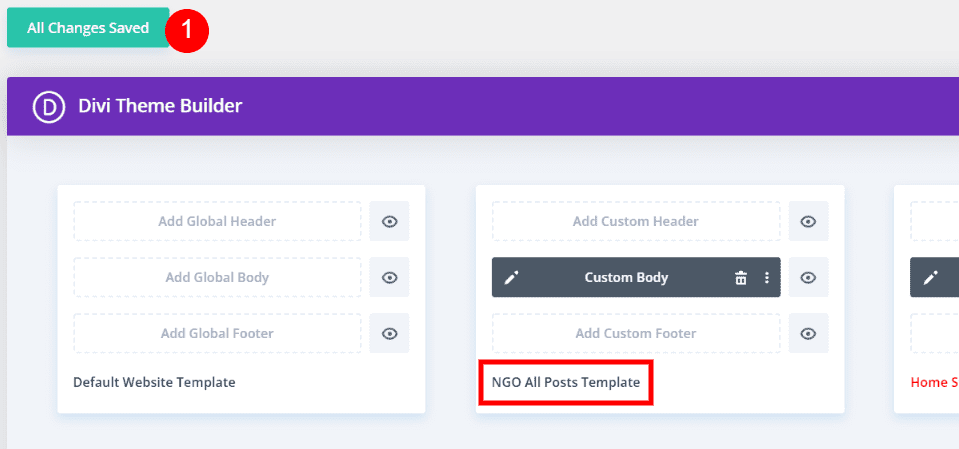
Finally, save the settings in the upper left of the screen. The template will then show the name of the template you selected in black. This is the template that will now be used for this category. All others at this point will display the default category.
Second Blog Post Specific Category

Secondly, select the gear icon for the second template.
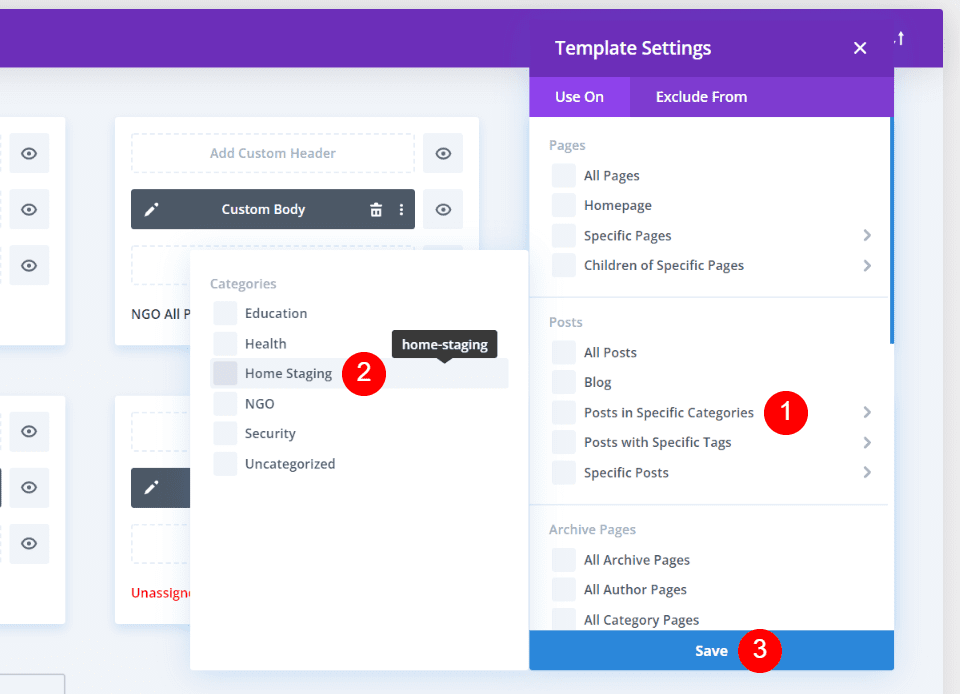
Hover over Posts in Specific Categories and select the second category and click Save.
Third Blog Post Specific Category
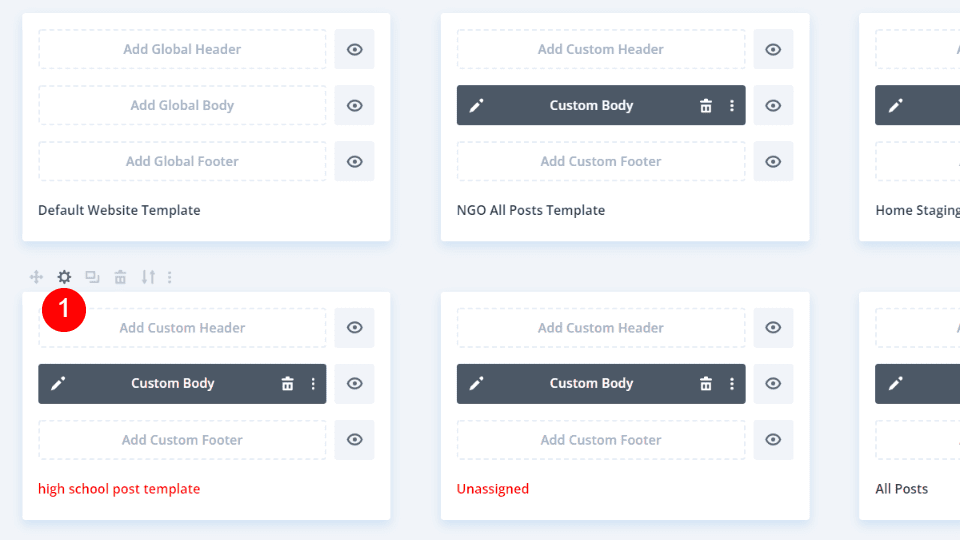
Thirdly, select the gear icon for the third template.
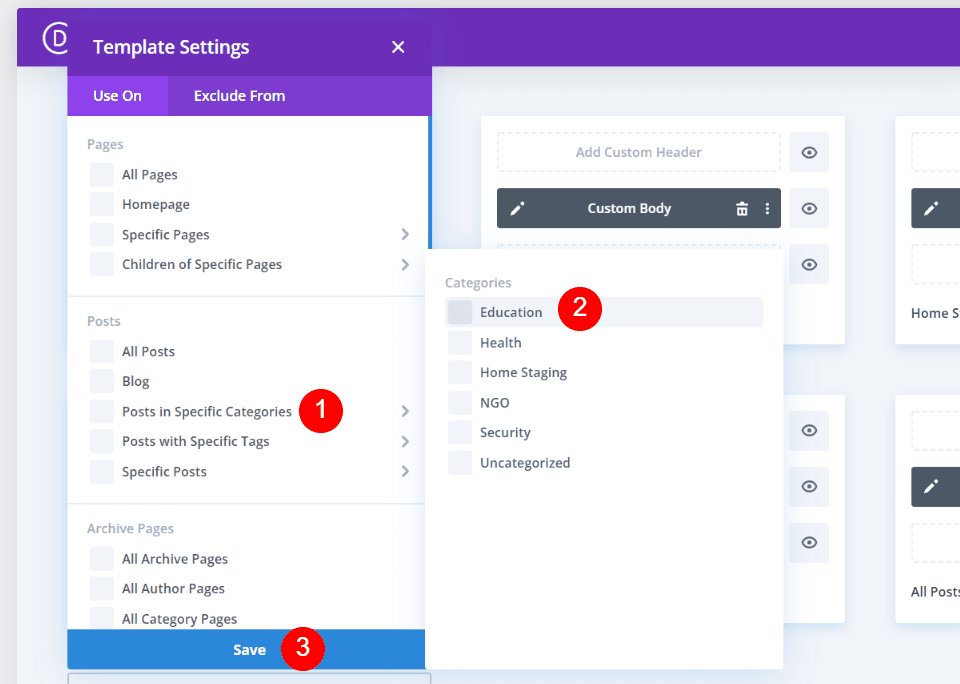
Hover over Posts in Specific Categories and select the third category and click Save.
Fourth Blog Post Specific Category
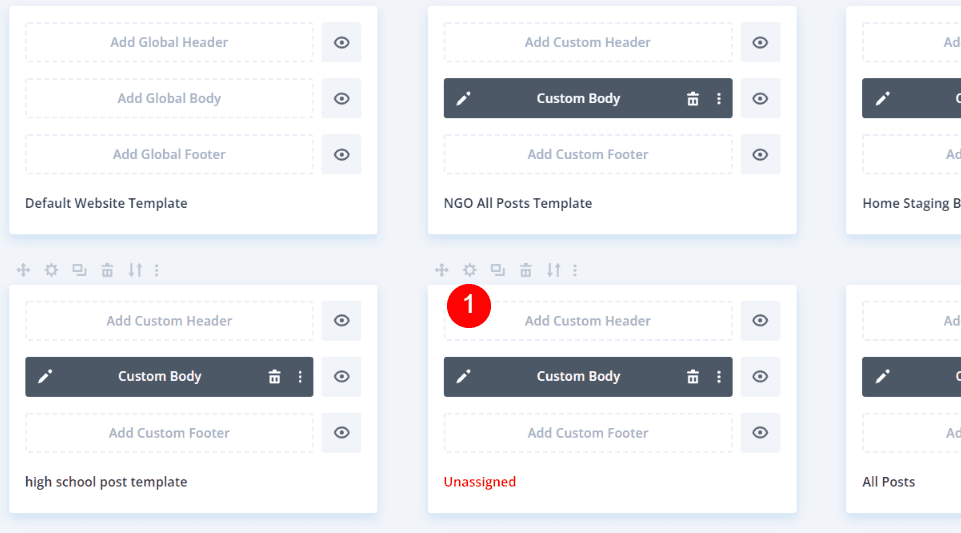
Fourthly, select the gear icon for the fourth template.
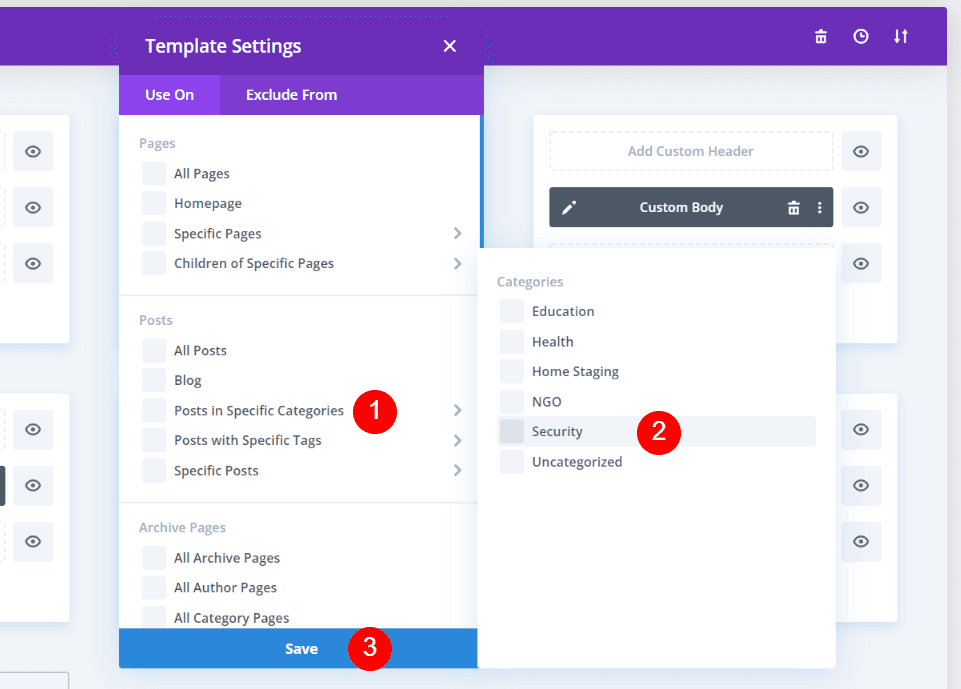
Next, hover over Posts in Specific Categories and select the fourth category and click Save.
Setting the Default Blog Post Template
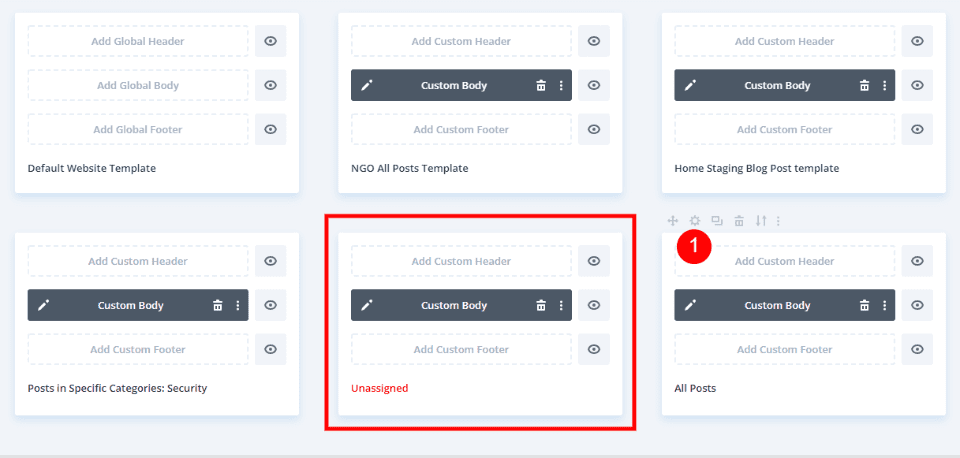
Finally, we’ll set up a new default blog post template. I have another template that I’d like to set as the default. First, we have to unassign the template that’s currently set to All Posts. Hover over the template that’s currently set to All Posts and select the gear icon.
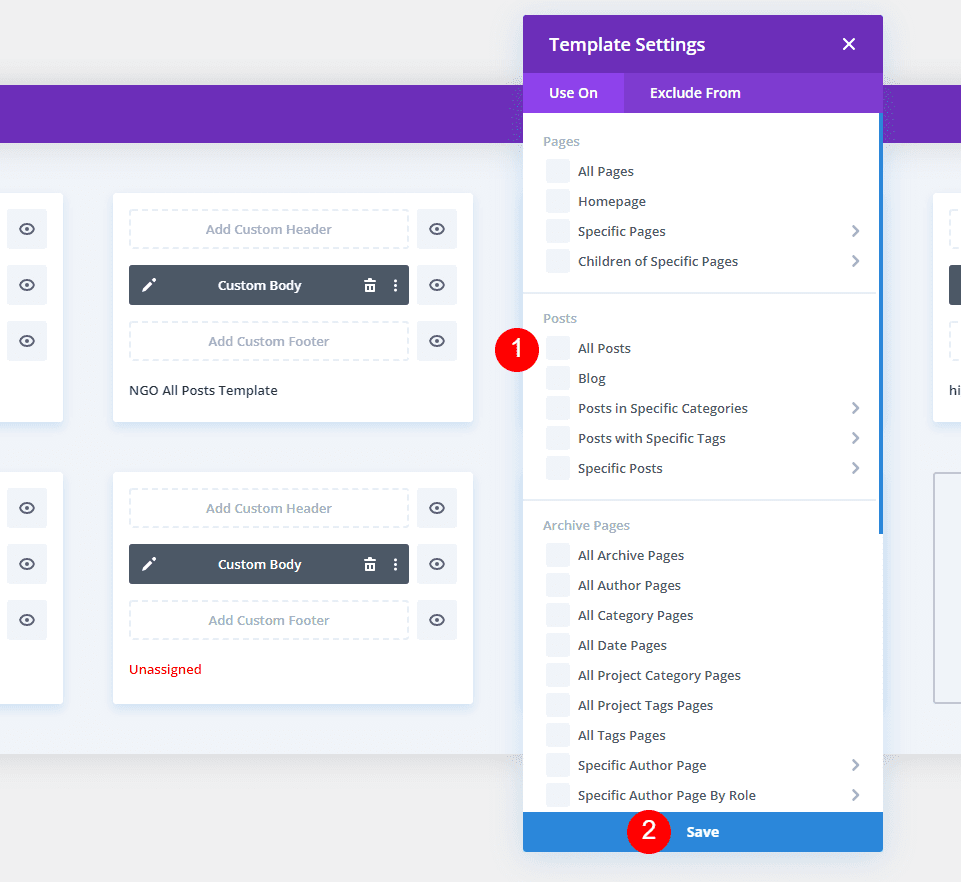
Uncheck All Posts and click Save.
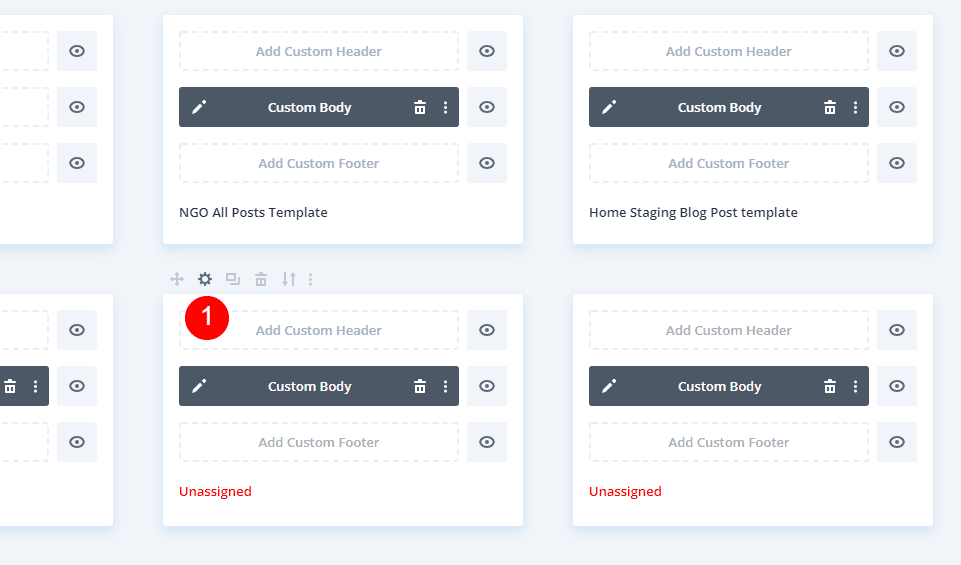
Hover over the template you want to assign to All Posts and click the gear icon.
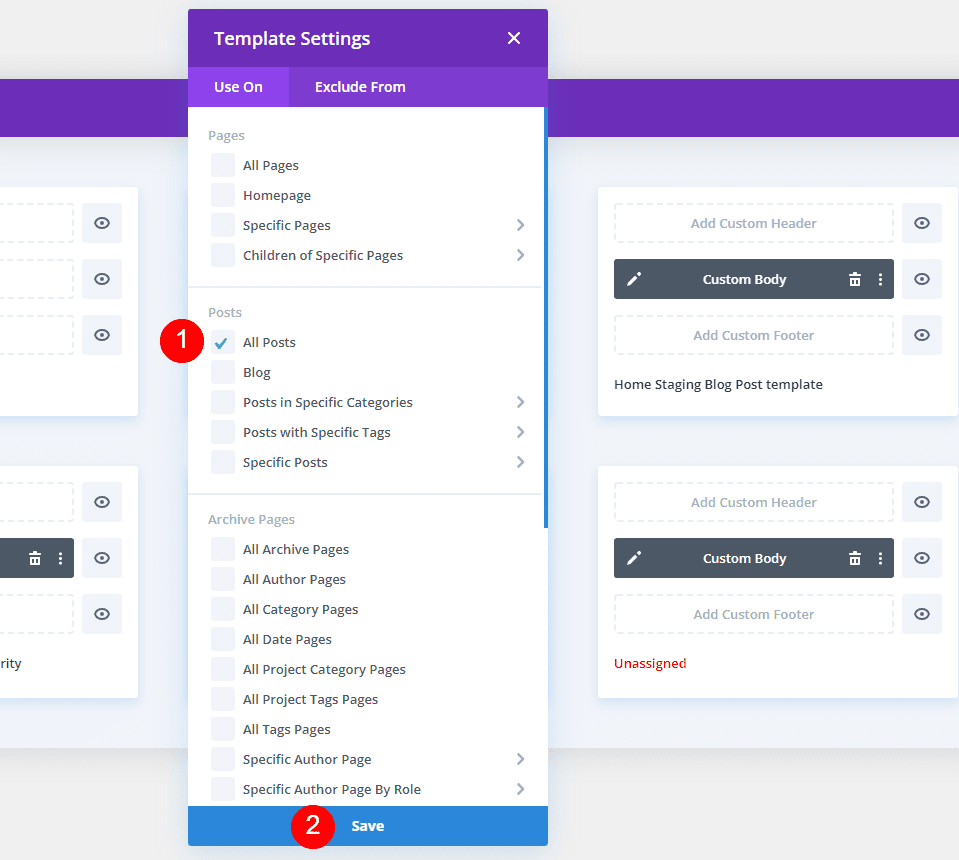
Check All Posts and click Save. I now have a new blog post template assigned as the default. I now have 5 blog post templates. Four are assigned to specific categories. Those categories will display those specific templates. All other categories will display the template I’ve set as All Posts. Any of these templates can be changed by reselecting what they’re assigned to.
Exclude a Category
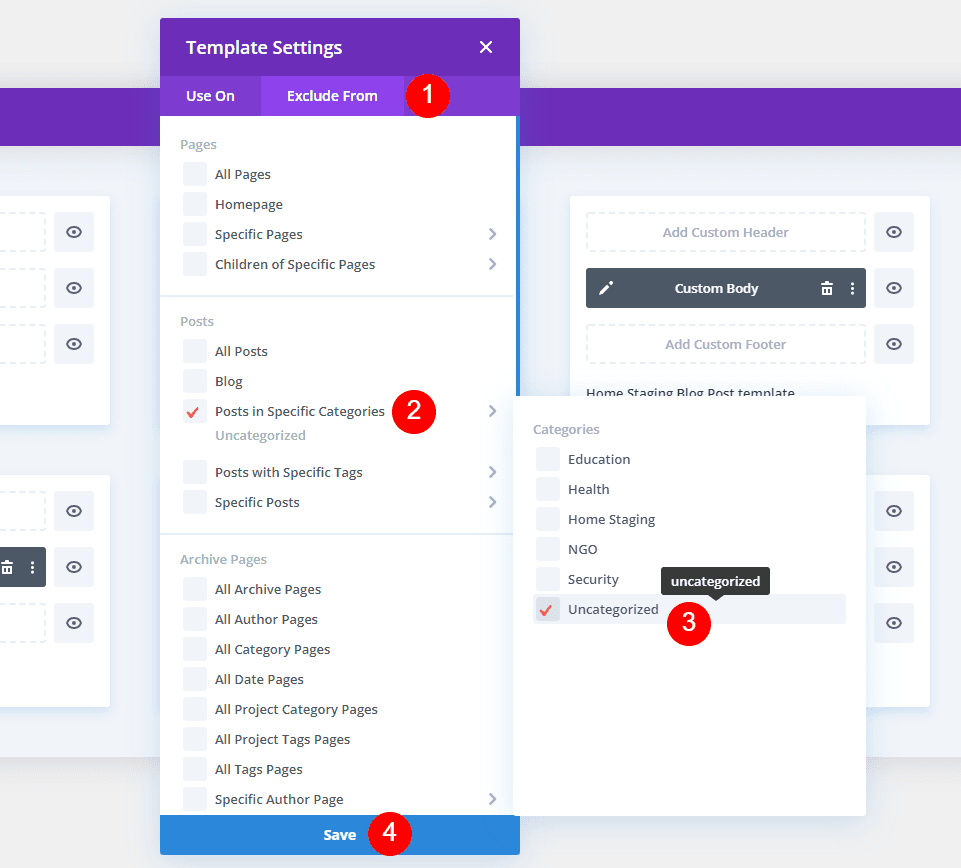
We can also exclude a category from displaying the default template. Select the Exclude From tab and hover over Posts in Specific Categories. Select the category and choose Save. For my example, I’ve selected Uncategorized to not use the default blog post template.
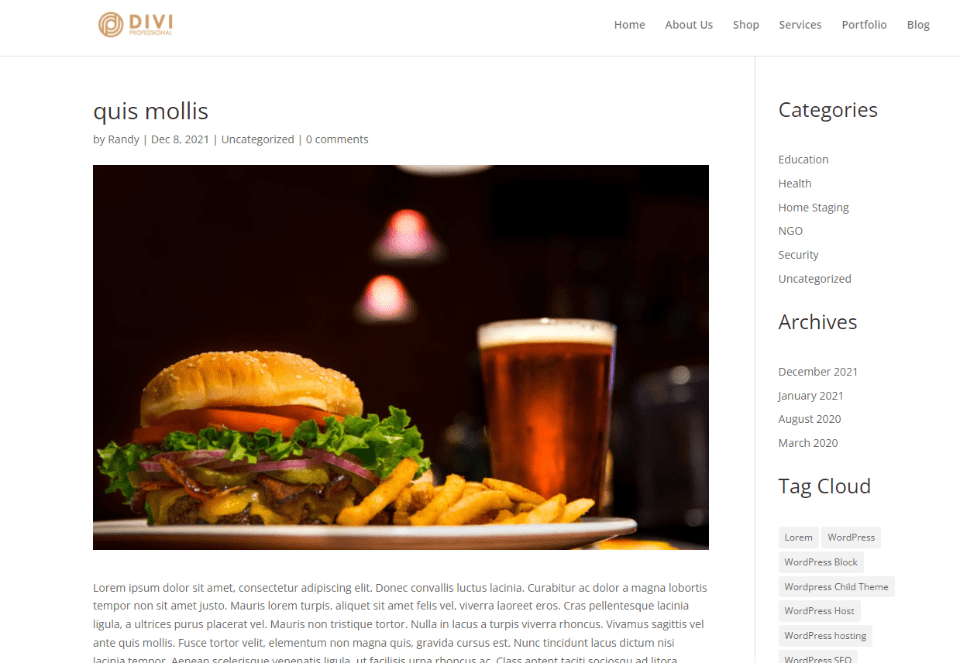
Now, any post that has Uncategorized for the category will not display a template from the Divi Theme Builder.
Results
Finally, here’s how our blog post templates look for each of the categories.
All Posts

I haven’t assigned a blog post template to the Health category, so it shows my default category.
First Blog Post Category

I assigned the NGO blog post template to my NGO category. This blog post template now displays for every post in the NGO category.
Second Blog Post Category

My second blog post category template shows my Home Staging category.
Third Blog Post Category

My third category displays the High School blog template.
Fourth Blog Post Category

My fourth category displays the Security blog post template.
Ending Thoughts
That’s our look at how to use different blog post templates for different categories with Divi. It’s easy to assign a blog post template to any category using the Divi Theme Builder. You can assign any number of post templates. You can even exclude categories from the templates. Any category not assigned or excluded will automatically display the default blog post layout.
We want to hear from you. Do you use different blog post templates for different categories with Divi? Let us know in the comments.
The post How to Use Different Blog Post Templates for Different Categories with Divi appeared first on Elegant Themes Blog.

