Business writing can become tedious and time-consuming. We often type the same words multiple times within an email, on social media, in presentations, articles, or within user’s guides. One way to help streamline the writing process is to use an app called Text Expander. This app allows you to create snippets of text and code and place them within your content using abbreviations.
In this article, I’ll walk through some of the features of Text Expander and see how easy it is to use. The app is available for Window, Mac, and iOS. I’m testing the demo version for Windows and running it on Windows 10.
Text Expander

Text Expander is a productivity improvement tool that can save hundreds of hours per year. It’s fast and accurate, saving you time without compromising quality. Improving efficiency helps reduce cost.
The app lets you add snippets as you type. You type a short abbreviation and Text Expander fills in the snippet. They can include strings of text, email addresses, signatures, code, images, form letters, styles, links, etc. You can add them with a shortcut or a custom abbreviation.
Snippets can be simple lines or complete paragraphs. You can style the snippet text and add links and images. It keeps you from having to type common phrases every time you want to use them. They can be added to any editor you’re typing in. Just type the abbreviation.
Create personal messages with fields for you to fill in. It includes multiple field types. The messages can be automated and personalized at the same time. You can search your snippets inline as you type. It also includes reminders as you type.
The snippets are stored in the cloud so they’re available on all of your devices. You can create it on one device and it’s automatically available on the others.
It integrates with your apps. It performs spell correction in multiple languages. Snippets can be nested within other snippets. It will import data from other apps, and you can import and export snippets.
Text Expander easily adds code snippets. It includes HTML, CSS, JavaScript, shell scripts, etc. It can accent words and include symbols. This is great for code templates that don’t rely on specific code editors. It will also shorten long URLs.
Text Expander is great for anything where you’d write the same thing more than once. This includes note-taking, replying to customers’ sales questions, customer support, emails, and lots more.
Using Text Expander with your Team
Using Text Expander with teams requires the Teams subscription. You can share the snippets with your team so everyone within the company can use the same text. Using Text Expander with teams helps keep consistency.
Create forms with fields so team members can enter the specific information while keeping the document consistent.
You can appoint a team member to be an authorized editor, and everyone on the team automatically gets the updated snippets. Easily manage thousands of snippets with a team across the globe. This keeps everyone using the same phrases, spellings, words, images, etc.
Team includes statistics so you can know how much time your team has saved by using Text Expander. This helps you make decisions about how you and your team use it.
Using Text Expander
Here’s a look at Text Expander in action.
Setting up Snippets
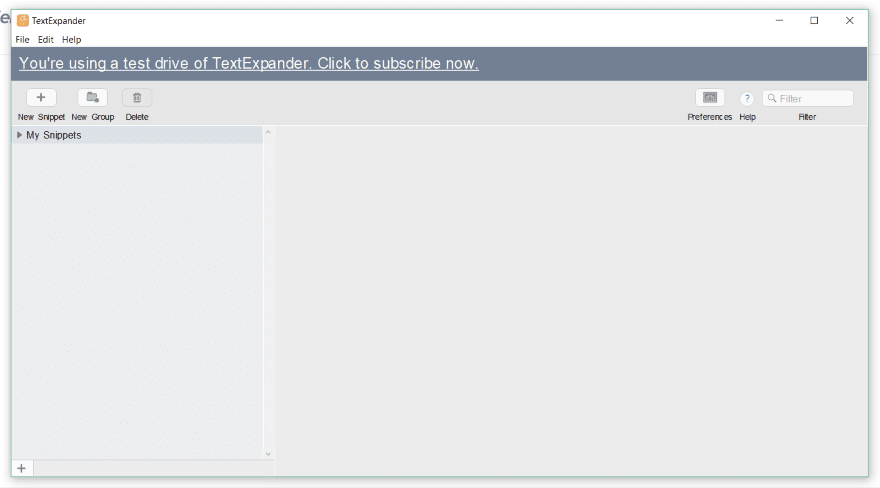
Once you install the app and log in, you’ll see a window where you can add snippets.
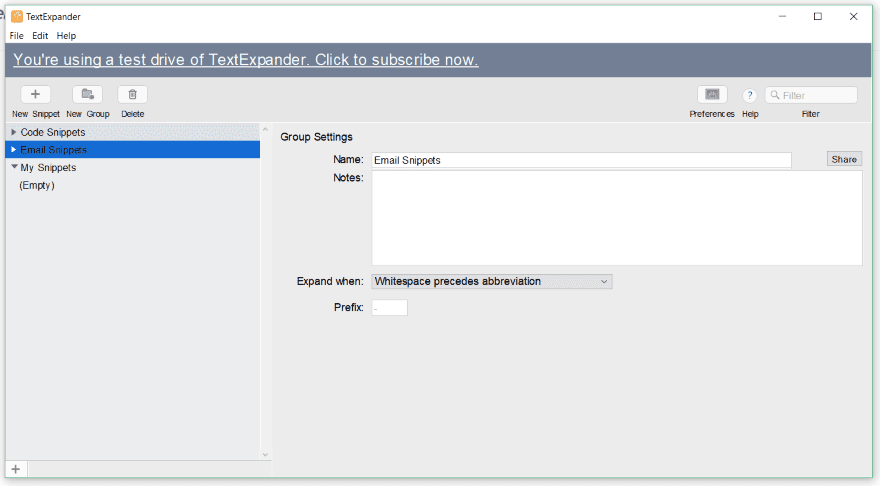
Create a group for your snippets if you want to organize them. I clicked on the New Group button and added the name. You can also add notes, choose when to expand (by selecting what precedes the abbreviation), and create the prefix. You can create your snippets in any of the groups you want.

The groups automatically appear within your account at the Text Expander website. You can also manage them or create them from here.
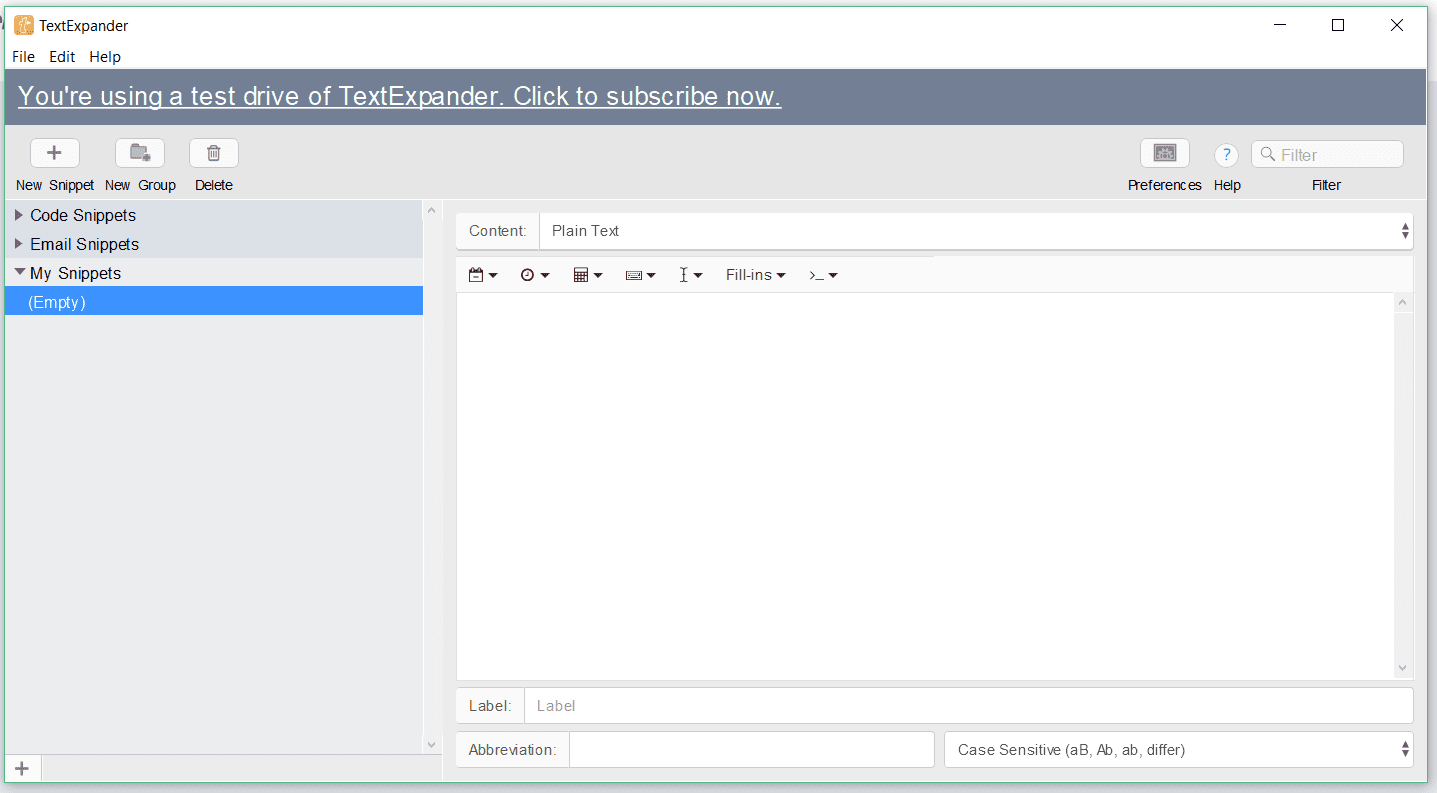
To create a snippet, select the New Snippet icon in the upper left corner. Here, you’ll choose the type of snippet you want to create, add the content, and choose the label, abbreviation, and case sensitivity.

In the Content window, you can choose to create plain text, AppleScript, shell script, JavaScript, or formatted text and pictures.
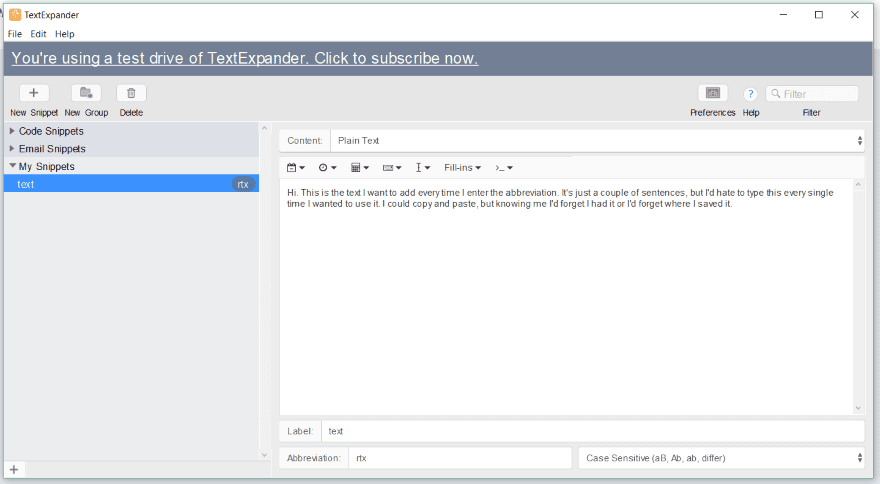
I chose plain text and typed a few random sentences. I gave it a label of ‘text’, set the abbreviation as rt… well, when I typed the abbreviation in my Word document it was replaced with the sentence in the snippet. I hadn’t saved it or anything. It just automatically worked.
Anyway, I gave it an abbreviation that means random text and left the case sensitivity at the default (meaning it’s case sensitive). It can also ignore the case or adapt the case of the abbreviation. The abbreviations appear in the left column with the name of the snippet. If you forget the abbreviation you can do an inline search. The keys depend on which OS you have. They do have some tips on creating abbreviations.
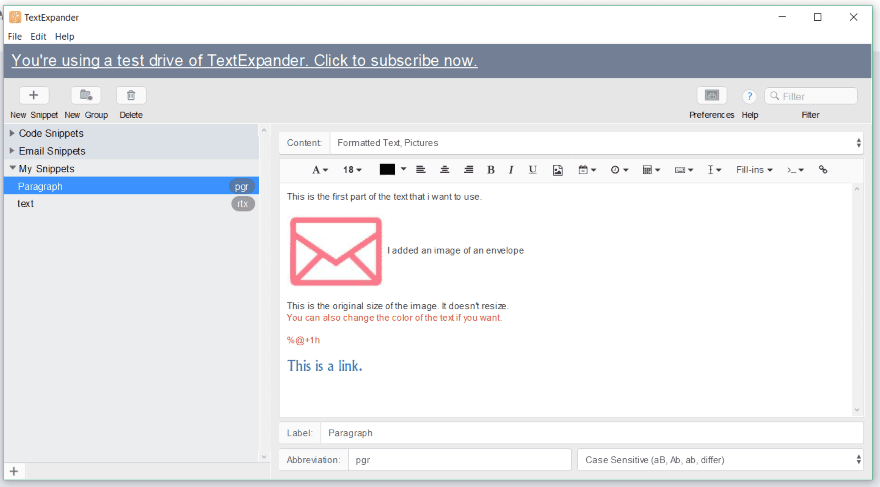
For this one, I chose formatted text and pictures. It opens a text editor where you can format the text, add images, add bullets, links, dates, etc. I’ve changed the color of a line, added a small image, a date code, and a link. I added the label and set the abbreviation to pg and r. The label is the name of the snippet that will appear in your snippet list. If you don’t give it a label it uses the first sentence.
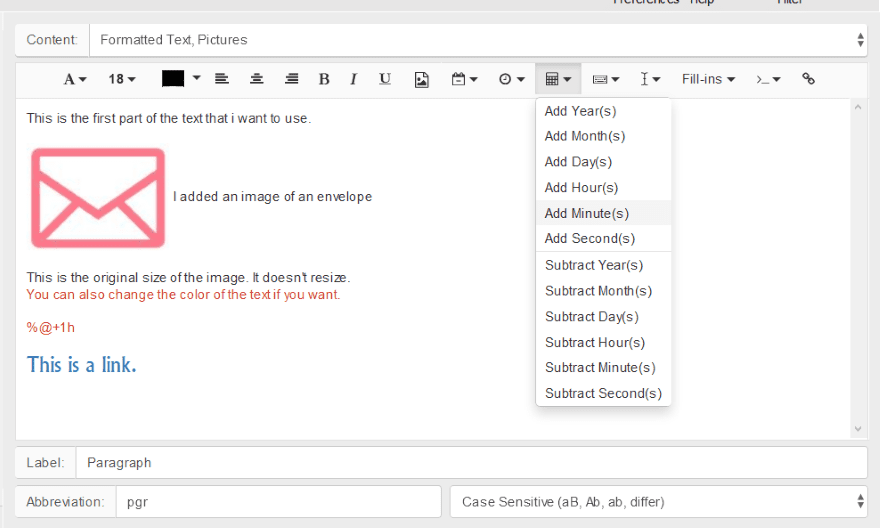
The date codes are selected from the drop-down links. You can add the current date or a future date without having to open a calendar. You can choose the format. It uses math so you can easily choose a future or past date.
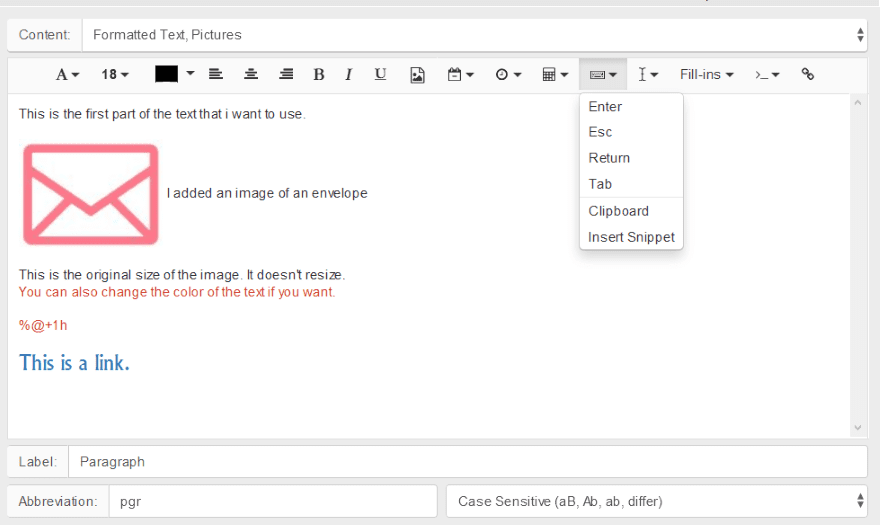
Choose the keyboard action you want to use with the snippet.
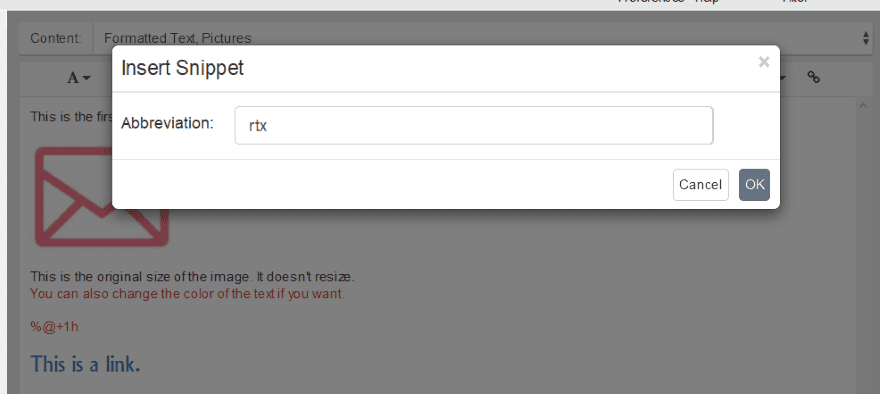
For example, I chose to insert a snippet and it asked for an abbreviation.

The snippet was then added to this snippet, allowing me to embed snippets within snippets.
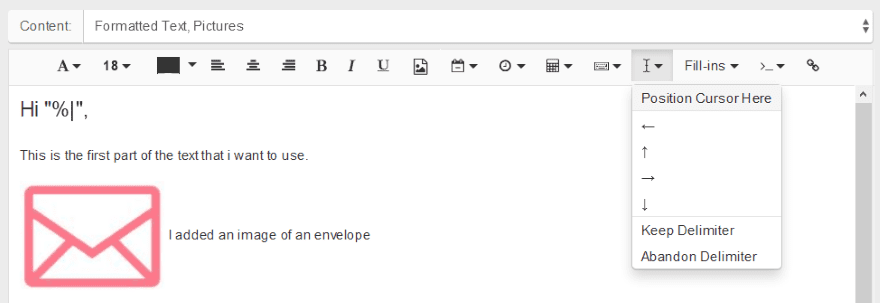
You can set the delimiter. In this example, I’ve added a couple of quotation marks, set the cursor within the quotes, and set the cursor to be placed at that location when the snippet is used. This gives the user the starting place so they can add the text.
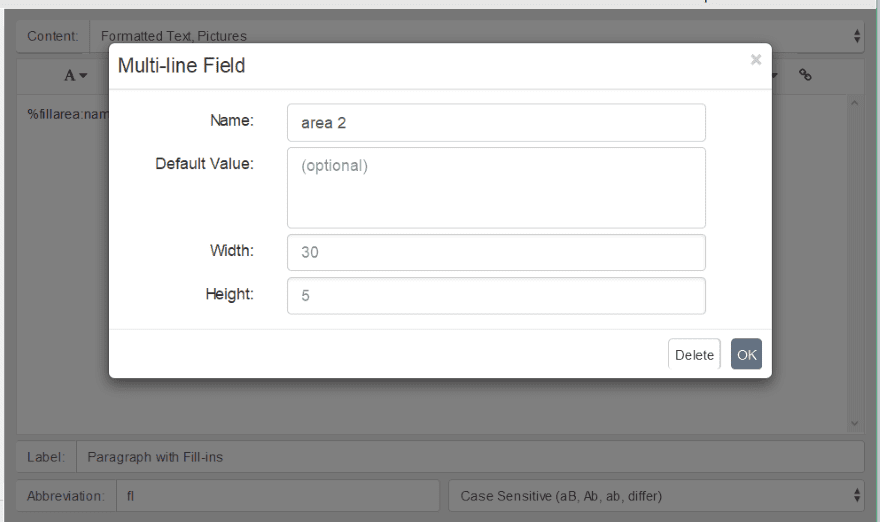
The fill-ins give you extra fields. This is the multi-line field.
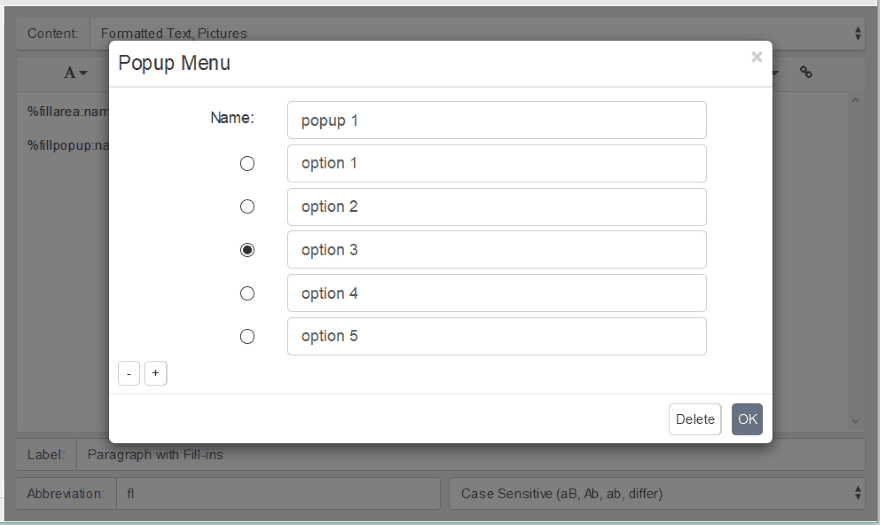
This is the popup menu. Add as many options as you want.
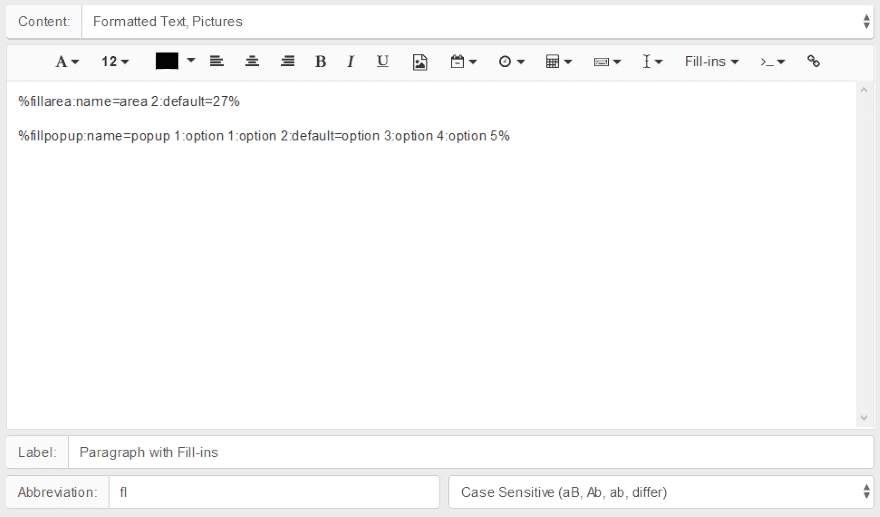
I added a fill area with the default value of 27 and a popup with 5 options (these are the default example options).
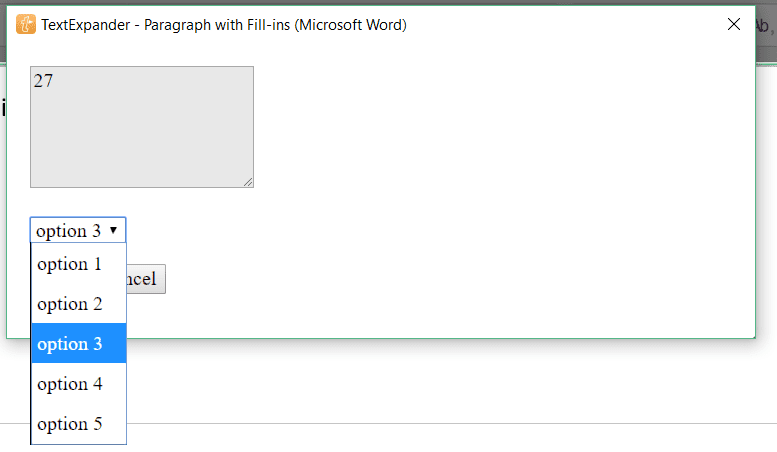
By typing my abbreviation I was given the popup with the default value that I added and a dropdown box with options. I made a selection and hit OK. This added the values (27 and option 3) to my text.
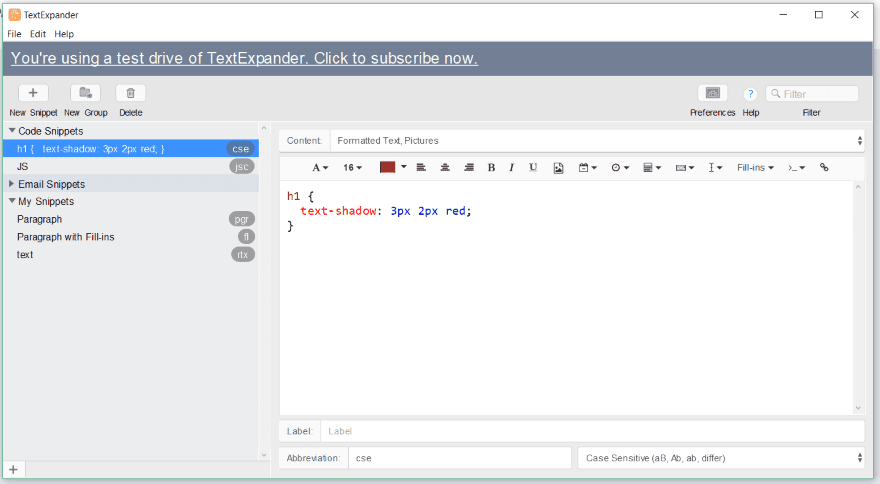
For this one, I created a snippet for CSS and added it to the Code Snippets group.
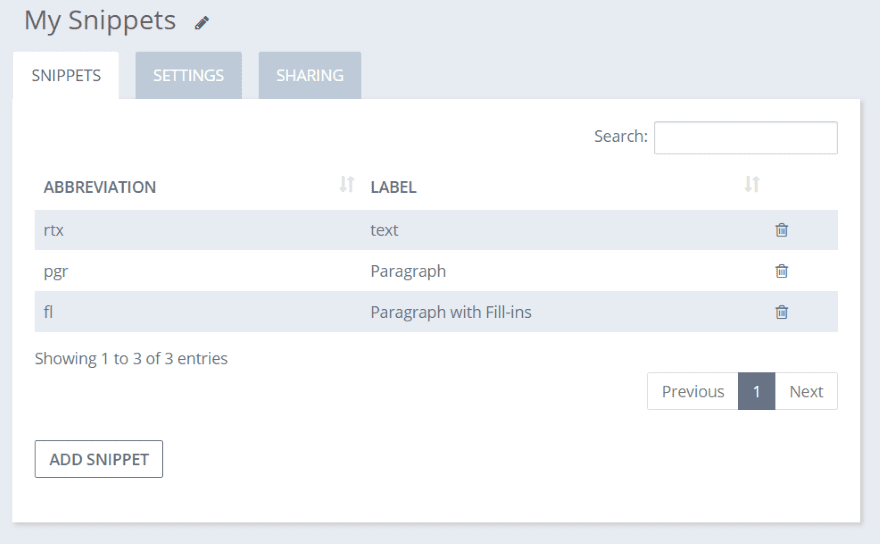
All of the snippets appear within your list in your Text Expander account.
Adding Snippets to Your Content
Adding your snippets to your documents is easy. Simply place your cursor where you want the snippet and enter the abbreviation in any editor. I want to create an email with a premade layout. For this, I’ll create the email, a project link, and an email signature.
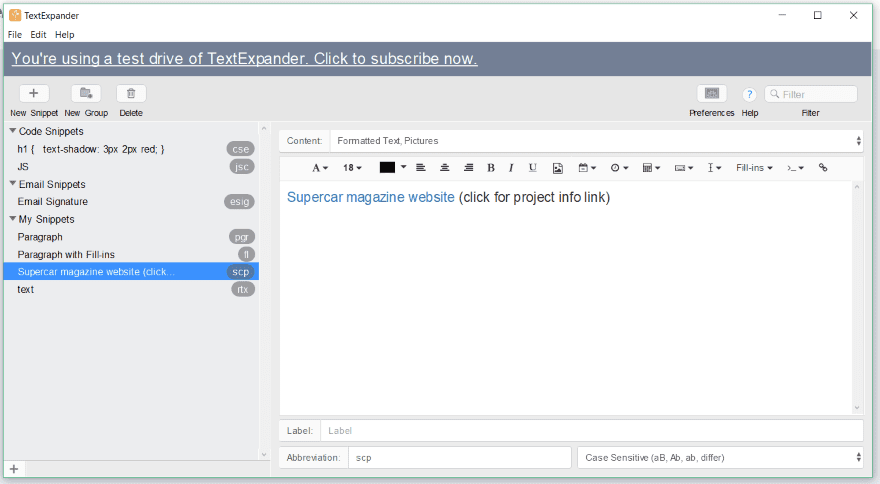
The project link is formatted text and just provides the project name. It’s clickable. I added it to the My Snippets group.
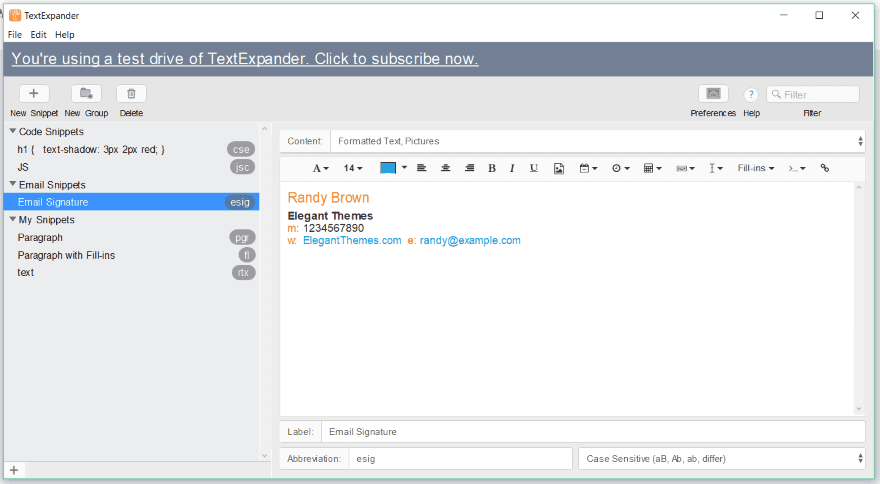
I created an email signature (using the links I discussed in the article How to Write a Professional Email Signature that Converts), pasted the signature into a formatted text snippet, and added it to my Email Snippets group.
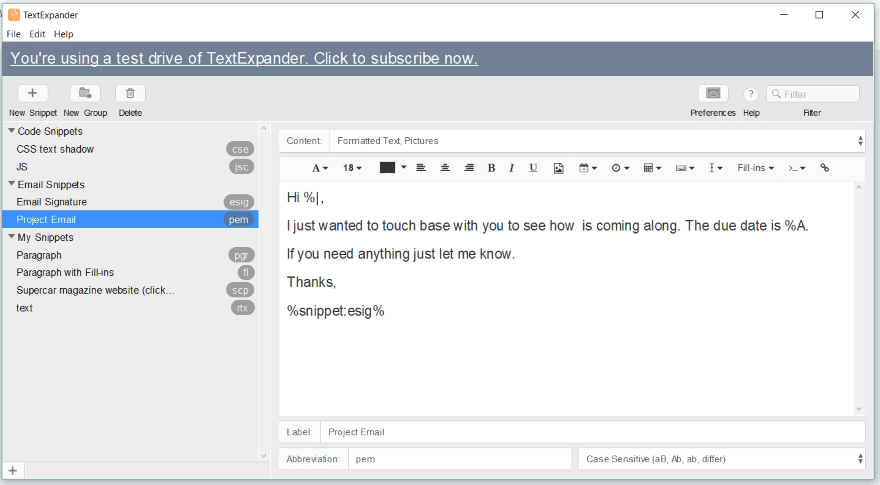
I also created the email template. It includes a location for the cursor, the date, and I’ve embedded the email signature snippet.
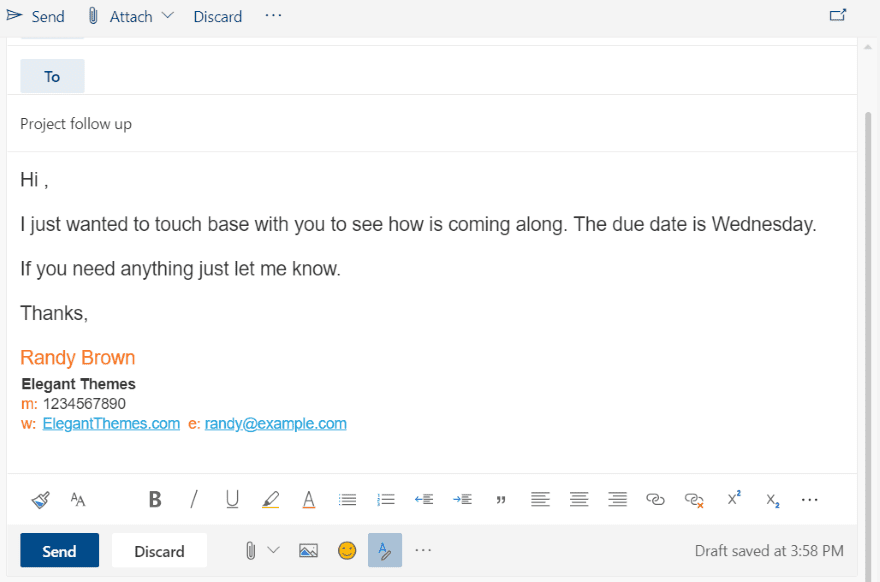
I went to my online email app and entered the abbreviation for the email template snippet. The cursor is automatically placed where I can enter the name. The email body and my signature are here.
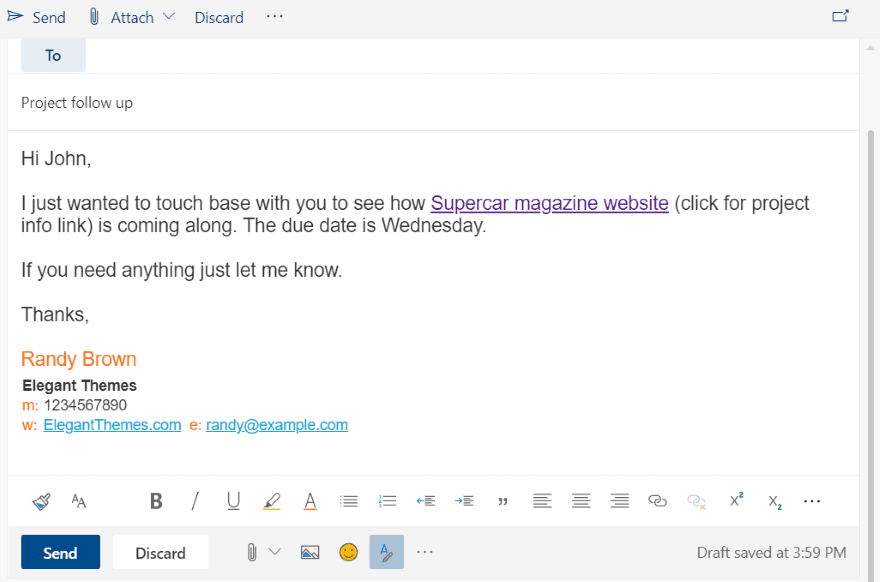
I entered the person’s name and then added the abbreviation for the project. It appeared and included the link. I could have included it as an embedded snippet, but this lets me use any project I want.
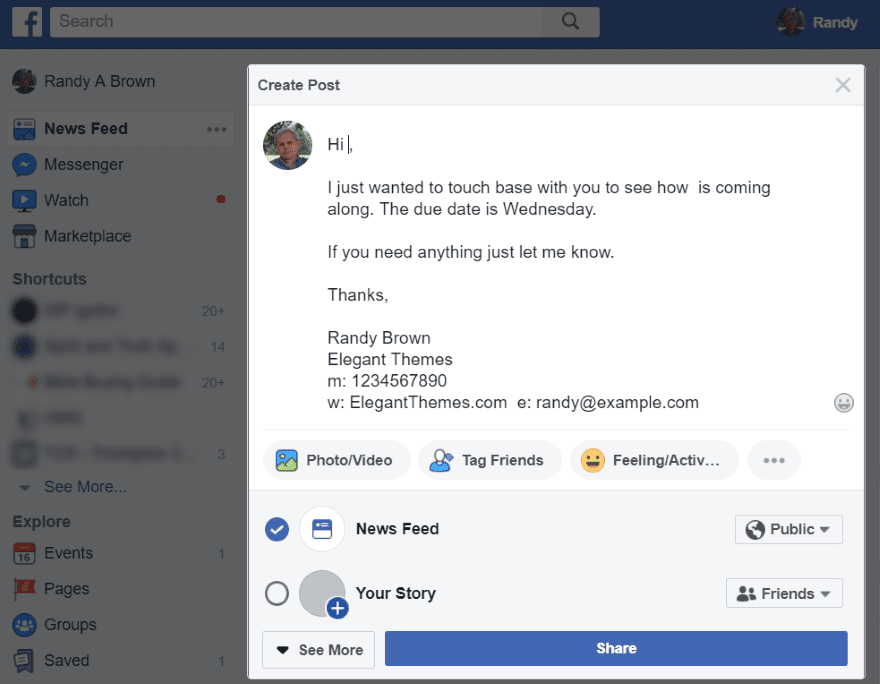
Here’s the same snippet on Facebook.
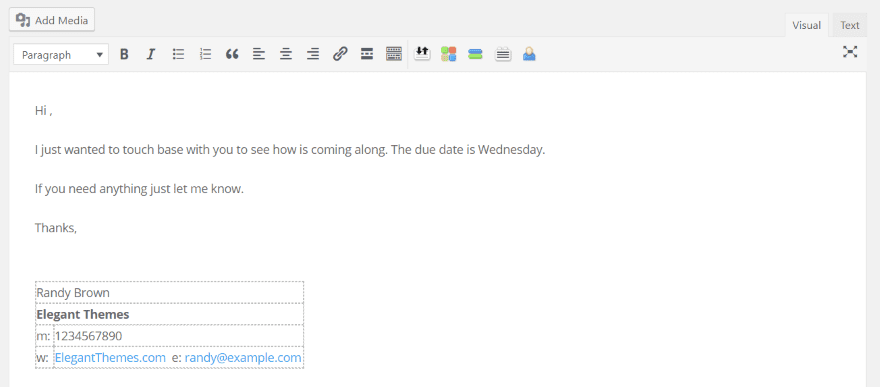
Here’s the snippet in WordPress using the Classic editor.
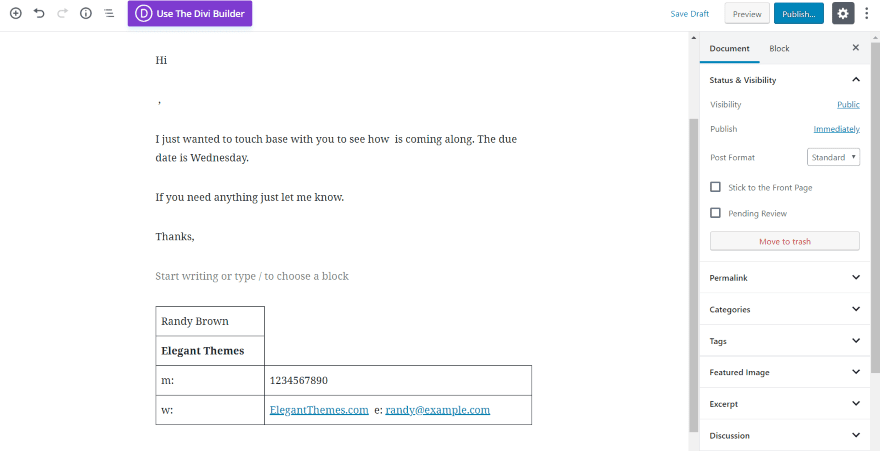
As expected Gutenberg creates individual blocks, but it’s easy enough to work with. When using them with Gutenberg I would create them specifically for this editor.
Text Expander Documentation and Support

Documentation and training include a blog and a support page with videos, knowledge base, help for teams, public groups, tips, user’s guides, etc.
Text Expander Pricing
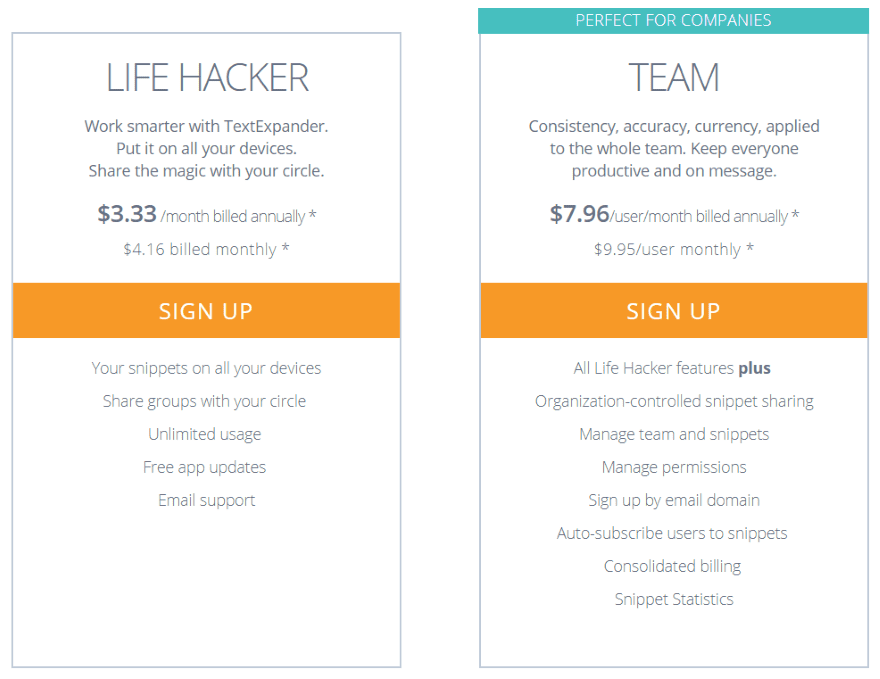
Text Expander is reasonably priced and it’s easy to see how it would pay for itself. There are two options to choose from:
- Life Hacker – $39.96 per year, or $4.16 per month
- Team – $95.52 per year per user, or $9.95 per month per user
The Life Hacker still lets you share groups of snippets with your circle. Team is great if you want your team to share the library of snippets and have control over how the snippets are managed.
Ending Thoughts
Text Expander is intuitive. I didn’t need the help files, but there are a lot of them and I’m sure I could find anything I needed. I just scratched the surface of what it can do, so I’m sure it can get more complex. I highly recommend watching the demonstration videos to see it in action. This is an easy app to recommend as it would be a great time-saver for businesses of any size.
We want to hear from you. Have you tried Text Expander? Let us know about your experience in the comments.
Featured Image via johavel / shutterstock.com
The post How to Use Text Expander to Drastically Speed Up Your Writing-Related Work appeared first on Elegant Themes Blog.
