If there’s one WordPress block you’ll end up using sooner or later, it’s this one. The Paragraph block is at the core of every WordPress blog post you read. It’s very easy to use, and yet it hides some features that you might miss at first glance.
In this article, we’ll tell you everything there is to know about the Paragraph block. That includes how to use it, its settings and options, and answers to some common questions.
Let’s get to it!
How to Add the Paragraph Block to Your Post or Page
Adding the Paragraph block to your content takes just seconds. First, open the Block Editor and add a new block by clicking on the plus (+) sign within the body of the post or page.
The Paragraph block should be among the first options you see. If it isn’t, click on Browse all to check out all of the blocks at your disposal, or use the search bar:
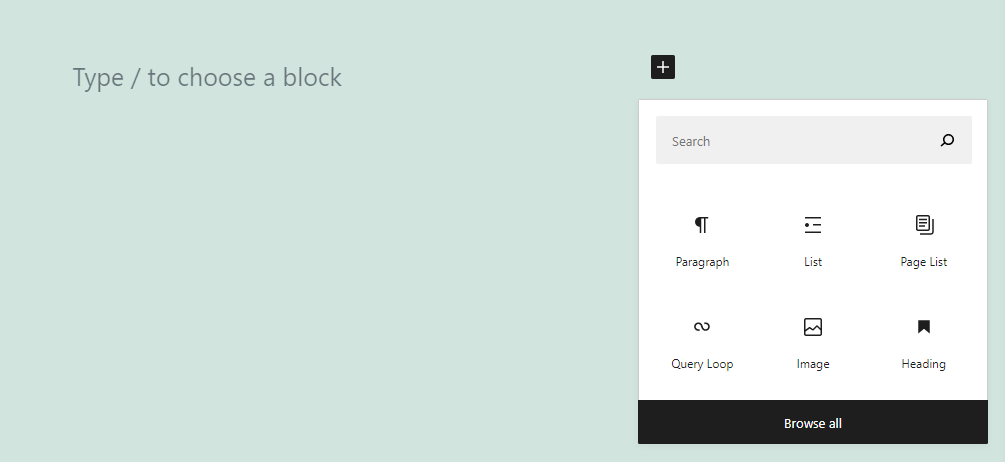
Once you add the Paragraph block, you can go ahead and start typing. If you see the placeholder text “Type / to choose a block”, as in the example above, you’re already working with this block.
Keep in mind that you won’t see any customization options and settings for your text until you start typing. After you add some text, a formatting menu will appear over the block:

Let’s talk about what those formatting options are in the next section. We’ll also go over all of the other customization settings you can use with this key block.
Paragraph Block Settings and Options
If you publish blog posts (or any other type of written content), you’ll probably spend a lot of time tinkering with text formatting to make it look just right. The Block Editor makes that process simple, by providing you with a menu full of formatting options. Most blocks have similar menus, but the options they include may vary.
In the case of the Paragraph block, here are the formatting options it gives you access to:
- Changing the type of block you’re using
- Modifying the text alignment
- Bolding and italicizing text
- Adding links to the paragraph
If you’ve used a text editor of any kind, you’ll probably recognize all of these options. Here’s a quick cheat sheet that shows you where each individual setting is within the menu:

You’ll also notice that the formatting menu includes an icon with a downward arrow. Clicking on that arrow will open a sub-menu with additional options. There you can embed images within your paragraphs, adding inline code, and more:
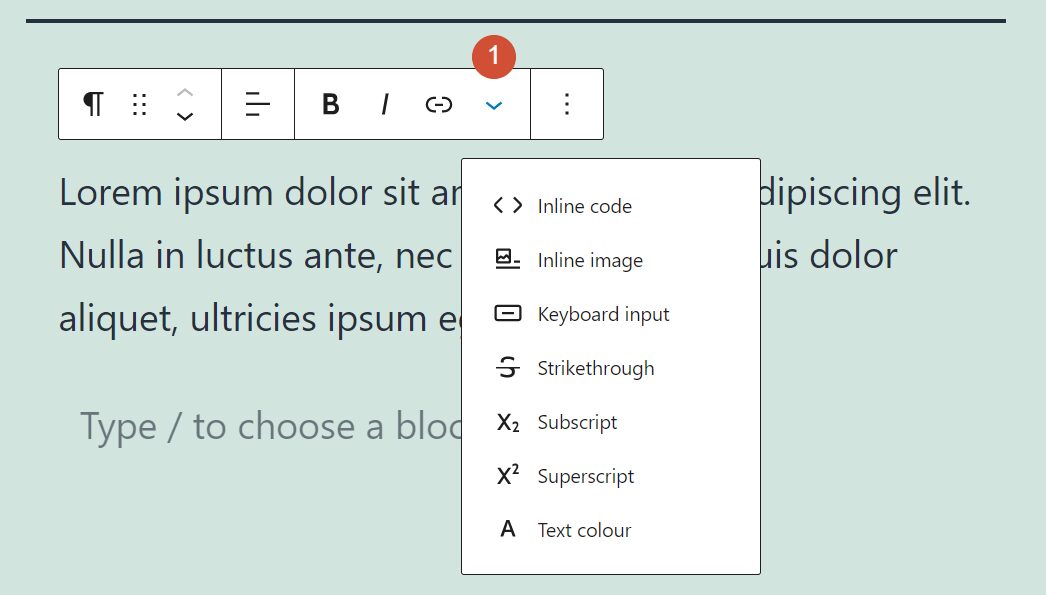
There are some minor caveats to keep in mind when changing the formatting of your text. The Paragraph block enables you to bold or italicize specific words, as well as add links to them. However, you can’t change text alignment for parts of a paragraph.
It may also come as a surprise not to see an option to add lists to your paragraphs. That’s because the Block Editor adds a standalone List block, which comes with its own set of features.
If you’re familiar with the Classic WordPress Editor, adding a new block for each paragraph you write may seem like too much work. However, the Block Editor makes that process simple. Each time that you hit Enter to move to a new line, the editor automatically adds a new Paragraph block for you (which you can use or switch to another option).
Moving past formatting options, the Paragraph block also offers a few additional settings to help you to customize your text. To access them, click on the gear icon in the top-right corner of the editor:
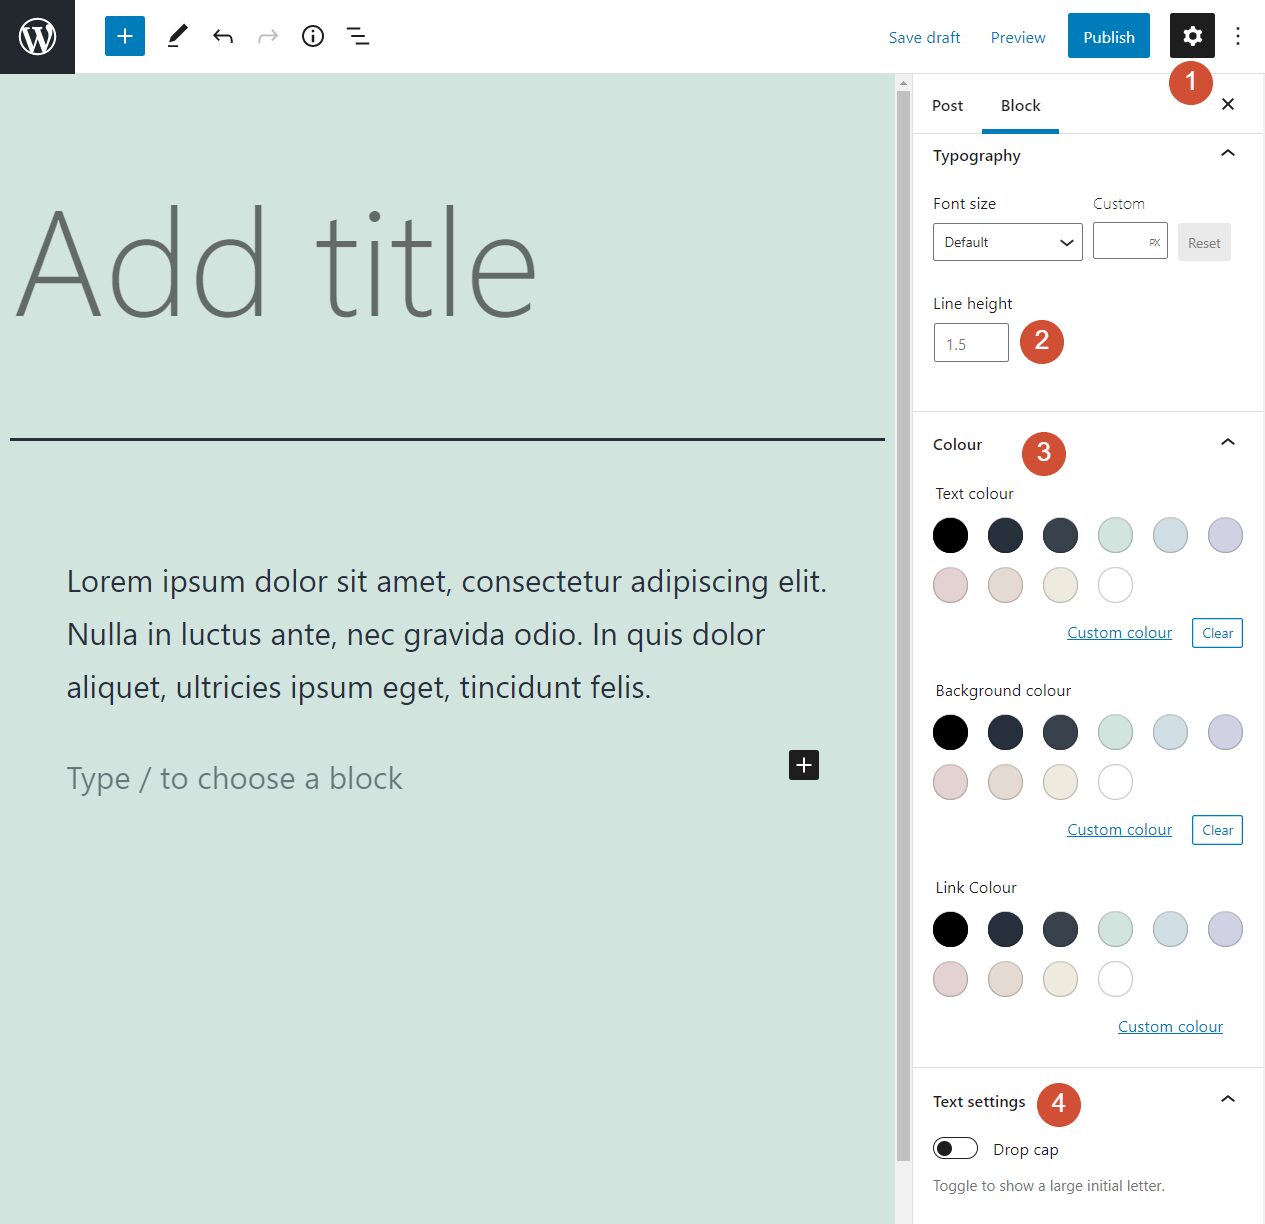
From this menu, you can change the font size (1) and line height (2) for the paragraph you’re working on. Likewise, you can change the text’s overall color, its background, and the color of any links it contains (3). The menu also includes an option to add a drop cap to the paragraph you’re customizing (4):
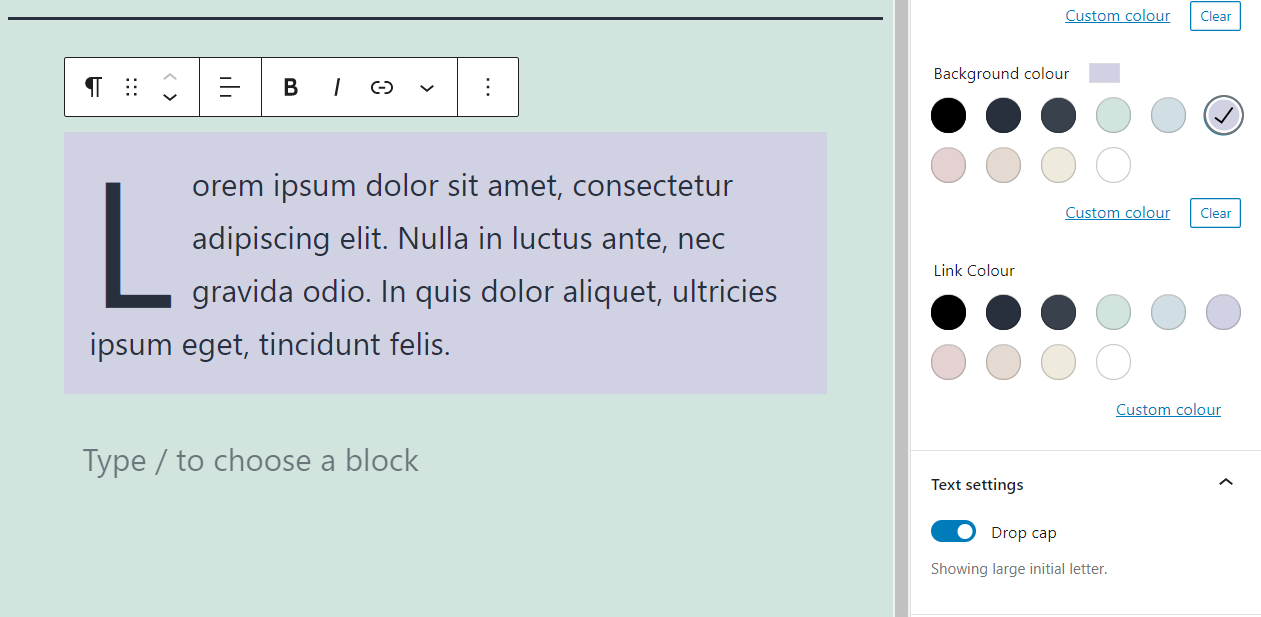
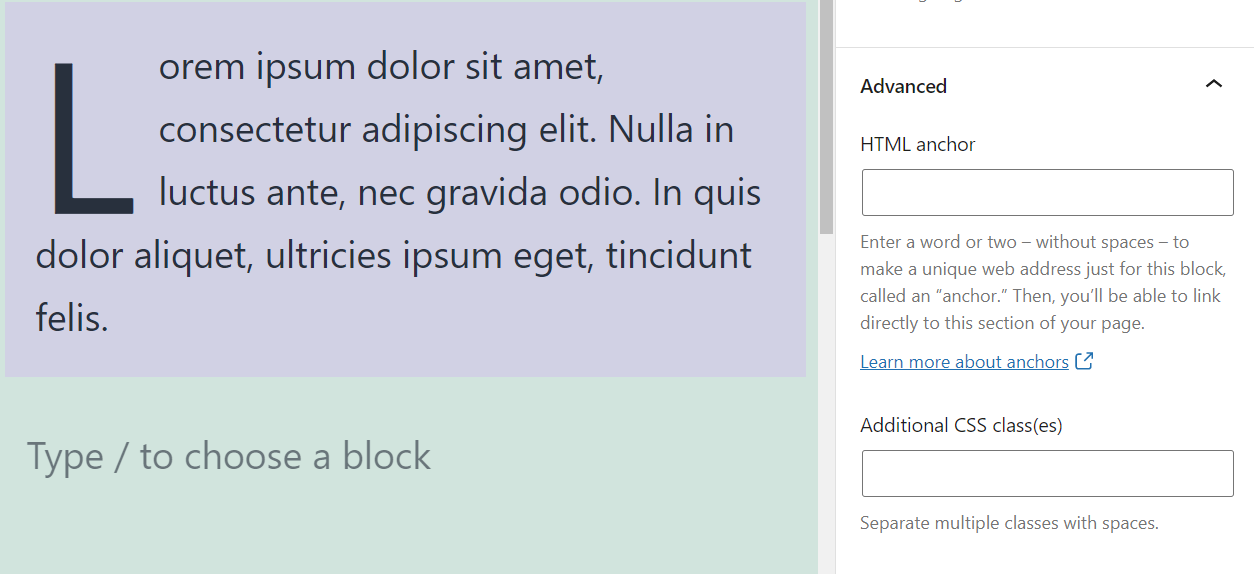
All of the settings we just mentioned apply to the entire block. In other words, you can’t change the color or font size for specific words within each paragraph. Likewise, if you enable drop caps, that setting only applies the block you select.
Finally, the Paragraph block also enables you to add HTML anchors and CSS classes. That means you can use CSS to customize the block further if you want:
That covers all of the options and settings that are available for the Paragraph block. Now all that’s left is to start using it.
Tips and Best Practices for Using the Paragraph Block Effectively
The Paragraph block is the foundation of most WordPress pages and posts. You’ll end up using this block so often that mastering all of its settings and options should come easily.
When it comes to paragraphs, the main thing to keep in mind is to avoid “walls of text.” Using plenty of short paragraphs is much easier on the eyes and more engaging to users. That’s because when people read on the web, they tend to skip over the information they don’t deem relevant. By using shorter paragraphs, you can adapt your content to users’ behavior.
Frequently Asked Questions About the Paragraph Block
If you have any questions about how to use the Paragraph block or its features, this section will answer them. Let’s start by talking about how WordPress treats each paragraph.
Can I Use a Single Paragraph Block?
If you’re coming from using the Classic WordPress Editor, having to add individual blocks for each paragraph can be a bit jarring. However, the Block Editor solves that problem by automatically adding a new Paragraph block every time you hit Enter.
In theory, you can use a single Paragraph block on a page or post, and include all of the content you want within it. However, long walls of text can be difficult to understand, so that’s not an approach we recommend.
Can I Add Lists Within a Paragraph Block?
The Block Editor has separate blocks for lists and paragraphs. That’s because it provides different sets of formatting and styling options for each type of element. While that may be a bit surprising if you’re used to the Classic Editor, it’s a small change that’s easy to get accustomed to.
How Do I Add Images Within the Paragraph Block?
The Paragraph block enables you to add embedded images. However, we recommend that you use the Image block instead. With the Image block, you get access to many more options for customizing, resizing, and formatting your images.
Conclusion
Paragraphs are the glue that holds most websites together. We spend most of our time on the web reading content, and if you’re visiting a WordPress site, chances are that content was created using the Paragraph block. Considering how important this element is, it’s essential that you learn its ins and outs.
In our experience, you’ll spend most of your time in the Block Editor working with paragraphs, lists, images, and headings. Once you master those basic blocks, using more complex elements should come easily as well. The best thing about the Paragraph block specifically is that it’s as simple or as in-depth as you need it to be.
Do you have any questions about how to use the Paragraph block in WordPress? Let’s talk about them in the comments section below!
Featured Image via Alexander Limbach / shutterstock.com
The post How to Use the WordPress Paragraph Block appeared first on Elegant Themes Blog.
