Data is the new gold. Almost every website and app collects at least some information about users’ behavior. However, some of your visitors may want to exercise more control over who’s monitoring their online habits. That’s why if you’re using a tool such as Google Analytics, providing an opt-out link is a move in the right direction.
In this article, we’re going to break down why enabling your users to have control over their data is in your best interest. Then we’ll teach you how to set up a Google Analytics opt-out link and test it in three steps.
Let’s get to work!
Why You Might Want to Let Users Opt Out of Google Analytics Tracking
It’s not a surprise that most websites collect information about user behavior. This practice is helpful for a wide variety of reasons that benefit both site owners and visitors, including marketing and Conversion Rate Optimization (CRO), as well as User Experience (UX) auditing.
Depending on which analytics tools are used, at any moment, at least some of the following information is being collected for a site’s guests:
- How much time visitors spend on the website and on which pages
- What searches led them to the content they’re viewing
- The specific actions they take once they’re on the page
- Individual IP addresses and which browsers visitors use
All that information sounds harmless. However, once websites and apps start sharing data with each other, it gets to the point where marketers can get an eerily accurate picture of who you are. For some, this is unnerving. Others may find the relentless stream of targeted ads annoying.
In many ways, the data we provide to websites and apps is the price we pay to get better product recommendations, search results, individualized offers, and more. On paper, it all makes for a better web experience. However, if you want to opt out of tracking, it should be within your ability to do so.
Fortunately, this is a right of all web users in many jurisdictions. There are legal reasons why websites inform you they’re collecting cookies and enable you to say no to tracking altogether.
Offering a Google Analytics opt-out option is just another way of empowering your own site’s visitors to decide who gets access to their information. Even if a percentage of your users decide to block data tracking, chances are you will still collect enough to make informed decisions regarding marketing, UX, and more.
How to Let WordPress Users Opt Out of Google Analytics Tracking (In 4 Steps)
For this tutorial, we’re working off the premise that you already have Google Analytics connected to your website. If you haven’t gotten around to it, you don’t need an analytics opt-out link yet. With that in mind, let’s jump in.
Step 1: Install and Activate the Google Analytics Opt-Out Plugin
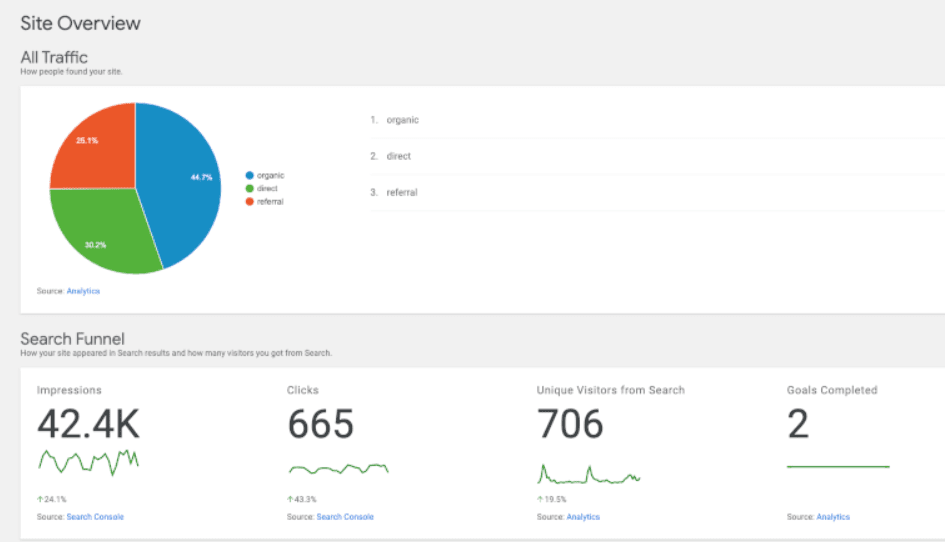
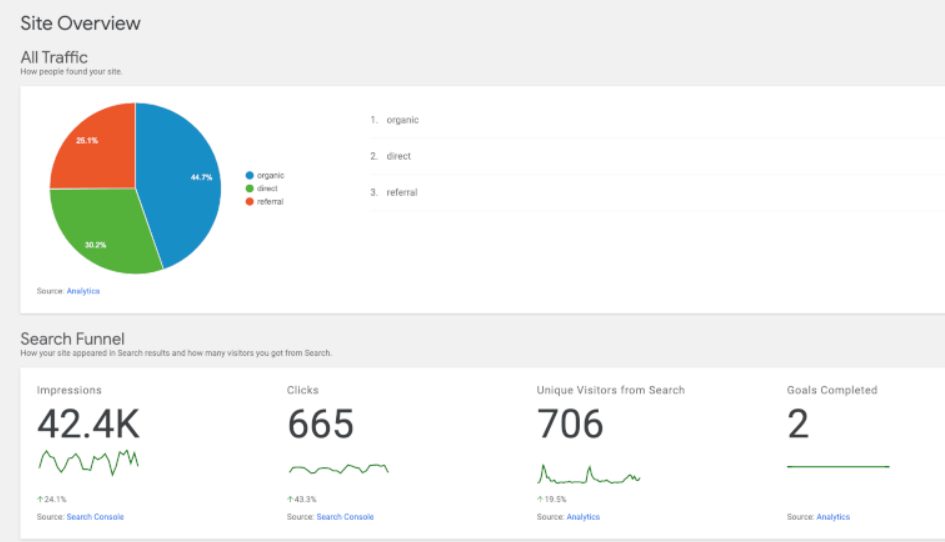
Google Analytics works by loading a script every time someone visits your website. That code collects information and sends it to the platform, which serves it up to you in easily readable charts and graphs:

If you want to give users the ability to opt-out of tracking, you need to disable that script. The Google Analytics Opt-Out plugin generates a long-term cookie that does just that:

This workaround is necessary so each of your visitors can choose whether to disable Google Analytics tracking individually. If they ever want to opt back in, however, they’ll need to clear their cookies.
Google Analytics Opt-Out is a free plugin available in the WordPress Plugin Directory. You can install it right from your admin dashboard by navigating to Plugins > Add New and searching for it.
Step 2: Add Your Tracking Code and Configure the Plugin’s Settings
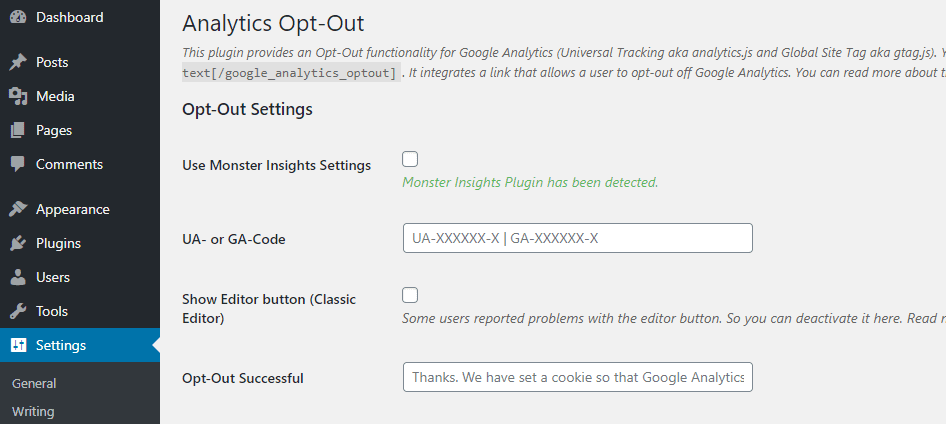
Configuring the plugin is fairly simple. Once you install and activate it, go to Settings > Analytics Opt-Out in your admin sidebar.
For the plugin to work, you’ll need to enter your Universal Analytics (UA) or Google Analytics (GA) code, depending on which you’re using to track data on your site:

These are the codes Google Analytics uses to identify your ‘properties’ on the platform and to link it to WordPress. To find out your code, go to your Google Analytics account and open your website’s linked property:

Click on the Admin button in the lefthand sidebar menu and open the Tracking Info > Tracking Code section:
![]()
What you’re looking for is the Tracking ID at the top of the page. Copy it, return to WordPress, and paste it in the corresponding field.
If you’re using the Monster Insights plugin, you can skip this step by enabling the Use Monster Insights Settings option under Settings > Analytics Opt-Out. The Google Analytics Opt-Out plugin will then automatically use the tracking code you entered previously to connect your site.
Once the plugin is working, you can add an opt-out link to your website. One quick note, though – if you’re using the Classic Editor, you’ll have to enable the Show Editor button (Classic Editor) option in the plugin’s settings before proceeding to the next step.
Step 3: Create an Opt-Out Link for Your Website
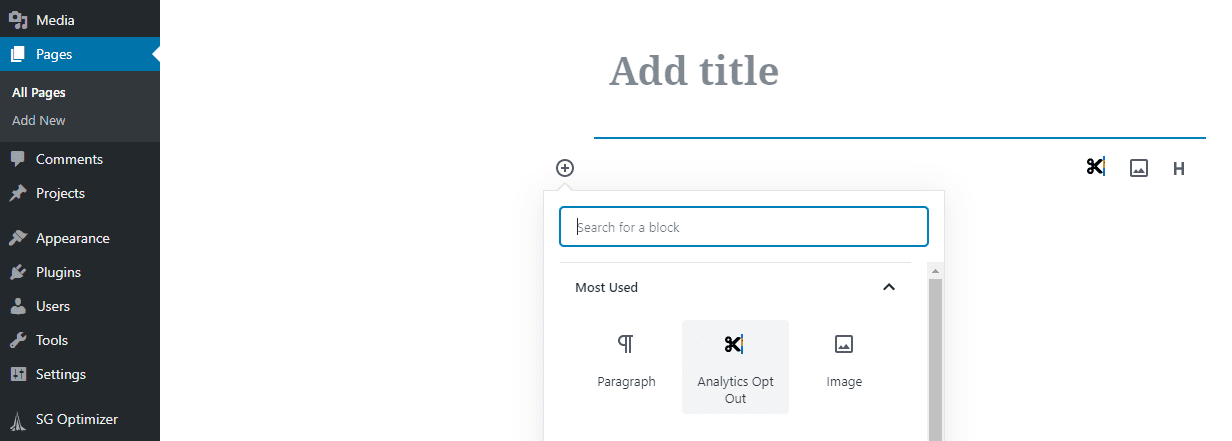
The Google Analytics Opt-Out plugin automatically adds an Analytics Opt-Out block to the Block Editor. All you have to do is add this element wherever you want it to appear and create the anchor text it should include:

By default, the plugin will add a barebones link to your website. Once you click on it, it will display a confirmation message, informing you that Google Analytics tracking will be disabled for you from the next time you visit:

The link works, but it’s not very visually appealing. Plus, visitors are liable to pass over it if you don’t make it more apparent. If possible, we recommend adding the opt-out setting to a secondary menu that’s hard to miss. You can easily accomplish this with Divi.
If you’re using the Classic Editor and you enabled the corresponding setting in during the second step, you can also easily incorporate an opt-out link on your site’s pages:

Clicking on the Analytics Opt-Out button in the editor toolbar will provide a shortcode you can place anywhere you want. It works exactly like the Block Editor link shown above.
Step 4: Test If Your Website is Sending Data to Google Analytics
Setting up an analytics opt-out link for your website is simple, but it’s wise to check that it’s actually working as it should. The easiest way to do that is by using your browser’s developer tools.
For example, if you’re using Chrome, you can right-click anywhere on your website and select the Inspect option. Once the console is open, go to Application > Manifest and look for a cookie with a name starting with ga-disable:

If that cookie’s value is set to True, it means Google Analytics won’t be tracking your data on that particular website. The same should be the case for any user who clicks on the link you’ve added to your site.
Conclusion
Almost every website tracks your behavior in one way or another. It sounds nefarious, but it’s that data that enables other services to understand what you want and provide relevant recommendations. Even so, it’s only natural some might not feel comfortable sharing all that information. That’s why letting users opt out should be the default practice.
To give your visitors control over their data, you can add a Google Analytics opt-out link to your site in four steps:
- Install and activate the Google Analytics Opt-Out plugin.
- Add your tracking code and configure the plugin’s settings.
- Create an analytics opt-out link for your website.
- Test if your website is sending data to Google Analytics.
Do you have any questions about adding a Google Analytics opt-out link to your site? Let us know in the comments section below!
Article thumbnail image by La1n / shutterstock.com
The post How WordPress Users Can Opt Out of Google Analytics Tracking appeared first on Elegant Themes Blog.

