If there’s one feature about WordPress that sets it apart from other content management systems (CMS) out there, it’s customization. Custom fields in WordPress are a built-in part of the CMS that lets you expand not only the meta-data and information you display, but also completely change the functionality and utility of a post or page. We want to help you to understand the fundamentals. We are going to discuss what a custom field is, why they’re useful, and provide some real-world examples of how they’re used.
What are WordPress Custom Fields?
In short, WordPress custom fields give you a way to add specific elements to pages. It might be a specific kind of image or byline or author bio, maybe a rating or even something like, as the Codex entry on custom fields says, mood, currently reading, listening to, or weather boxes.
These fields make up what is called metadata for your post (basically anything that’s not included in the main content of your article). By default, WordPress has meta-boxes for generic info, like tags, categories, permalink, featured images, etc. If you want to add more, you will be using custom fields.
You might even want to add information that each of the writers on your team need to complete to publish a post.
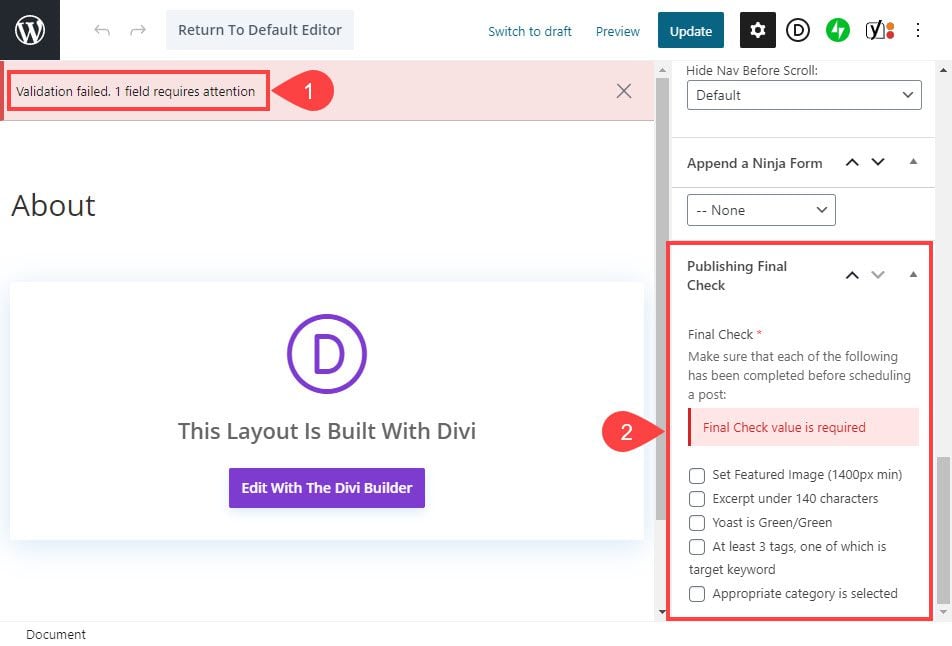
You can create a required field that won’t let the post be published until certain criteria are checked off. So keep in mind that these custom fields aren’t just for information on the front-end. They can be useful for the back-end, too.
Adding Custom Fields to a WordPress Post
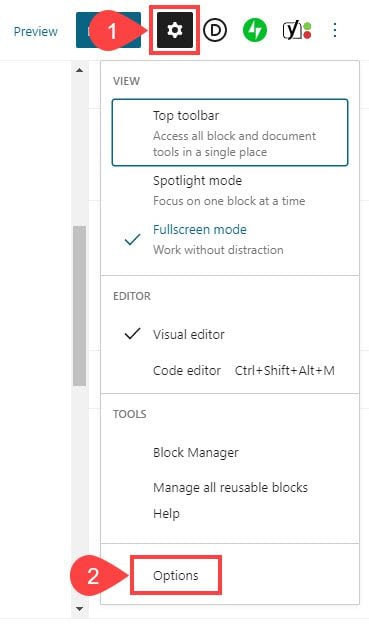
By default, WordPress custom fields are disabled in the page and post editor. If you’re using the Block Editor, it’s easy to enable them. Just click on the Gear Icon in the upper-right corner of the screen. Select Options.
Then choose to enable Custom Fields near the bottom of the screen that pops up. You will have to reload the page, so make sure to save your work first.
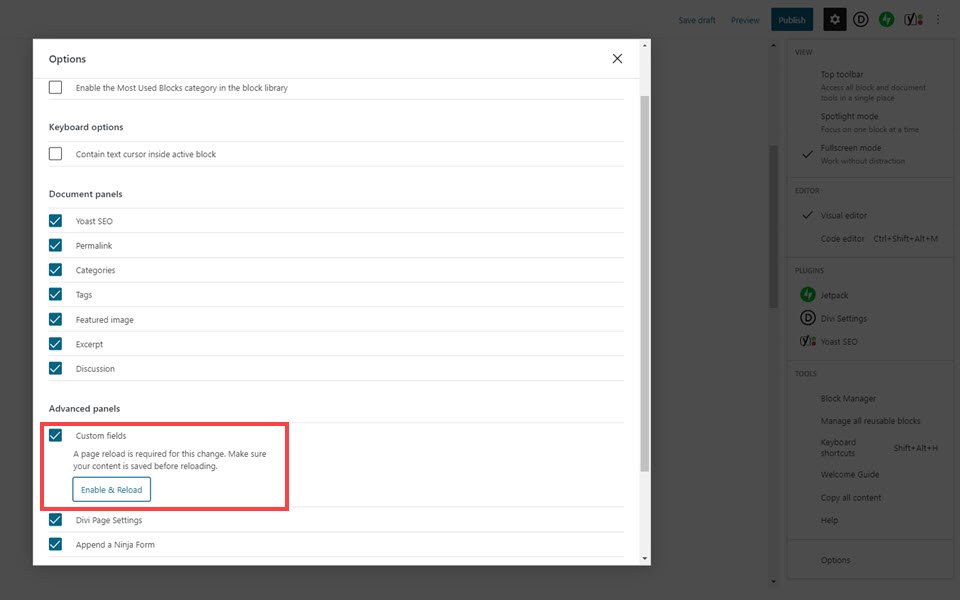
Once you’ve enabled and reloaded, your custom fields meta-boxes will appear at the bottom of the screen. Beneath the content editor part of the screen.

While WordPress custom fields are incredibly powerful, the default ones are limited to a text value. It takes PHP and development to get them more robust. Luckily, there are plugins that do that work for you, and we’re going to walk you through how to get them going. If all you need is a text field on some posts and don’t want a plugin, feel free to skip below about adding the WordPress custom fields to your theme’s front end. That applies to the default fields as well as the ones generated by plugins like Advanced Custom Fields.
Using Advanced Custom Fields Plugin
As with most things in WordPress, you have two options on implementation. You can manually edit the PHP files to add in custom field functionality, or you can use a plugin. In this case, we highly recommend going the plugin route. If, however, you feel the need to edit the PHP and get into the code, you can do so under Appearance – Theme Editor. Here is the WP Codex page on custom fields to get you going. It links to the various template tags and hooks you will need to make it work.
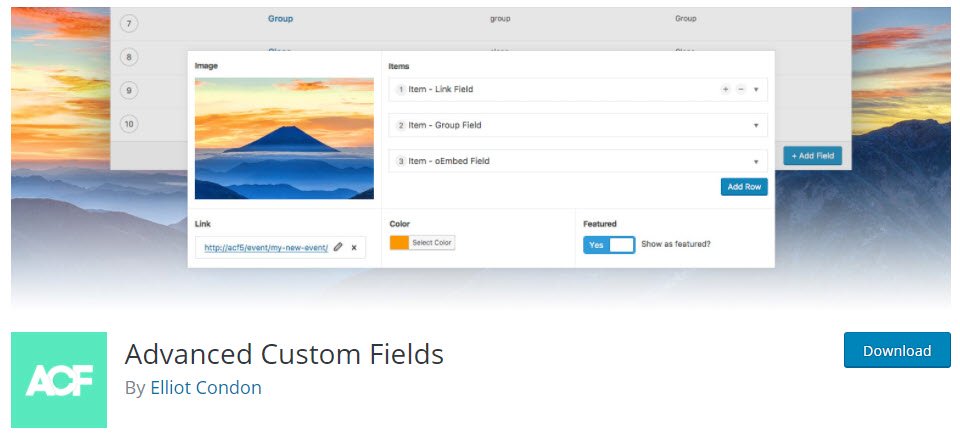
But again, we highly suggest using the Advanced Custom Fields plugin over tweaking code. The plugin allows everything you would want from custom fields (and then some), so we don’t feel the need to reinvent the wheel. When it works, it works. Use it.
Once ACF has been installed and activated, you will notice a Custom Fields entry in the left-hand sidebar of the WordPress admin panel. It comes with three options: Field Groups, Add New,and Tools.
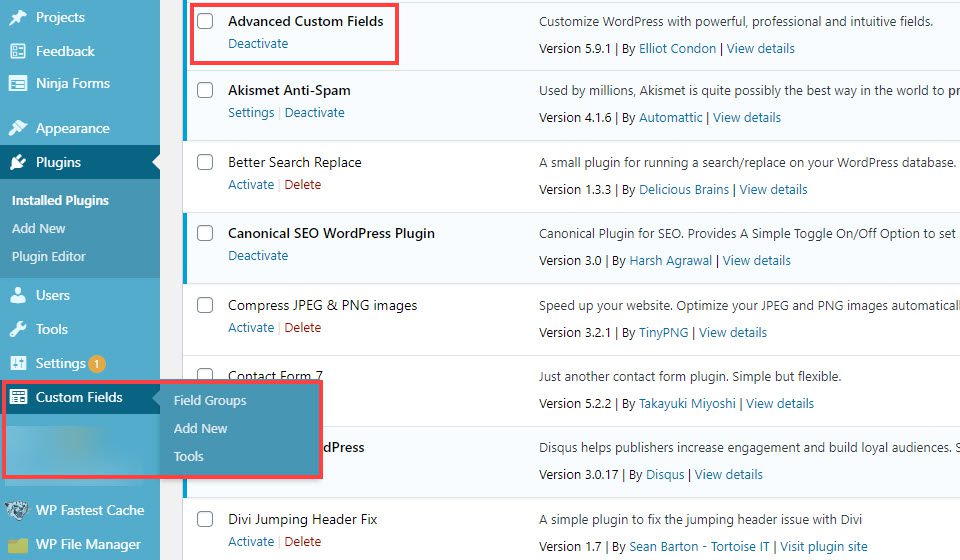
Field Groups can be thought of as sets. Anything you want to show up in the same box, you will include in the same group. Add New will let you add both a new group and a new custom field. While Tools is where you go to import and export different existing sets of custom fields from other WordPress sites.
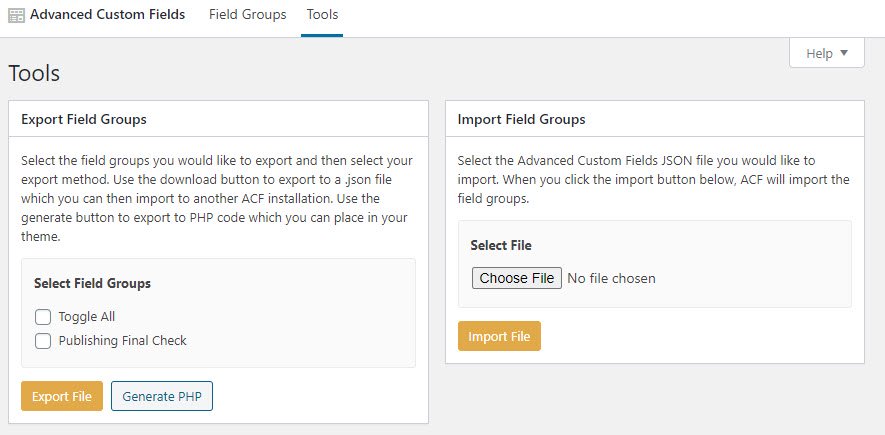
The Basics of ACF
Creating the fields themselves is pretty straightforward. Move into the Add New window.
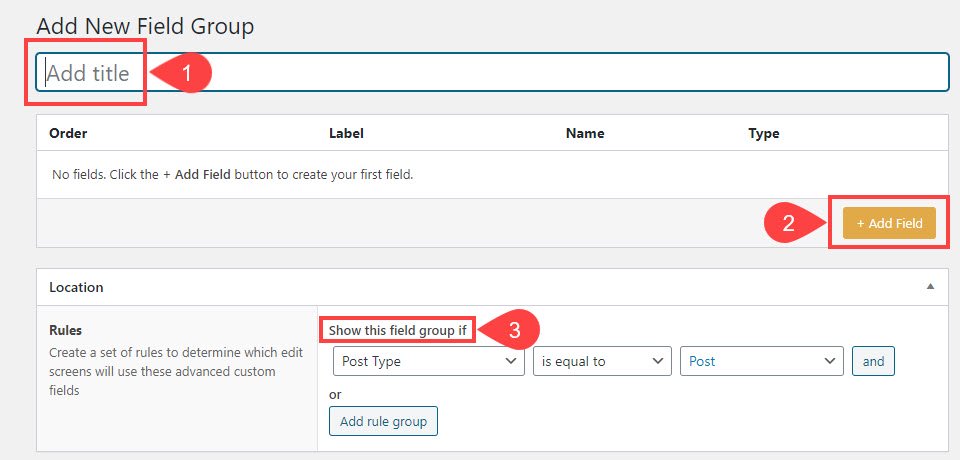
No matter what, ACF custom fields will be included in a Field Group. This just means the specific fields contained in the same box. So you can name it whatever you want it to appear as in the post editor. Each time you want to add an individual entry to the group, you will click the Add Field button. Do this each time you want a different field in the same meta-box. The Location rules determine where and when the box will appear. In this example, since Post Type Is Equal To Post, that means it will only appear on Posts. Not Pages or other custom post types.
Next, you get to actually choose the Settings for the field itself. What it’s going to do and the function it will serve on the site.
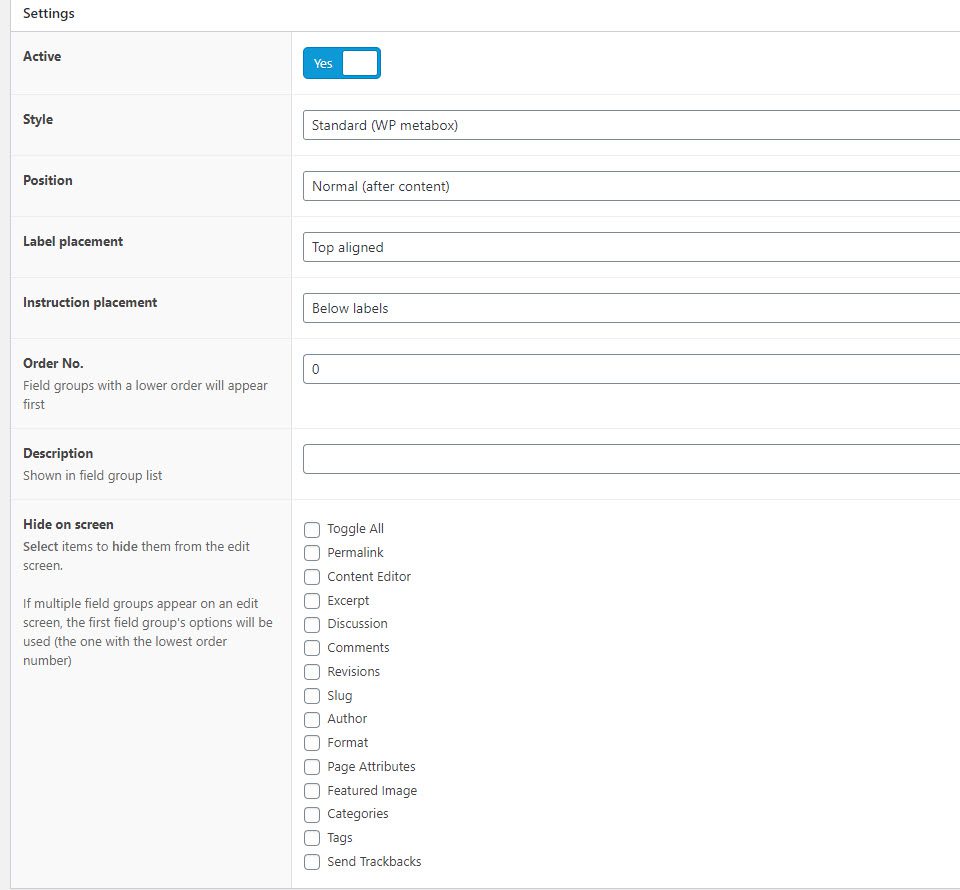
You basically choose your placement (below post content in the editor, sidebar, above the content, etc.), as well as the placement for the text and fields themselves. The Hide on Screen area is the most interesting. Depending on how you need to use your custom fields, you can exclude any and all other meta-boxes from your drafts. Select the conditions for this custom field’s appearance, and then determine which other boxes appear with it, if any. Many times you won’t even worry about this.
Creating Custom Fields with ACF
Once you have named your Field Group, you can click the Add Field button. You can have any number of fields within the same group, but make sure to keep them all related to one another. You can make almost any kind of entry field you can imagine with ACF.
For this example, let’s pretend we’re running a pop culture WordPress site that looks at movies and want custom fields to show a rating, to list whether the movie is streaming, and if so, where to find it.
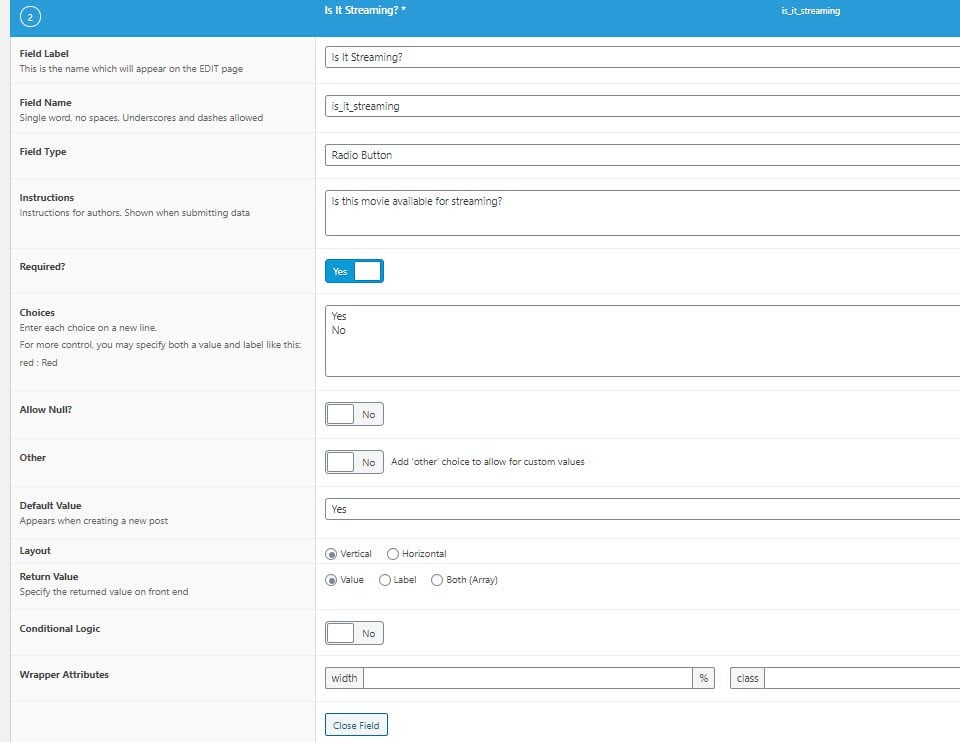
These would be all under the same Field Group, but different fields. As you can see above, the Is It Streaming? field is set up to be a radio button with a yes/no selector that is required before publication. Additionally, we want a conditional field to show up if the field is marked as Yes. This is done simply by pressing Add Field again.
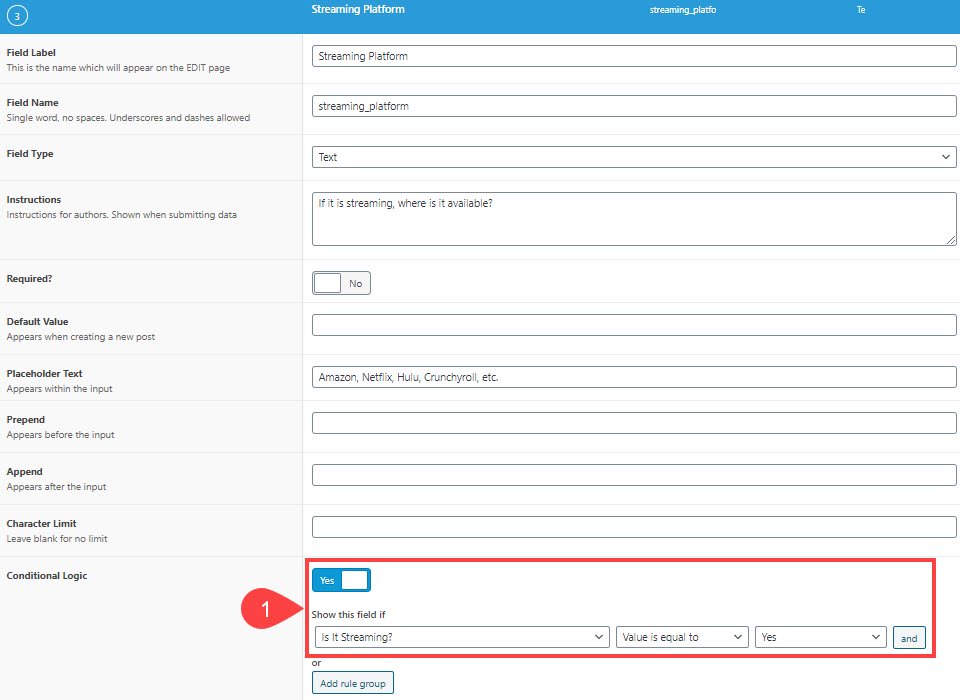
With the Conditional Logic toggle enabled, you just need to select which field it’s subject to and what the value needs to be. In this case, Is It Streaming? needs to be equal to Yes.
In the post editor, the custom fields entry will look like this:
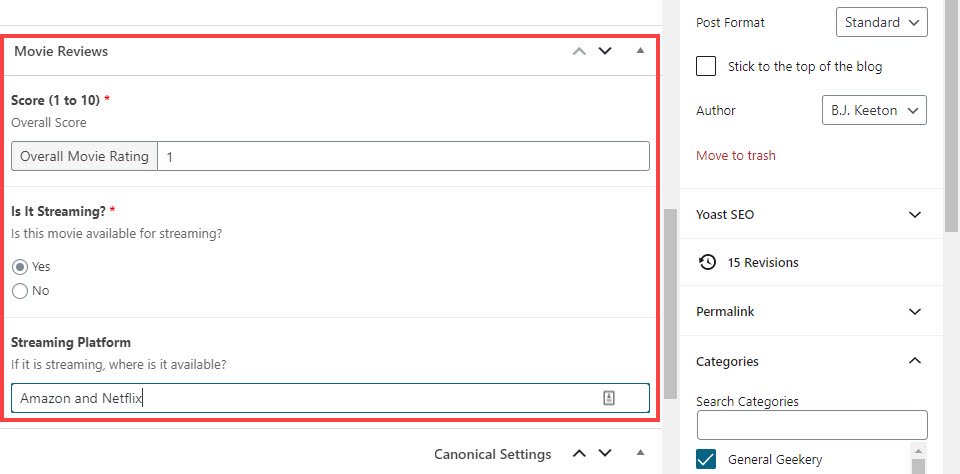
And when you publish your post, the metadata you’ve entered will be a part of the post. But there’s still one problem. You can’t see it, nor can your visitors.
How to Display Custom Fields on the WordPress Front-End
Even if you have done all this perfectly, the data you’ve entered won’t show up on the front end of your site without a little tweaking. After all, where would it show up? Many times, your theme will have a way to display meta data and custom fields, but those differ theme by theme. Check your theme options for the documentation.
Another way to display custom fields on the front end is the built-in ACF shortcodes. While there is no customizer or builder built into ACF, you can use the following shortcode for text fields only.
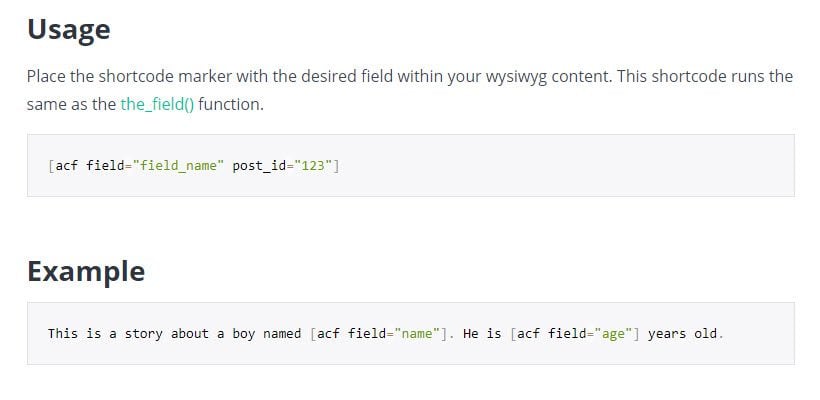
But because it’s limited to text fields, it may have limited use for many people. You can also go into the PHP and use the ACF code, as in their documentation examples. You can also upgrade to ACF Pro and get access to the built-in Gutenberg block that displays the custom field exactly as you style it in the builder.
But like we said, many themes come packed with custom fields integration these days, and we will show you how that is handled in Divi.
How to Display Custom Fields on the Front-End Using Divi
First, remember that lots of Divi modules can render shortcodes. So many times your text custom fields created in ACF can simply be inserted using their shortcodes, like we mention above.
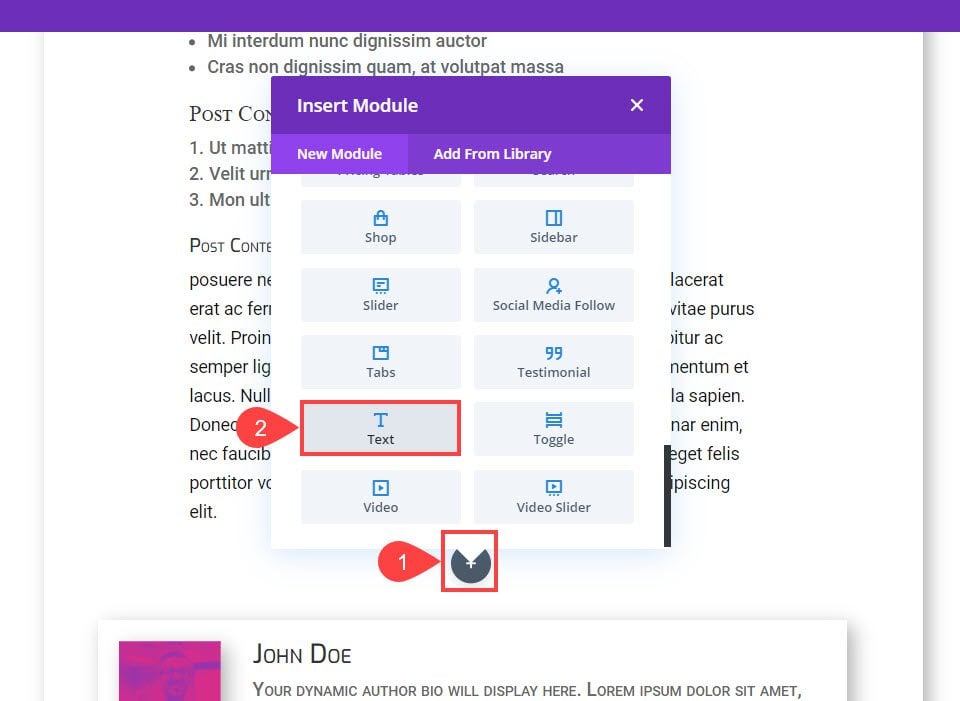
For our example above that uses conditional logic and radio buttons, we will be using Divi’s dynamic content feature. It’s super easy to use, too. We will be showing you this through the Divi Theme Builder, but you can use it in literally any module that supports it in the regular Divi builder. Click the Black + and select the module you want. For this, it’s the Text Module.
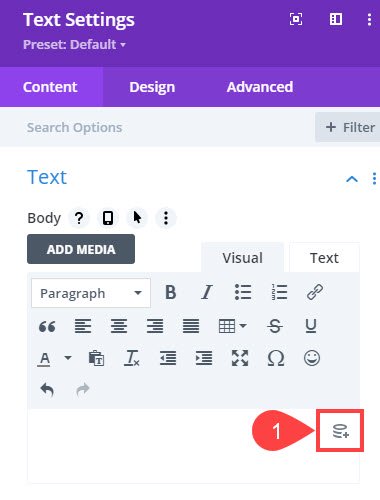
Next, find the part of the module you want to insert the custom field into. Look for the Dynamic Content icon to the right side of any place that supports the feature.
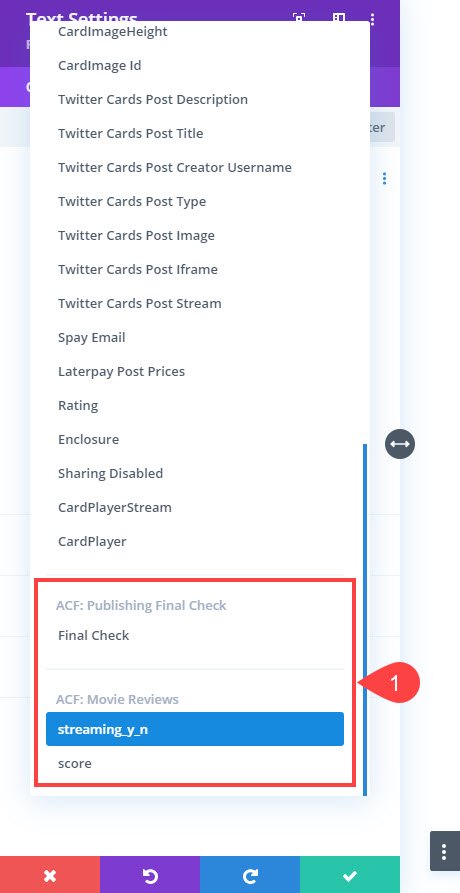
Click it to select from the drop-down menu of all available kinds of dynamic content, including all custom fields. They may be at the very bottom.
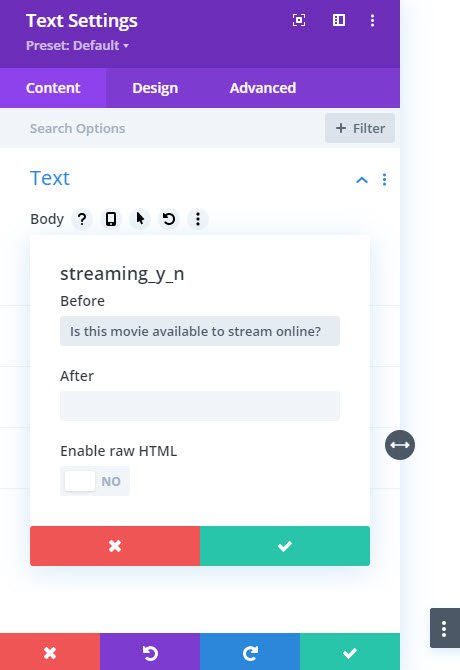
Divi gives you the option to basically add before/after labels to your field content. We want ours to read naturally as a part of the post, so Is this movie available to stream online? will be placed before the value when the field is rendered. Also, we did add a trailing space at the end to separate our label from the ACF value.
Since you can only have one piece of dynamic content per module area, repeat this process for other fields. Note, however, that even though the custom field is conditional, the Divi module is not. So if you use a before/after label on a conditional field, you will still see that label. If you leave them blank, then no value will render at all.

Additionally, the Enable Raw HTML option will allow any code you put into the ACF field to render, such as links to the various platforms, etc.
Wrapping Up
As you can see, despite seeming like it’s pretty complicated, WordPress custom fields is a feature that doesn’t take a developer to get right. Just install ACF and begin customizing how you and your team input information. Whether it’s a review site, ecommerce marketplace, or even just a friendly blog where you want to share what’s going on in your life, being able to tweak and perfect your posts’ and pages’ metadata can elevate your website to new levels.
What do you use WordPress custom fields for?
Featured image by SurfsUp / shutterstock.com
The post The Essential Guide to WordPress Custom Fields appeared first on Elegant Themes Blog.

