Sometimes bad things happen to good people websites. It’s not fair, but it’s true. And one of the worst things that can happen to your website (specifically your WordPress website) is that your posts go poof. Gone. They’re outta here like a home run at the World Series. And you, of course, are the one who has to find some way of WordPress database recovery to bring them back from whatever limbo dimension they currently exist in.
Never fear, Divi Nation, that’s not nearly as hard (or as complicated) as it sounds. WordPress, thankfully, is set up to make this process as painless as it can be. Think about WordPress database recovery as stubbing your toe, while other software’s db recovery options are more like breaking your toe–not the worst thing that could happen, but definitely not something you’re eager to experience.
Like almost everything else around here, WordPress database recovery comes in two primary flavors: use a plugin or do it manually.
WordPress Database Recovery via Plugin
Let’s start with the simpler option. Hopefully, you have a backup plugin running on your site. If you don’t, go grab one. My personal favorite is UpdraftPlus. It’s what the cool kids call good stuff. There are lots of other options out there, too, like BackWPup or All-in-One WP Migration. Heck, even Jetpack offers you backups.
But we’re gonna use UpdraftPlus because I like it.
Make the Backup to Restore From
Under the Settings menu in your dashboard, you now get an UpdraftPlus Backups option. Navigate there, and you’ll see this:
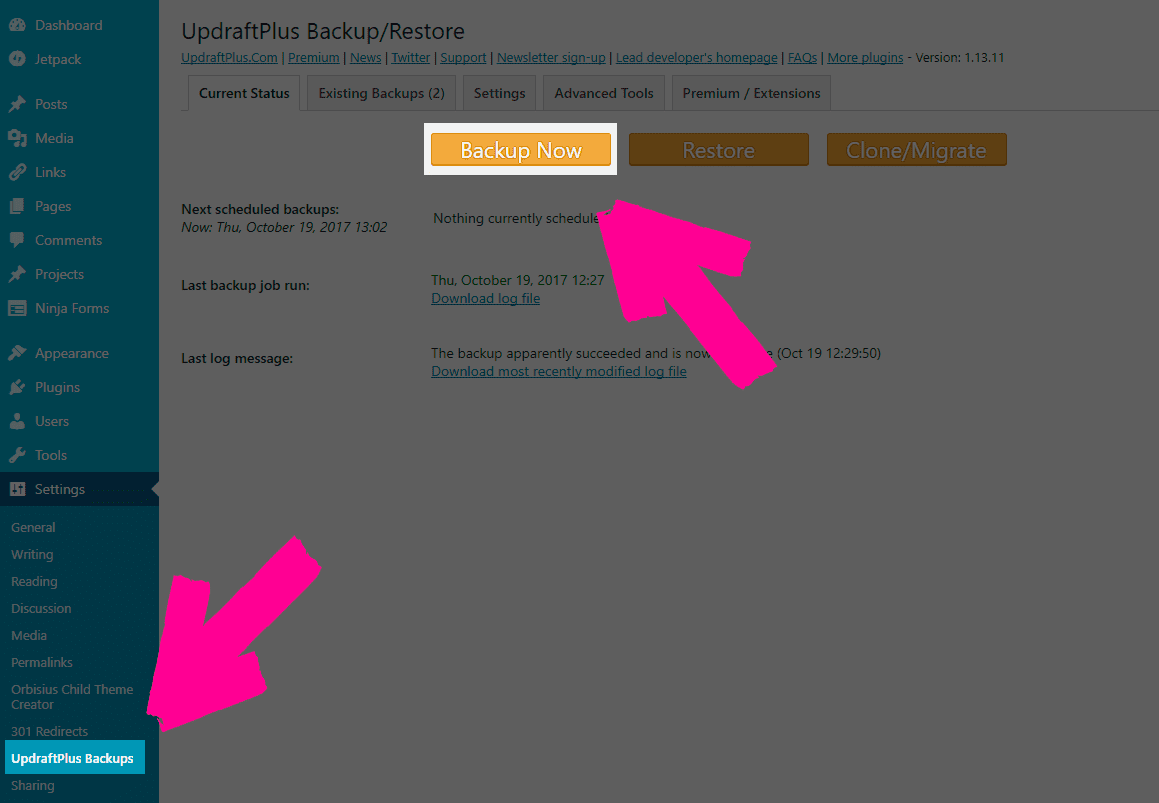
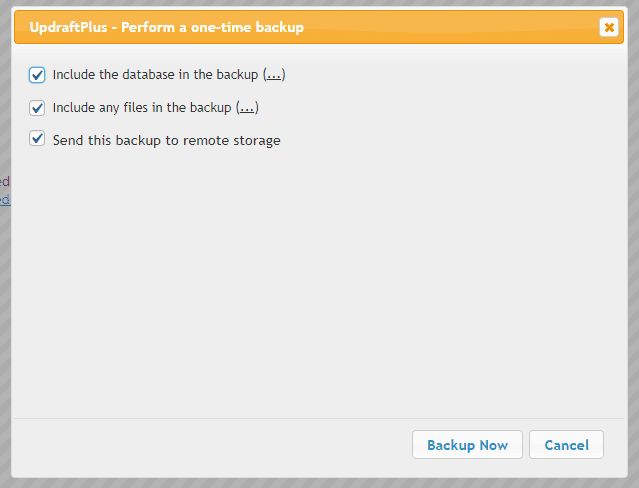
Before you can restore your database, you have to back it up. So click, obviously, the Backup Now button to perform a one-time backup. The really important one is that the database is included, but I highly suggest backing up everything regularly.
Fast Forward to Disaster Day
Oh, no! Your posts! They’re gone! The website is a blank, desolate wasteland of blankness! What ever will you do?
Restore that backup, that’s what! Hit the Existing Backups tab and get ready to get everything back under control.

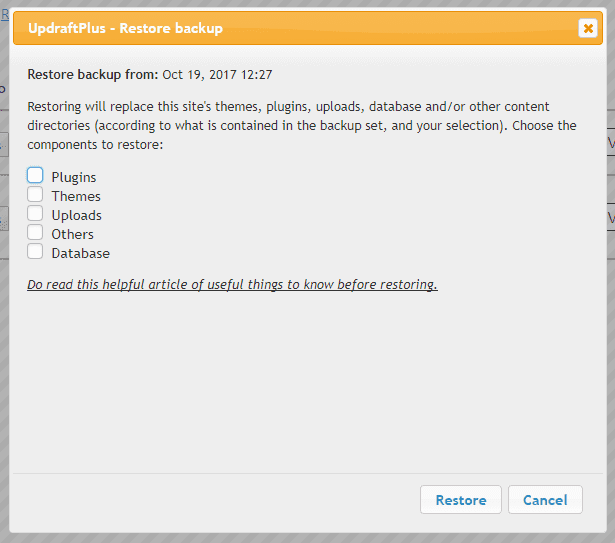
Once that’s done, you’ll get a modal window that asks you what you want to restore. If your posts are gone, make sure you click database, but if you’re totally blank, give em all a go.
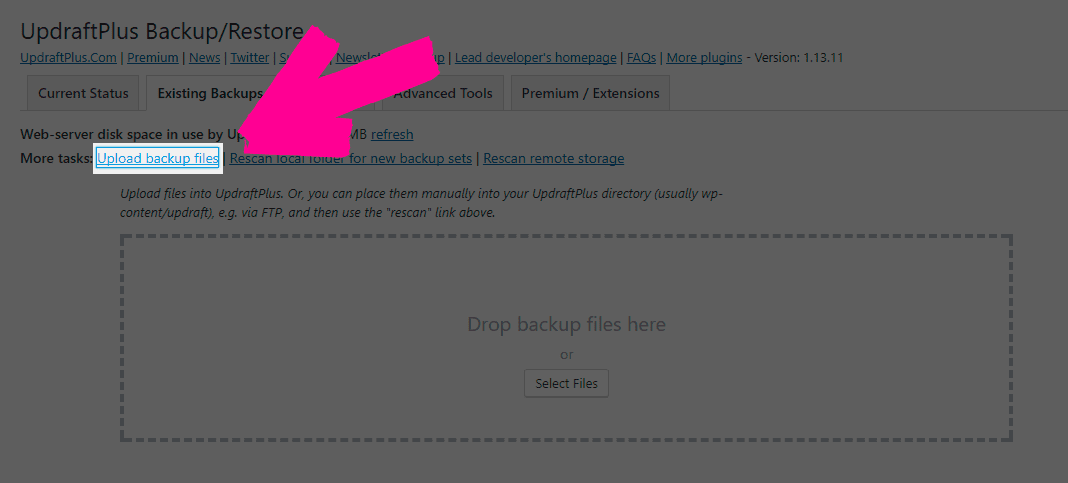
Please note that if you don’t see the restore button, you’ll need to upload the backup from before (which will be easy because you totally downloaded it or sent it to remote storage, right?).
You’ll get another modal after this telling you the files have been pulled and are being restored, which will eventually lead you to this magnificent sight:
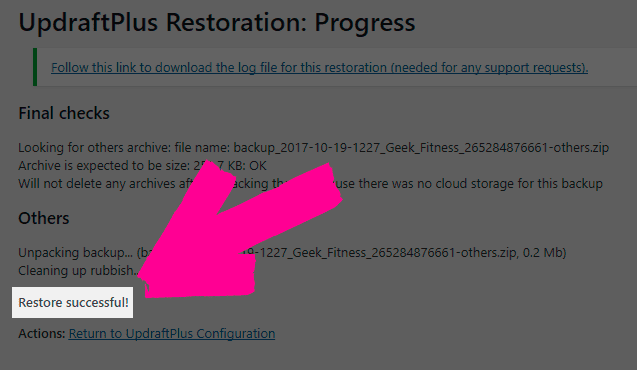
Ain’t that just the most beautiful sight you ever did see? When you’ve finished restoring all the backup files you need, your site should be back to normal.
The Old Fashioned Way
Nobody–yep, nobody! Fight me!–likes to dig around in MySQL unless they have to. But you can–and if things go truly wonky on your site, you might have to.
The first thing you’ll want to do is head into phpMyAdmin. If you aren’t familiar with it, you can get there from your cPanel.

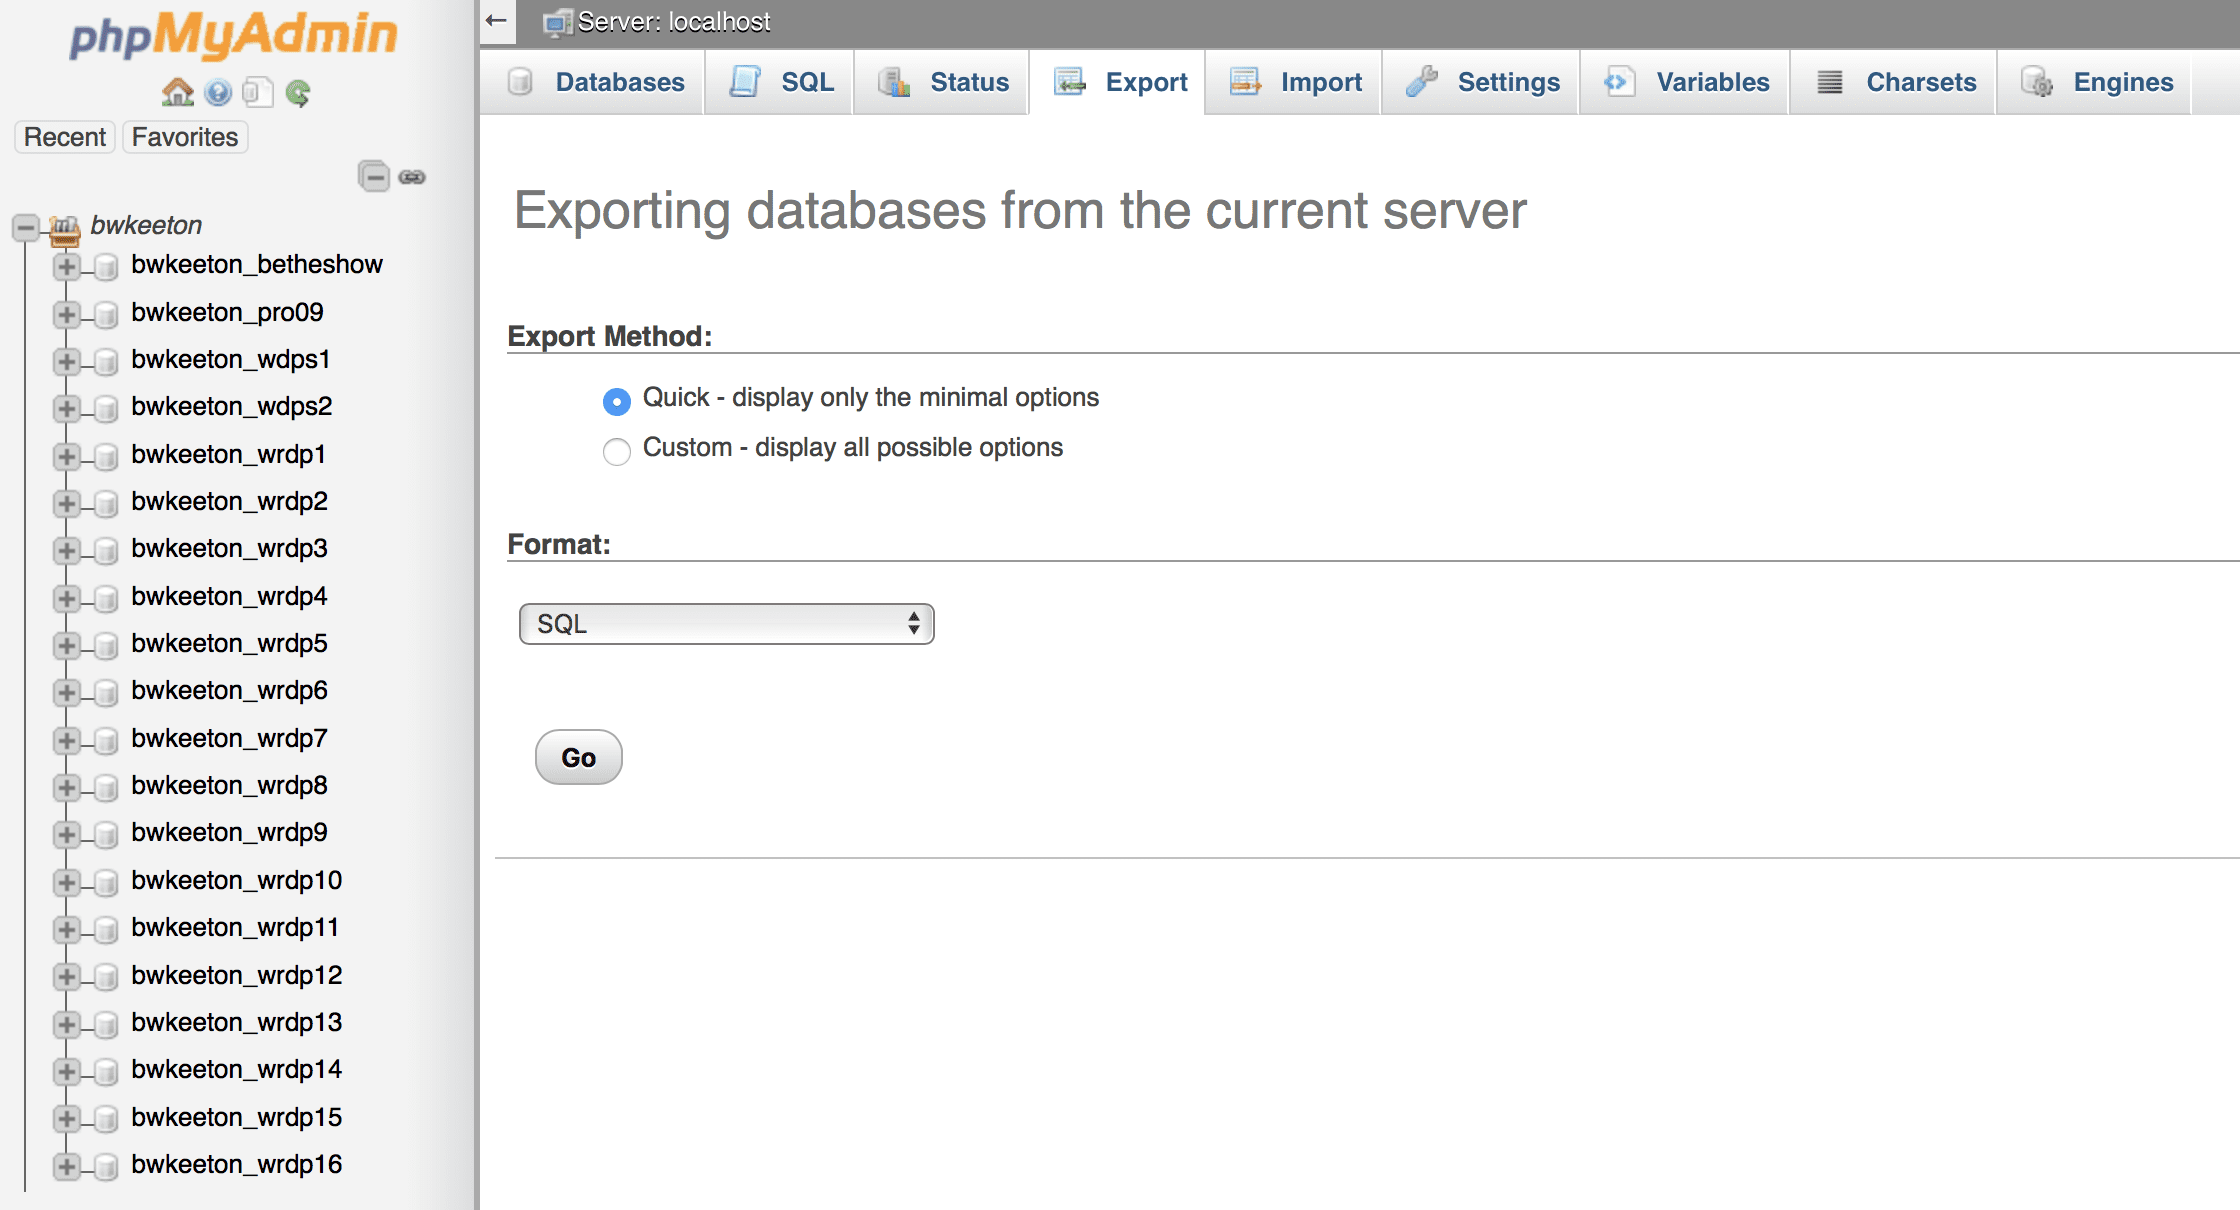
When you’re inside, you will probably be a little overwhelmed if you’ve never done this before. You can make a backup of your db here, too, by going to the Export tab after selecting which DB you want to save. It will just save as a .sql file to your computer.
(Note: you should totally do this step regularly as a precaution, too. Backing up your database is a good habit.)
Here’s the Scary Part
Well, it’s the kind of scary part. Once you’ve got your database exported, you’re gonna have to clear out the old one. Yikes. I know, right? But there’s something obviously wrong with it, else you wouldn’t be doing this at all, you know?
So head back to the db itself, pick the database you need to restore, check the box to select everything in there, and get ready to do what every admin has nightmares about: drop all those tables. To the ground!
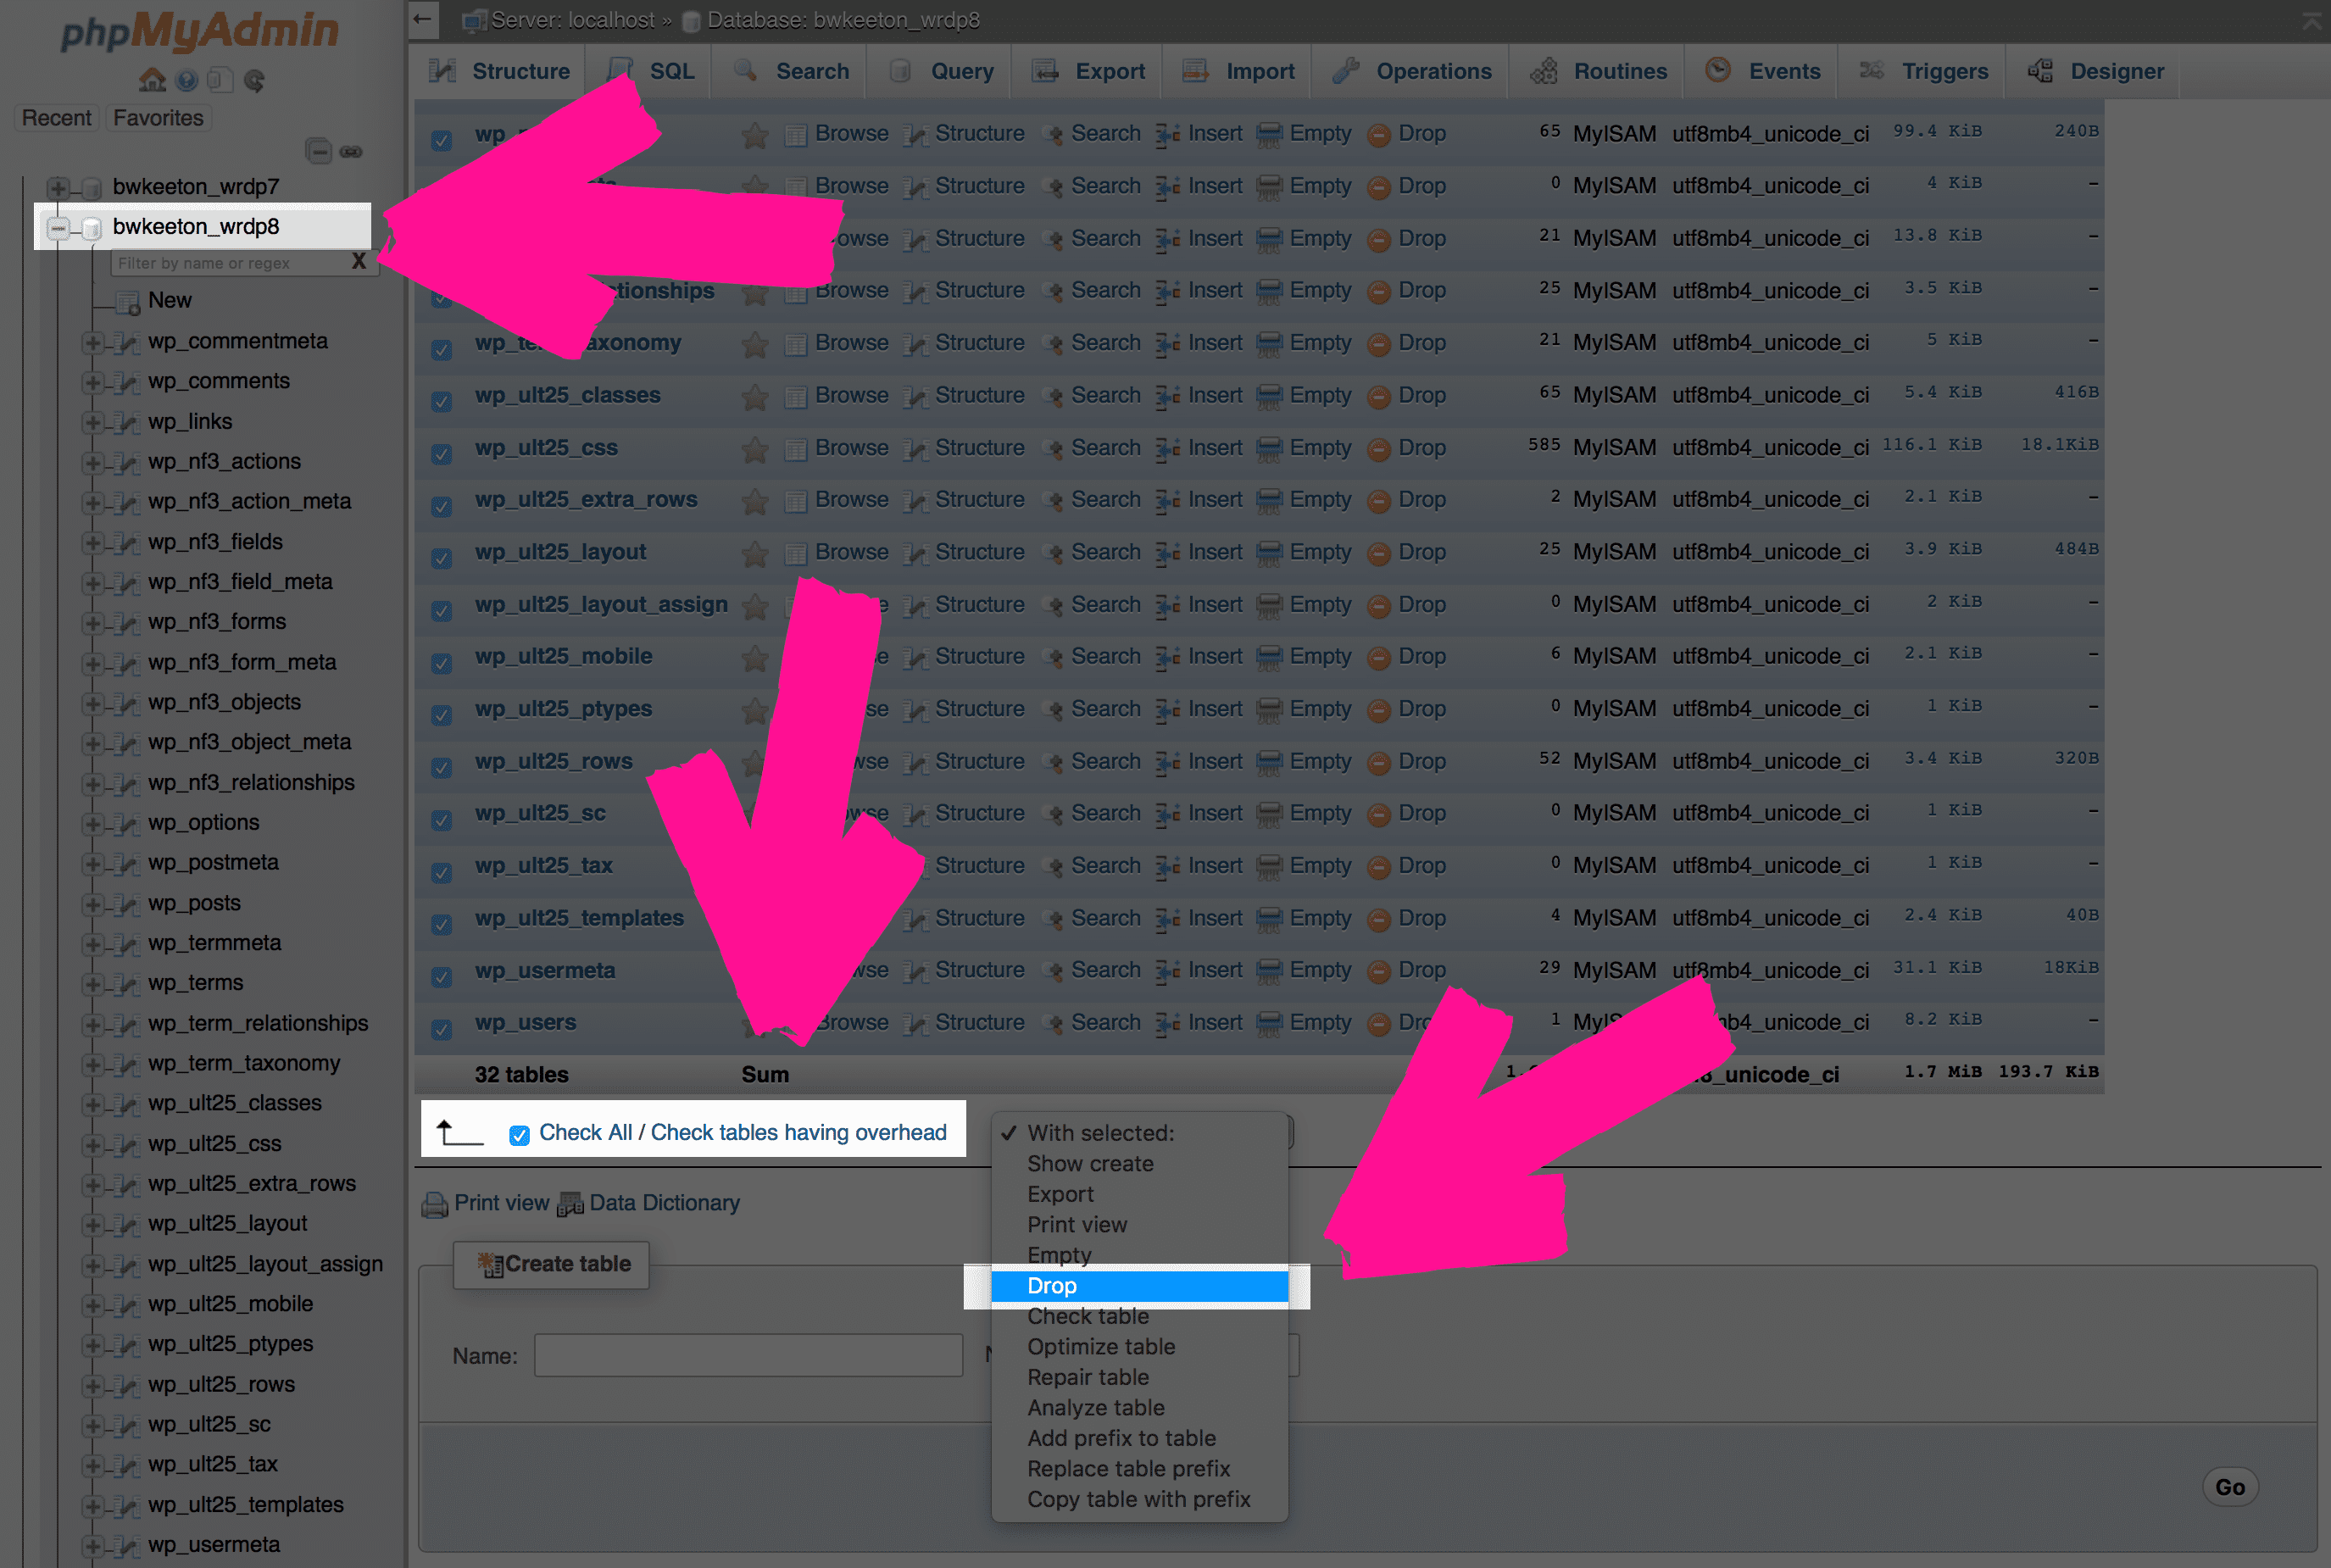
Once you’ve confirmed (but hitting ok on the next screen) that you are totally and completely obliterating the existing database (not to put too fine a point on it, or anything), you will see this:
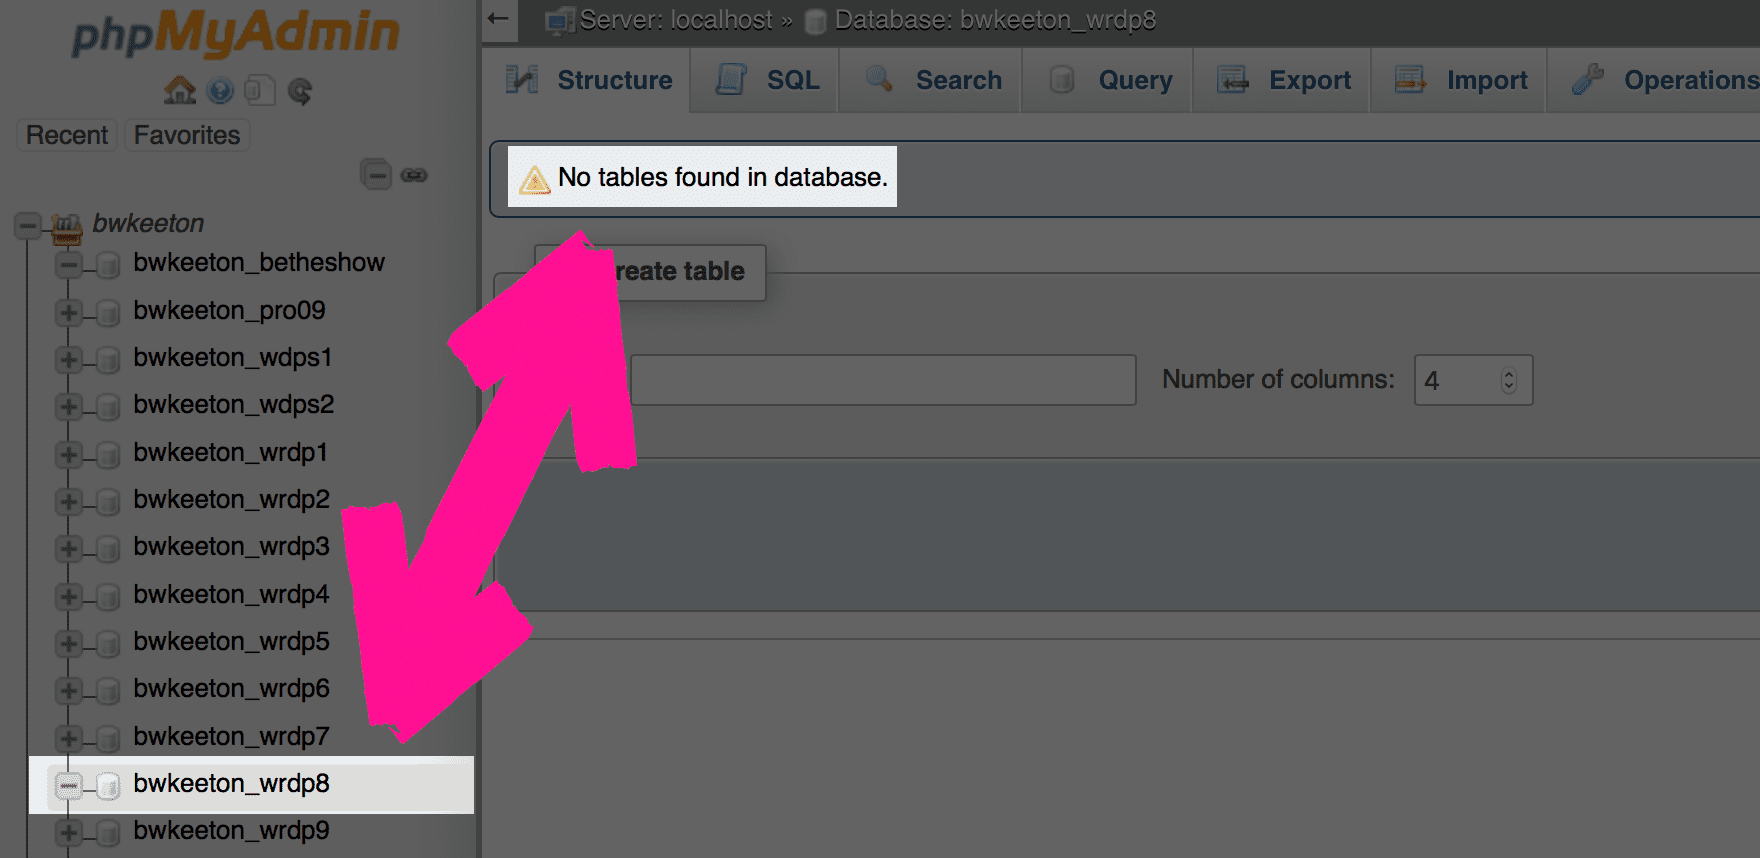
Congratulations! You have no WordPress database!
Putting the Pieces Back Together
This is really the easy part of the whole thing. Since you’ve got the downloaded .sql file or the backup from a plugin like UpdraftPlus, you can just import that through phpMyAdmin, pretty much the same way as you destroyed it.
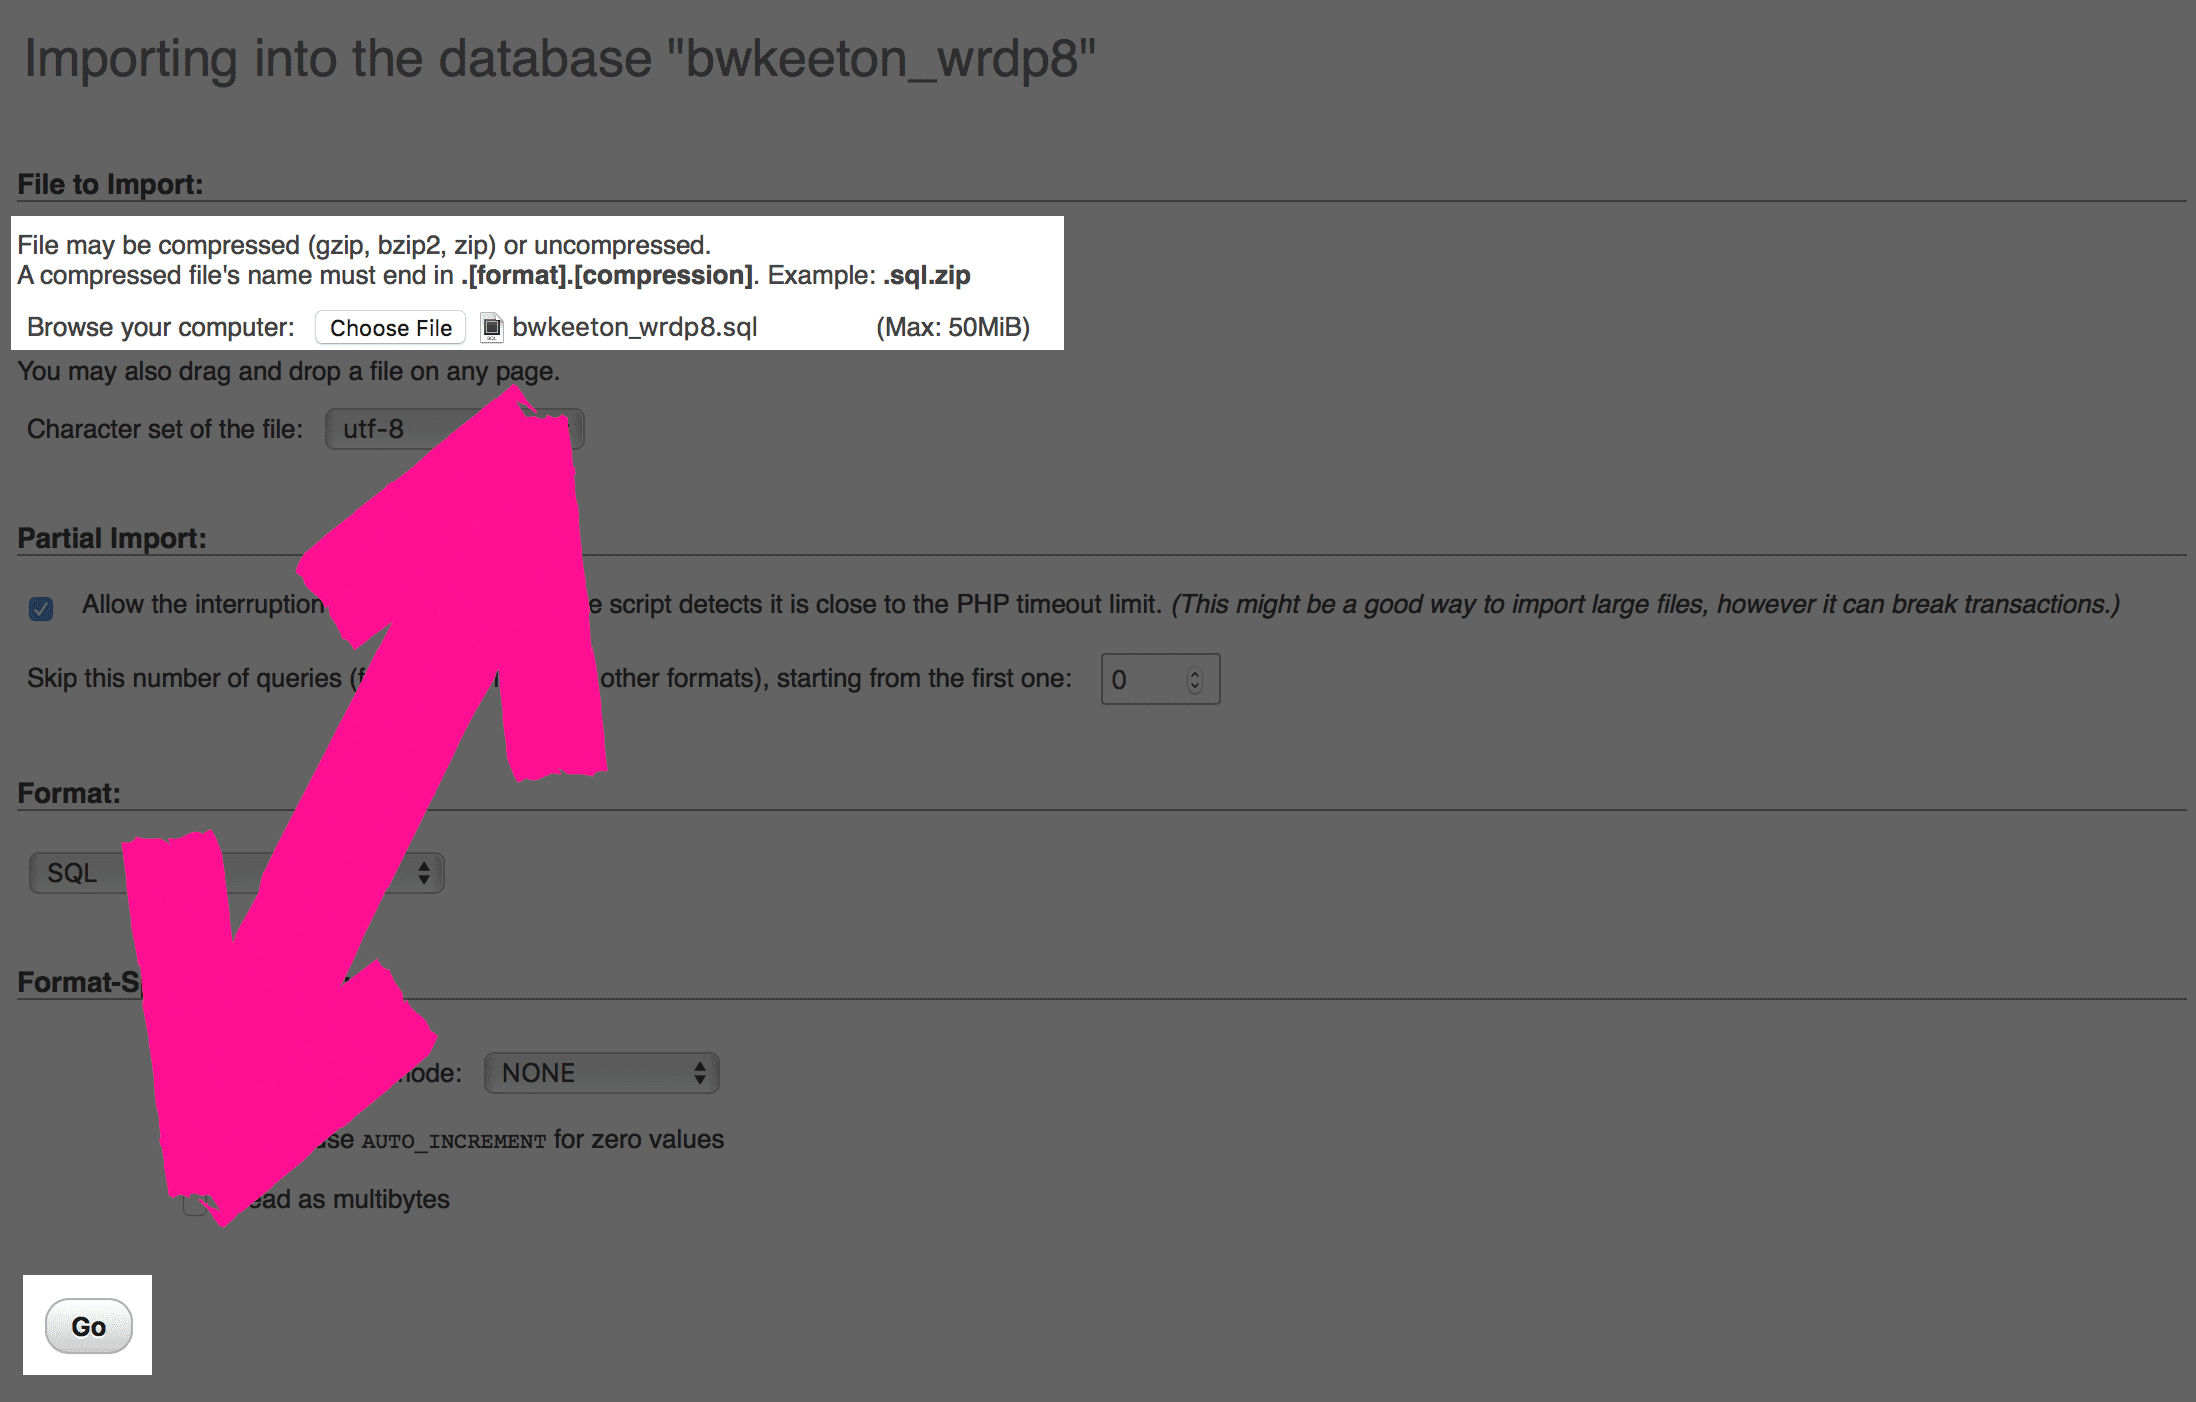
Hit Go, and you’ve saved the day. Once that import is finished, the databases have been restored, and you have totally put Humpty Dumpty back together again. Congrats for real this time!
Bonus: Writing is Revision (History)
One thing that WordPress is awesome about is keeping copies of your revisions of posts for you to revert back to at a later date (and to compare changes). Every time you update, save a draft, or WP does an autosave, a revision is created. You can check that to see if something is amiss, too, before doing a full WordPress database recovery.
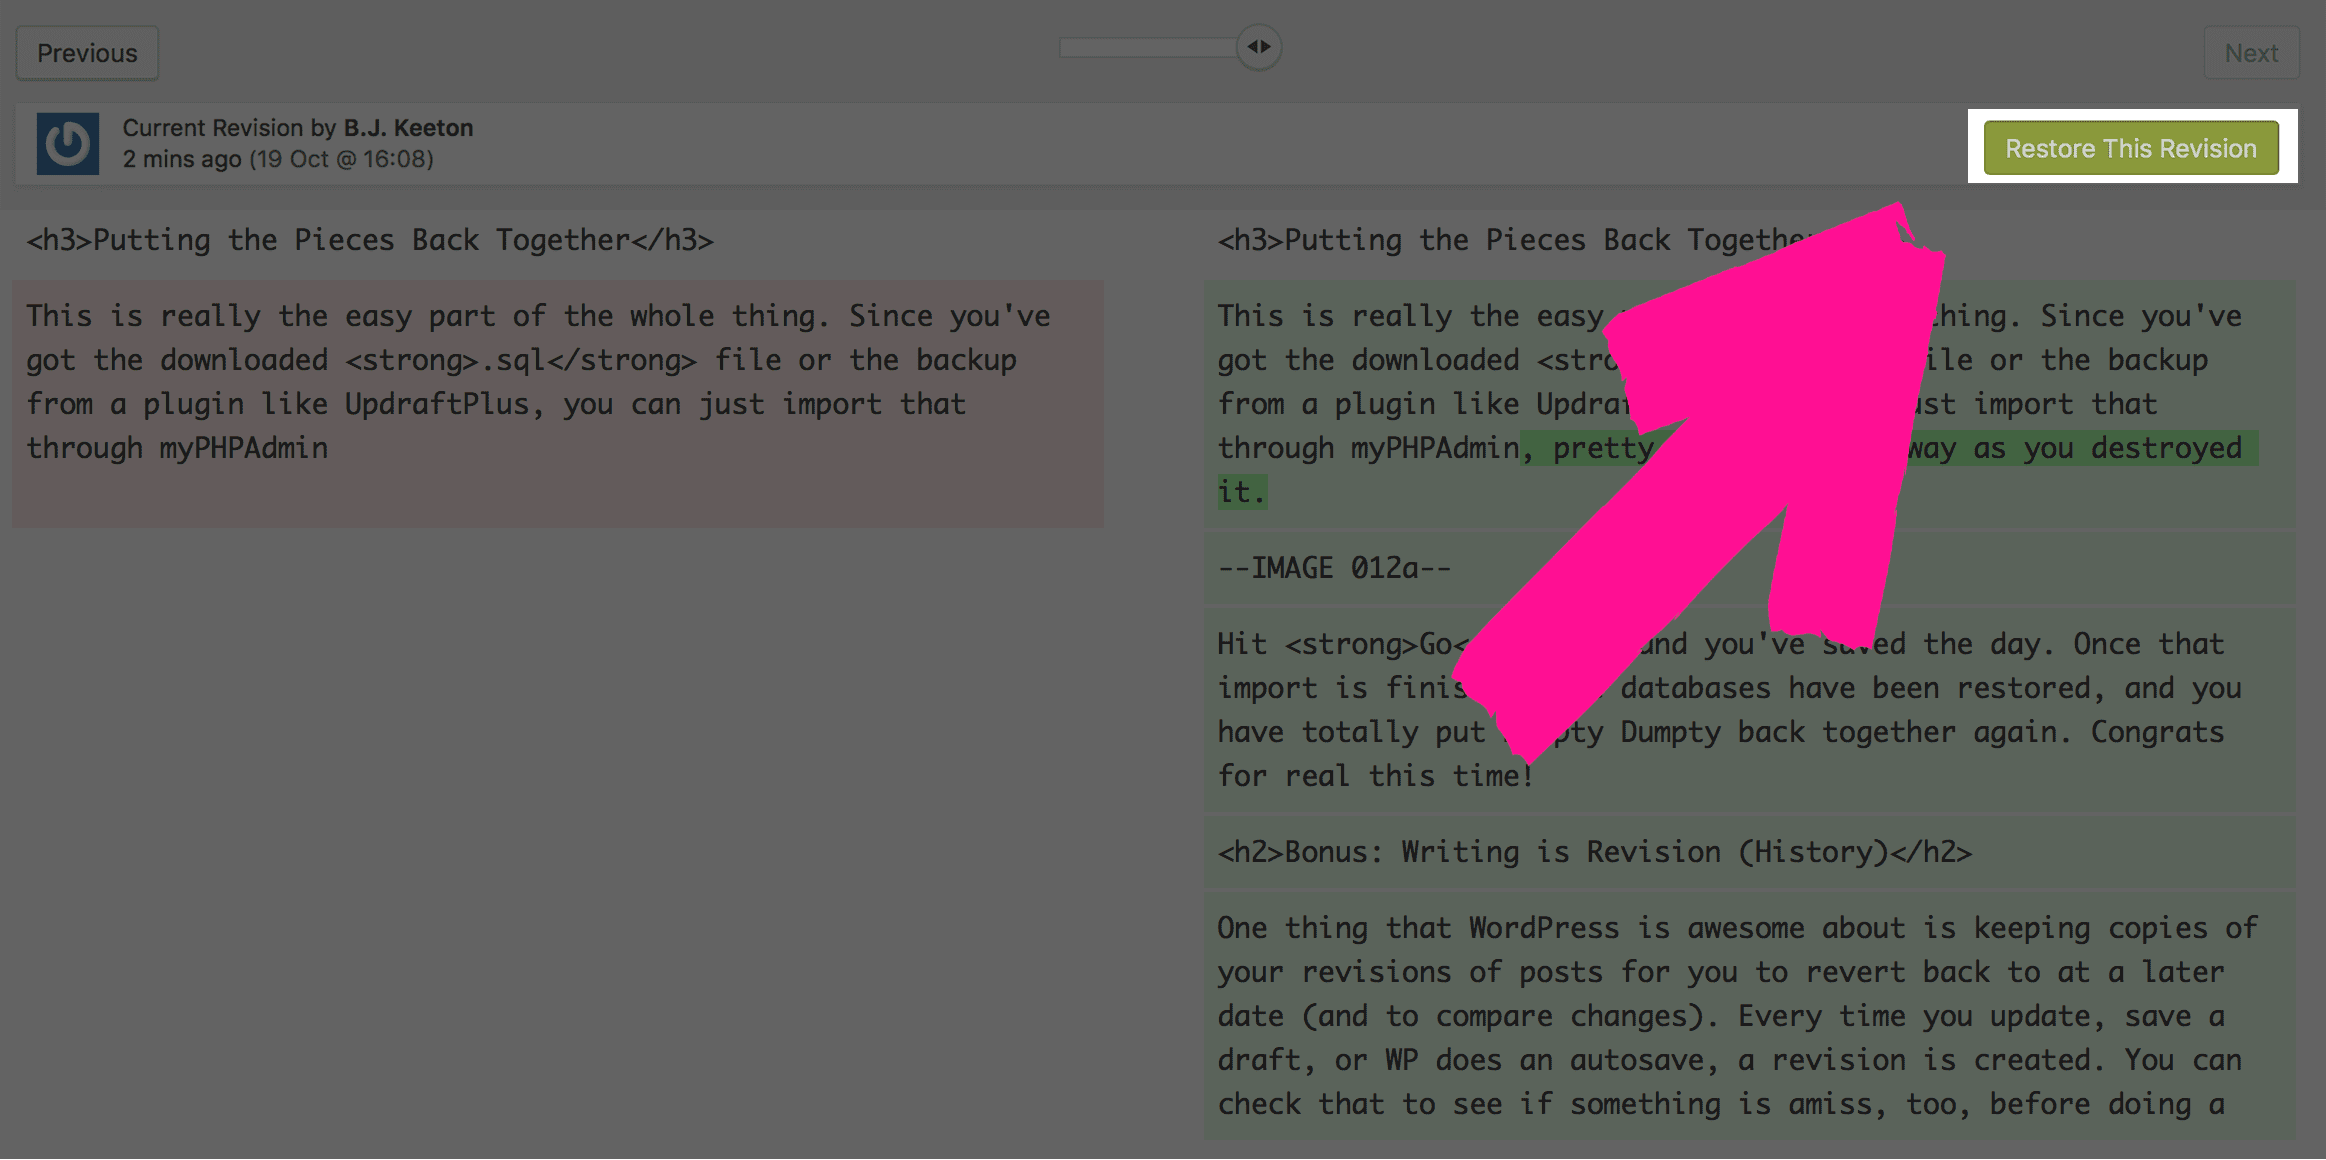
From personal experience, I can say just giving a couple of revision histories has really saved me some trouble over the years.
Don’t Fret Your Pretty Little Head
It’s a big deal when something goes wrong. I know that. But there’s no reason to freak out–okay, maybe there’s a few reasons to freak out, but if you stay calm and follow the right steps, there is a good chance that no lasting damage is going to happen to your site.
So whether you got hacked, a new teammember (or an old one!) made a boo-boo, or the universe just decided that you were the one it wanted to put through the wringer that day, you now have all the tools you need for complete and total WordPress database recovery.
Be safe out there, Divi Nation.
Article thumbnail by MSSA / shutterstock.com
The post Two Ways to Recover All Your Posts from a WordPress Database appeared first on Elegant Themes Blog.
