Managing downloads from a WordPress site might seem like it would be no big deal, but in reality, a lot goes into the process. While WP does offer basic media control built-in, if you’re offering those downloads as part of a service or business venture, you’re going to need more control. That’s where plugins like the WordPress Download Manager come in. By leveraging the features of this plugin, you will be able to easily grant your users and customers access to anything they need without much hassle on their end or yours.
WordPress Download Manager
First off, as always, you will want to head over the WP.org repo and download/install the plugin. Once that is done, you should see the Download menu item added to your dashboard to the left.

This area will effectively be your dashboard for the plugin and the management of your downloads.
Adding a New Download
When you press the Add New button, a familar-looking screen will appear. The title and text area should be familiar for anyone who has ever blogged with WP or created a product with WooCommerce. You use the text area for a description of the download, and the title is, well, the name of the download.
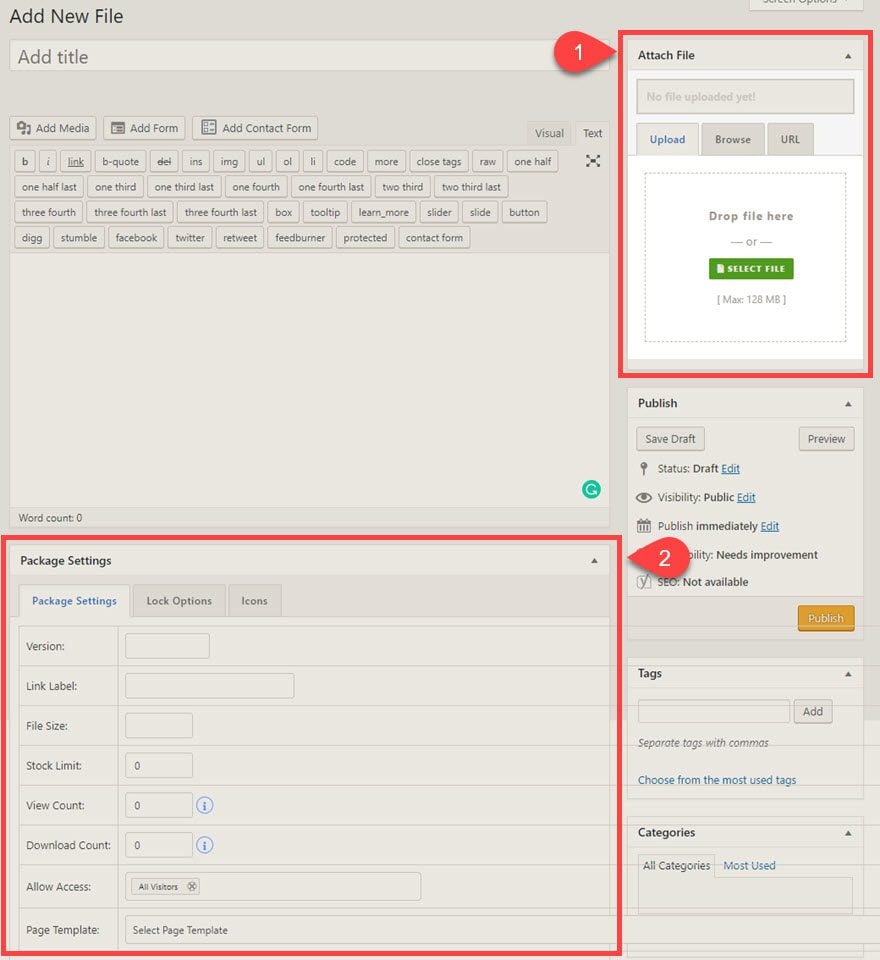
Creating a new download using the plugin is actually very easy. In the upper-right corner of the screen, you will see a box labeled Attach File, which is self-explanatory. Simply upload the file you want to manage, and it will be available for download. You can only attack a single file per new download page, though it can be a .zip. Uploading a second will replace the previous one. If you are using a cloud storage service like Dropbox or Google Drive, you can use the URL tab to link there.
Package Settings
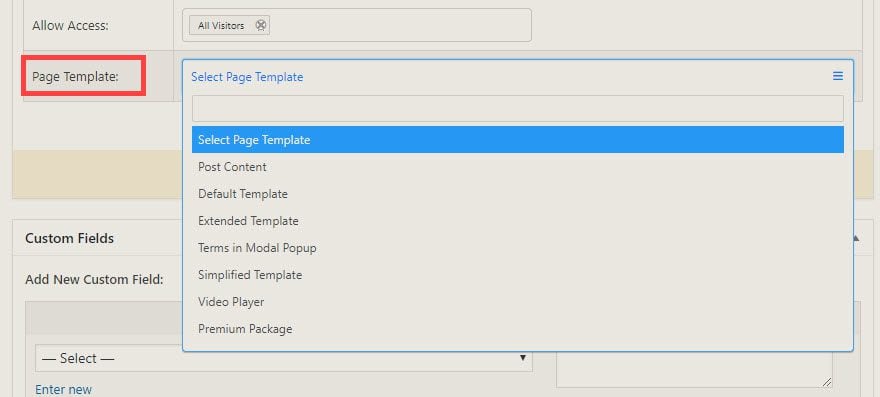
Under the Package Settings box, you have three tabs. The first, labeled Package Settings, is straightforward. You can set the details for the file that the users will see. Anchor text, versioning, who can access it, etc. You can then use the dropdown for Page Template to choose how you want the download page to appear.
Lock Options and Icon Tabs
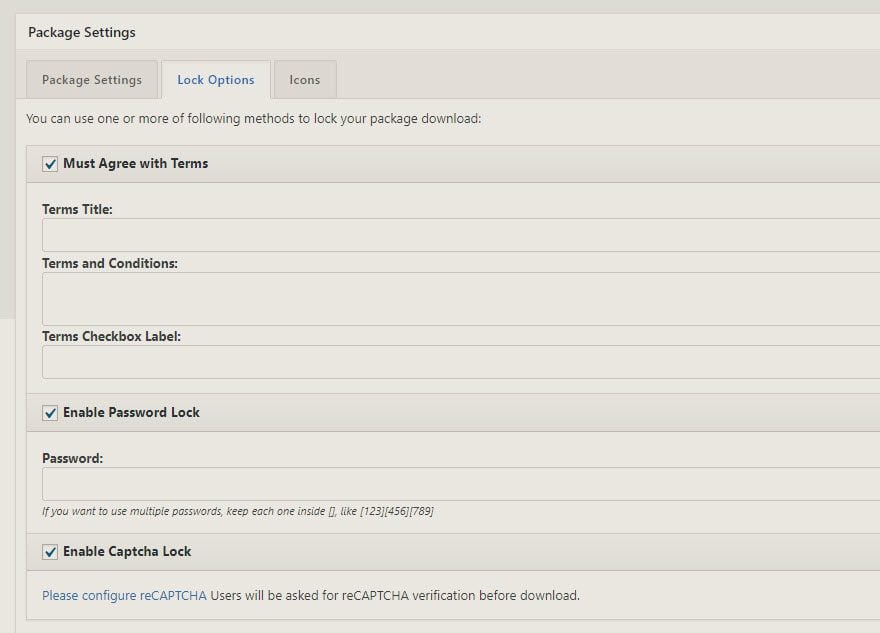
The Lock Options tab holds the settings for how you want to restrict the plugin. You can add terms, password, or reCaptcha to the page that must be completed or accepted before the download will begin.
The Icons tab is just as straightforward. You have a library of icons to represent what your customers will be downloading. Additionally, there’s a link at the bottom of the tab that you can click to activate your site as a digital store.

If you choose to activate this and sell your products, a new tab appears upon page refresh: Pricing & Discounts.
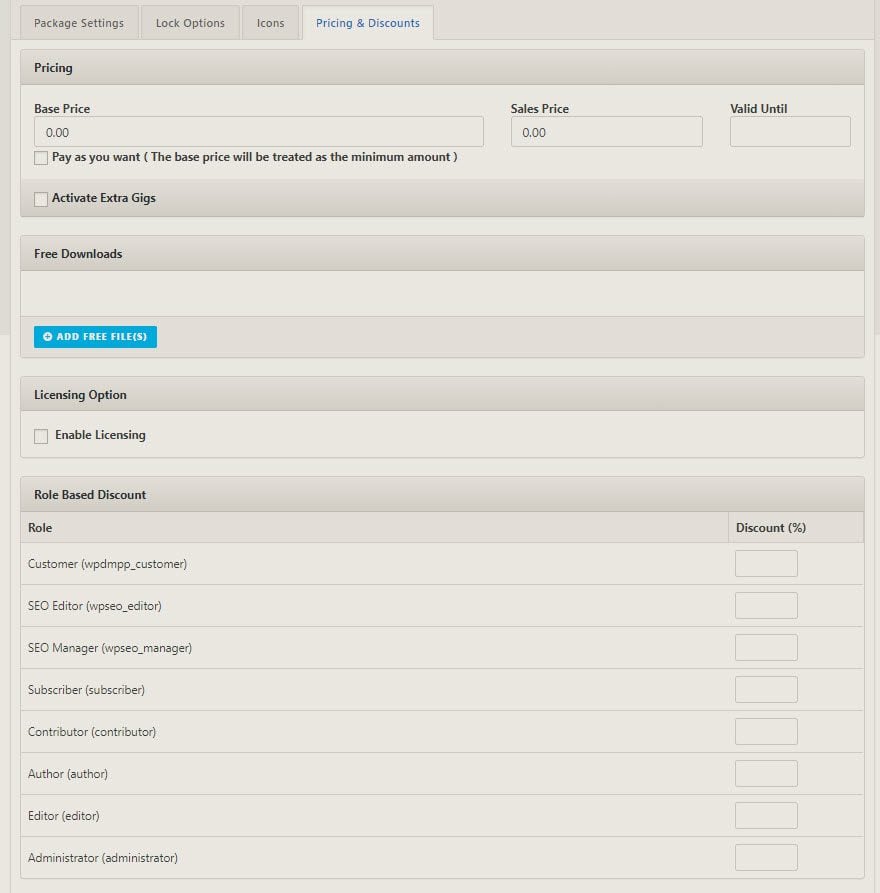
Again, this tab is self-explanatory. You have the option to set prices for your downloads and give discounts based on price, percentage, or even user roles. So you can give different members of your services at different tiers different prices. It’s incredibly easy to set up, just putting in a percentage based on each one, and it will automatically be deducted from the base price you set above.
The Download Page
When you publish the download, a new page will be created where you can view it. The URL will be example.com/download/title-of-download. The content of the page is based on what you entered into the settings tabs for that particular download.
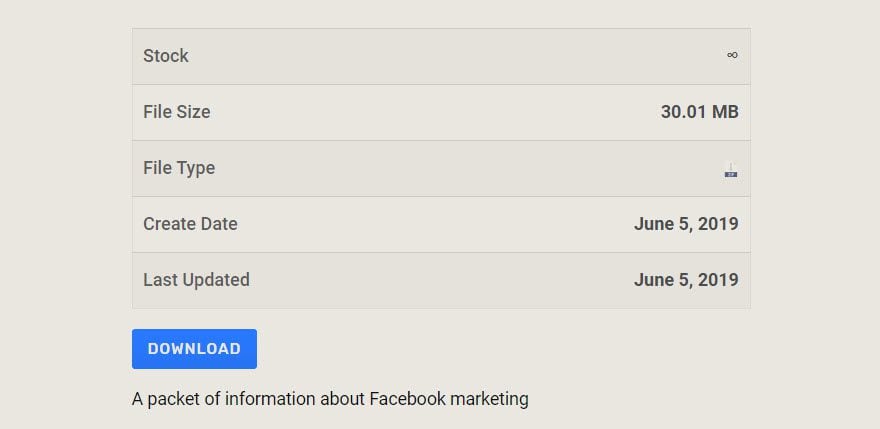
If you don’t want to link to that page itself, but rather include the table and download button in a separate post, you can go into the All Downloads page in your admin dashboard, and you will see a shortcode column, where you can copy/paste it into any place on your site that renders shortcodes. That way, you can more easily customize what is included where for your store or membership site. Also, the download button is included in the shortcode, so you won’t have to worry about including that separately.

With all of that, you’re ready to put your downloads toward the public.
Free Add-Ons for WordPress Download Manager
However, if you want more options than just the base WordPress Download Manager plugin gives you, you’re in luck. The developers have a massive database of add-ons for you to choose from, including 15 free ones that extend the functionality well beyond this baseline.
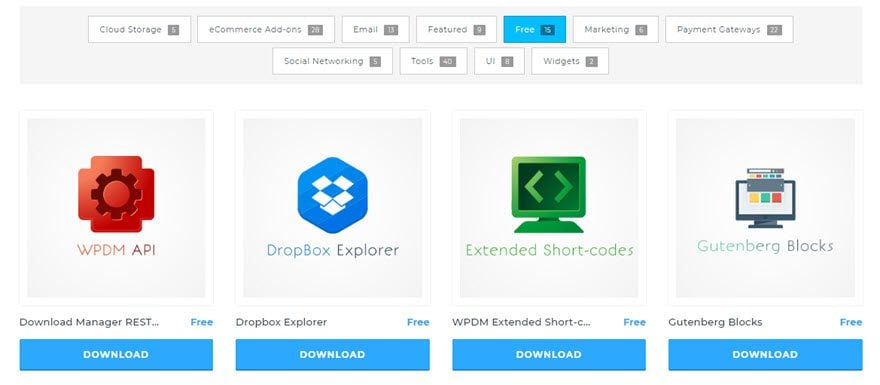
All of them are useful in some way or another, but some of the highlights are the ready-made Gutenberg Blocks add-on that lets you integrate the download manager directly into your posts via the block editor. No more shortcodes, just insert it like a paragraph. And if you’re not a block editor user, you can install the TinyMCE add-on which gives a button to the classic editor (which is called the TinyMCE, in case you didn’t know) where you can insert the download with just a click there, too.
Additionally, you can install Dropbox and Google Drive add-ons to further and more seamlessly integrate cloud storage, a WP-REST add-on for server calls, advanced sales reports, and even more page templates than are included by default, as well as additional button templates that can really add to the conversion rates.
And if that weren’t enough, there are dozens more premium plugins you can purchase to add even more functionality — directories, package lists, collections, payment gateway support, even multi-level affiliate marketing to drive people back to your site. You can even buy them in bulk in a package to save on licensing fees.
Wrapping Up
WordPress Download Manager delivers on what it promises. It’s easy to set up, and it is full of so many features you might not even use some of them. But you know that they exist for when you expand your store or business and may need them then. WDM’s large add-on database is officially supported by the developers. And even better, so many of those are free. You should definitely install this plugin if you have to manage even a small number of downloads. It’s easy to work with, and it’s far better than trying to hack your way into a solution using the media library.
Have you used WordPress Download Manager before? What are your experiences with it?
Article featured image by Blan-k / shutterstock.com
The post WordPress Download Manager: Plugin Overview and Review appeared first on Elegant Themes Blog.

